Love this? Save it for later!
Share the inspiration with your friends
I was standing in my kitchen at 10 p.m., staring into the pantry like it held the answers to all of life’s problems. The day had been one of those weird ones where nothing went exactly wrong but nothing went exactly right either. I wanted something sweet. Not in a desperate, I-need-chocolate-right-now way, but in a quiet, I-just-want-a-little-something kind of way. You know the feeling.
My eyes landed on the egg whites sitting in a bowl from earlier (I had made creamy raspberry cheesecake latte for breakfast, don’t judge). I remembered this old trick my grandmother used to do. She would whip egg whites into stiff peaks, fold in sugar and vanilla, and then just… leave them in the oven overnight. She called them forgotten cookies because you literally forget them in the oven. The magic happens while you sleep.
Honestly, I was skeptical the first time she told me about them. Cookies that you don’t bake? That just sit in a cooling oven? It sounded like one of those old wives’ tales that doesn’t actually work. But I tried it anyway, probably because I was too tired to do anything more complicated. And let me tell you, biting into one of these light, airy, melt-in-your-mouth meringues the next morning felt like discovering a secret. They are crisp on the outside, tender on the inside, and somehow feel like you’re eating a cloud that decided to become a cookie.
These light forgotten cookies have become my go-to when I want dessert without the guilt. No butter, no flour, just a handful of simple ingredients that transform into something genuinely delightful. They are proof that you don’t need a complicated recipe or a long ingredient list to create something worth remembering.
Why You’ll Love This Recipe
Let’s be real for a second. Most desserts that claim to be “light” or “guilt-free” end up tasting like cardboard sprinkled with disappointment. These forgotten cookies are the exception. They deliver on texture, flavor, and satisfaction without any of the heavy stuff.
Why these cookies stand out:
- Practically Fat-Free : No butter, no oil, no egg yolks. Just pure, airy meringue that satisfies your sweet tooth without weighing you down.
- Under 50 Calories Each : You can have two or three and still feel good about it. Perfect for those evenings when you need a little something.
- Only 4 Ingredients : Egg whites, sugar, vanilla, and a pinch of salt. That’s it. You probably have everything right now.
- No Special Equipment Needed : A hand mixer or stand mixer does the job. No fancy gadgets required.
- Hands-Off Overnight Method : You spend about 10 minutes actively working, then the oven does the rest while you sleep. Morning cookies. Yes, please.
- Naturally Gluten-Free : No flour means no gluten. These are safe for anyone avoiding wheat.
What makes these different from other meringue recipes? It’s the overnight drying method. Instead of baking at a low temperature for hours, you let the residual heat of the oven do the work. This creates a more delicate, melt-in-your-mouth texture that you just can’t achieve with traditional baking. Plus, the flavor develops beautifully overnight. The vanilla infuses the meringue, and the sugar caramelizes just slightly, giving you this subtle, almost honey-like sweetness.
I’ve tested this recipe at least a dozen times, tweaking temperatures and sugar ratios. This version is the sweet spot (pun intended). It works every single time, and it’s the kind of recipe you’ll find yourself making on repeat, especially when you want something dessert-like without the post-dessert regret.
What Ingredients You Will Need
This recipe uses simple, wholesome ingredients to create something that feels surprisingly indulgent. The magic is in the technique, not the grocery list.
- 3 large egg whites (room temperature) — The foundation of the entire cookie. Room temperature egg whites whip up higher and hold their shape better than cold ones. If you forget to take them out ahead of time, place the eggs in a bowl of warm water for 5 minutes. I prefer using fresh eggs rather than carton egg whites for better stability.
- 3/4 cup (150g) granulated sugar — Regular white sugar works best here. It dissolves into the egg whites and creates that crisp exterior. Do not substitute with brown sugar or coconut sugar; they have molasses content that will weigh down the meringue. Superfine sugar is ideal if you have it, but regular granulated sugar works perfectly fine.
- 1 teaspoon vanilla extract — Pure vanilla extract makes a noticeable difference. Imitation vanilla works in a pinch, but the flavor won’t be as warm and rich. You can also scrape half a vanilla bean pod into the mixture for an even more pronounced vanilla flavor.
- 1/8 teaspoon salt — Just a tiny pinch to balance the sweetness and help stabilize the egg whites. Don’t skip this; it makes the cookies taste more rounded.
- Optional: 1/4 teaspoon cream of tartar — This is not required, but it helps stabilize the egg whites and makes them less likely to deflate. If you have it, use it. If not, your cookies will still turn out fine.
- Optional mix-ins : 1/4 cup mini chocolate chips, 1/4 cup chopped nuts, or 1 tablespoon cocoa powder for a chocolate version. Fold these in gently at the end.
Ingredient Selection Tips: For the best results, use eggs that are at least a few days old. Fresh eggs have tighter proteins that don’t whip up as high. Older eggs (within reason) actually produce more stable meringue. I know that sounds backwards, but it’s true. If you’re using farm-fresh eggs, let them sit in the fridge for about a week before making this recipe.
Substitution Guidance: If you need a vegan version, this recipe won’t work with aquafaba (chickpea water) because the overnight oven method requires specific protein structure. However, you can try my perfect vegan hazelnut cookies which are equally light and delicious. For a sugar-free version, you can substitute with powdered erythritol or monk fruit sweetener, but the texture will be slightly different and less crisp.
Equipment Needed
You don’t need much for this recipe, which is part of its charm. Here’s what you’ll need:
- Electric hand mixer or stand mixer — Whisking by hand is possible but your arm will hate you. Egg whites need to be whipped for 8-10 minutes to reach stiff peaks. A stand mixer makes this effortless.
- Large mixing bowl — Glass or metal works best. Plastic bowls can retain grease residue which prevents egg whites from whipping properly. Make sure your bowl is spotlessly clean.
- Baking sheet — A standard half-sheet pan works perfectly.
- Parchment paper — Essential for preventing sticking. Do not use wax paper; it will melt.
- Rubber spatula — For folding in any mix-ins gently.
- Cookie scoop or two spoons — For portioning the meringue onto the baking sheet. A 1-tablespoon scoop gives you perfectly uniform cookies.
Budget-Friendly Options: If you don’t have a stand mixer, a $15 hand mixer from the grocery store works just as well. The only difference is you have to hold it for a few minutes longer. I actually prefer my hand mixer for small batches because it’s easier to scrape down the sides. If you’re really in a pinch, you can use a whisk and some elbow grease, but honestly, treat yourself to the electric option.
Maintenance Tip: After using your mixer, wipe the beaters clean immediately. Dried egg white is stubborn and requires soaking. A quick rinse under warm water right after use saves you scrubbing time later.
Preparation Method
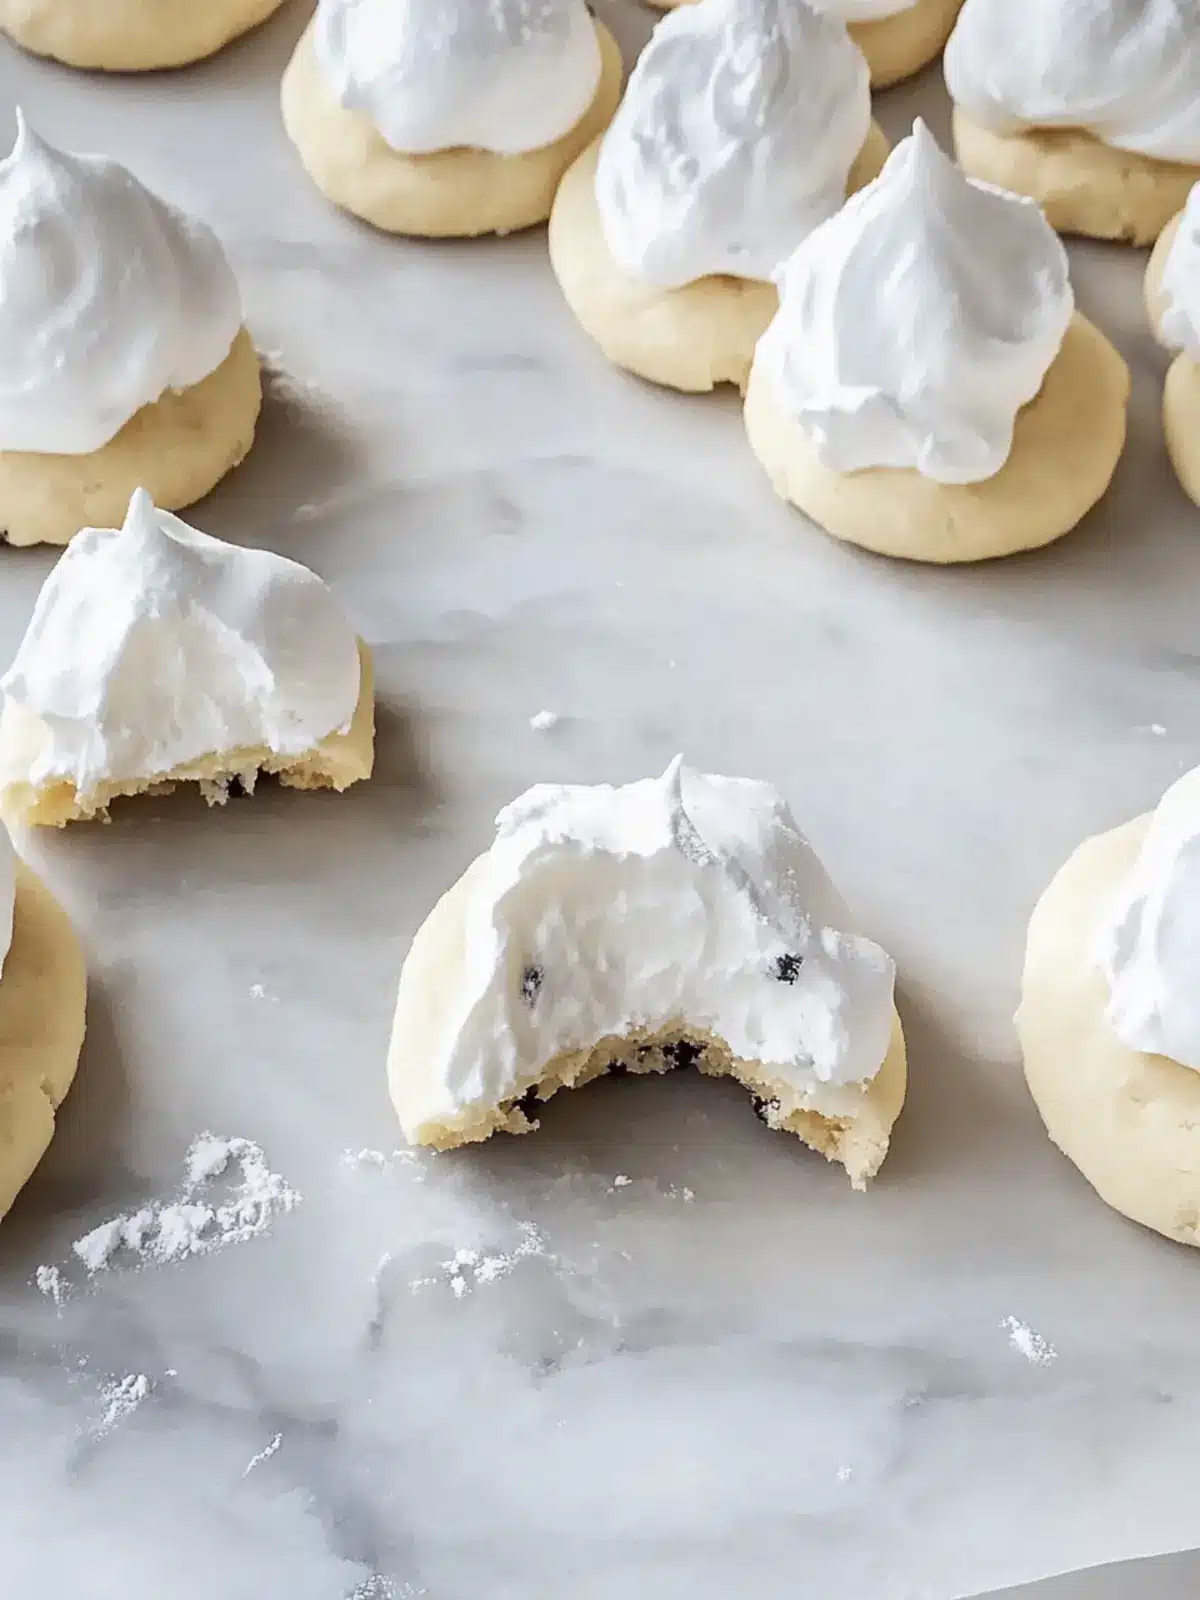
This is where the magic happens. Follow these steps carefully, and you’ll have perfect forgotten cookies every time.
- Preheat your oven to 350°F (175°C). Yes, you read that right. You’re going to heat the oven, then turn it off. The residual heat does all the work. Line a baking sheet with parchment paper and set aside.
- Prepare your egg whites. Separate 3 large eggs while they’re cold. It’s easier to separate cold eggs without breaking the yolk. Then let the whites sit at room temperature for about 15 minutes. Warm egg whites whip up to a higher volume. Trust me, this small step makes a big difference.
- Start whipping. Pour the egg whites into your perfectly clean bowl. Add the salt (and cream of tartar if using). Begin whipping on medium speed. After about 2 minutes, the mixture will become frothy and bubbly, like foam on top of a latte.
- Gradually add the sugar. With the mixer running, add the sugar one tablespoon at a time. This should take about 2 minutes. Adding it slowly allows each grain to dissolve before the next one goes in. If you dump it all at once, your meringue will be grainy and weep later.
- Whip to stiff peaks. Increase the speed to high and whip for another 4-6 minutes. You’re looking for stiff, glossy peaks that hold their shape when you lift the beaters. The mixture should look like marshmallow fluff. To test, turn the bowl upside down (carefully!). If nothing moves, you’re there. If it slides, keep whipping.
- Add the vanilla. Drizzle in the vanilla extract and whip for another 30 seconds just to incorporate. The mixture will deflate slightly, but that’s normal.
- Fold in any mix-ins. If you’re adding chocolate chips, nuts, or cocoa powder, now is the time. Use a rubber spatula and fold gently. Over-mixing will deflate the meringue. Stop as soon as everything is evenly distributed.
- Portion the cookies. Using a cookie scoop or two spoons, drop rounded tablespoons of meringue onto the prepared baking sheet. Space them about 1 inch apart. They don’t spread much, so you can fit about 24 cookies on one sheet. For a more rustic look, you can use two spoons to create slightly irregular shapes.
- Place in the oven and turn it off. Put the baking sheet in the preheated oven, then immediately turn the oven off. Do not open the door. Do not peek. The cookies need to sit undisturbed for at least 6 hours, but overnight is best. I usually make them right before bed and wake up to perfect cookies.
- Remove and cool. After 6-8 hours (or overnight), remove the cookies from the oven. They should be dry to the touch and lift easily off the parchment paper. Let them cool completely on the baking sheet for about 10 minutes before transferring to a wire rack.
Sensory Cues: During whipping, you’ll hear the sound change from sloshing to a soft, creamy sound as peaks form. The mixture will go from translucent to bright white and glossy. When you lift the beaters, the peak should stand straight up without drooping. If it curls over, keep whipping for another minute.
Troubleshooting: If your meringue won’t whip to stiff peaks, there might be a tiny bit of yolk in the whites. This is the most common problem. Always separate eggs one at a time into a small bowl before adding to the main bowl. That way, if a yolk breaks, you only lose one egg instead of three.
Cooking Tips & Techniques
I’ve made these cookies more times than I can count, and I’ve learned a few things the hard way. Here’s what I wish someone had told me:
The Humidity Factor. Meringue hates humidity. If you live in a humid climate or it’s a rainy day, your cookies might turn out chewy instead of crisp. I learned this the hard way during a summer thunderstorm. The cookies were still tasty, just not as crunchy. On humid days, leave the cookies in the turned-off oven for an extra 2 hours with the door slightly cracked open to let moisture escape.
Don’t Overwhip. There’s a fine line between stiff peaks and overwhipped meringue. Overwhipped meringue looks grainy and separated, almost like cottage cheese. If you see this, you’ve gone too far. Unfortunately, there’s no fixing it. Start over with fresh egg whites. To avoid this, stop whipping every 30 seconds after the 5-minute mark to check the texture.
Timing Strategy. The beauty of this recipe is that you can make it ahead. I often whip up the meringue after dinner, portion the cookies, and let them sit in the oven overnight. By breakfast, they’re ready. This also means your oven is occupied for the night, so plan your evening meals accordingly.
Consistency Check. If your cookies are sticky or chewy the next morning, they need more drying time. Simply leave them in the turned-off oven for another 2-4 hours with the door closed. They’ll continue to dry out without over-baking. If they’re still sticky after 12 hours, your oven might not be holding enough residual heat. Try preheating to 375°F (190°C) next time for more heat retention.
Batch Size. This recipe makes about 24 cookies, which sounds like a lot, but they disappear fast. I usually double the batch and make two sheets at once. Just make sure your oven can accommodate both sheets without them touching. Rotate the sheets halfway through the whipping process to ensure even drying.
Variations & Adaptations
One of the best things about this recipe is how versatile it is. Here are some variations I’ve tried and loved:
Chocolate Mint Forgotten Cookies. Add 1/4 cup mini chocolate chips and 1/2 teaspoon peppermint extract (in place of vanilla). The combination of cool mint and rich chocolate is absolutely addictive. These are my favorite around the holidays.
Lemon Lavender. Replace the vanilla with 1 teaspoon lemon zest and 1/2 teaspoon dried culinary lavender. The floral notes pair beautifully with the light, airy texture. This version feels incredibly elegant, perfect for a spring brunch.
Vegan Adaptation. While traditional forgotten cookies rely on egg whites, you can try using aquafaba (the liquid from a can of chickpeas). Use 3 tablespoons of aquafaba per egg white. The texture is slightly less crisp, but it works. Whip the aquafaba with cream of tartar for about 10 minutes until stiff peaks form. The drying time might need to be extended by 1-2 hours.
Spiced Chai. Add 1/2 teaspoon of chai spice blend (cinnamon, cardamom, ginger, cloves) along with the sugar. The warm spices make these perfect for cozy evenings. I like to serve these with a cup of hot tea.
Nutty Delight. Fold in 1/4 cup finely chopped pistachios or almonds. The crunch adds a lovely contrast to the soft meringue. Toast the nuts first for extra flavor. Just make sure they’re finely chopped so they don’t weigh down the cookies.
Dietary Adjustments. For a sugar-free version, use powdered erythritol. The texture will be slightly less crisp, and the cookies might be a bit more fragile. For a keto-friendly option, combine erythritol with a pinch of stevia. The cookies won’t be as airy, but they’ll still satisfy that sweet craving.
Serving & Storage Suggestions
These cookies are best served at room temperature, straight from the oven (or rather, from the cooling oven). They have a delicate, airy texture that practically dissolves on your tongue. Here’s how to make the most of them:
Serving Temperature: Serve them as is, or slightly warm if you’re impatient like me. They pair beautifully with fresh berries, a dollop of whipped cream, or alongside a cup of coffee or tea. For a dessert platter, arrange them with dark chocolate shavings and fresh mint leaves.
Complementary Dishes: These cookies are light enough to serve after a heavy meal. They also work wonderfully as a topping for ice cream or yogurt. Crumble them over a bowl of fresh fruit for a quick, elegant dessert. If you’re feeling fancy, dip the bottoms in melted dark chocolate and let them set on parchment paper.
Storage Instructions: Store forgotten cookies in an airtight container at room temperature. They will stay crisp for up to 5 days. Do not refrigerate them; the moisture in the fridge will make them sticky. If they do become soft, place them back in a 200°F (95°C) oven for 10 minutes to re-crisp.
Freezer Instructions: You can freeze the baked cookies for up to 3 months. Place them in a single layer in a freezer-safe container with parchment paper between layers. Thaw at room temperature for about 15 minutes before serving. Do not microwave them; the heat will turn them into sticky puddles.
Flavor Development: Interestingly, these cookies actually taste better after a day or two. The flavors meld together, and the texture becomes even more delicate. If you can resist eating them all immediately, you’ll be rewarded with even better cookies the next day.
Nutritional Information & Benefits
Let’s talk numbers. Per cookie (based on 24 cookies per batch):
- Calories: 28
- Fat: 0g
- Carbohydrates: 6g
- Protein: 1g
- Sugar: 6g
These are incredibly low-calorie treats that still feel indulgent. The egg whites provide a small amount of high-quality protein, and the sugar gives you quick energy. There’s no fiber, so they’re not a health food, but they’re certainly better for you than a traditional cookie loaded with butter and flour.
Health Benefits: Egg whites are rich in protein and contain no cholesterol or fat. They’re also a good source of selenium and riboflavin. The vanilla extract adds antioxidants, and if you use dark chocolate chips as a mix-in, you’ll get a small dose of flavonoids.
Dietary Considerations: These cookies are naturally gluten-free, dairy-free, and nut-free (unless you add nuts). They’re also low in fat and cholesterol-free. The only potential allergen is eggs. For those watching sugar intake, the sugar-free version is a good alternative.
Personal Wellness Perspective: I love that these cookies let me enjoy dessert without the post-dessert slump. They satisfy my sweet tooth without making me feel heavy or sluggish. It’s a small win, but sometimes that’s exactly what you need.
Conclusion
These light forgotten cookies are proof that simple ingredients can create something truly special. They’re easy enough for a weeknight craving, elegant enough for a dinner party, and light enough that you don’t feel guilty reaching for a second one. Or a third. No judgment here.
What I love most about this recipe is how forgiving it is. Even if your meringue isn’t perfect, even if you forget them in the oven for 10 hours instead of 8, they still turn out delicious. They’re the kind of recipe that builds confidence in the kitchen, especially if you’re new to working with egg whites.
I encourage you to make these your own. Experiment with different extracts, mix-ins, and flavor combinations. Try the chocolate mint version for a crowd-pleaser, or keep it classic with vanilla. Share them with friends, bring them to potlucks, or hoard them all for yourself. I won’t tell.
If you make these, I’d love to hear how they turn out. Drop a comment below and tell me about your favorite variation. And if you’re looking for more light, guilt-free treats, check out my healthy matcha truffles or these cozy paleo cinnamon apple cookies. Happy baking, friends!
Frequently Asked Questions
Can I use liquid egg whites from a carton?
Yes, you can use carton egg whites, but the results won’t be quite as stable. Carton egg whites are pasteurized, which slightly alters the protein structure. You’ll need to whip them longer, and the cookies might be a bit more fragile. For best results, stick with fresh egg whites.
Why are they called “forgotten cookies”?
The name comes from the cooking method. You literally forget the cookies in the oven overnight. The residual heat from the preheated oven dries them out slowly, creating a crisp, airy texture. It’s a clever name for a clever technique.
Can I add food coloring to make them colorful?
Absolutely! Gel food coloring works best because it doesn’t add extra liquid. Add it along with the vanilla extract. A few drops of pink or purple make these perfect for baby showers or birthday parties. Just fold gently to avoid deflating the meringue.
My cookies turned out chewy instead of crisp. What went wrong?
This usually happens when the humidity is high or the cookies didn’t dry long enough. Make sure your oven is fully preheated before turning it off, and leave the cookies undisturbed for at least 6 hours. On humid days, leave the oven door slightly cracked open for the last 2 hours to let moisture escape.
Can I double this recipe?
Yes, you can easily double or triple the recipe. Just make sure your mixer bowl is large enough to accommodate the increased volume. If using a stand mixer, the 5-quart bowl can handle up to 6 egg whites comfortably. For larger batches, whip in batches to avoid overfilling the bowl.
Pin This Recipe!
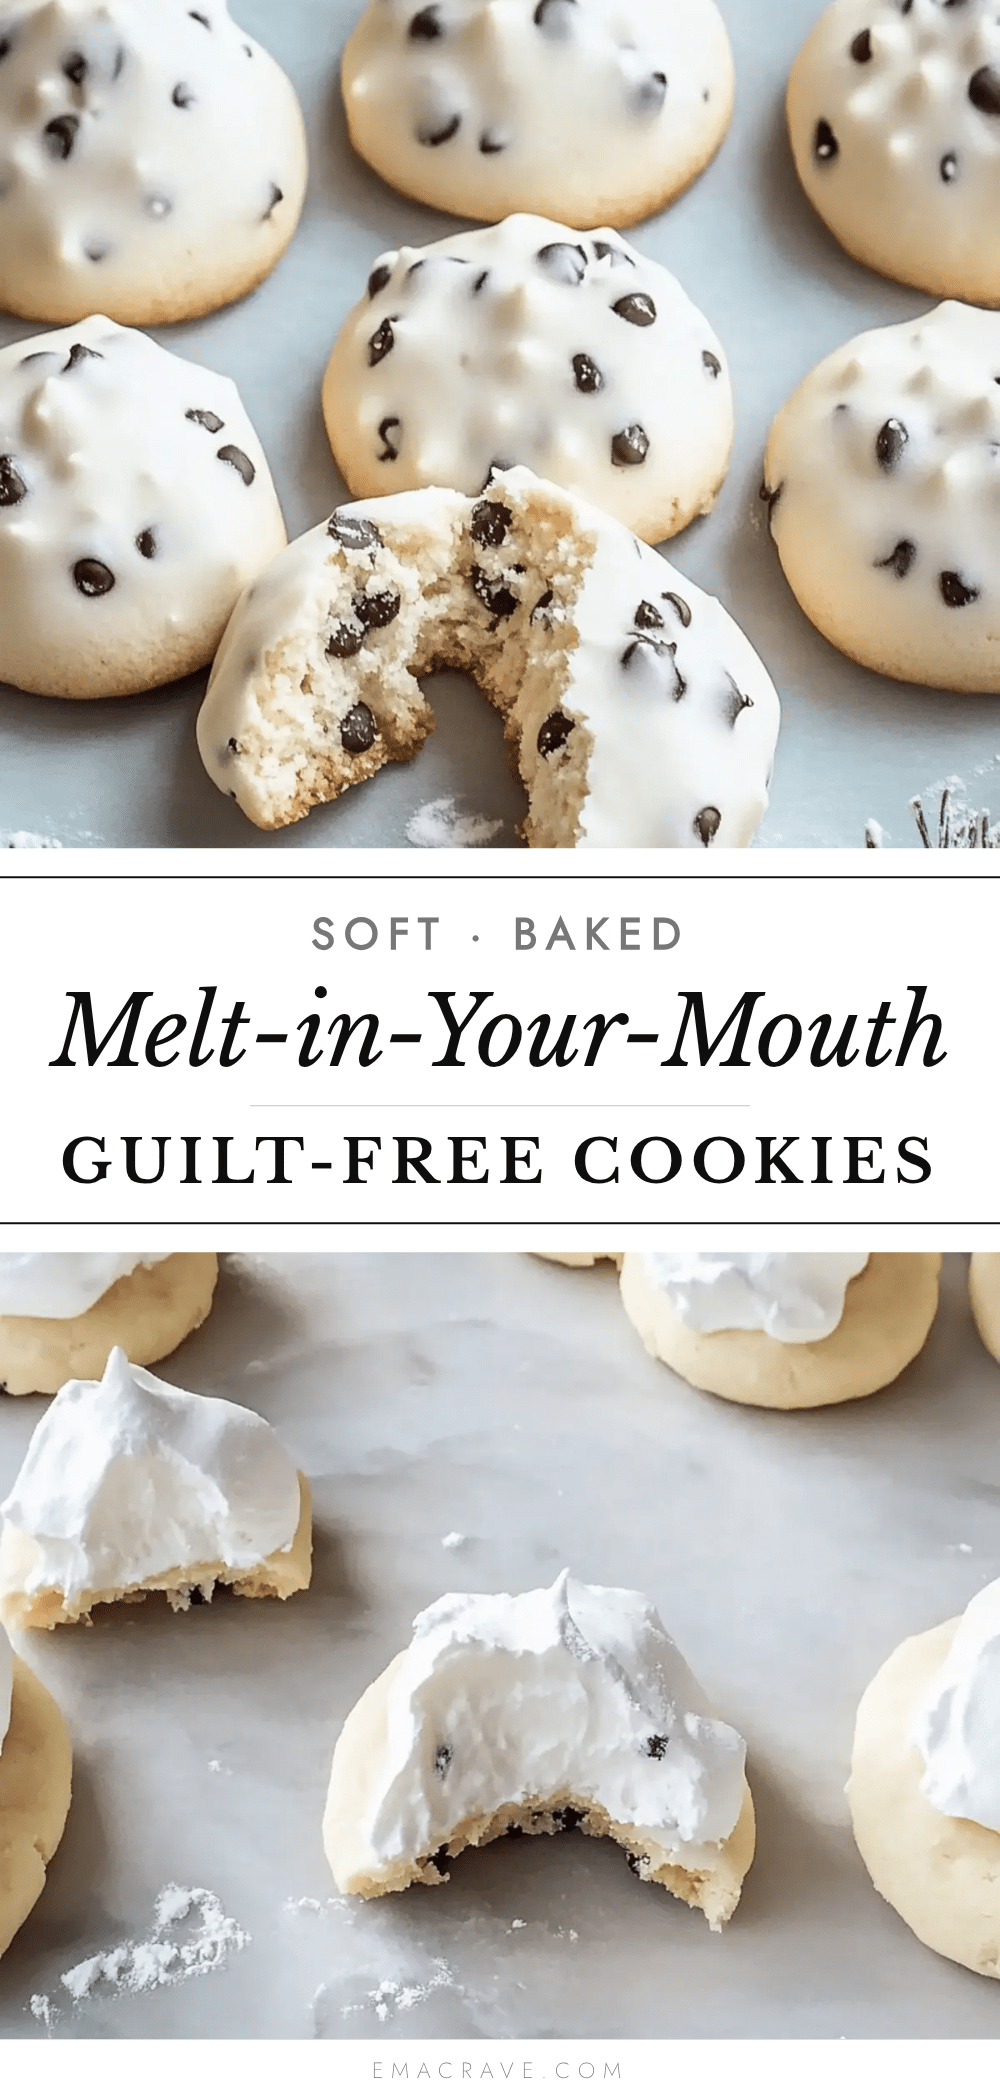
Light Forgotten Cookies Easy Guilt-Free Dessert

These light forgotten cookies are airy, melt-in-your-mouth meringues made with just 4 ingredients. They’re a guilt-free dessert that you literally forget in the oven overnight, resulting in crisp, tender cookies perfect for satisfying a sweet craving without the heaviness.
- Prep Time: 15 minutes
- Cook Time: 0 minutes (overnight drying in residual oven heat)
- Total Time: 6 hours 15 minutes (includes overnight drying)
- Yield: 24 cookies 1x
- Category: Dessert
- Cuisine: American
Ingredients
- 3 large egg whites (room temperature)
- 3/4 cup (150g) granulated sugar
- 1 teaspoon vanilla extract
- 1/8 teaspoon salt
- Optional: 1/4 teaspoon cream of tartar
- Optional mix-ins: 1/4 cup mini chocolate chips, 1/4 cup chopped nuts, or 1 tablespoon cocoa powder
Instructions
- Preheat your oven to 350°F (175°C). Line a baking sheet with parchment paper and set aside.
- Separate 3 large eggs while cold, then let the egg whites sit at room temperature for about 15 minutes.
- Pour the egg whites into a clean bowl. Add the salt (and cream of tartar if using). Begin whipping on medium speed until frothy, about 2 minutes.
- With the mixer running, add the sugar one tablespoon at a time over about 2 minutes.
- Increase speed to high and whip for 4-6 minutes until stiff, glossy peaks form. The mixture should look like marshmallow fluff and hold its shape when the beaters are lifted.
- Drizzle in the vanilla extract and whip for another 30 seconds to incorporate.
- If using mix-ins, fold them in gently with a rubber spatula until evenly distributed.
- Using a cookie scoop or two spoons, drop rounded tablespoons of meringue onto the prepared baking sheet, spacing them about 1 inch apart.
- Place the baking sheet in the preheated oven, then immediately turn the oven off. Do not open the door.
- Let the cookies sit in the turned-off oven for at least 6 hours, preferably overnight.
- Remove from the oven. The cookies should be dry to the touch and lift easily off the parchment paper. Let cool completely on the baking sheet for about 10 minutes before transferring to a wire rack.
Notes
For best results, use room temperature egg whites. Avoid making on humid days; if necessary, leave oven door slightly cracked for last 2 hours. Do not over whip meringue. Store in airtight container at room temperature for up to 5 days. Can be frozen for up to 3 months.
Nutrition
- Serving Size: 1 cookie
- Calories: 28
- Sugar: 6
- Sodium: 15
- Carbohydrates: 6
- Protein: 1
Keywords: forgotten cookies, meringue cookies, guilt-free dessert, light cookies, egg white cookies, gluten-free cookies, low-calorie dessert, overnight cookies



