Love this? Save it for later!
Share the inspiration with your friends
The first batch went into the oven looking like sad little pebbles—misshapen, slightly greasy, and honestly, I was already planning what takeout I’d order when they inevitably failed. I’d been trying to nail a vegan hazelnut cookie that didn’t taste like cardboard dust mixed with regret. You know the kind—the ones that crumble into a thousand pieces the second you look at them, or worse, turn into hockey pucks that could double as doorstops.
These cookies were different. When I pulled the tray out, the kitchen smelled like a fancy Italian bakery had somehow materialized in my tiny apartment. The edges were perfectly golden, the centers slightly soft, and they held together—actually held together—when I picked one up. I took a bite, and let me tell you, I let out a sound that made my neighbor knock on the wall to check if I was okay. That nutty, rich hazelnut flavor mixed with just the right amount of sweetness, all wrapped up in a texture that’s somehow both tender and crumbly in the best possible way. These vegan hazelnut cookies were a genuine accident that turned into my most requested recipe.
I’ve made them at least seven times since that first happy accident. Each batch confirms what I suspected that evening—you don’t need eggs, butter, or complicated ingredients to make a cookie that disappears in minutes. Three simple ingredients, one bowl, and about twenty minutes later, you’ve got a cookie that makes people say “wait, these are vegan?” every single time.
Why You’ll Love This Recipe
Let me be real with you—I’ve tested more vegan cookie recipes than I care to count. Some were disasters. Others were just… fine. But these? These are the ones I keep coming back to, and here’s why they’ll win you over too:
- Only 3 Ingredients: No fancy egg replacers, no obscure flours, no trip to three different stores. You probably have everything already.
- Ready in 20 Minutes: From craving to cookie in less time than it takes to decide what to watch on Netflix. Perfect for those sudden “I need something sweet” moments.
- Naturally Vegan & Gluten-Free: These work for pretty much everyone at the table. No one has to miss out, and honestly, no one will even notice.
- That Perfect Texture: They’re tender without being fragile, crumbly without falling apart. The kind of cookie that shatters slightly when you bite into it, then melts on your tongue.
- Seriously Addictive: I once made a batch to “test” for this post and ate six before they’d fully cooled. They’re that dangerous.
What makes these different from every other vegan cookie out there? It’s the way the hazelnut flavor takes center stage. Most recipes bury the nuttiness under sugar and fat, but this one lets the hazelnuts shine. The texture is also a game-changer—not too dense, not too airy, just that perfect middle ground that makes you close your eyes after the first bite. This isn’t just another vegan cookie recipe; it’s the one you’ll actually want to make again and again.
What Ingredients You Will Need
This recipe relies on three simple ingredients that work together beautifully. No tricks, no hidden components—just straightforward, honest baking that delivers every single time.
- 1 ½ cups hazelnut flour (also called hazelnut meal) – This is the star of the show. I prefer Bob’s Red Mill brand for its consistent texture, but any finely ground hazelnut flour works. Don’t confuse this with hazelnut butter, which has a completely different consistency and will ruin the cookie structure. Look for a flour that’s light and powdery, not clumpy.
- ⅓ cup maple syrup (or agave nectar) – This provides sweetness and binds everything together. Pure maple syrup gives a subtle warmth that complements the hazelnuts perfectly. If you’re in a pinch, agave works too, though the flavor profile shifts slightly. Avoid honey if keeping this strictly vegan.
- ¼ cup coconut oil (melted) – This replaces butter and gives the cookies their tender, crumbly texture. I use virgin coconut oil for a mild coconut undertone, but refined coconut oil works if you want a completely neutral flavor. Make sure it’s melted but not hot when you add it.
- Pinch of sea salt (optional but recommended) – A tiny amount balances the sweetness and makes the hazelnut flavor pop. Don’t skip this if you have it on hand—it makes a noticeable difference.
- ½ teaspoon vanilla extract (optional) – Adds depth without overpowering the hazelnut. I add this about half the time, depending on my mood.
That’s genuinely it. Three base ingredients, plus two optional ones that take these cookies from good to unforgettable. The beauty of this recipe is its simplicity—there’s nowhere to hide, so every ingredient matters. I’ve tested this with different nut flours (almond, cashew) and while they work, nothing beats the distinctive flavor of hazelnuts. If you’re feeling adventurous, you can add a tablespoon of cocoa powder for a chocolate version, but that’s a variation for another day.
Equipment Needed
You don’t need a fully stocked bakery kitchen for these cookies. Here’s what you’ll actually use:
- Mixing bowl – Any medium-sized bowl works. I use a glass one because I like seeing the ingredients come together.
- Spatula or wooden spoon – For mixing. A spatula makes it easier to scrape the sides clean.
- Baking sheet – Standard half-sheet pan or any flat baking tray. Line it with parchment paper for easiest cleanup.
- Parchment paper – Non-negotiable for these cookies. They’re tender and will stick to an unlined pan. Trust me on this one.
- Measuring cups and spoons – Accurate measurements matter more here than in most recipes because there are so few ingredients.
- Cooling rack – Helps the cookies set properly. If you don’t have one, let them cool on the baking sheet for an extra 5 minutes before moving.
If you don’t have hazelnut flour, you can make your own by blitzing whole hazelnuts in a food processor until fine. Just be careful not to over-process or you’ll end up with hazelnut butter. Pulse in short bursts and stop when it looks like sand. I’ve done this plenty of times when I’ve run out of pre-made flour.
Preparation Method
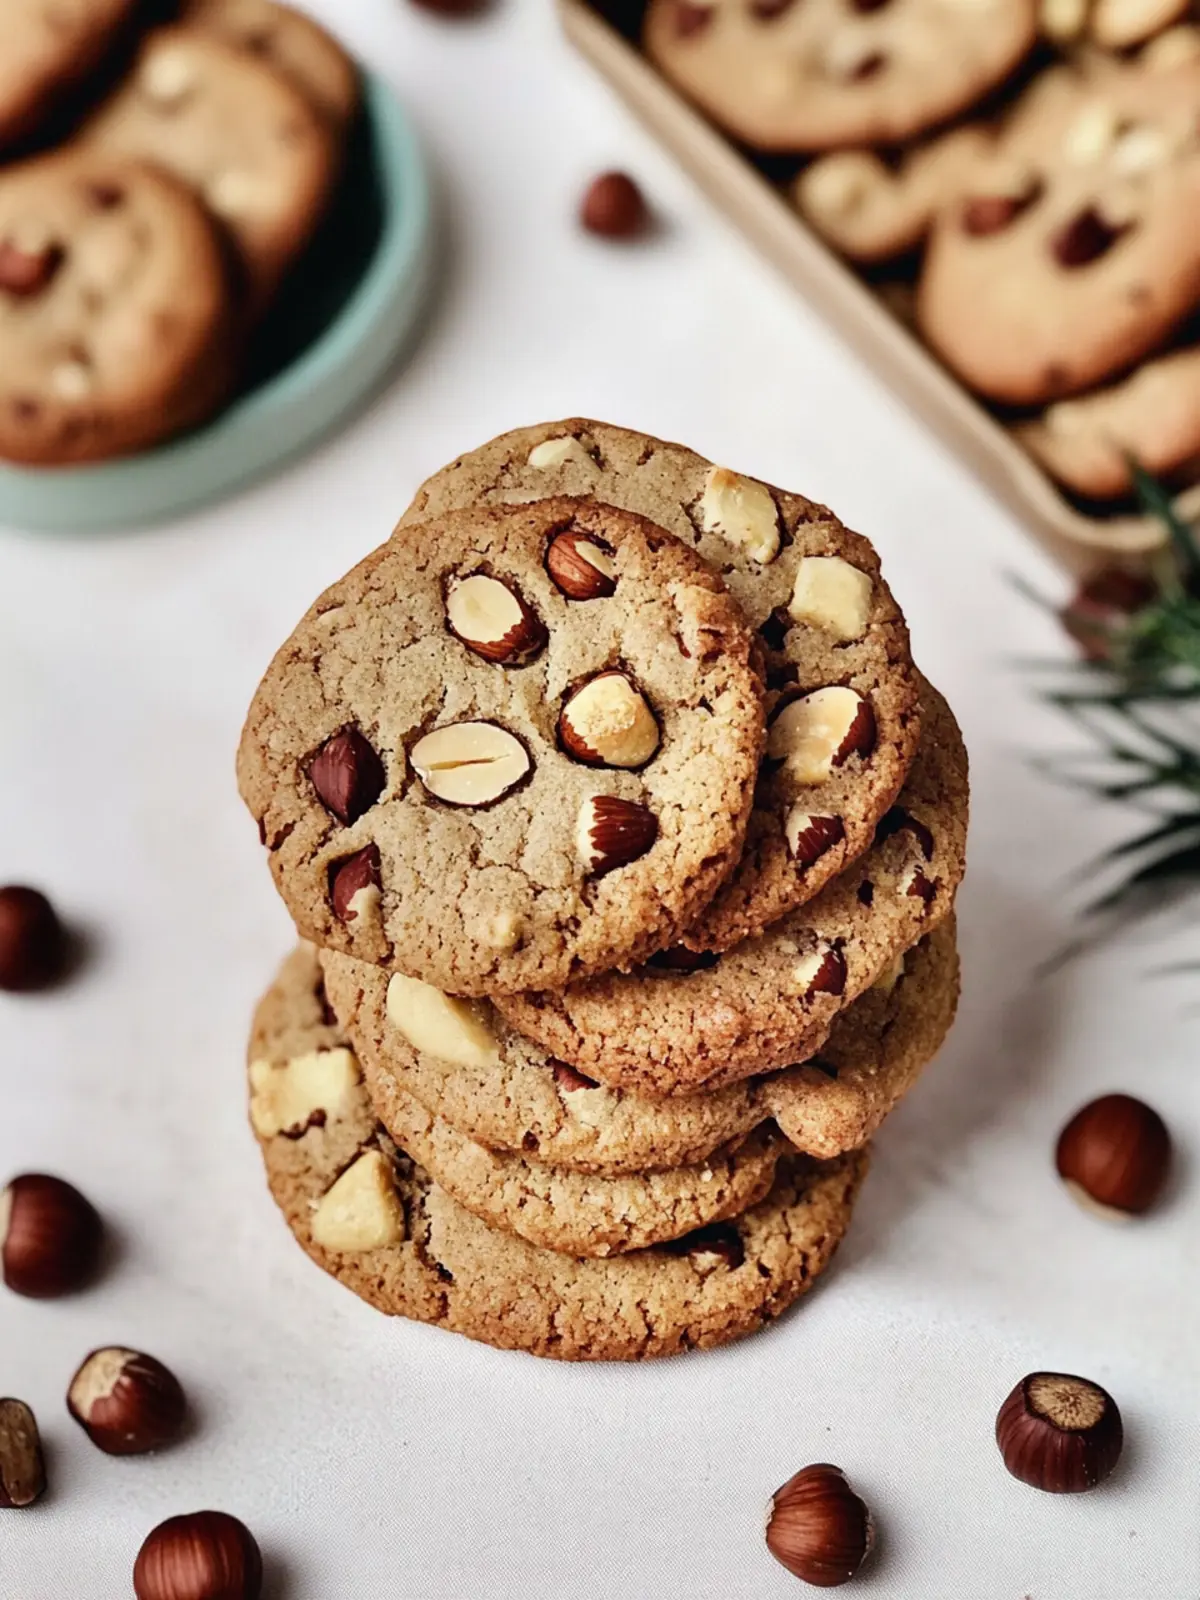
These cookies come together so fast you’ll barely have time to preheat the oven. Here’s exactly how to make them:
- Preheat your oven to 350°F (175°C). Line a baking sheet with parchment paper. This step matters—don’t skip the paper.
- In a medium mixing bowl, combine 1 ½ cups hazelnut flour and a pinch of sea salt. Stir them together with your spatula so the salt distributes evenly. Take a moment to smell the hazelnut flour—it should smell sweet and nutty, not stale or rancid.
- Add ⅓ cup maple syrup and ¼ cup melted coconut oil. If you’re using vanilla extract, add ½ teaspoon now. The coconut oil should be melted but not hot—warm enough to pour easily, but not so hot it cooks the maple syrup.
- Stir everything together until a dough forms. It will look crumbly at first, then suddenly come together into a cohesive mass. This usually takes about 30 seconds of vigorous stirring. Scrape the sides and bottom of the bowl to make sure everything’s incorporated. The dough should feel slightly greasy but hold together when pressed between your fingers.
- Scoop tablespoon-sized portions of dough. I use a small cookie scoop for consistency, but a regular spoon works fine. Roll each portion into a ball between your palms. The dough will be a bit oily—that’s normal.
- Place the balls on the prepared baking sheet, spacing them about 2 inches apart. These cookies spread slightly, so give them room. You should get about 12 cookies from this batch.
- Gently press each ball down with the back of a fork. This flattens them slightly and creates that classic crisscross pattern. Don’t press too hard—you want them about ½ inch thick. If the fork sticks, dip it in a little water first.
- Bake for 10-12 minutes. At 10 minutes, the edges should be lightly golden and the centers will still look slightly soft. That’s exactly what you want. At 12 minutes, they’ll be firmer and more golden all over. I prefer 11 minutes for that perfect tender-crumbly balance.
- Let the cookies cool on the baking sheet for 5 minutes. This is crucial—they’re fragile when hot and need time to set. Don’t try to move them immediately or they’ll fall apart.
- Transfer to a cooling rack and let cool completely. They’ll continue firming up as they cool. If you can resist eating them warm, they’ll be even better after 15 minutes.
A quick tip: if your dough feels too dry and crumbly to form balls, add another teaspoon of maple syrup. If it feels too wet and sticky, add a tablespoon more hazelnut flour. Humidity and flour brands vary, so trust your hands more than the recipe.
Cooking Tips & Techniques
I’ve made enough mistakes with these cookies to fill a small notebook. Here’s what I’ve learned so you don’t have to repeat my errors:
Don’t overbake them. I cannot stress this enough. The first time I made these, I left them in for 14 minutes because I wanted them “well done.” They came out dry and crumbly in the bad way—the kind that shatters into dust when you bite them. These cookies continue cooking from residual heat after they leave the oven, so pull them when the centers still look slightly underdone. They’ll set perfectly as they cool.
Let them cool completely. I know, I know—warm cookies are irresistible. But these particular cookies need that cooling time to develop their signature texture. Warm, they’re fragile and almost fudgy. Cool, they’re tender and crumbly with that perfect snap. If you eat one warm (and let’s be honest, you will), save the rest for later so you can experience the difference.
Use room temperature ingredients. Cold coconut oil will seize up when you mix it, creating lumps that never fully incorporate. If your kitchen is cold, warm the maple syrup slightly too—just 10 seconds in the microwave makes a noticeable difference in how smoothly everything comes together.
Toast the hazelnut flour for deeper flavor. This is optional but transformative. Spread the flour on a baking sheet and toast at 350°F for 5-7 minutes, stirring halfway through. Let it cool completely before using. The flavor becomes almost caramelized—nutty and rich in a way that plain flour just can’t match. I do this when I’m making these for guests or when I want something extra special.
Measure your flour correctly. Scoop it gently into your measuring cup and level it off with a knife. Don’t pack it down or scoop directly from the bag—you’ll end up with too much flour and dry cookies. This is one of those small details that makes a big difference.
Variations & Adaptations
These cookies are wonderfully adaptable. Here are some variations I’ve tested and loved:
Chocolate Hazelnut Cookies: Add 1 tablespoon of cocoa powder to the dry ingredients and increase the maple syrup to ⅓ cup plus 1 tablespoon. The chocolate balances the hazelnut beautifully, and you get a cookie that tastes like a grown-up version of a chocolate-hazelnut spread. I made these for a friend who’s not usually a fan of vegan desserts, and she asked for the recipe before finishing her first cookie.
Orange Hazelnut Cookies: Add 1 teaspoon of orange zest and a tablespoon of fresh orange juice. The citrus brightens the nuttiness and adds a lovely aromatic quality. These are especially good in winter when you want something that feels a little festive without being complicated.
Cinnamon Spice Hazelnut Cookies: Add ½ teaspoon of cinnamon, ¼ teaspoon of nutmeg, and a pinch of cloves. This turns them into something almost like a speculoos cookie—warm, spiced, and perfect with coffee. I made these for a holiday cookie exchange and they were the first tin emptied.
Nut-Free Option: Substitute the hazelnut flour with sunflower seed flour (grind raw sunflower seeds in a food processor). The flavor is different—more earthy—but the texture works surprisingly well. Just note that the cookies may turn slightly green from a natural reaction between sunflower seeds and baking soda. They’re still delicious, just not as pretty.
Lower Sugar Option: Reduce the maple syrup to ¼ cup. The cookies will be less sweet but still satisfying, especially if you add a pinch more salt to balance the flavors. This version works great for breakfast alongside a cup of tea or coffee.
My personal favorite variation? The chocolate version with a sprinkle of flaky sea salt on top before baking. The salt cuts through the sweetness and makes the hazelnut flavor absolutely sing. I’ve made this version more times than I can count, and it never gets old.
Serving & Storage Suggestions
These cookies are wonderful at room temperature, but they also shine in a few specific situations:
Serving: Arrange them on a simple plate with a dusting of powdered sugar for a prettier presentation. They pair beautifully with coffee—especially a creamy latte or a strong espresso. For a dessert spread, serve them alongside a scoop of vegan vanilla ice cream or a dollop of coconut whipped cream. They’re also fantastic crumbled over a bowl of nice cream for added texture.
Storage: Keep these cookies in an airtight container at room temperature for up to 5 days. Place a piece of bread in the container to help maintain moisture if your kitchen is dry. Don’t refrigerate them—the cold will make them dry out faster. If you live in a humid climate, they might soften slightly, but they’ll still taste great.
Freezing: These freeze beautifully. Place cooled cookies in a single layer in a freezer-safe container, separated by parchment paper. They’ll keep for up to 3 months. To thaw, leave them at room temperature for about 15 minutes. You can also freeze the unbaked dough balls—just place them on a baking sheet, freeze until solid, then transfer to a bag. Bake from frozen, adding 2-3 minutes to the baking time.
Reheating: If you want that just-baked warmth, pop a cookie in a 300°F oven for 3-4 minutes. A microwave works in a pinch (about 10 seconds), but it can make them slightly chewy rather than tender-crumbly. I prefer the oven method when I have the time.
One thing I love about these cookies is that their flavor actually improves after a day or two. The hazelnut flavor deepens and the texture settles into that perfect balance. So don’t worry if you make them ahead—they’ll be even better tomorrow.
Nutritional Information & Benefits
Here’s the approximate nutritional breakdown for one cookie (based on 12 cookies):
- Calories: 98
- Total Fat: 7g
- Saturated Fat: 3g
- Carbohydrates: 8g
- Fiber: 1g
- Sugar: 5g
- Protein: 2g
These cookies are naturally vegan, gluten-free, and dairy-free. They’re also relatively low in sugar compared to most cookie recipes, thanks to the maple syrup providing sweetness without the refined stuff. Hazelnuts are rich in healthy fats, vitamin E, and antioxidants, making these a treat that actually offers some nutritional value.
If you’re watching your sugar intake, the lower-sugar variation with ¼ cup maple syrup brings each cookie down to about 4g of sugar. That’s pretty impressive for a cookie that still tastes genuinely indulgent.
As with any treat, moderation is key. But I’d rather reach for one of these than a store-bought cookie loaded with preservatives and questionable ingredients. At least I know exactly what’s in these—three simple, whole-food ingredients that I can feel good about eating.
Conclusion
These perfect vegan hazelnut cookies have become my go-to for so many reasons. They’re simple enough for a random Tuesday night craving, but impressive enough to bring to a gathering where everyone will ask for the recipe. They prove that vegan baking doesn’t have to be complicated or require a laundry list of specialty ingredients. Sometimes the best things come from the simplest combinations.
I love that I can make these without planning ahead—no need to soften butter or bring eggs to room temperature. Just three ingredients, one bowl, and about twenty minutes until I’m enjoying a cookie that genuinely satisfies that sweet, crunchy, nutty craving. They’ve saved me from many a late-night dessert impulse, and they’ve earned a permanent spot in my regular baking rotation.
I’d love to hear how yours turn out! Try them with different mix-ins, play with the spices, or keep them exactly as written—they’re perfect either way. Drop a comment below and let me know your favorite variation, or share a photo of your batch. Happy baking, friend—you’ve got this!
Frequently Asked Questions
Can I use almond flour instead of hazelnut flour?
Yes, you can substitute almond flour in equal amounts. The cookies will have a milder, sweeter flavor and a slightly different texture—still tender and crumbly, but without that distinctive hazelnut taste. If you’re looking for something close to the original, I’d recommend sticking with hazelnut flour, but almond works in a pinch.
Why did my cookies fall apart?
This usually happens for one of three reasons: the cookies were underbaked and didn’t set properly, they were moved too soon after coming out of the oven, or the dough was too dry. Make sure you’re letting them cool on the baking sheet for a full 5 minutes before transferring. If the dough feels too dry when mixing, add an extra teaspoon of maple syrup.
Can I make these cookies nut-free?
Absolutely! Substitute the hazelnut flour with sunflower seed flour (ground raw sunflower seeds) or pumpkin seed flour. The texture will be similar, but the flavor will be different—more earthy and savory. Just be aware that sunflower seed flour can react with baking powder to turn green, though this doesn’t affect the taste.
How do I store these cookies to keep them fresh?
Store them in an airtight container at room temperature for up to 5 days. Adding a slice of bread to the container helps maintain moisture. Don’t refrigerate them, as the cold air will dry them out. For longer storage, freeze them in a single layer in a freezer-safe container for up to 3 months.
Can I add chocolate chips or other mix-ins?
Yes! Fold in up to ¼ cup of mini chocolate chips, chopped dried fruit, or toasted coconut flakes before shaping the dough. Just keep in mind that add-ins will change the texture slightly and may make the cookies a bit more fragile. I love adding dark chocolate chips for a double-chocolate-hazelnut experience.
Pin This Recipe!

Perfect Vegan Hazelnut Cookies – Easy 3-Ingredient Recipe

These vegan hazelnut cookies are made with just three simple ingredients and come together in about 20 minutes. They are tender, crumbly, and packed with rich hazelnut flavor, proving that vegan baking can be both easy and delicious.
- Prep Time: 10 minutes
- Cook Time: 10-12 minutes
- Total Time: 20-22 minutes
- Yield: 12 cookies 1x
- Category: Dessert
- Cuisine: American
Ingredients
- 1 ½ cups hazelnut flour (hazelnut meal)
- ⅓ cup maple syrup (or agave nectar)
- ¼ cup coconut oil, melted
- Pinch of sea salt (optional but recommended)
- ½ teaspoon vanilla extract (optional)
Instructions
- Preheat your oven to 350°F (175°C). Line a baking sheet with parchment paper.
- In a medium mixing bowl, combine 1 ½ cups hazelnut flour and a pinch of sea salt. Stir together.
- Add ⅓ cup maple syrup and ¼ cup melted coconut oil. If using, add ½ teaspoon vanilla extract.
- Stir everything together until a dough forms. It will look crumbly at first, then come together into a cohesive mass. Scrape the sides and bottom of the bowl to ensure everything is incorporated.
- Scoop tablespoon-sized portions of dough. Roll each portion into a ball between your palms.
- Place the balls on the prepared baking sheet, spacing them about 2 inches apart.
- Gently press each ball down with the back of a fork to flatten slightly and create a crisscross pattern. Dip the fork in water if it sticks.
- Bake for 10-12 minutes. At 10 minutes, the edges should be lightly golden and the centers still slightly soft. For a firmer cookie, bake 12 minutes.
- Let the cookies cool on the baking sheet for 5 minutes. This is crucial for them to set.
- Transfer to a cooling rack and let cool completely. They will continue to firm up as they cool.
Notes
Do not overbake; cookies continue to cook from residual heat. Let cool completely for best texture. If dough is too dry, add another teaspoon of maple syrup; if too wet, add a tablespoon more hazelnut flour. For deeper flavor, toast hazelnut flour at 350°F for 5-7 minutes before using. Store in an airtight container at room temperature for up to 5 days. Freeze for up to 3 months.
Nutrition
- Serving Size: 1 cookie
- Calories: 98
- Sugar: 5
- Fat: 7
- Saturated Fat: 3
- Carbohydrates: 8
- Fiber: 1
- Protein: 2
Keywords: vegan cookies, hazelnut cookies, 3-ingredient cookies, gluten-free cookies, dairy-free cookies, easy vegan dessert



