Love this? Save it for later!
Share the inspiration with your friends
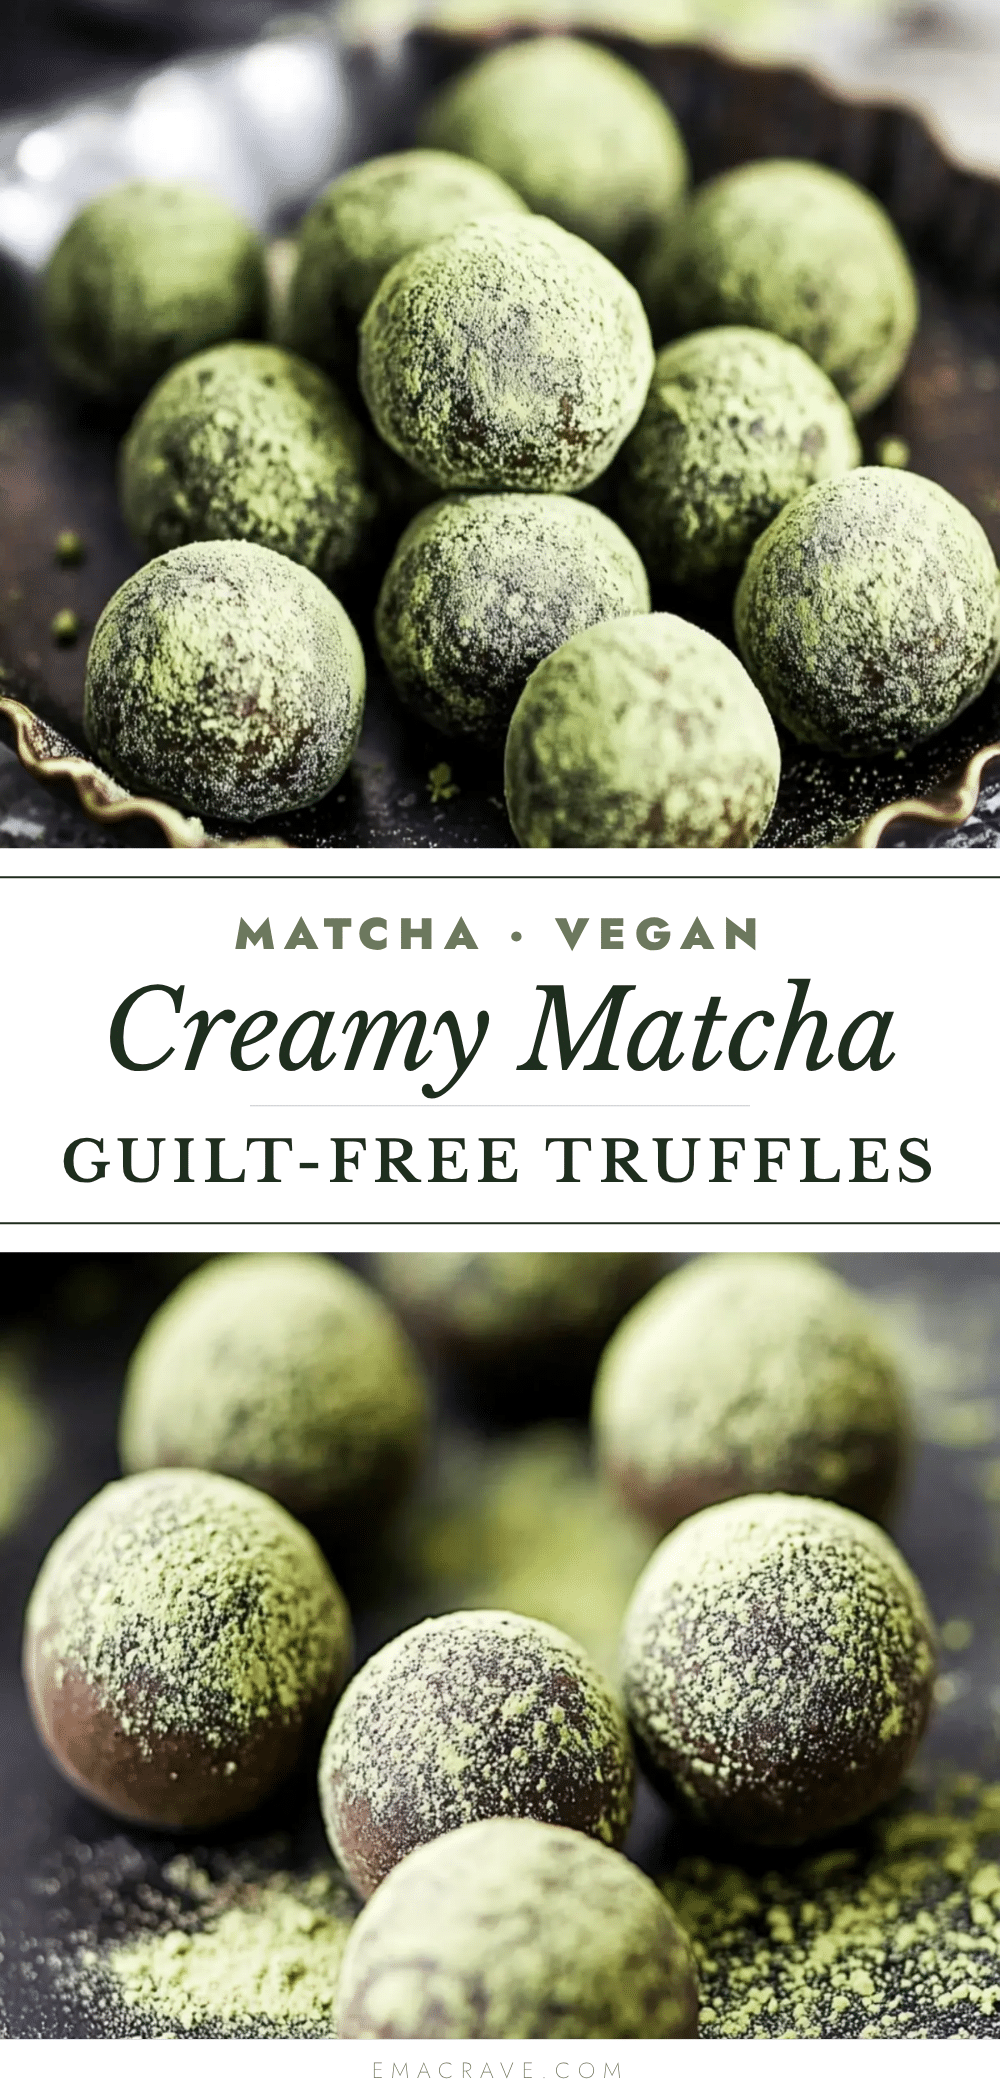
I was stirring a batch of my creamy matcha cookie dough cups last week, and a little voice in my head whispered, “What if you just… stopped here?” The texture was so luscious, so spoon-lickingly good, that I set the silicone mold aside and grabbed a tiny bowl. I rolled a bit of the mixture between my palms, dusted it with a pinch of matcha, and popped it into my mouth. That little orb of creamy, earthy sweetness was a revelation. It had all the satisfaction of a truffle with none of the heavy cream or refined sugar. I knew right then I had stumbled onto something worth repeating.
For the next three days, I kept tinkering. First, I tried them with almond butter, then cashew butter. I swapped the sweetener, adjusted the matcha powder, and even tested a version with a pinch of sea salt on top. By the third batch, I had a recipe that felt like a secret weapon. These Healthy Matcha Truffles are the kind of treat you can grab on your way out the door, stash in your bag for a mid-afternoon slump, or serve to friends who have no idea they’re eating something actually good for them. Honestly, the hardest part is not eating the entire bowl of filling before it even hits the freezer.
I’m not a professional pastry chef, nor do I pretend to be one. I’m just someone who loves a sweet bite that doesn’t leave me feeling sluggish. These truffles became my go-to because they solve a real problem—how to satisfy a craving for something creamy, rich, and indulgent without derailing a good day. They’re proof that a little bit of intention in the kitchen can go a long way.
Why You’ll Love This Recipe
These aren’t just any truffles. They’re a small moment of calm in a busy day. Here’s why they’ve earned a permanent spot in my fridge.
- Just 3 Ingredients : You only need a creamy nut butter, good-quality matcha powder, and a natural sweetener. No heavy cream, no butter, no white sugar. It’s almost too simple to believe.
- Ready in 15 Minutes : From mixing bowl to freezer, these come together faster than you can decide on takeout. Perfect for those moments when a craving hits hard and fast.
- Naturally Sweet & Creamy : The richness comes from healthy fats, not dairy. The texture is so velvety, you’ll forget they’re actually good for you.
- Perfect for Meal Prep : Make a batch on Sunday and you’ve got a week’s worth of portion-controlled treats ready to go. They’re also great for packing in lunchboxes.
- Crowd-Pleaser Energy : I’ve brought these to brunches and potlucks, and people always ask for the recipe. They’re a conversation starter, especially for matcha lovers.
What makes these different from other truffle recipes is the technique. I found that letting the mixture sit for five minutes after stirring allows the matcha to fully hydrate, which deepens the flavor and prevents any bitter, dry pockets. It’s a small step, but it makes a big difference. This isn’t just another no-bake dessert—it’s my best version of a guilt-free indulgence.
What Ingredients You Will Need
This short list is the backbone of these creamy truffles. Each ingredient plays a specific role, so quality matters here more than quantity.
- ½ cup creamy almond butter (or cashew butter) : This is the base that gives the truffles their rich, fudgy texture. I prefer a drippy, natural almond butter with no added sugar or oil. Cashew butter makes them even creamier, while peanut butter works in a pinch but will give a stronger flavor. Look for a brand that’s just nuts and salt.
- 3 tablespoons maple syrup (or honey) : This provides the sweetness and helps bind the mixture. Pure maple syrup adds a subtle caramel note that pairs beautifully with matcha. If you use honey, the flavor will be slightly more floral. For a sugar-free option, use monk fruit syrup or a liquid allulose sweetener.
- 2 tablespoons culinary-grade matcha powder : This is the star. Do not use ceremonial grade matcha for baking or truffles—it’s too delicate and expensive. Culinary grade is designed for mixing and has a bolder, more robust flavor that holds up well. I recommend a brand like Ippodo Tea or Matchaful for consistent color and taste. Store your matcha in the freezer to keep it vibrant.
- Optional: Pinch of sea salt : A tiny sprinkle on top before the truffles set really brightens the flavor. It balances the sweetness and makes the matcha taste even more complex.
- Optional: ¼ cup shredded unsweetened coconut : For rolling the truffles in, if you want a little texture and a tropical twist. I do this about half the time.
Equipment Needed
You don’t need a fancy kitchen to pull these off. Here’s what I use every single time.
- Medium mixing bowl : Any bowl will do, but a wider one makes stirring easier. I use a glass bowl.
- Rubber spatula : Essential for scraping down the sides and getting every last bit of that matcha mixture.
- Small cookie scoop (about 1 tablespoon) : This is my secret weapon for uniform truffles. If you don’t have one, use two teaspoons to portion the mixture.
- Parchment paper or silicone baking mat : For lining a baking sheet or plate. The truffles won’t stick, and cleanup is a breeze.
- Small shallow dish : For holding the optional coconut flakes or extra matcha powder for rolling.
- Freezer-safe container : For storing the finished truffles. A glass Tupperware or a zip-top bag works fine.
If you don’t have a cookie scoop, no worries. Just wet your hands slightly before rolling to prevent the mixture from sticking to your palms. It’s a simple trick that makes a messy job much cleaner.
Preparation Method
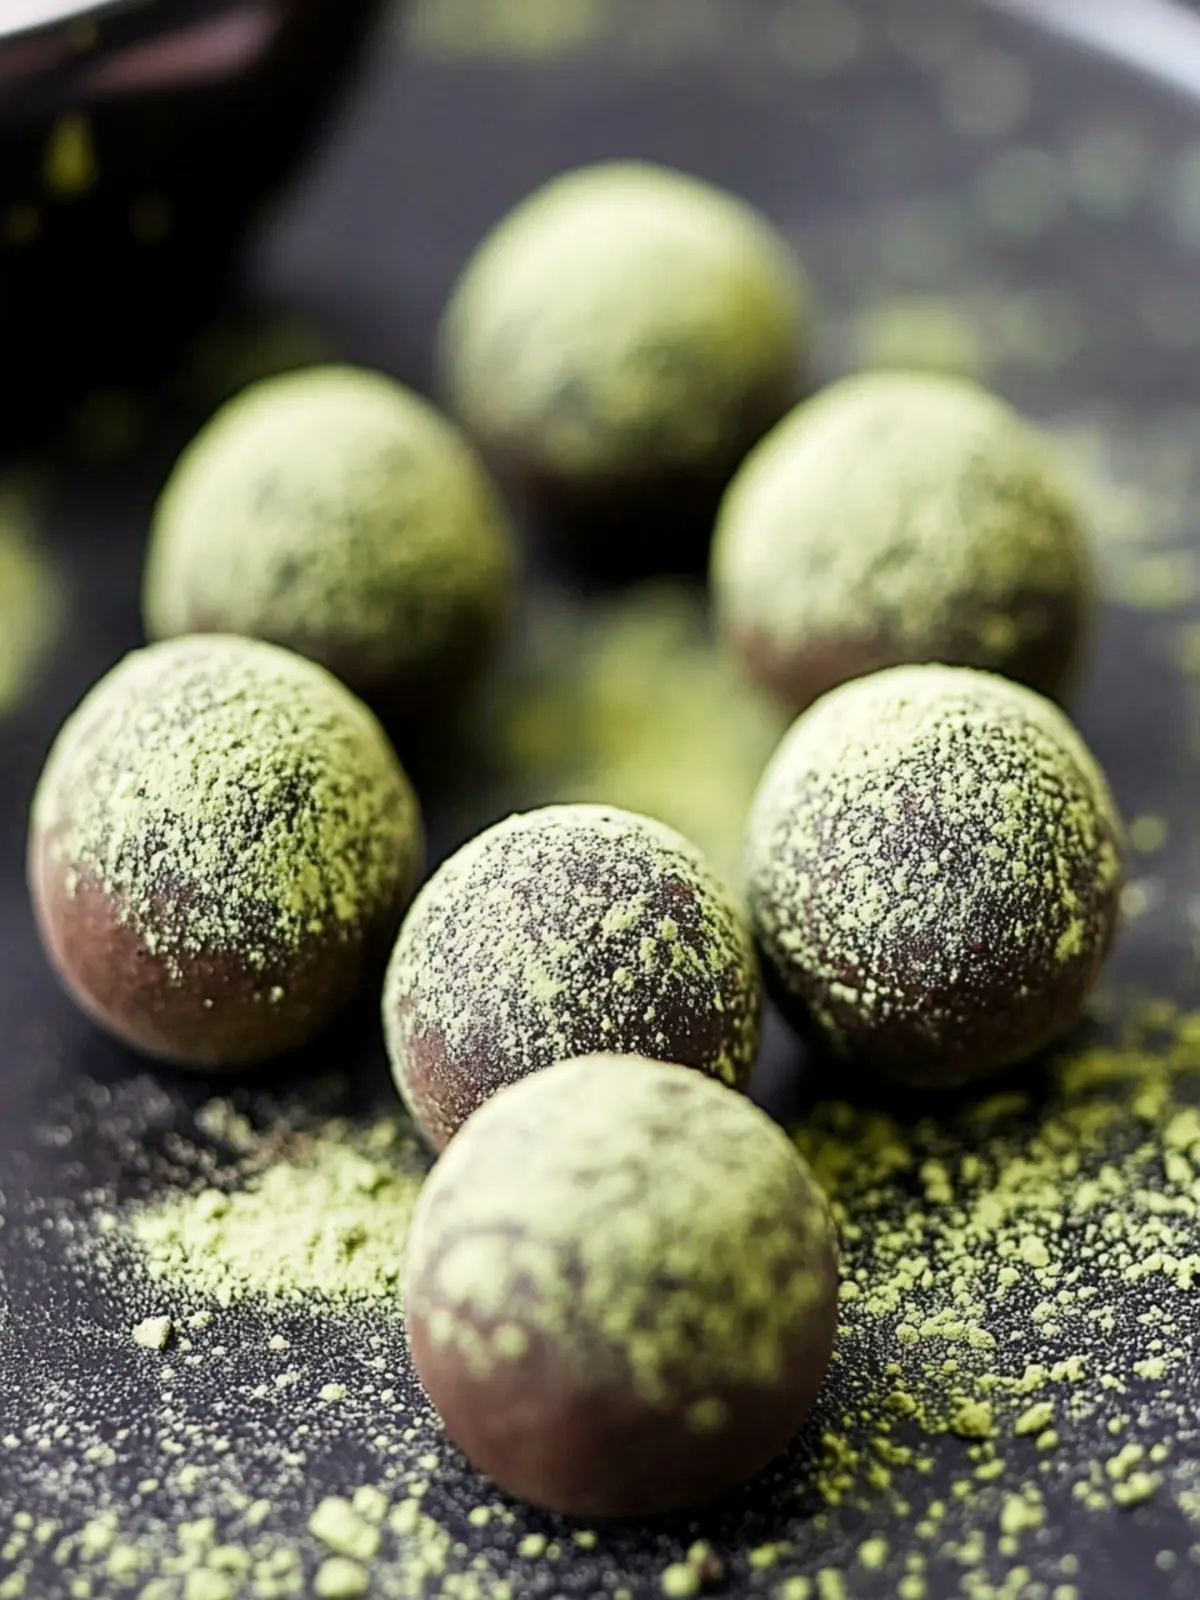
This is where the magic happens. Follow these steps, and you’ll have a batch of perfect truffles in no time.
- Mix the base : In your medium mixing bowl, combine ½ cup of creamy almond butter and 3 tablespoons of maple syrup. Stir them together with your rubber spatula until they’re fully incorporated. The mixture should look smooth and glossy. It might seem a little thin at this point—don’t worry, that’s normal.
- Sift in the matcha : This step is important. Sift 2 tablespoons of culinary-grade matcha powder over the almond butter mixture. Sifting prevents clumps from forming. If you skip this, you’ll end up with green lumps that are hard to break up later. Stir everything together gently at first, then more vigorously as the powder incorporates. The mixture will thicken considerably. Scrape the sides and bottom of the bowl well. Let it sit for 5 minutes. This resting time allows the matcha to fully hydrate, which deepens the color and smooths out the texture.
- Test the consistency : After the rest, give it one more stir. The mixture should be thick enough to hold its shape when you scoop it. If it feels too soft or sticky, pop the bowl in the fridge for 10 minutes. If it seems too dry, add a teaspoon of warm water or a tiny splash of extra maple syrup. I’ve had to do this when my almond butter was particularly thick.
- Portion the truffles : Line a baking sheet or large plate with parchment paper. Using your small cookie scoop or two teaspoons, scoop out heaping tablespoon-sized portions of the mixture. Drop them onto the parchment paper. You should get about 12 to 14 truffles. If you want them smaller, go for it—just adjust the nutritional info accordingly.
- Roll them into balls : Lightly wet your hands with a little water. This prevents the mixture from sticking to your skin. Pick up each portion and roll it gently between your palms to form a smooth ball. Place each finished truffle back on the parchment paper. If the mixture starts sticking again, just re-wet your hands. It’s a quick process once you get into a rhythm.
- Optional coating : If you want to roll them in shredded coconut, extra matcha powder, or a pinch of sea salt, do it right after rolling while the truffles are still slightly tacky. Place the coating in a shallow dish and roll each truffle gently until covered.
- Chill to set : Transfer the baking sheet to the freezer. Let the truffles firm up for at least 20 to 30 minutes. They should be solid to the touch but not rock hard. If you’re in a hurry, 15 minutes might be enough, but 30 is better for a clean bite.
- Serve or store : Once set, transfer the truffles to a freezer-safe container. They’re ready to eat immediately after chilling. I always sneak one straight from the freezer—it’s the best way to enjoy them.
Cooking Tips & Techniques
I’ve made these truffles more times than I can count, and I’ve learned a few things along the way. Here’s what I wish I knew from the start.
- Don’t skip the sifting : I know it feels like an extra step, but unsifted matcha is a nightmare to stir in. You’ll end up with green streaks and bitter lumps. A fine-mesh strainer is your best friend here. It takes ten seconds and saves you a lot of frustration.
- Let the mixture rest : That five-minute rest after mixing is non-negotiable in my kitchen. It allows the matcha to bloom, which mellows out any bitterness and creates a smoother, creamier texture. I learned this the hard way after making a batch that tasted a little too grassy.
- Watch your nut butter : Not all almond butters are created equal. A drippy, natural brand will give you a softer, more pliable dough. A thick, stiff one (like the kind that separates) can make the mixture crumbly. If your dough feels dry, just add a teaspoon of warm water or a splash of maple syrup. I’ve saved many a dry batch this way.
- Work quickly when rolling : The mixture can start to warm up from the heat of your hands, making it stickier. If you notice it getting tacky, just run your hands under cold water for a second and dry them off. It makes a huge difference.
- Chill before judging : The flavor of these truffles really develops after they’ve been in the freezer for a while. The matcha taste becomes more rounded, and the sweetness mellows. Don’t taste-test right after mixing—wait until they’re fully set. You’ll be glad you did.
Variations & Adaptations
This recipe is incredibly forgiving. Here are a few ways I’ve changed it up depending on what I have in the pantry or who I’m feeding.
- Vegan & Dairy-Free : The recipe is already vegan as written if you use maple syrup. Just double-check your matcha brand to make sure it’s pure tea powder with no additives. Most are, but it’s worth a peek at the label.
- Nut-Free Version : Swap the almond butter for sunflower seed butter or tahini. Sunflower seed butter will give a slightly earthier flavor, while tahini adds a savory, sesame note that’s surprisingly good with matcha. Just note that the color will be a bit darker.
- Extra Protein Boost : Add 1 scoop of vanilla or unflavored collagen powder or plant-based protein powder when you mix the dry ingredients. You may need to add an extra tablespoon of maple syrup or a splash of water to keep the texture right. I’ve done this for post-workout snacks, and it works great.
- Chocolate-Coated Truffles : After rolling and freezing the truffles for 30 minutes, dip them in melted dark chocolate. Let the excess drip off, then place them back on the parchment and freeze until the chocolate sets. It’s a decadent upgrade that still feels relatively healthy.
- Spiced Matcha : Add a pinch of ground ginger or a tiny pinch of white pepper to the matcha mixture. It sounds weird, but it actually brightens the flavor and makes the truffles taste even more complex. I tried this on a whim and now I do it every other batch.
Serving & Storage Suggestions
These truffles are best enjoyed straight from the freezer. The texture is like a firm, creamy fudge that softens slightly as it warms. I like to serve them on a small plate with a cup of hot green tea or a creamy raspberry cheesecake latte for a cozy afternoon treat. They also make a lovely addition to a dessert board alongside fresh berries and dark chocolate.
For storage, place the truffles in a single layer in a freezer-safe container. Separate layers with a piece of parchment paper to prevent them from sticking together. They’ll keep in the freezer for up to 3 months, though they rarely last that long in my house. In the fridge, they’re good for about 2 weeks, but they’ll be softer and more delicate. I prefer them frozen because the texture stays perfect.
If you’re taking them to a party or packing them for a trip, let them thaw for about 5 minutes at room temperature before serving. They’ll soften just enough to be perfectly creamy without being messy. The flavor actually deepens after a day or two in the fridge, so don’t be afraid to make them ahead of time.
Nutritional Information & Benefits
Here’s an approximate breakdown per truffle (based on 12 truffles using almond butter and maple syrup):
| Nutrient | Amount per Truffle |
|---|---|
| Calories | 95 kcal |
| Fat | 7g |
| Carbohydrates | 7g |
| Fiber | 1g |
| Sugar | 5g |
| Protein | 3g |
These truffles are naturally gluten-free, dairy-free, and refined sugar-free. The matcha powder is packed with antioxidants called catechins, which are known for their anti-inflammatory properties and ability to support focus and calm energy. Almond butter provides healthy monounsaturated fats and vitamin E, which is great for skin health. The maple syrup adds a touch of natural sweetness with a lower glycemic impact than white sugar. I love that these truffles give me a little energy boost without the crash that comes from processed sweets. They’re my favorite way to end a meal or power through a busy afternoon.
Conclusion
These Healthy Matcha Truffles have become my little secret weapon. They’re the answer to every late-night craving, every mid-afternoon slump, and every time I want something sweet but don’t want to undo a good day of eating. They’re proof that you don’t need a long list of ingredients or complicated techniques to make something truly satisfying. Just three simple things, a little patience, and a few minutes of your time.
I really hope you give them a try. Play with the flavors, roll them in whatever you love, and make them your own. Maybe you’ll discover a new favorite variation, like adding a pinch of ginger or dipping them in dark chocolate. If you do, I’d love to hear about it. Drop a comment below and let me know how your batch turned out. And if you’re looking for another easy, guilt-free treat, don’t miss my perfect vegan hazelnut cookies—they’re just as simple and just as good. Happy rolling!
Frequently Asked Questions
Can I use ceremonial grade matcha for these truffles?
You can, but I don’t recommend it. Ceremonial grade is very delicate and expensive. Its flavor is subtle and can get lost when mixed with nut butter and sweetener. Culinary grade is designed for baking and has a bolder taste that holds up much better. Save the ceremonial grade for your morning tea.
My mixture is too dry and crumbly. What did I do wrong?
This usually happens if your nut butter is too thick or if you over-measured the matcha. Don’t panic. Just add a teaspoon of warm water or an extra splash of maple syrup, then stir well. The mixture should come together into a smooth, pliable dough. If it’s still dry, add another teaspoon of liquid until it feels right.
How long do these truffles last at room temperature?
They’re best kept chilled. At room temperature, they’ll soften and become quite sticky within an hour or two. If you’re serving them at a party, keep them on a chilled plate or take them out of the freezer just before serving. They’ll be perfectly creamy after about 5 minutes of thawing.
Can I make these without a cookie scoop?
Absolutely. Just use two teaspoons to portion out the mixture. One spoon to scoop, the other to scrape it onto the parchment. Wet your hands slightly before rolling to prevent sticking. It’s a little more hands-on, but it works just as well. I’ve done it plenty of times when my scoop was in the dishwasher.
Are these truffles keto-friendly?
As written, they contain maple syrup, which has natural sugars. To make them keto-friendly, swap the maple syrup for a sugar-free liquid sweetener like monk fruit syrup or allulose. You’ll also want to use a nut butter with no added sugar. The rest of the ingredients are naturally low in carbs, so it’s an easy adjustment.
Pin This Recipe!
Healthy Matcha Truffles: 3-Ingredient Easy Dessert
These Healthy Matcha Truffles are a creamy, earthy-sweet treat made with just 3 ingredients. They’re ready in 15 minutes, naturally sweetened, and perfect for a guilt-free indulgence.
- Prep Time: 15 minutes
- Cook Time: 0 minutes
- Total Time: 15 minutes
- Yield: 12 servings 1x
- Category: Dessert
- Cuisine: Japanese
Ingredients
- ½ cup creamy almond butter (or cashew butter)
- 3 tablespoons maple syrup (or honey)
- 2 tablespoons culinary-grade matcha powder
- Optional: Pinch of sea salt
- Optional: ¼ cup shredded unsweetened coconut
Instructions
- Mix the base: In a medium mixing bowl, combine ½ cup of creamy almond butter and 3 tablespoons of maple syrup. Stir together with a rubber spatula until fully incorporated and smooth.
- Sift in the matcha: Sift 2 tablespoons of culinary-grade matcha powder over the almond butter mixture. Stir gently at first, then more vigorously until the powder is fully incorporated. Scrape the sides and bottom of the bowl well. Let the mixture sit for 5 minutes to allow the matcha to hydrate.
- Test the consistency: After resting, stir again. The mixture should be thick enough to hold its shape when scooped. If too soft, refrigerate for 10 minutes. If too dry, add a teaspoon of warm water or extra maple syrup.
- Portion the truffles: Line a baking sheet or plate with parchment paper. Using a small cookie scoop or two teaspoons, scoop out heaping tablespoon-sized portions of the mixture and drop them onto the parchment. You should get about 12 to 14 truffles.
- Roll them into balls: Lightly wet your hands with water to prevent sticking. Roll each portion gently between your palms to form a smooth ball. Place each truffle back on the parchment.
- Optional coating: If desired, roll the truffles in shredded coconut, extra matcha powder, or a pinch of sea salt while they are still tacky.
- Chill to set: Transfer the baking sheet to the freezer and let the truffles firm up for at least 20 to 30 minutes, until solid to the touch.
- Serve or store: Once set, transfer the truffles to a freezer-safe container. They are ready to eat immediately after chilling.
Notes
Let the mixture rest for 5 minutes after mixing to allow the matcha to hydrate and deepen the flavor. If the mixture is too sticky when rolling, wet your hands slightly. For best texture, store truffles in the freezer and let them thaw for about 5 minutes before serving.
Nutrition
- Serving Size: 1 truffle
- Calories: 95
- Sugar: 5
- Sodium: 50
- Fat: 7
- Saturated Fat: 1
- Carbohydrates: 7
- Fiber: 1
- Protein: 3
Keywords: matcha truffles, healthy truffles, 3-ingredient dessert, no-bake dessert, vegan truffles, gluten-free truffles, dairy-free truffles, easy matcha recipe