Love this? Save it for later!
Share the inspiration with your friends
“You really think this will turn out okay?” I remember mumbling that to myself, staring skeptically at the few ingredients scattered across my countertop. It was one of those evenings when the freezer was empty, the craving for something sweet and comforting was loud, and the clock was ticking fast toward bedtime. Honestly, I wasn’t sure if this dreamy, creamy homemade biscoff ice cream would be a hit or a flop.
The idea sparked when a friend texted me a photo of her latest dessert obsession — a luscious scoop of biscoff ice cream, smooth and speckled with crunchy cookie bits. I hadn’t tried making it myself, and since my freezer was begging for some love, I figured, why not? I’d always loved the caramelized, cinnamon-spiced magic of biscoff spread, but turning it into ice cream at home with just five ingredients? That felt like a sweet shortcut I had to test.
Mixing the biscoff spread with heavy cream and a touch of sugar, I hesitated before pouring it into the ice cream maker. But as it churned, the kitchen filled with a warm, spicy aroma that felt like a hug in a bowl. When I finally tasted it, the texture was so smooth it almost made me close my eyes — that perfect balance of sweet, creamy, and just a hint of biscuit crunch.
Since that first batch, I’ve found myself making this recipe on repeat, sometimes swapping in a pinch of sea salt or a swirl of caramel for extra indulgence. It’s become my go-to treat for cozy nights, a quick celebration dessert, or when friends drop by unexpectedly. And honestly, it’s a little reminder that sometimes the simplest ingredients really do make the most magical moments.
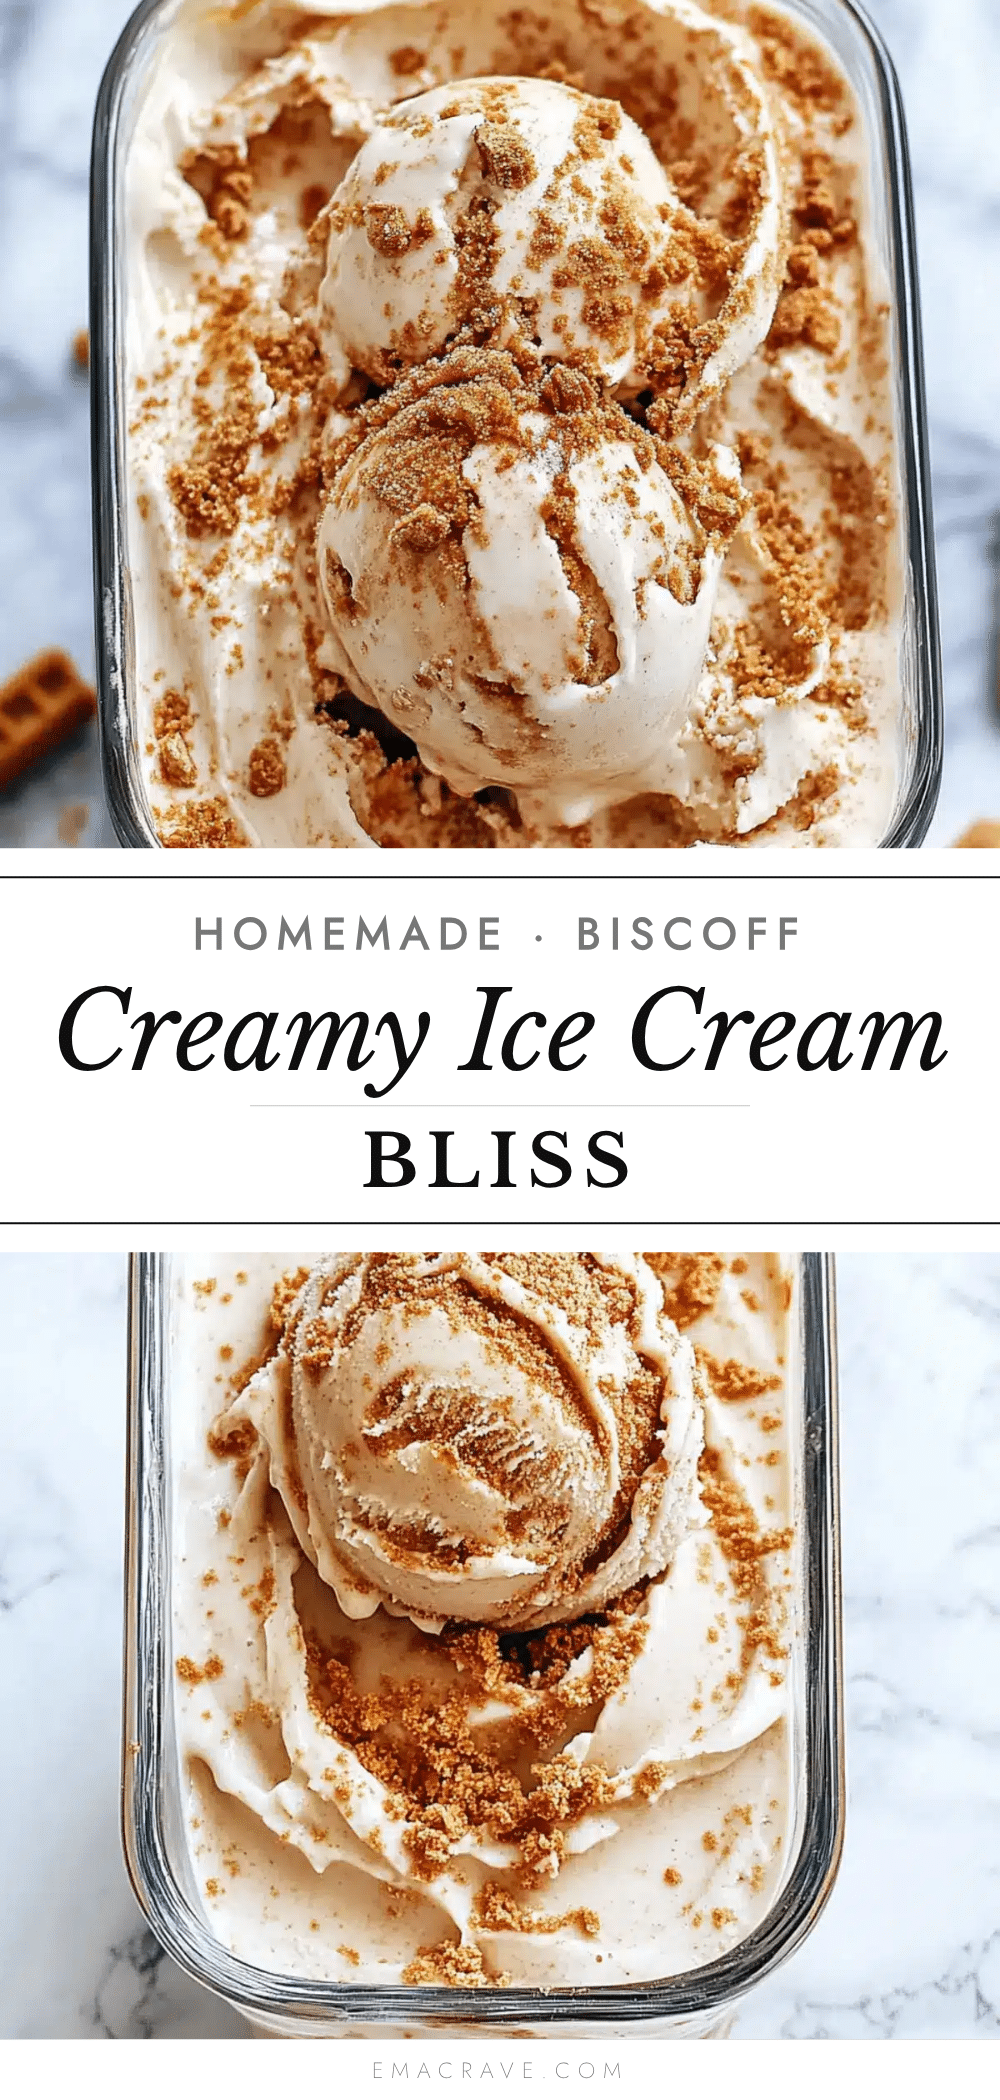
This creamy homemade biscoff ice cream recipe stuck with me not just for its deliciousness but for how effortlessly it turns an ordinary night into something special. It’s proof that you don’t need a dozen complicated steps or hard-to-find ingredients to create pure bliss in a bowl.
Why You’ll Love This Recipe
After countless trials in my kitchen, this creamy homemade biscoff ice cream recipe has earned its spot as a favorite for so many reasons. It’s not just a dessert; it’s a little ritual of comfort and joy — and I’m confident it’ll become one of your favorites too.
- Quick & Easy: Ready in under 30 minutes of active prep, this recipe is perfect for those busy evenings or last-minute dessert cravings.
- Simple Ingredients: With just five pantry staples, no fancy shopping trips required. You probably already have all of them on hand.
- Perfect for Any Occasion: Whether it’s a family movie night, a casual hangout, or a sweet ending to a cozy dinner, this ice cream fits right in.
- Crowd-Pleaser: Kids and adults alike rave about the rich, velvety texture and the warm biscoff flavor that feels both nostalgic and fresh.
- Unbelievably Delicious: The secret lies in balancing the creamy base with just the right amount of biscoff spread for that signature caramelized crunch.
- Unique Twist: Unlike typical ice creams, this recipe blends the biscoff spread directly into the base, creating an ultra-smooth, uniform flavor without overpowering sweetness.
This recipe isn’t just a quick fix — it’s that kind of dessert you’ll want to savor slowly, closing your eyes after the first bite. Comfort food doesn’t have to be heavy or complicated, and this biscoff ice cream proves that perfectly. Plus, it pairs wonderfully with other treats like the fluffy pistachio cinnamon rolls I adore for weekend mornings.
What Ingredients You Will Need
This recipe uses simple, wholesome ingredients to deliver bold flavor and a satisfyingly creamy texture without any fuss. Most of these are pantry staples or easy-to-find in any grocery store.
- Biscoff Spread (about 1 cup or 250 grams) – This is the star ingredient. I recommend Lotus Biscoff for that authentic caramelized flavor and smooth consistency.
- Heavy Cream (2 cups / 480 ml) – Use fresh heavy cream for the richest texture. If you want a lighter version, half-and-half can work but expect a less creamy result.
- Whole Milk (1 cup / 240 ml) – Adds balance and helps the ice cream churn smoothly. Full-fat milk works best.
- Granulated Sugar (3/4 cup / 150 grams) – Sweetens the base without overwhelming the biscoff’s natural caramel notes.
- Vanilla Extract (1 teaspoon) – Enhances the flavor profile with a warm, aromatic touch.
You can swap the granulated sugar for coconut sugar if you want a slightly deeper, molasses-like sweetness. For a dairy-free twist, try using canned coconut milk (full fat) and a non-dairy creamer, but the texture will be a bit different — still delicious though! In summer, adding a handful of crushed grilled pineapple chunks can add a fun tropical flair to your biscoff ice cream.
Equipment Needed
- Ice Cream Maker: An essential for that smooth, churned texture. I use a simple electric model with a freezing bowl, but if you don’t have one, a no-churn method can work with some adjustments.
- Mixing Bowls: Medium and large bowls for combining ingredients.
- Whisk: For blending sugar into cream and milk smoothly.
- Measuring Cups & Spoons: Precision helps keep the balance just right.
- Spatula or Spoon: For scraping down the sides and folding in the biscoff spread.
If you’re on a budget, some ice cream makers work well with just a bowl frozen overnight, so you don’t need a pricey machine. I’ve found that keeping the bowl well-frozen and the biscoff spread slightly warmed helps it mix in easier, so don’t skip that step. Also, cleaning the machine promptly after use makes a big difference in maintenance.
Preparation Method
- Warm the Biscoff Spread (5 minutes): Gently heat the biscoff spread in a microwave-safe bowl for about 30 seconds to 1 minute, stirring halfway. It should be pourable but not hot. This step helps it blend smoothly into the ice cream base.
- Mix Sugar and Milk (5 minutes): In a medium bowl, whisk together the granulated sugar and whole milk until the sugar dissolves completely. This step avoids graininess in the final texture.
- Combine Cream and Vanilla (2 minutes): Pour the heavy cream into a large bowl, add the vanilla extract, and gently fold in the warmed biscoff spread until fully incorporated. The mixture will look rich and caramel-colored.
- Blend Milk Mixture into Cream (3 minutes): Slowly whisk the milk and sugar mixture into the cream and biscoff blend. Make sure it’s smooth and uniform — no lumps or streaks.
- Chill the Mixture (1-2 hours): Cover the bowl with plastic wrap and refrigerate the custard base until it’s very cold. This rest time improves the texture and helps with proper churning.
- Churn the Ice Cream (20-30 minutes): Pour the chilled base into your ice cream maker and churn according to the manufacturer’s instructions. It should thicken and nearly double in volume. Watch for a soft-serve consistency.
- Freeze to Firm Up (4+ hours): Transfer the churned ice cream to an airtight container and freeze for at least 4 hours or overnight to reach scoopable firmness.
- Serve and Enjoy: Let the ice cream sit at room temperature for about 5 minutes before scooping to soften slightly. This helps with perfect texture and flavor release.
Pro Tip: If you notice the ice cream is too hard after freezing, a quick 10-minute wait at room temp softens it beautifully without melting. Also, stirring in some crushed biscoff cookies right after churning adds a delightful crunch!
Cooking Tips & Techniques
Making creamy homemade biscoff ice cream is surprisingly simple once you get the hang of a few key techniques. Here’s what I’ve learned through trial, error, and plenty of taste-testing.
- Warm the Biscoff Spread: Heating the spread slightly makes blending easier and prevents clumps. If it’s too cold and stiff, you’ll get uneven pockets in your ice cream.
- Dissolve Sugar Fully: Always whisk sugar into milk before combining with cream to avoid grainy texture — nobody wants a crunchy surprise in their smooth ice cream!
- Chill Thoroughly: Never skip chilling the mixture before churning. Cold base means better texture and faster freezing inside the ice cream maker.
- Don’t Over-Churn: Stop the machine once it reaches a soft-serve stage. Over-churning can lead to icy texture instead of creamy bliss.
- Multitask Wisely: While the ice cream churns, clean up your prep area or prep toppings to save time. I often make a quick batch of Butterfinger puppy chow to sprinkle on top for a fun crunch.
- Be Patient with Freezing: Proper freezing isn’t instant, so plan ahead. Rushing this step often results in icy or hard ice cream that’s tough to scoop.
Honestly, I’ve had batches that turned out too icy or overly sweet, but adjusting chill times and sugar levels helped me nail the perfect balance. Remember, your freezer’s temperature can vary, so a little experimentation is normal. Once you get these steps down, you’ll be making perfect biscoff ice cream that impresses every time.
Variations & Adaptations
One of the best parts about this creamy homemade biscoff ice cream is how easy it is to tweak based on what you have or your taste preferences. Here are some ideas I’ve tried and loved:
- Salted Caramel Biscoff: Add a pinch of flaky sea salt to the base or swirl in homemade salted caramel sauce before freezing for a sweet-salty contrast.
- Dairy-Free Version: Swap heavy cream and milk with full-fat coconut milk and coconut cream. The texture will be slightly different but still rich and indulgent.
- Crunchy Mix-Ins: Fold in crushed biscoff cookies, roasted nuts, or even chocolate chips after churning for added texture and flavor bursts.
- Spiced Up: Add a pinch of cinnamon or nutmeg to the base for a warm, cozy twist that echoes the biscoff spice notes.
- Fruit Swirl: A swirl of raspberry or mango puree can add a fresh zing, balancing the caramel sweetness beautifully.
Personally, I once tried blending in a little espresso powder — it was unexpectedly delicious, bringing out the caramel notes with a coffee kick. For a seasonal spin, pairing this ice cream with the strawberries and cream pie from my blog makes for a dreamy summer dessert duo.
Serving & Storage Suggestions
Serve your creamy homemade biscoff ice cream slightly softened for the best scoopability and flavor release. A few minutes at room temperature is perfect to let those flavors bloom.
This ice cream shines as a standalone treat, but it’s also fantastic paired with warm desserts — imagine a scoop melting over freshly baked apple pie or alongside rich brownies. For a refreshing combo, try it with some grilled pineapple and cinnamon whipped cream for a tropical twist.
Store leftover ice cream in an airtight container in the freezer. To prevent ice crystals, press a piece of parchment paper or plastic wrap directly onto the surface before sealing. It keeps the texture creamy and fresh for up to two weeks.
When reheating or softening frozen ice cream, avoid using a microwave — just let it sit at room temperature for 5–10 minutes. Flavors tend to deepen and mellow after a day or two in the freezer, so sometimes waiting can be worth it.
Nutritional Information & Benefits
This creamy homemade biscoff ice cream is a treat best enjoyed in moderation, but it does have some nutritional perks thanks to its simple ingredients.
| Per Serving (approx. 1/2 cup / 120g) | Amount |
|---|---|
| Calories | 270 kcal |
| Fat | 18 g |
| Saturated Fat | 11 g |
| Carbohydrates | 24 g |
| Sugars | 22 g |
| Protein | 3 g |
The key ingredients like heavy cream and whole milk provide calcium and vitamin D, while biscoff spread adds a unique caramel flavor but also sugar and fat, so portion control is key. For gluten-free diets, check the biscoff spread label carefully or use a certified gluten-free cookie butter alternative.
From a wellness perspective, this recipe is a reminder that indulgence can be simple and satisfying without a laundry list of additives. It’s a sweet reward that feels homemade and honest.
Conclusion
This creamy homemade biscoff ice cream recipe has become a little joy in my kitchen — easy, comforting, and surprisingly sophisticated with so few ingredients. It’s proof that you can whip up something truly special without fuss or fancy tools.
Feel free to customize it with your favorite mix-ins or twists — whether it’s a sprinkle of sea salt, a swirl of caramel, or a handful of crunchy cookie bits, it’s all about making it your own.
I love that this recipe turns a simple craving into a moment worth savoring, whether it’s a quiet night in or a spontaneous get-together. If you give it a try, I’d love to hear how you make it your own or what other flavors you pair it with!
Sharing your thoughts and tweaks helps me keep this recipe fresh and fun for everyone — so don’t be shy to drop a comment below and spread the creamy biscoff bliss.
FAQs
Can I make this biscoff ice cream without an ice cream maker?
Yes! You can use a no-churn method by whipping heavy cream until stiff peaks form, folding in sweetened condensed milk and biscoff spread, then freezing in a container. The texture will be slightly different but still delicious.
How do I prevent ice crystals in my homemade ice cream?
Chilling your base thoroughly before churning and storing the ice cream in an airtight container with plastic wrap pressed on the surface helps reduce ice crystals. Also, avoid frequent thawing and refreezing.
Can I add mix-ins like cookies or nuts?
Absolutely! Fold in crushed biscoff cookies, nuts, or chocolate chips right after churning for added texture and flavor.
Is this recipe gluten-free?
Biscoff spread typically contains wheat, so it’s not gluten-free. You can use a gluten-free cookie butter alternative if needed.
How long can I store this ice cream in the freezer?
Stored properly in an airtight container, it will keep well for up to two weeks. For best texture and flavor, consume within that timeframe.
Pin This Recipe!
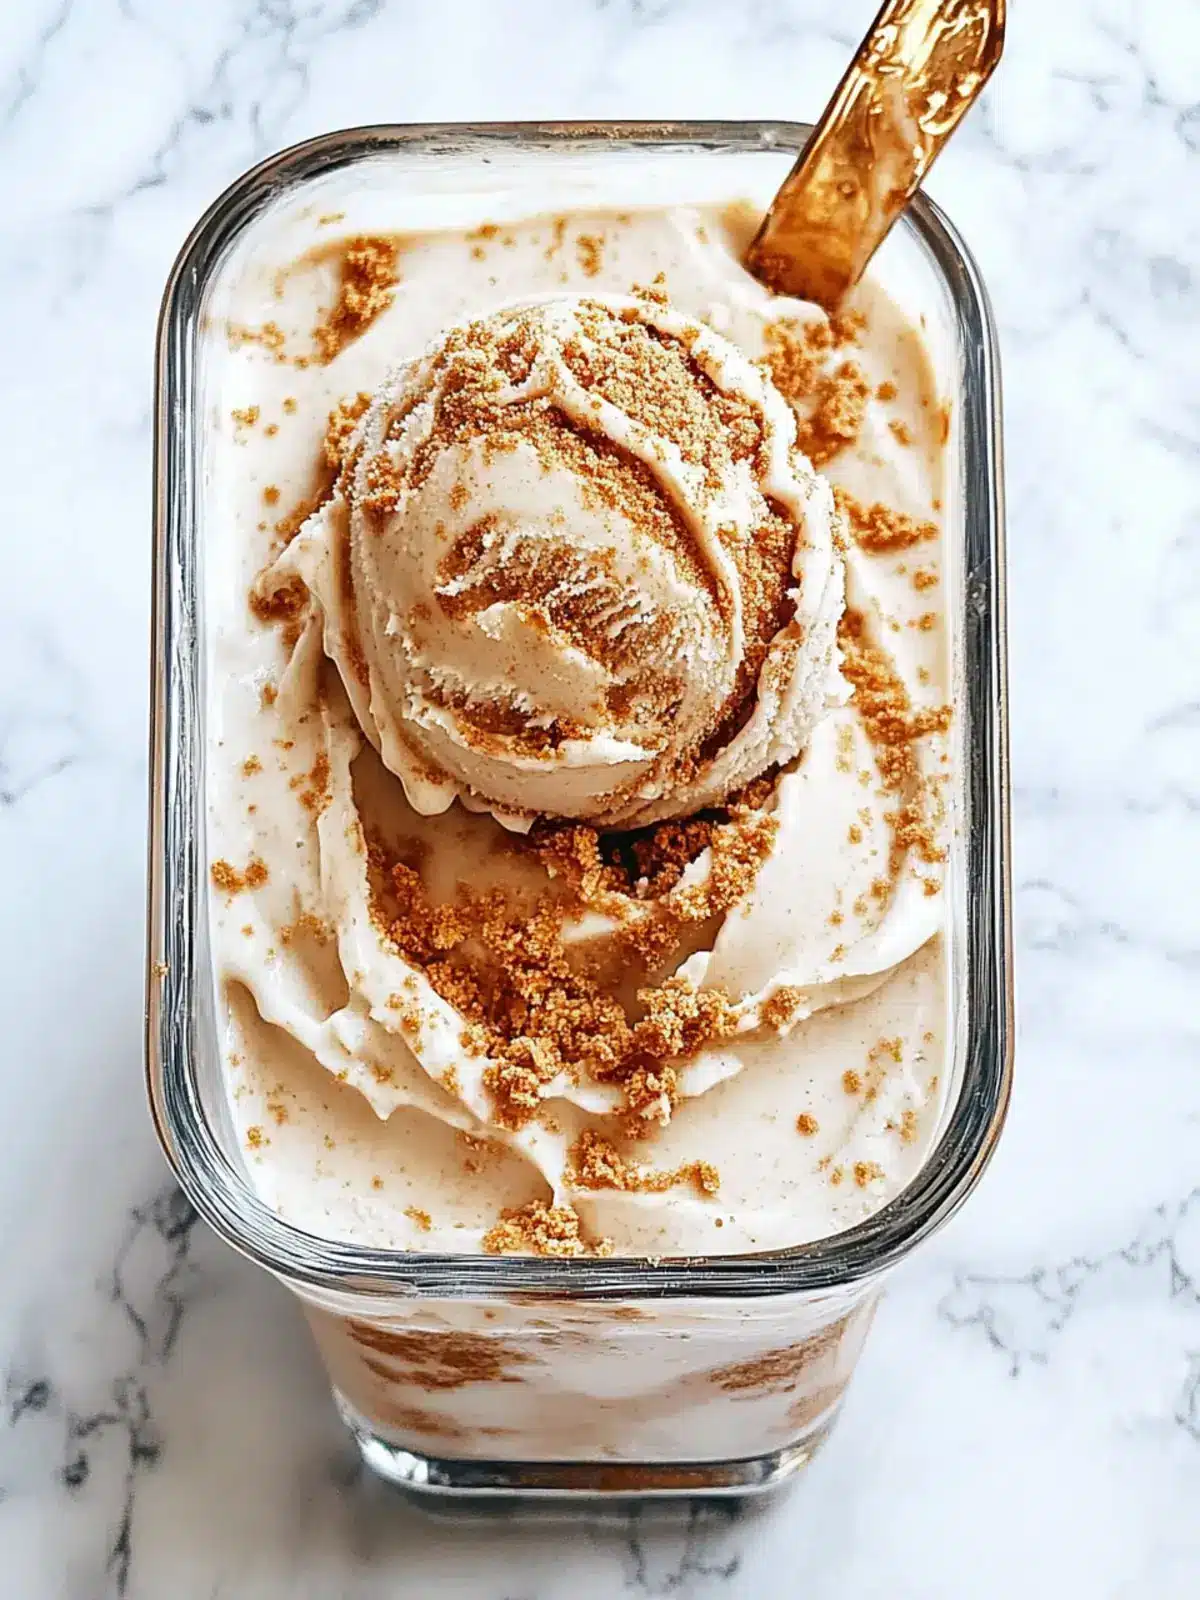
Creamy Homemade Biscoff Ice Cream Recipe Easy 5-Ingredient Delight

A quick and easy homemade biscoff ice cream recipe using just five simple ingredients, delivering a creamy, smooth texture with a warm caramelized biscoff flavor.
- Prep Time: 15 minutes
- Cook Time: 30 minutes (churning) plus freezing time
- Total Time: 5 hours (including chilling and freezing)
- Yield: 8 servings 1x
- Category: Dessert
- Cuisine: American
Ingredients
- 1 cup (250 grams) Biscoff Spread (Lotus Biscoff recommended)
- 2 cups (480 ml) Heavy Cream
- 1 cup (240 ml) Whole Milk
- 3/4 cup (150 grams) Granulated Sugar
- 1 teaspoon Vanilla Extract
Instructions
- Warm the biscoff spread in a microwave-safe bowl for 30 seconds to 1 minute, stirring halfway, until pourable but not hot.
- In a medium bowl, whisk together the granulated sugar and whole milk until the sugar dissolves completely.
- Pour the heavy cream into a large bowl, add the vanilla extract, and gently fold in the warmed biscoff spread until fully incorporated.
- Slowly whisk the milk and sugar mixture into the cream and biscoff blend until smooth and uniform.
- Cover the bowl with plastic wrap and refrigerate the custard base for 1-2 hours until very cold.
- Pour the chilled base into an ice cream maker and churn for 20-30 minutes until it thickens to a soft-serve consistency.
- Transfer the churned ice cream to an airtight container and freeze for at least 4 hours or overnight to firm up.
- Let the ice cream sit at room temperature for about 5 minutes before scooping and serving.
Notes
Warm the biscoff spread before mixing to avoid clumps. Chill the mixture thoroughly before churning to improve texture. Stop churning at soft-serve stage to avoid icy texture. Let ice cream soften at room temperature for 5-10 minutes before serving. For no ice cream maker, use no-churn method by whipping heavy cream and folding in sweetened condensed milk and biscoff spread.
Nutrition
- Serving Size: 1/2 cup (120 grams)
- Calories: 270
- Sugar: 22
- Fat: 18
- Saturated Fat: 11
- Carbohydrates: 24
- Protein: 3
Keywords: biscoff ice cream, homemade ice cream, easy dessert, 5-ingredient recipe, creamy ice cream, biscoff spread, no-churn ice cream option