Love this? Save it for later!
Share the inspiration with your friends
I was standing in my kitchen at 10 PM on a Tuesday, staring at a brick of cream cheese that needed using up, when the idea hit me. Not another cheesecake—I’ve made plenty of those, and honestly, they can be fussy. But cheesecake bars? That felt different. Less pressure, more margin for error. And if I could make them gluten-free without anyone noticing, well, that would be the real win.
The raspberry swirl was almost an afterthought. I had a bag of frozen raspberries in the freezer, leftover from a batch of homemade raspberry chia seed jam oat crumble squares I’d made the week before, and I figured why not. I’m not someone who plans elaborate desserts days in advance—I’m more of a “what’s in the fridge, let’s make it work” kind of cook. And let’s face it, that’s when the best stuff happens.
So I pulled out my 9×13 pan, softened the cream cheese on the counter while I crushed some gluten-free graham crackers (yes, they exist and they’re good), and just started layering. The first batch came out okay. The second batch came out dangerously good. By the third, I knew I had something worth sharing.
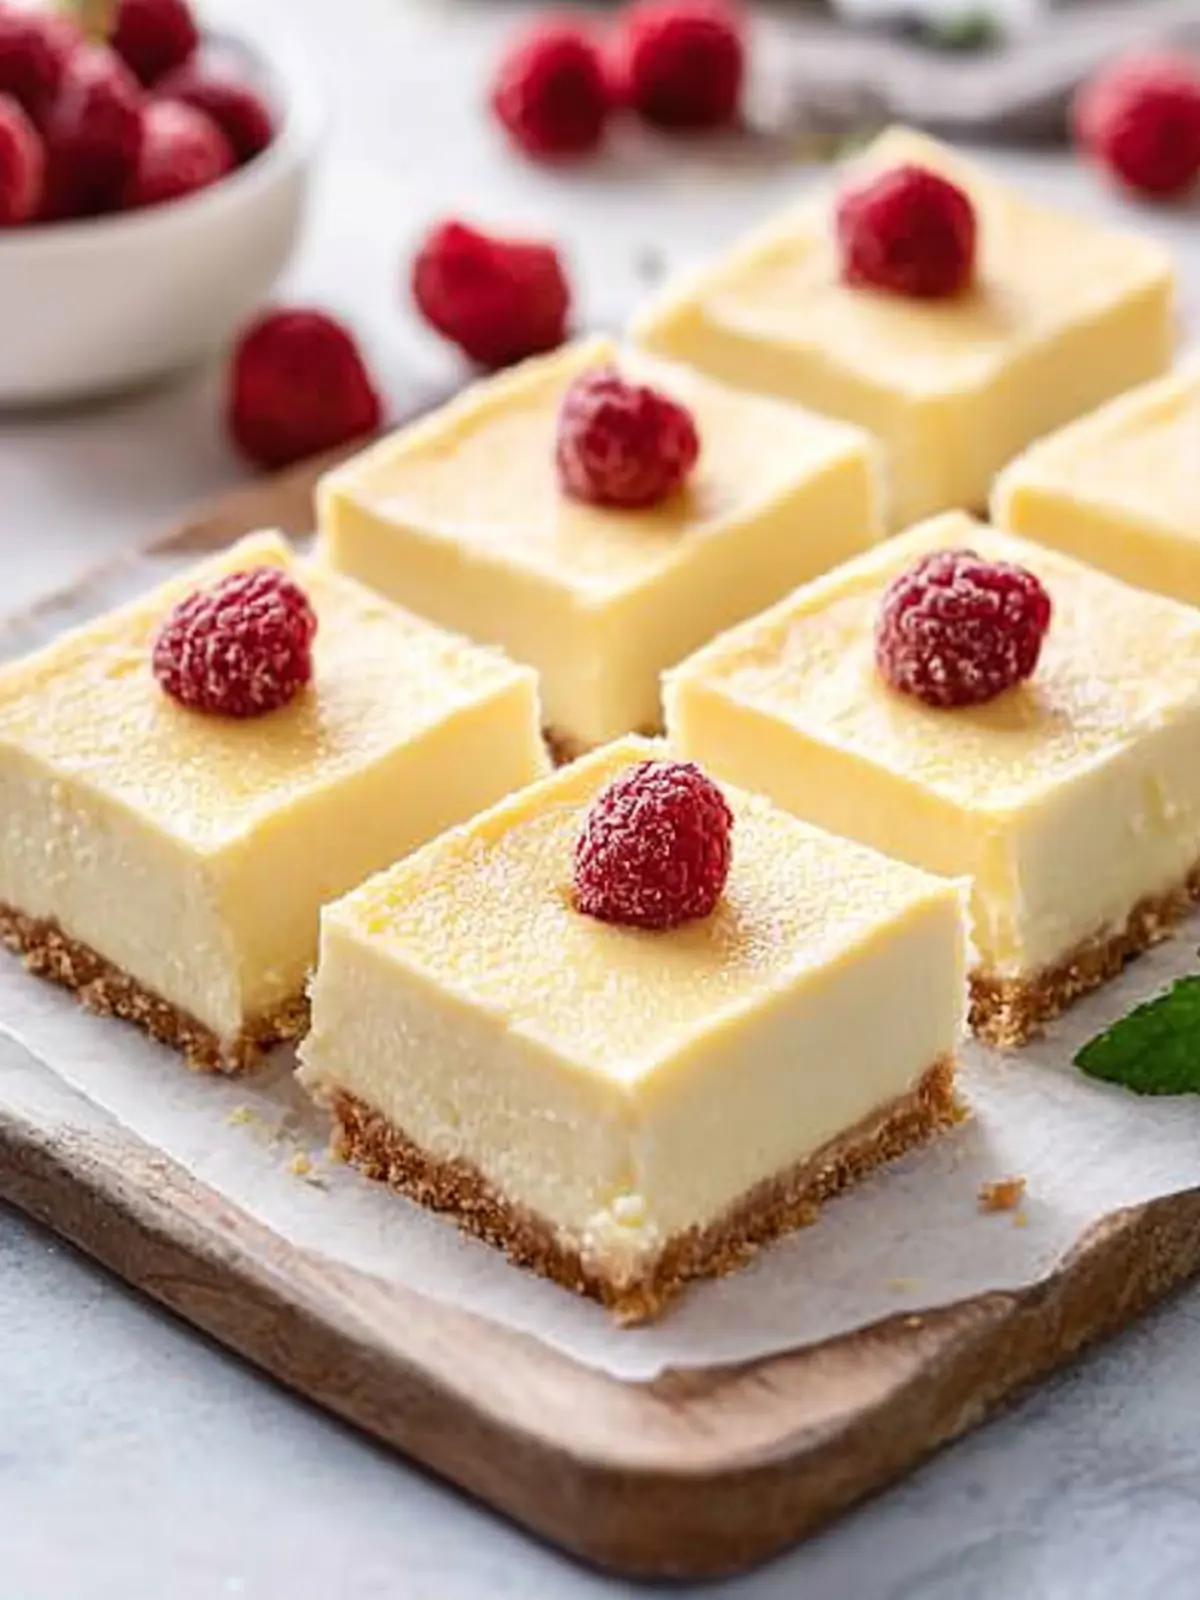
These creamy gluten-free cheesecake bars with raspberry swirl are the kind of dessert that makes people say, “Wait, this is gluten-free?” They’re rich without being heavy, tangy without being sharp, and that raspberry swirl cuts through the sweetness just enough to keep you coming back for another bite. I’ve made them for brunch, for potlucks, and honestly, just for myself on a random Thursday night. No judgment here.
The best part? They’re actually easier than a full cheesecake. No water bath, no cracking, no stress. Just a buttery crust, a silky filling, and that gorgeous swirl on top that makes you look like you tried way harder than you did.
Why You’ll Love This Recipe
I’ve tested this recipe more times than I care to admit, and here’s what I’ve learned: these bars hit every single note you want in a dessert. Let me break it down for you.
- Gluten-Free Without Compromise — The crust uses gluten-free graham crackers or cookies, and honestly, no one can tell the difference. I’ve served these to gluten-free friends and regular eaters alike, and the bars disappear just as fast from both groups.
- No Water Bath Required — Traditional cheesecake needs that steamy water bath to prevent cracking. These bars? Not a chance. The shallow baking and the crust support mean you get a smooth, creamy top every single time without the hassle.
- Perfect for Any Occasion — Whether it’s a holiday brunch, a summer barbecue, or just a Tuesday night treat, these bars fit right in. They’re fancy enough to impress but simple enough to whip up on a whim.
- Raspberry Swirl That Steals the Show — The tangy raspberry puree swirled into the creamy filling isn’t just pretty—it balances the richness beautifully. It’s like the lemon zest in a lemon bar; it just makes everything better.
- Make-Ahead Friendly — These bars actually taste better the next day after they’ve had time to set and the flavors have melded. That makes them perfect for entertaining when you want to cross dessert off your to-do list ahead of time.
I’ve been developing recipes for years, and I can tell you with confidence: these are the gluten-free cheesecake bars you’ve been looking for. They’re tested, they’re reliable, and they’re absolutely delicious. The kind of dessert that makes you close your eyes after the first bite and just… enjoy it.
What Ingredients You Will Need
This recipe uses simple, wholesome ingredients that come together to create something truly special. Most of these are pantry staples, and the ones that aren’t are easy to find at any grocery store.
For the Crust
- 1 ½ cups gluten-free graham cracker crumbs (about 10-12 full sheets, crushed finely — I prefer the Kinnikinnick brand for best texture)
- ¼ cup granulated sugar (adds just enough sweetness to balance the tangy filling)
- 6 tablespoons unsalted butter, melted (use dairy-free butter if needed, but make sure it’s melted and slightly cooled)
- Pinch of salt (don’t skip this—it enhances all the flavors)
For the Cheesecake Filling
- 24 ounces cream cheese, softened to room temperature (three 8-ounce blocks — full-fat is best for that ultra-creamy texture)
- 1 cup granulated sugar
- 3 large eggs, room temperature (cold eggs can make the filling lumpy, so let them sit out for 30 minutes)
- 1 teaspoon vanilla extract (pure vanilla, not imitation, makes a real difference)
- ¼ cup sour cream, room temperature (adds tanginess and extra creaminess — Greek yogurt works too)
- 2 tablespoons gluten-free all-purpose flour or cornstarch (helps stabilize the filling so it sets perfectly)
For the Raspberry Swirl
- 1 cup fresh or frozen raspberries (if using frozen, no need to thaw first)
- 2 tablespoons granulated sugar
- 1 teaspoon lemon juice (brightens the raspberry flavor and helps the swirl set)
- 1 teaspoon cornstarch mixed with 1 tablespoon water (this thickens the puree so it swirls beautifully without bleeding into the filling)
One thing I’ve learned from testing: use full-fat cream cheese. Low-fat versions have more water and can make the filling runny or cause cracking. Trust me on this one—I learned it the hard way when I tried to “lighten up” an early batch and ended up with a soupy mess. Also, if you’re looking for a dairy-free option, you can swap the cream cheese for a good-quality vegan version, but the texture will be slightly less dense.
Equipment Needed
You don’t need a lot of fancy equipment for these bars, which is part of why I love this recipe so much.
- 9×13-inch baking pan — The sweet spot for bar desserts. Glass or metal both work fine, but if you use glass, reduce the oven temperature by 25°F.
- Electric hand mixer or stand mixer — You can mix by hand if you’re patient, but a mixer makes the filling silky smooth with way less effort.
- Food processor or rolling pin — For crushing the graham crackers. I’ve used both methods, and honestly, a rolling pin and a zip-top bag work just as well if you don’t mind a little arm workout.
- Small saucepan — For making the raspberry swirl puree.
- Fine-mesh strainer — Optional, but it removes the seeds from the raspberry puree for a smoother swirl.
- Rubber spatula — For scraping every last bit of that creamy filling into the pan.
- Parchment paper — Line your pan with it, leaving some overhang on the sides. This makes lifting the bars out so much easier. I learned this trick after a particularly sticky situation with a stuck cheesecake bar that ended up as crumbled cheesecake bites instead.
If you don’t have a food processor, don’t sweat it. A zip-top bag and a rolling pin (or even a heavy skillet) will get those graham crackers crushed just fine. And if you’re using a metal pan, you’re good to go as-is.
Preparation Method
Let’s walk through this step by step. I’ve included timing estimates and sensory cues so you know exactly what to look for at each stage.
Step 1: Preheat and Prep
Preheat your oven to 350°F (175°C). Line your 9×13-inch baking pan with parchment paper, leaving about 2 inches of overhang on the two long sides. This will be your handle to lift the bars out later. Lightly grease the parchment with non-stick spray or a little butter.
Step 2: Make the Crust
In a medium bowl, combine the gluten-free graham cracker crumbs, ¼ cup sugar, and a pinch of salt. Pour in the melted butter and stir with a fork until the mixture looks like wet sand and holds together when you squeeze it. Press this mixture firmly and evenly into the bottom of your prepared pan. I use the bottom of a measuring cup to really pack it down—this helps the crust hold together when you cut the bars. Bake for 10 minutes, then set aside to cool slightly while you make the filling. The crust should be lightly golden and smell toasty.
Step 3: Make the Raspberry Swirl
In a small saucepan, combine the raspberries, 2 tablespoons sugar, and lemon juice. Cook over medium heat, stirring occasionally, until the berries break down and the mixture is bubbling, about 5-7 minutes. Stir in the cornstarch slurry (cornstarch mixed with water) and cook for another minute until thickened. Remove from heat and press through a fine-mesh strainer into a small bowl to remove the seeds. You should have about ⅓ cup of seedless raspberry puree. Set aside to cool while you make the filling.
Step 4: Make the Cheesecake Filling
In a large bowl, beat the softened cream cheese with an electric mixer on medium speed until smooth and creamy, about 2 minutes. Scrape down the sides of the bowl with a rubber spatula. Add the 1 cup sugar and beat until combined, about 1 minute more. Add the room-temperature eggs one at a time, beating on low speed after each addition just until incorporated—don’t overmix or you’ll incorporate too much air, which can cause cracks. Add the vanilla extract, sour cream, and gluten-free flour (or cornstarch), and mix on low until just combined. The filling should be smooth, thick, and silky, with no lumps. If you see lumps, your cream cheese wasn’t soft enough—next time, let it sit out for an hour.
Step 5: Assemble the Bars
Pour the cheesecake filling over the pre-baked crust and spread it evenly with a spatula. Drop spoonfuls of the raspberry puree over the top of the filling—about 8-10 dollops spaced evenly. Use a knife or a toothpick to swirl the puree into the filling. I like to make figure-eight motions for a pretty marbled effect. Don’t over-swirl or the colors will muddy together. You want distinct ribbons of raspberry running through the creamy filling.
Step 6: Bake
Bake at 350°F (175°C) for 30-35 minutes, or until the edges are set and the center is just slightly jiggly when you gently shake the pan. It should look like firm Jell-O, not liquid. The top should be pale golden and might have a few small cracks—that’s totally normal. Remove from the oven and let cool completely on a wire rack, about 1 hour. Then refrigerate for at least 4 hours, but overnight is best. This is the hardest part, I know, but the wait is worth it. The bars need time to fully set so you get clean slices.
Step 7: Slice and Serve
Once fully chilled, use the parchment overhang to lift the entire block of cheesecake bars out of the pan. Place on a cutting board and use a sharp knife to slice into bars. For clean cuts, wipe the knife clean between each slice. I usually cut into 12-16 bars, depending on how generous I’m feeling. Serve cold or at room temperature.
Cooking Tips & Techniques
I’ve made this recipe more times than I can count, and I’ve picked up a few tricks along the way that make a real difference.
Room temperature ingredients are non-negotiable. I know it’s tempting to use cold cream cheese straight from the fridge, but don’t. Cold cream cheese creates lumps that no amount of beating will fully smooth out. The same goes for eggs and sour cream. Set everything out on the counter at least 30 minutes before you start, preferably an hour. I’ve forgotten this step more than once, and every time I regret it.
Don’t overmix the filling. Once you add the eggs, mix on low speed and stop as soon as everything is combined. Overmixing incorporates too much air, which can cause the filling to puff up during baking and then crack as it cools. A few cracks on top aren’t the end of the world—especially since the raspberry swirl hides them—but for the smoothest surface, go easy on the mixer.
The water bath alternative. Traditional cheesecakes use a water bath to prevent cracking. For these bars, I skip it because the shallow pan and the crust support mean cracking is less likely. But if you’re nervous, you can place a shallow pan of hot water on the oven rack below the cheesecake bars while they bake. The steam helps keep the surface moist and crack-free.
Let them cool slowly. After baking, let the bars cool on the counter for a full hour before refrigerating. If you put them in the fridge while still warm, condensation can form on the surface and make the top watery. I learned this one the hard way when I was rushing to get dessert ready for a dinner party.
Use a hot knife for clean cuts. Run your knife under hot water, dry it off, then slice. Wipe the blade clean between each cut. This gives you those gorgeous, Instagram-worthy slices with clean edges and no smearing.
Variations & Adaptations
One of the best things about this recipe is how easily it adapts to different tastes and dietary needs. Here are some of my favorite variations.
Berry Swirl Variations — Swap the raspberries for strawberries, blueberries, or blackberries. Each berry gives a slightly different flavor and color. Strawberry swirl is especially pretty for spring. You can also use a mix of berries for a more complex flavor. I’ve made a version with homemade raspberry chia seed jam oat crumble squares style jam swirled in, and it was incredible.
Chocolate Lover’s Version — Add ¼ cup of cocoa powder to the crust mixture for a chocolate base. Or swirl in ¼ cup of melted dark chocolate into the cheesecake filling along with the raspberry puree. The chocolate-raspberry combo is a classic for a reason.
Dairy-Free Adaptation — Use dairy-free cream cheese (I like the brand Miyoko’s for best texture), dairy-free butter for the crust, and coconut cream instead of sour cream. The texture will be slightly less dense, but still delicious. Just make sure all your dairy-free ingredients are at room temperature.
Low-Sugar Option — Reduce the sugar in the filling to ¾ cup and use a sugar substitute like monk fruit sweetener in both the filling and the crust. The raspberry swirl can be made with just 1 tablespoon of sugar or a sugar-free sweetener. The bars will be less sweet but still creamy and satisfying.
Lemon-Raspberry Twist — Add 1 tablespoon of lemon zest to the cheesecake filling and use lemon juice in the swirl instead of water. The bright citrus flavor pairs beautifully with the raspberry and cuts through the richness of the cream cheese. This is my personal favorite variation for spring and summer.
Serving & Storage Suggestions
These bars are incredibly versatile when it comes to serving. Here’s how I like to enjoy them.
Serving Temperature — I prefer them cold, straight from the fridge. The filling is firmer and the flavors are more pronounced. But they’re also lovely at room temperature if you let them sit out for 10-15 minutes. The texture becomes softer and more luscious.
Presentation Ideas — Top each bar with a fresh raspberry and a tiny sprig of mint for a pop of color. A dusting of powdered sugar adds a nice touch, too. For a more decadent presentation, drizzle with a little melted white chocolate or a raspberry coulis.
What to Serve With Them — These bars are perfect on their own, but they pair beautifully with a cup of coffee or tea. For a dessert platter, serve them alongside irresistibly soft cream cheese chocolate chip cookies for a double cream cheese treat. A dollop of whipped cream or a scoop of vanilla ice cream takes them over the top.
Storage Instructions — Store the bars in an airtight container in the refrigerator for up to 5 days. Layer them between sheets of parchment paper to prevent sticking. The flavors actually improve after a day or two as they meld together.
Freezing Instructions — These bars freeze beautifully. Wrap individual bars tightly in plastic wrap, then place them in a freezer-safe bag or container. They’ll keep for up to 3 months. To thaw, transfer to the refrigerator overnight or let sit at room temperature for about 30 minutes. I always keep a stash in my freezer for unexpected guests or late-night cravings.
Reheating — These are best served cold or at room temperature, so no reheating needed. If you want a warm dessert, you can microwave a bar for about 10-15 seconds, but the texture will be softer and less defined.
Nutritional Information & Benefits
While these are definitely a treat, there are a few nutritional highlights worth noting. Per bar (based on 16 servings), here’s the estimated breakdown:
- Calories: 285
- Fat: 19g
- Carbohydrates: 24g
- Protein: 5g
- Sugar: 18g
- Fiber: 1g
Health Benefits of Key Ingredients — Raspberries are packed with antioxidants and vitamin C, which support immune health and reduce inflammation. Cream cheese provides calcium and protein, though it’s higher in fat, so moderation is key. The gluten-free crust makes this dessert accessible to those with celiac disease or gluten sensitivity.
Dietary Considerations — This recipe is naturally gluten-free when using certified gluten-free graham crackers. It can be made dairy-free with appropriate substitutions, though the texture will vary. It contains eggs and dairy, so it’s not suitable for vegans. For a lower-calorie option, you can reduce the crust by half or use a thinner layer.
My Personal Take — I believe in enjoying dessert without guilt. These bars are rich and satisfying, so a small serving is all you need. Pair them with a cup of herbal tea and you’ve got a moment of pure comfort that doesn’t derail your healthy habits. Balance, not restriction, is the name of the game.
Conclusion
These creamy gluten-free cheesecake bars with raspberry swirl are everything I want in a dessert: rich, tangy, beautiful, and surprisingly easy to make. They’ve become my go-to for potlucks, holidays, and those quiet evenings when I just need something sweet to look forward to.
What I love most about this recipe is how forgiving it is. No water bath, no complicated techniques, no special equipment. Just simple ingredients and a little patience while they chill. And the raspberry swirl? It makes every bar look like a work of art, even when you’re just making them for yourself on a random Tuesday.
I’d love to hear how these turn out for you. Did you try a different berry? Add chocolate? Make them dairy-free? Drop a comment below and let me know—I read every single one, and your feedback helps me create better recipes for all of us. And if you loved these bars, share this post with a friend who needs a gluten-free dessert in their life. Happy baking, friends!
Frequently Asked Questions
Can I use a different type of gluten-free cookie for the crust?
Absolutely. Gluten-free vanilla wafers, shortbread cookies, or even gluten-free Oreos work beautifully. Just crush them finely and adjust the butter slightly—drier cookies might need a tablespoon more butter to hold together.
Why did my cheesecake filling crack on top?
A few small cracks are normal and totally fine, especially since the raspberry swirl covers them up. Cracks usually happen from overmixing the filling (which incorporates too much air) or from drastic temperature changes. Let the bars cool slowly on the counter before refrigerating, and mix gently once you add the eggs.
Can I make these bars ahead of time for a party?
Yes, and I actually recommend it. These bars taste even better the next day after the flavors have melded and the texture has fully set. Make them up to 2 days in advance and keep them covered in the refrigerator. Just add any fresh raspberry garnish right before serving.
How do I get clean, neat slices without the bars falling apart?
Patience is key. Make sure the bars are fully chilled—at least 4 hours, but overnight is better. Use a sharp knife and run it under hot water, drying it off between each slice. Wipe the blade clean after every cut. This gives you those beautiful, clean-edged bars that look like they came from a bakery.
Can I use a different fruit for the swirl?
Definitely. Strawberries, blueberries, blackberries, or even mango all work beautifully. Just adjust the sugar to taste—sweeter fruits might need less, while tart fruits like blackberries might need a touch more. Cook the fruit down the same way, strain out the seeds if needed, and swirl away.
Pin This Recipe!
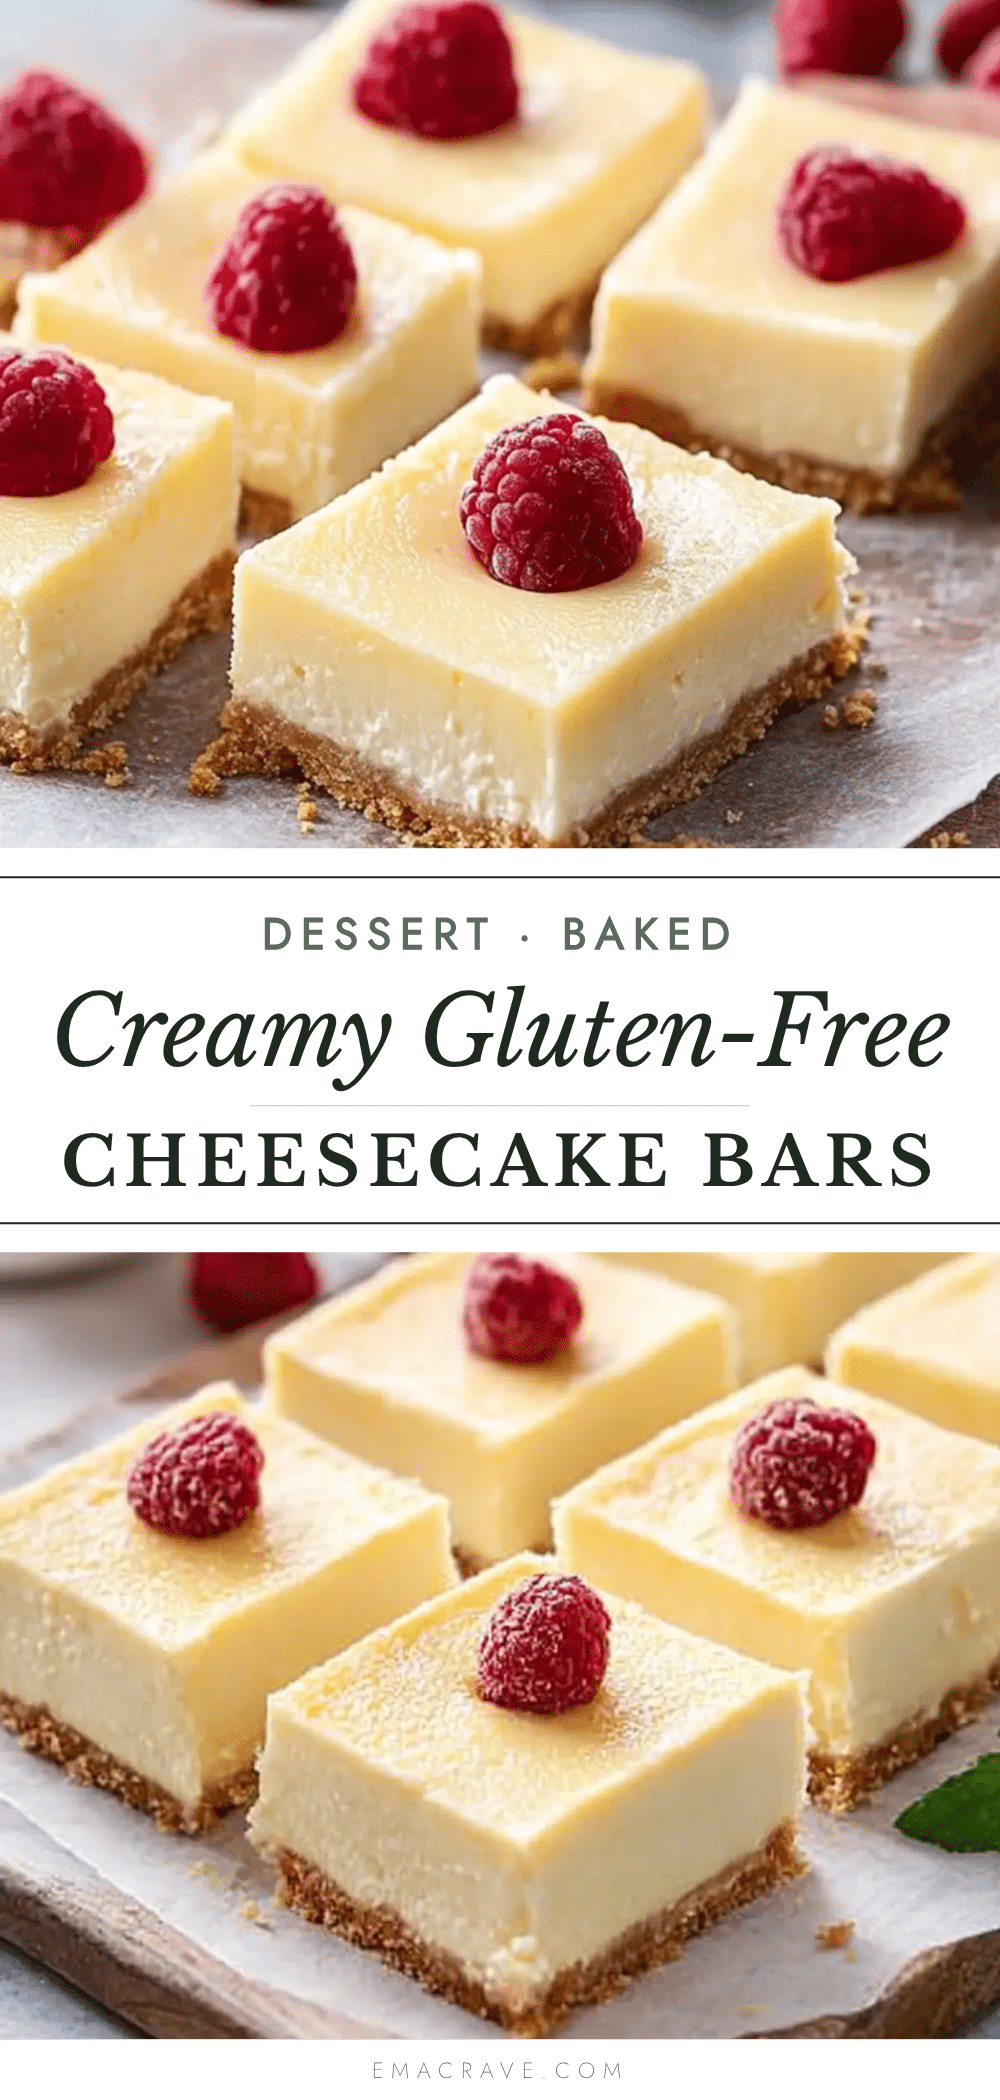
Creamy Gluten-Free Cheesecake Bars with Raspberry Swirl
Rich, tangy, and surprisingly easy gluten-free cheesecake bars with a gorgeous raspberry swirl. No water bath required, perfect for any occasion.
- Prep Time: 30 minutes
- Cook Time: 35 minutes
- Total Time: 5 hours 5 minutes (includes chilling)
- Yield: 16 servings 1x
- Category: Dessert
- Cuisine: American
Ingredients
- 1 ½ cups gluten-free graham cracker crumbs (about 10–12 full sheets)
- ¼ cup granulated sugar
- 6 tablespoons unsalted butter, melted
- Pinch of salt
- 24 ounces cream cheese, softened to room temperature
- 1 cup granulated sugar
- 3 large eggs, room temperature
- 1 teaspoon vanilla extract
- ¼ cup sour cream, room temperature
- 2 tablespoons gluten-free all-purpose flour or cornstarch
- 1 cup fresh or frozen raspberries
- 2 tablespoons granulated sugar
- 1 teaspoon lemon juice
- 1 teaspoon cornstarch mixed with 1 tablespoon water
Instructions
- Preheat oven to 350°F (175°C). Line a 9×13-inch baking pan with parchment paper, leaving overhang on two long sides. Lightly grease parchment.
- In a medium bowl, combine gluten-free graham cracker crumbs, ¼ cup sugar, and a pinch of salt. Stir in melted butter until mixture resembles wet sand. Press firmly into bottom of prepared pan. Bake for 10 minutes, then set aside to cool slightly.
- In a small saucepan, combine raspberries, 2 tablespoons sugar, and lemon juice. Cook over medium heat, stirring occasionally, until berries break down and mixture bubbles, about 5-7 minutes. Stir in cornstarch slurry and cook 1 minute more until thickened. Press through a fine-mesh strainer to remove seeds. Set aside to cool.
- In a large bowl, beat softened cream cheese with an electric mixer on medium speed until smooth, about 2 minutes. Add 1 cup sugar and beat until combined, about 1 minute. Add eggs one at a time, beating on low after each addition just until incorporated. Add vanilla, sour cream, and gluten-free flour (or cornstarch); mix on low until just combined.
- Pour cheesecake filling over pre-baked crust and spread evenly. Drop spoonfuls of raspberry puree over filling (8-10 dollops). Use a knife or toothpick to swirl puree into filling with figure-eight motions.
- Bake at 350°F (175°C) for 30-35 minutes, until edges are set and center is slightly jiggly. Cool completely on a wire rack (about 1 hour), then refrigerate for at least 4 hours, preferably overnight.
- Once fully chilled, use parchment overhang to lift bars out of pan. Place on cutting board and slice into 12-16 bars using a sharp knife, wiping blade clean between cuts.
Notes
Room temperature ingredients are essential for a smooth filling. Do not overmix once eggs are added. For clean slices, use a hot knife and wipe between cuts. Bars taste even better the next day.
Nutrition
- Serving Size: 1 bar
- Calories: 285
- Sugar: 18
- Sodium: 220
- Fat: 19
- Saturated Fat: 11
- Carbohydrates: 24
- Fiber: 1
- Protein: 5
Keywords: gluten-free cheesecake bars, raspberry swirl, gluten-free dessert, cheesecake bars, easy cheesecake



