Love this? Save it for later!
Share the inspiration with your friends
I pulled the baking sheet out of the oven and just stood there, staring. The cookies were domed, pale, and completely un-cookie-like. No spreading. No golden edges. Honestly, they looked like sad little biscuits that had given up on life. My husband peeked over my shoulder and said, “What… are those?” I didn’t even have an answer.
That was my third attempt at making cream cheese cookies, and I was about to toss the whole batch in the trash. But then I grabbed one, mostly out of spite, and took a bite. And I froze. The texture was insane—soft, almost pillowy, with a tangy richness that regular cookies just don’t have. I ate three more standing at the counter, still annoyed at how they looked but completely won over by how they tasted.
So I went back to the kitchen (again) and started tweaking. I adjusted the flour ratio, chilled the dough longer, and finally cracked the code. These Irresistibly Soft Cream Cheese Chocolate Chip Cookies have that perfect bakery-style dome, a tender crumb that stays soft for days, and just enough tang from the cream cheese to keep you reaching for another one. They’re the kind of cookie you make when you want something familiar but secretly better. Let me show you how they come together.
Why You’ll Love This Recipe
I’ve tested cream cheese cookies more times than I care to admit, and this version is the one that finally stuck. Here’s what makes it special:
- Unbelievably Soft Texture: The cream cheese adds fat and moisture without making the cookies greasy. You get this tender, almost cake-like crumb that stays soft for 3-4 days. No stale cookies here.
- Simple Pantry Ingredients: You probably have everything already. Butter, cream cheese, sugar, flour, eggs, vanilla, and chocolate chips. No weird specialty items needed.
- Perfect for Any Occasion: These work for bake sales, holiday cookie swaps, afternoon tea with friends, or just a random Tuesday when you need something sweet. They’re fancy enough to impress but simple enough to whip up anytime.
- Crowd-Pleaser Status: I’ve brought these to potlucks and family gatherings, and they disappear fast. Kids love them, adults love them, even people who claim they “don’t really like sweets” end up grabbing a second one.
- Better Than Standard Chocolate Chip Cookies: The cream cheese gives them a subtle tang that balances the sweetness perfectly. It’s like a chocolate chip cookie and a cheesecake had a baby, and that baby is delicious.
These cookies are the kind that make you close your eyes after the first bite. They’re comfort food reimagined—familiar enough to feel like home, but with that little something extra that makes them unforgettable.
What Ingredients You Will Need
This recipe uses simple, wholesome ingredients to deliver that signature soft texture and rich flavor. Most of these are pantry staples, which makes these cookies perfect for spontaneous baking sessions.
For the Cookie Dough
- 1/2 cup (113g) unsalted butter, softened to room temperature. I use Kerrygold for the best flavor, but any good-quality butter works. Make sure it’s truly soft—you should be able to press your finger into it easily.
- 4 oz (113g) full-fat cream cheese, softened. This is crucial—do not use low-fat or Neufchâtel. The full fat gives the cookies their signature tenderness and flavor. I recommend Philadelphia brand for consistent results.
- 1 cup (200g) granulated sugar. White sugar helps the cookies spread just enough while keeping that soft center.
- 1/2 cup (100g) packed light brown sugar. Adds moisture and a subtle caramel note that pairs beautifully with the cream cheese tang.
- 1 large egg, at room temperature. Cold eggs will seize up the butter mixture, so let it sit out for 30 minutes first.
- 2 teaspoons vanilla extract. Pure vanilla, not imitation. It makes a noticeable difference in the depth of flavor.
- 2 1/2 cups (312g) all-purpose flour. Spoon and level your flour—scooping directly from the bag packs in too much and makes cookies dry.
- 1 teaspoon baking soda. Helps the cookies rise and gives them that soft, puffy texture.
- 1/2 teaspoon salt. Fine sea salt or table salt works best. Don’t skip it—salt balances the sweetness and enhances the chocolate.
- 1 1/2 cups (270g) semi-sweet chocolate chips. I prefer Ghirardelli, but any good-quality chip works. You can also chop up a chocolate bar for bigger puddles of chocolate.
Ingredient Tips
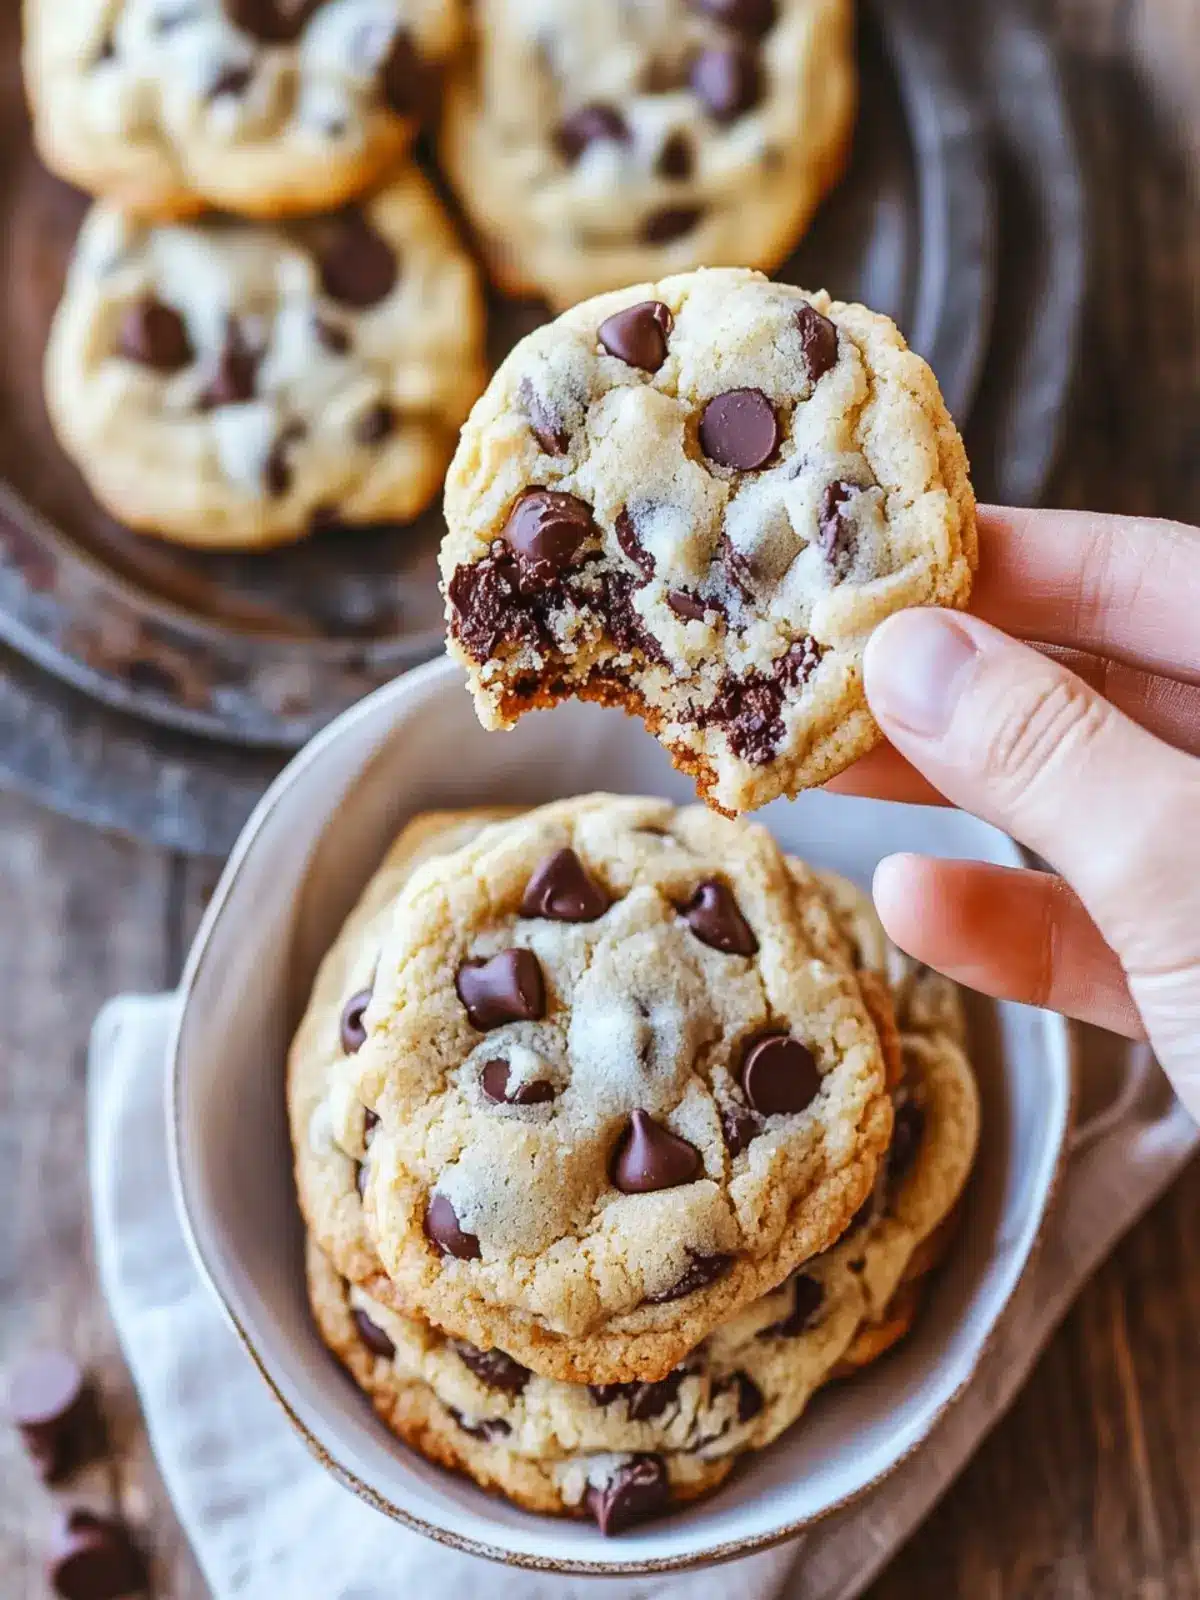
Make sure your butter and cream cheese are truly at room temperature—about 65-70°F. If they’re too cold, the dough won’t cream properly and your cookies will be dense. If they’re too warm, the cookies will spread into flat discs. I usually take them out of the fridge about 45 minutes before I start baking.
For a fun twist, try swapping 1/2 cup of the chocolate chips with white chocolate chips or chopped pecans. I’ve done both, and they’re equally delicious.
Equipment Needed
- Electric hand mixer or stand mixer. A hand mixer works perfectly here—no need for a fancy stand mixer unless you have one. You just need something to cream the butter and cream cheese together until fluffy.
- Large mixing bowl. Go for a medium-to-large size so you have room to mix without flour flying everywhere.
- Baking sheets. Two standard 13×18-inch sheets work great. Line them with parchment paper for easy cleanup and even baking.
- Cookie scoop. A 1.5-tablespoon scoop (about #40 size) gives you consistent cookies. If you don’t have one, use two spoons to portion the dough.
- Cooling rack. Letting cookies cool on a rack prevents soggy bottoms. If you don’t have one, a clean kitchen towel works in a pinch.
- Parchment paper or silicone baking mat. Either works. Parchment is cheaper and disposable; silicone mats are reusable and give slightly softer bottoms.
I’ve made these cookies with just a whisk and a wooden spoon before, and they still turned out great. The key is patience—cream the butter and cream cheese well, even if you’re doing it by hand.
Preparation Method
- Cream the butter and cream cheese: In a large mixing bowl, beat the softened butter and cream cheese together with an electric mixer on medium speed until smooth and fluffy—about 2 minutes. Scrape down the sides of the bowl halfway through. You want the mixture to look light and airy, not greasy.
- Add the sugars: Add the granulated sugar and brown sugar to the bowl. Beat on medium speed for another 2-3 minutes until the mixture is pale and fluffy. It should look like a thick, creamy paste. This step is where you build the structure for soft cookies, so don’t rush it.
- Incorporate the egg and vanilla: Add the egg and vanilla extract. Beat on low speed until just combined—about 30 seconds. Overmixing here can make the cookies tough. Scrape the bowl again to make sure everything is evenly mixed.
- Mix the dry ingredients: In a separate medium bowl, whisk together the flour, baking soda, and salt. Make sure there are no lumps, especially from the baking soda. This step ensures even distribution of leavening agents.
- Combine wet and dry ingredients: Gradually add the dry ingredients to the wet mixture, mixing on low speed. Add the flour in three batches, mixing just until each addition disappears. Stop as soon as you no longer see streaks of flour—overmixing develops gluten and makes cookies tough.
- Fold in the chocolate chips: Use a rubber spatula to gently fold in the chocolate chips. Make sure they’re evenly distributed throughout the dough. If you’re adding nuts or other mix-ins, fold them in now.
- Chill the dough: Cover the bowl with plastic wrap and refrigerate for at least 30 minutes (1 hour is better). Chilling solidifies the fat and prevents the cookies from spreading too much. This step is non-negotiable for that perfect domed shape.
- Preheat the oven: While the dough chills, preheat your oven to 350°F (175°C). Line your baking sheets with parchment paper.
- Portion the dough: Use your cookie scoop or two spoons to portion dough into 1.5-tablespoon balls. Roll them gently between your palms to form smooth balls. Place them 2 inches apart on the prepared baking sheets—these cookies spread a bit but not excessively.
- Bake: Bake for 10-12 minutes, or until the edges are lightly golden and the centers look slightly underdone and puffy. The tops should be set but still soft to the touch. Do not overbake—they continue cooking on the hot sheet after you pull them out.
- Cool: Let the cookies cool on the baking sheet for 5 minutes. This allows them to set up properly. Then transfer them to a cooling rack to cool completely. If you move them too soon, they’ll fall apart.
Sensory cues to watch for: Your kitchen should smell like vanilla and butter by the time they’re done. The edges will be a warm golden brown, and the centers will look slightly puffy and pale. If you gently press the top, it should feel soft but not wet.
Cooking Tips & Techniques
I learned most of these the hard way—through batches of cookies that looked nothing like what I wanted. Here’s what I wish someone had told me:
Don’t skip the chill time. I know it’s tempting to rush, but cold dough is the secret to those thick, soft cookies. Warm dough spreads into thin, crispy discs. If you’re short on time, even 15 minutes in the freezer helps, but 30 minutes in the fridge is ideal.
Measure flour correctly. This is the most common mistake I see. Scooping flour directly from the bag can add up to 25% more flour than the recipe calls for. Use the spoon-and-level method: fluff the flour with a spoon, spoon it into your measuring cup, then level it off with a knife. Your cookies will thank you.
Use room temperature ingredients. Cold cream cheese creates lumps that never fully incorporate. Cold butter won’t cream properly. Set everything out 30-45 minutes before you start. Your dough will come together smoothly and bake evenly.
Bake one sheet at a time. If you crowd both sheets in the oven, the heat circulates unevenly and your cookies bake at different rates. Bake one sheet in the center rack, then swap positions for the second batch. It takes a few extra minutes but gives you consistent results.
Underbake slightly. Pull the cookies out when the edges are set but the centers still look slightly underdone. They’ll continue baking from residual heat on the sheet. This is how you get that soft, gooey center that stays tender for days.
Variations & Adaptations
One of the best things about this recipe is how flexible it is. Here are some variations I’ve tried and loved:
Double Chocolate Cream Cheese Cookies: Replace 1/4 cup of the flour with 1/4 cup of unsweetened cocoa powder. Use dark chocolate chips instead of semi-sweet. The cream cheese tang cuts through the richness beautifully.
Gluten-Free Version: Substitute the all-purpose flour with a 1:1 gluten-free baking flour blend (I like Bob’s Red Mill). Add an extra tablespoon of milk to the dough since gluten-free flours absorb more moisture. Chill the dough for at least 1 hour—gluten-free dough is stickier and needs more time to firm up.
Citrus Cream Cheese Cookies: Add 1 tablespoon of lemon or orange zest to the butter mixture when creaming. Swap half the chocolate chips for white chocolate chips or dried cranberries. The bright citrus notes pair perfectly with the tangy cream cheese.
Lower Sugar Option: Reduce the granulated sugar to 3/4 cup and the brown sugar to 1/3 cup. The cookies will be slightly less sweet but still soft and delicious. Add an extra 1/4 teaspoon of vanilla to compensate for the reduced sugar.
Spiced Fall Version: Add 1 teaspoon of cinnamon, 1/2 teaspoon of nutmeg, and a pinch of cloves to the dry ingredients. Use a mix of semi-sweet and butterscotch chips. These taste like autumn in cookie form.
Serving & Storage Suggestions
These cookies are best served slightly warm, when the chocolate chips are still a little melty and the center is ultra-soft. Let them cool for about 5 minutes on the baking sheet, then transfer to a plate and enjoy with a cold glass of milk or a hot cup of coffee. They also pair beautifully with a scoop of vanilla ice cream for an easy dessert.
Room Temperature Storage: Keep cookies in an airtight container at room temperature for up to 5 days. Place a slice of bread in the container—it absorbs excess moisture and keeps the cookies soft. Replace the bread every 2 days. Trust me, this trick works wonders.
Freezer Storage: You can freeze the baked cookies for up to 3 months. Layer them in a freezer-safe container with parchment paper between layers. Thaw at room temperature for about 30 minutes, then warm in a 300°F oven for 5 minutes for that fresh-baked taste.
Freezing the Dough: Portion the dough into balls and freeze them on a baking sheet until solid (about 1 hour). Transfer to a freezer bag and store for up to 3 months. Bake from frozen, adding 2-3 minutes to the baking time. Fresh cookies anytime you want them!
One thing I love about these cookies is that the flavors actually deepen after a day. The cream cheese tang mellows out and the vanilla becomes more pronounced. Day 2 cookies are just as good as day 1—maybe even better.
Nutritional Information & Benefits
Here’s the approximate nutritional breakdown per cookie (based on 24 cookies):
- Calories: 185
- Fat: 10g
- Carbohydrates: 23g
- Protein: 3g
- Sugar: 14g
- Fiber: 1g
While these cookies are definitely a treat, the cream cheese adds a small amount of protein and calcium compared to traditional butter-only cookies. The semi-sweet chocolate chips provide antioxidants called flavonoids, which are linked to heart health benefits. Plus, using both butter and cream cheese means you get a more satisfying cookie with a smaller portion—you’ll feel content with one or two instead of a whole handful.
For those watching their sugar intake, the lower sugar variation works beautifully without sacrificing texture. And if you’re dairy-sensitive, you can substitute the butter and cream cheese with plant-based alternatives, though the texture will be slightly different.
Conclusion
These Irresistibly Soft Cream Cheese Chocolate Chip Cookies are the kind of recipe that becomes a staple in your baking rotation. They’re easy enough for a weeknight craving but special enough to share at holiday gatherings or potlucks. The cream cheese adds a subtle tang that makes them feel more sophisticated than your average chocolate chip cookie, while the soft, tender texture keeps them comfortingly familiar.
I love how forgiving this recipe is—you can customize it with different chips, add-ins, or even make it gluten-free, and it still works beautifully. It’s the kind of recipe that makes you look like a baking pro even on your first try.
So go ahead—preheat that oven, soften that cream cheese, and treat yourself to something truly special. And when you make these (because you will), come back and let me know how they turned out. Did you try any variations? What’s your favorite way to enjoy them? Drop a comment below—I read every single one and I’d love to hear your story.
Happy baking, friends!
Frequently Asked Questions
Can I use low-fat cream cheese in this recipe?
I don’t recommend it. Low-fat cream cheese has more water and less fat, which throws off the texture. Your cookies won’t be as soft or tender, and they might spread more during baking. Stick with full-fat cream cheese for the best results—it’s worth the extra few calories.
Why did my cookies turn out flat?
Flat cookies usually mean the dough was too warm when it went into the oven, or there wasn’t enough flour. Make sure you chill the dough for at least 30 minutes, and always measure your flour using the spoon-and-level method. If your butter and cream cheese were too soft, that can also cause spreading.
Can I make the dough ahead of time?
Absolutely! You can refrigerate the dough for up to 3 days before baking. Just wrap it tightly in plastic wrap so it doesn’t dry out. You might need to let it sit at room temperature for 10-15 minutes before scooping if it’s too firm. This actually makes the cookies taste even better as the flavors meld together.
How do I keep these cookies soft for several days?
Store them in an airtight container with a slice of bread. The bread absorbs excess moisture and releases it slowly, keeping the cookies soft. Replace the bread slice every 2 days. Avoid storing them in the refrigerator, as that dries out baked goods faster.
Can I freeze the baked cookies?
Yes! Let them cool completely, then layer them in a freezer-safe container with parchment paper between layers. They’ll keep for up to 3 months. Thaw at room temperature for about 30 minutes, then warm in a 300°F oven for 5 minutes. They taste almost as good as fresh-baked.
Pin This Recipe!

Irresistibly Soft Cream Cheese Chocolate Chip Cookies

These cream cheese chocolate chip cookies have a perfectly soft, pillowy texture with a subtle tangy richness that makes them unforgettable. They’re easy to make with simple pantry ingredients and stay soft for days.
- Prep Time: 15 minutes
- Cook Time: 12 minutes
- Total Time: 1 hour 27 minutes (including 1 hour chill time)
- Yield: 24 cookies 1x
- Category: Dessert
- Cuisine: American
Ingredients
- 1/2 cup (113g) unsalted butter, softened to room temperature
- 4 oz (113g) full-fat cream cheese, softened
- 1 cup (200g) granulated sugar
- 1/2 cup (100g) packed light brown sugar
- 1 large egg, at room temperature
- 2 teaspoons vanilla extract
- 2 1/2 cups (312g) all-purpose flour
- 1 teaspoon baking soda
- 1/2 teaspoon salt
- 1 1/2 cups (270g) semi-sweet chocolate chips
Instructions
- Cream the butter and cream cheese: In a large mixing bowl, beat the softened butter and cream cheese together with an electric mixer on medium speed until smooth and fluffy—about 2 minutes. Scrape down the sides of the bowl halfway through.
- Add the sugars: Add the granulated sugar and brown sugar to the bowl. Beat on medium speed for another 2-3 minutes until the mixture is pale and fluffy.
- Incorporate the egg and vanilla: Add the egg and vanilla extract. Beat on low speed until just combined—about 30 seconds. Scrape the bowl again.
- Mix the dry ingredients: In a separate medium bowl, whisk together the flour, baking soda, and salt until no lumps remain.
- Combine wet and dry ingredients: Gradually add the dry ingredients to the wet mixture, mixing on low speed. Add the flour in three batches, mixing just until each addition disappears.
- Fold in the chocolate chips: Use a rubber spatula to gently fold in the chocolate chips until evenly distributed.
- Chill the dough: Cover the bowl with plastic wrap and refrigerate for at least 30 minutes (1 hour is better).
- Preheat the oven: While the dough chills, preheat your oven to 350°F (175°C). Line your baking sheets with parchment paper.
- Portion the dough: Use a cookie scoop or two spoons to portion dough into 1.5-tablespoon balls. Roll them gently between your palms to form smooth balls. Place them 2 inches apart on the prepared baking sheets.
- Bake: Bake for 10-12 minutes, or until the edges are lightly golden and the centers look slightly underdone and puffy. Do not overbake.
- Cool: Let the cookies cool on the baking sheet for 5 minutes, then transfer them to a cooling rack to cool completely.
Notes
Don’t skip the chill time—cold dough is the secret to thick, soft cookies. Measure flour using the spoon-and-level method. Use room temperature ingredients. Bake one sheet at a time for even results. Underbake slightly for a soft center. Store in an airtight container with a slice of bread to keep cookies soft for up to 5 days.
Nutrition
- Serving Size: 1 cookie
- Calories: 185
- Sugar: 14
- Sodium: 120
- Fat: 10
- Saturated Fat: 6
- Carbohydrates: 23
- Fiber: 1
- Protein: 3
Keywords: cream cheese chocolate chip cookies, soft chocolate chip cookies, cream cheese cookies, easy cookie recipe, soft cookies



