Love this? Save it for later!
Share the inspiration with your friends
I was sitting on my kitchen floor. Not in a dramatic, movie-of-the-week way—I’d just dropped a whole stick of butter and it slid under the fridge. It was one of those afternoons where everything felt slightly off, and I needed something bright. Not just sweet, but bright. The kind of dessert that makes you stop scrolling and just look at it for a second.
That’s when I remembered the purple yams sitting in my pantry. I’d bought them on a whim, drawn in by that ridiculous, almost unnatural color. I had no real plan. I just knew I wanted to make something that felt like a little bit of magic on a plate. So I started experimenting. I mashed, I mixed, I added a little more butter (from a new stick, obviously), and I crossed my fingers.
The first batch was a disaster. Too dry, not sweet enough, and the color? Kind of a sad, grayish lavender. Not the vibe. But the second batch? That was the one. The ube flavor came through warm and nutty, and the center stayed soft and fudgy in a way that felt almost intentional. I pulled them out of the oven, let them cool just enough, and cut into one. That gooey middle oozed out like a secret.
Honestly, I think I let out a little laugh. These easy ube brownies with gooey molten center were exactly what I needed—something unexpected and comforting all at once. They’re not trying to be fancy. They’re just trying to be really, really good.
Why You’ll Love This Recipe
Let me tell you, I’ve tested this recipe more times than I’m willing to admit publicly. But that’s the thing about getting a brownie just right—it takes a little obsession. And these easy ube brownies with gooey molten center are the result of all that trial and error. Here’s why they’re worth every single attempt:
- Stunning Color, No Artificial Dye: The vibrant purple comes entirely from ube (purple yam). It’s natural, it’s gorgeous, and it’s a total conversation starter.
- That Gooey Center: We’re not talking about a dry, cakey brownie. The middle stays soft, fudgy, and almost molten—like the best brownie you’ve ever had, but better.
- Simple Ingredients: You don’t need a specialty grocery store. Ube extract is easy to find online or at Asian markets, and the rest is pantry stuff.
- Perfect for Sharing: Bring these to a party and watch people’s faces light up. They’re unexpected in the best way.
- Beginner-Friendly: If you can melt butter and stir, you can make these. No fancy techniques required.
What makes this recipe different from the hundreds of other brownie recipes out there? It’s the balance. The ube adds a subtle, nutty sweetness that plays beautifully with the rich chocolate. It’s not a gimmick—it’s a genuinely good flavor combination. And when you get that gooey center, it’s like the universe is telling you everything is going to be okay.
What Ingredients You Will Need
This recipe uses simple, wholesome ingredients to deliver bold flavor and satisfying texture without the fuss. Most of these are probably already in your kitchen, except for the star of the show.
- Unsalted butter (½ cup / 113 g): Melted and slightly cooled. This gives the brownies their rich, fudgy texture. I prefer unsalted so I can control the salt level.
- Granulated sugar (1 cup / 200 g): Adds sweetness and helps create that crackly top. Don’t substitute with a liquid sweetener here—it changes the texture.
- Large eggs (2): At room temperature. Cold eggs can seize the melted butter, so let them sit out for 15 minutes first.
- Ube extract (2 teaspoons): This is the magic ingredient. It gives the brownies that vibrant purple color and distinct flavor. Look for a brand that uses natural coloring if possible.
- Ube halaya (ube jam, ¼ cup / 80 g): This adds extra flavor and moisture. You can find it in jars at Asian grocery stores. If you can’t find it, you can use an extra tablespoon of ube extract, but the texture will be slightly different.
- All-purpose flour (¾ cup / 90 g): Spoon and level it—don’t scoop directly from the bag, or you’ll end up with dry brownies.
- Cocoa powder (¼ cup / 20 g): Use unsweetened, Dutch-processed if you have it. It deepens the chocolate flavor without adding extra sugar.
- Salt (½ teaspoon): Balances the sweetness and enhances the chocolate and ube flavors.
- Baking powder (¼ teaspoon): Just a touch for a little lift. Don’t skip it, or the brownies will be too dense.
- White chocolate chips (½ cup / 85 g): Optional, but highly recommended. They add little pockets of creamy sweetness that complement the ube.
- For the gooey center: You’ll need an extra 2 tablespoons of ube halaya or a few tablespoons of cream cheese, softened. I’ll explain in the method.
A quick note on ube extract: not all brands are created equal. I’ve tried a few, and my personal favorite is Butterfly. It has a clean, floral flavor and a really intense purple color. Some cheaper extracts can taste artificial or faint, so it’s worth spending a couple extra dollars.
Equipment Needed
You don’t need a professional bakery setup for these easy ube brownies with gooey molten center. Here’s what you’ll need:
- 8×8-inch baking pan: This is the perfect size for a thick, fudgy brownie. If you use a 9×9, they’ll be thinner and bake faster.
- Parchment paper: Line your pan with it, leaving some overhang on two sides. This makes lifting the brownies out a breeze.
- Mixing bowls: One large, one medium. Glass or stainless steel works great.
- Whisk: For combining wet ingredients. A wooden spoon works too, but a whisk gives you a smoother batter.
- Rubber spatula: For folding in the flour and scraping every last bit of batter into the pan.
- Measuring cups and spoons: Accurate measurements matter in baking. Use the spoon-and-level method for flour.
- Kitchen scale (optional but helpful): If you have one, use it for the butter and flour. It’s more precise.
If you don’t have an 8×8 pan, you can use a 9-inch round cake pan. Just check for doneness a few minutes earlier. And if you don’t have parchment paper, you can grease the pan well with butter and dust it with cocoa powder. It’s not as neat, but it works.
Preparation Method
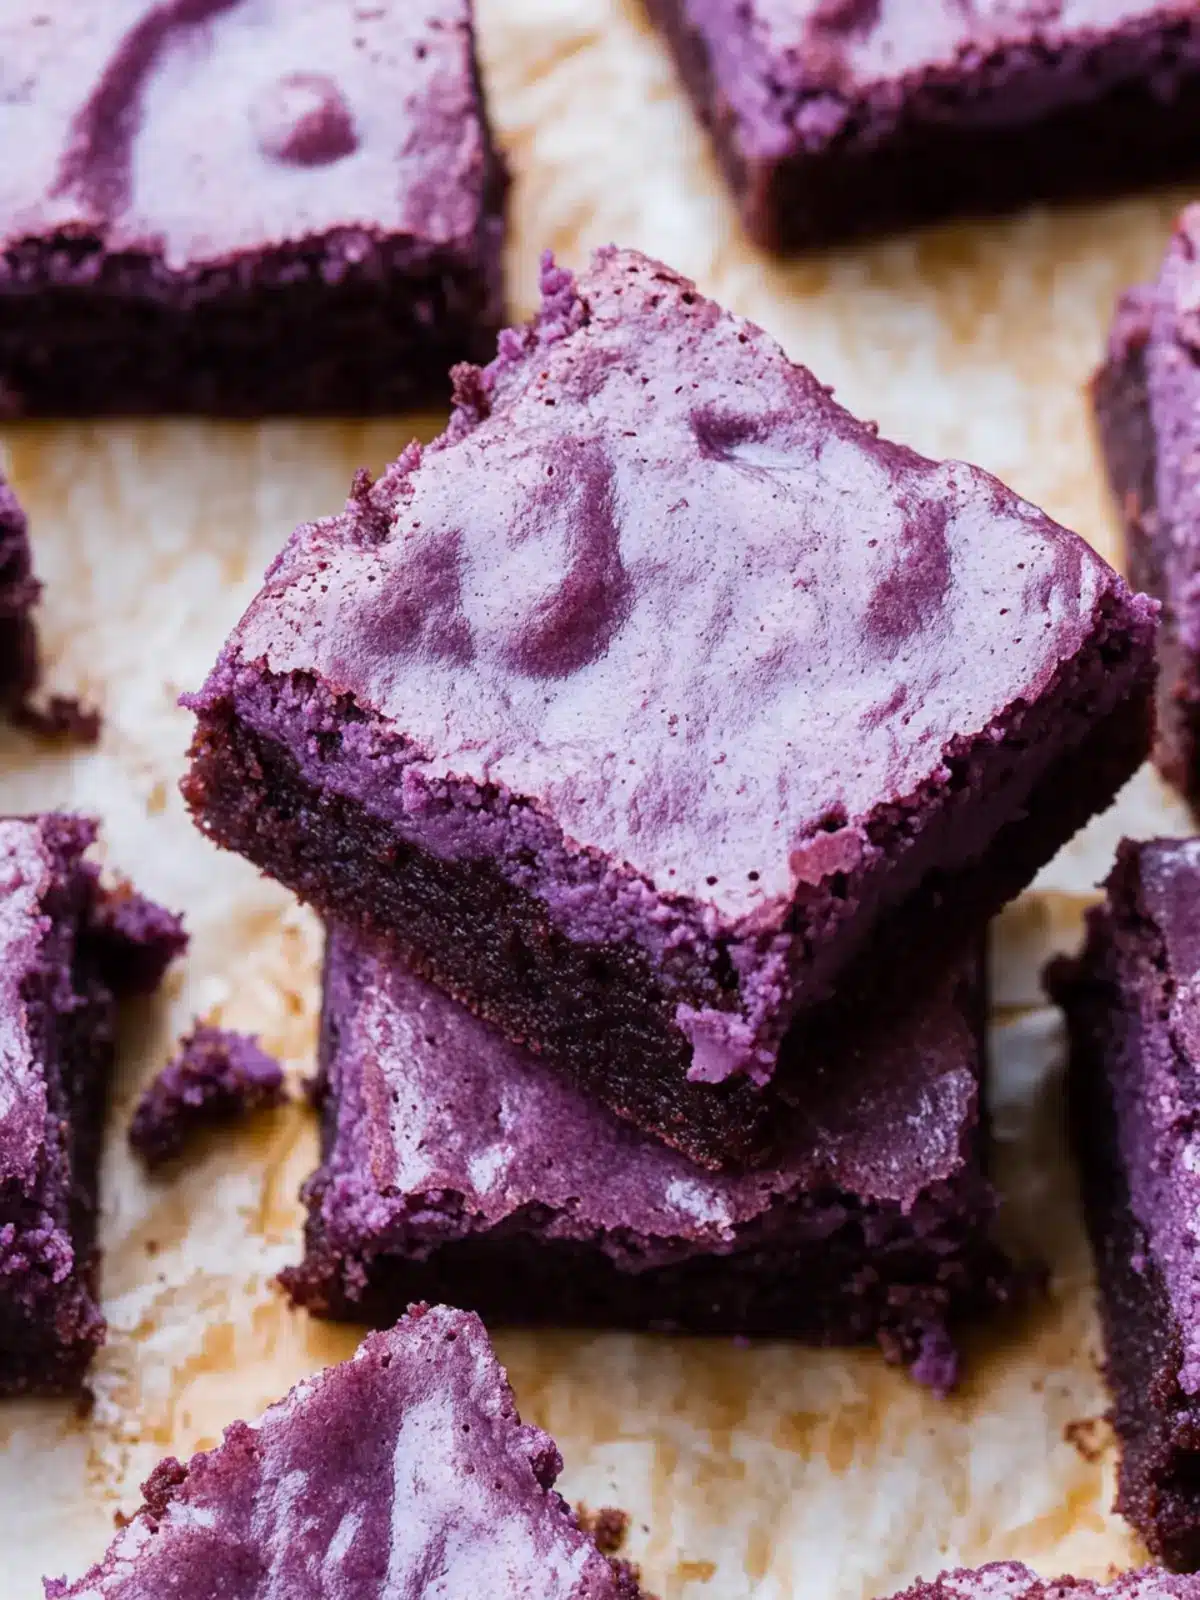
Let’s get to the fun part. This method is broken down into clear steps so you can follow along without any guesswork.
- Preheat and prep: Preheat your oven to 350°F (175°C). Line your 8×8 baking pan with parchment paper, leaving a 2-inch overhang on two opposite sides. This creates handles for lifting the brownies out later.
- Melt the butter: In a large microwave-safe bowl, melt the ½ cup (113 g) of unsalted butter in 30-second bursts, stirring between each, until just melted. Don’t let it boil. Set it aside to cool for 2-3 minutes—you want it warm, not hot.
- Mix the wet ingredients: To the melted butter, add 1 cup (200 g) of granulated sugar. Whisk vigorously for about 1 minute until the mixture looks smooth and slightly thickened. Then add the 2 room-temperature eggs, one at a time, whisking well after each. The batter should look glossy and pale. Now whisk in the 2 teaspoons of ube extract and ¼ cup (80 g) of ube halaya. The color should be a beautiful, deep purple.
- Combine the dry ingredients: In a separate medium bowl, whisk together ¾ cup (90 g) all-purpose flour, ¼ cup (20 g) cocoa powder, ½ teaspoon salt, and ¼ teaspoon baking powder. Make sure there are no lumps—cocoa powder can be stubborn.
- Fold it together: Pour the dry ingredients into the wet mixture. Use a rubber spatula to fold gently until just combined. A few streaks of flour are okay—overmixing will make the brownies tough. If you’re using white chocolate chips, fold them in now.
- Create the gooey center: This is the secret step. Take about ¼ cup of the brownie batter and set it aside in a small bowl. To the remaining batter in the large bowl, add 2 tablespoons of ube halaya (or 2 tablespoons of softened cream cheese if you want a tangy twist). Stir it in gently. This concentrated ube mixture will create that molten pocket in the center. Pour this ube-heavy batter into the prepared pan and spread it evenly.
- Add the reserved batter: Dollop the reserved plain batter on top in small spoonfuls. Use a knife or skewer to gently swirl it into the top layer. Don’t over-swirl—you want some pockets of plain batter to create contrast. The top should look marbled.
- Bake: Place the pan in the preheated oven and bake for 22-25 minutes. The key here is to underbake slightly. The edges should look set and the top should be shiny and cracked, but the center should still jiggle when you gently shake the pan. A toothpick inserted into the center should come out with a few moist crumbs, not clean.
- Cool completely: This is the hardest part. Let the brownies cool in the pan on a wire rack for at least 30 minutes. The residual heat will continue to cook the center, and the gooey texture will set just enough to hold together. If you cut them too soon, they’ll fall apart (trust me, I’ve done it).
- Lift and cut: After cooling, use the parchment paper handles to lift the entire block of brownies out of the pan. Place it on a cutting board. Use a sharp knife to cut into 9 or 16 squares, wiping the blade clean between cuts for neat edges.
Cooking Tips & Techniques
I’ve made these easy ube brownies with gooey molten center more times than I can count, and I’ve definitely made my share of mistakes. Here’s what I’ve learned so you don’t have to repeat them.
- Don’t overbake. This is the #1 mistake. That jiggle in the center is your friend. If you bake until a toothpick comes out clean, you’ll have dry, cakey brownies. Pull them out when the center still looks slightly underdone—it will set as it cools.
- Room temperature eggs are non-negotiable. Cold eggs will cause the melted butter to seize up, creating a lumpy batter. If you forget to take them out ahead of time, place the eggs in a bowl of warm water for 5 minutes.
- Use good quality ube extract. The cheap stuff can taste like perfume. I’ve had the best luck with Butterfly brand. It’s widely available online and gives a gorgeous color.
- Let them cool completely. I know it’s tempting, but cutting into warm brownies is a recipe for a gooey mess. Give them the full 30 minutes. The texture will be perfect—fudgy but sliceable.
- Line your pan well. Parchment paper is your best friend. If you don’t have it, grease the pan thoroughly and dust it with cocoa powder. Butter alone won’t cut it—the brownies will stick.
Variations & Adaptations
One of the best things about this recipe is how flexible it is. Here are a few ways to make it your own.
- Gluten-free version: Swap the all-purpose flour with a 1:1 gluten-free baking blend. I’ve used King Arthur’s and it works perfectly. The texture is slightly more tender, but still fudgy.
- Dairy-free option: Use vegan butter (like Miyoko’s) and dairy-free white chocolate chips. The ube halaya is naturally dairy-free, so you’re good there.
- Extra gooey center: Instead of ube halaya in the center, try a tablespoon of cream cheese mixed with a teaspoon of sugar. It creates a tangy, molten pocket that’s incredible with the ube.
- Add crunch: Fold in ½ cup of toasted coconut flakes or chopped macadamia nuts. The texture contrast is lovely.
- Make it a swirl: For a marbled effect, drop spoonfuls of plain brownie batter (without ube) on top and swirl it in with a knife. It creates beautiful ribbons of purple and chocolate.
- Personal variation: I once added a teaspoon of pandan extract along with the ube extract, and it was heavenly. Pandan has a nutty, vanilla-like flavor that pairs beautifully with ube. Just be careful—pandan is also green, so the color gets a little muddy. Still delicious though.
Serving & Storage Suggestions
These brownies are best served slightly warm, when the gooey center is at its most dramatic. But they’re also fantastic at room temperature—the fudgy texture really shines.
- Serving temperature: If you want that molten effect, pop a brownie in the microwave for 10-15 seconds before serving. It brings back the gooeyness.
- Presentation: Dust with a little powdered sugar or a sprinkle of flaky sea salt right before serving. It looks gorgeous and adds a nice contrast.
- Pairings: A scoop of vanilla ice cream is the obvious choice, but I also love these with a dollop of whipped cream and fresh berries. For drinks, a cold glass of milk or a warm cup of coffee works beautifully.
- Storage: Store leftover brownies in an airtight container at room temperature for up to 3 days. They’ll stay fudgy, but the gooey center will firm up. If you want to keep them longer, refrigerate for up to a week.
- Freezing: These freeze beautifully. Wrap individual brownies tightly in plastic wrap, then place them in a freezer bag. They’ll keep for up to 3 months. Thaw at room temperature or microwave for 15 seconds.
- Flavor development: Honestly, these brownies taste even better the next day. The ube flavor deepens and the texture becomes even more fudgy. If you can wait, make them a day ahead.
Nutritional Information & Benefits
Let’s be real—these are brownies, not a health food. But there are a few silver linings worth mentioning.
- Estimated per brownie (based on 9 servings): Calories: 290, Fat: 14g, Carbs: 38g, Protein: 4g, Fiber: 2g, Sugar: 26g. These are estimates and will vary based on your exact ingredients.
- Ube is a root vegetable: It’s packed with antioxidants, vitamin C, and fiber. So technically, you’re eating a vegetable. (I’m not saying that makes it a salad, but it’s something.)
- Dietary considerations: This recipe can be made gluten-free and dairy-free with simple swaps. It’s naturally nut-free if you skip the add-ins.
- Potential allergens: Contains dairy, eggs, and gluten (unless substituted). The white chocolate chips may contain soy lecithin.
- My perspective: I believe in balance. These brownies are a treat, and they’re meant to be enjoyed without guilt. The fact that ube has some nutritional benefits is just a bonus. Life’s too short for sad desserts.
Conclusion
These easy ube brownies with gooey molten center are more than just a pretty face. They’re the kind of dessert that feels special without being complicated. The vibrant purple color is a showstopper, but the real magic is in that fudgy, molten center that makes every bite feel like a little celebration.
I love this recipe because it’s proof that you don’t need a million ingredients or hours of work to make something truly memorable. It’s approachable, forgiving, and endlessly customizable. Whether you’re making them for a party, a cozy night in, or just because you need a little color in your life, these brownies deliver.
If you make them, I’d love to hear about it. Drop a comment below and let me know how they turned out—did you add any fun variations? Did the gooey center get you the oohs and ahhs you deserved? Share a photo on Pinterest or tag me on social media. I can’t wait to see your purple creations.
Now go preheat that oven. You’ve got some brownies to make.
Frequently Asked Questions
Can I use frozen ube instead of ube extract?
Yes, but it’s a different process. You’d need to thaw, boil, and mash about ½ cup of frozen ube, then mix it into the batter. The color will be less vibrant, and the texture will be slightly more dense. Ube extract is much easier and gives a more consistent result.
Why did my brownies turn out dry?
You likely overbaked them. Remember, the center should still jiggle when you pull them out of the oven. Also, make sure you’re measuring your flour correctly—scooping directly from the bag can pack in too much flour, leading to dry brownies.
Can I make these without the gooey center?
Absolutely. Just skip the step where you set aside batter and add extra ube halaya. Mix everything together and bake as directed. You’ll have a delicious, fudgy ube brownie without the molten pocket.
How do I get that shiny, crackly top?
The crackly top comes from beating the eggs and sugar together well. Whisk them for a full minute until the mixture is pale and thick. Also, using granulated sugar (not brown sugar) helps create that signature crackle.
Can I double this recipe?
Yes! Double all the ingredients and bake in a 9×13-inch pan. You’ll need to increase the baking time to about 30-35 minutes. Keep an eye on it and use the jiggle test to check for doneness.
Pin This Recipe!
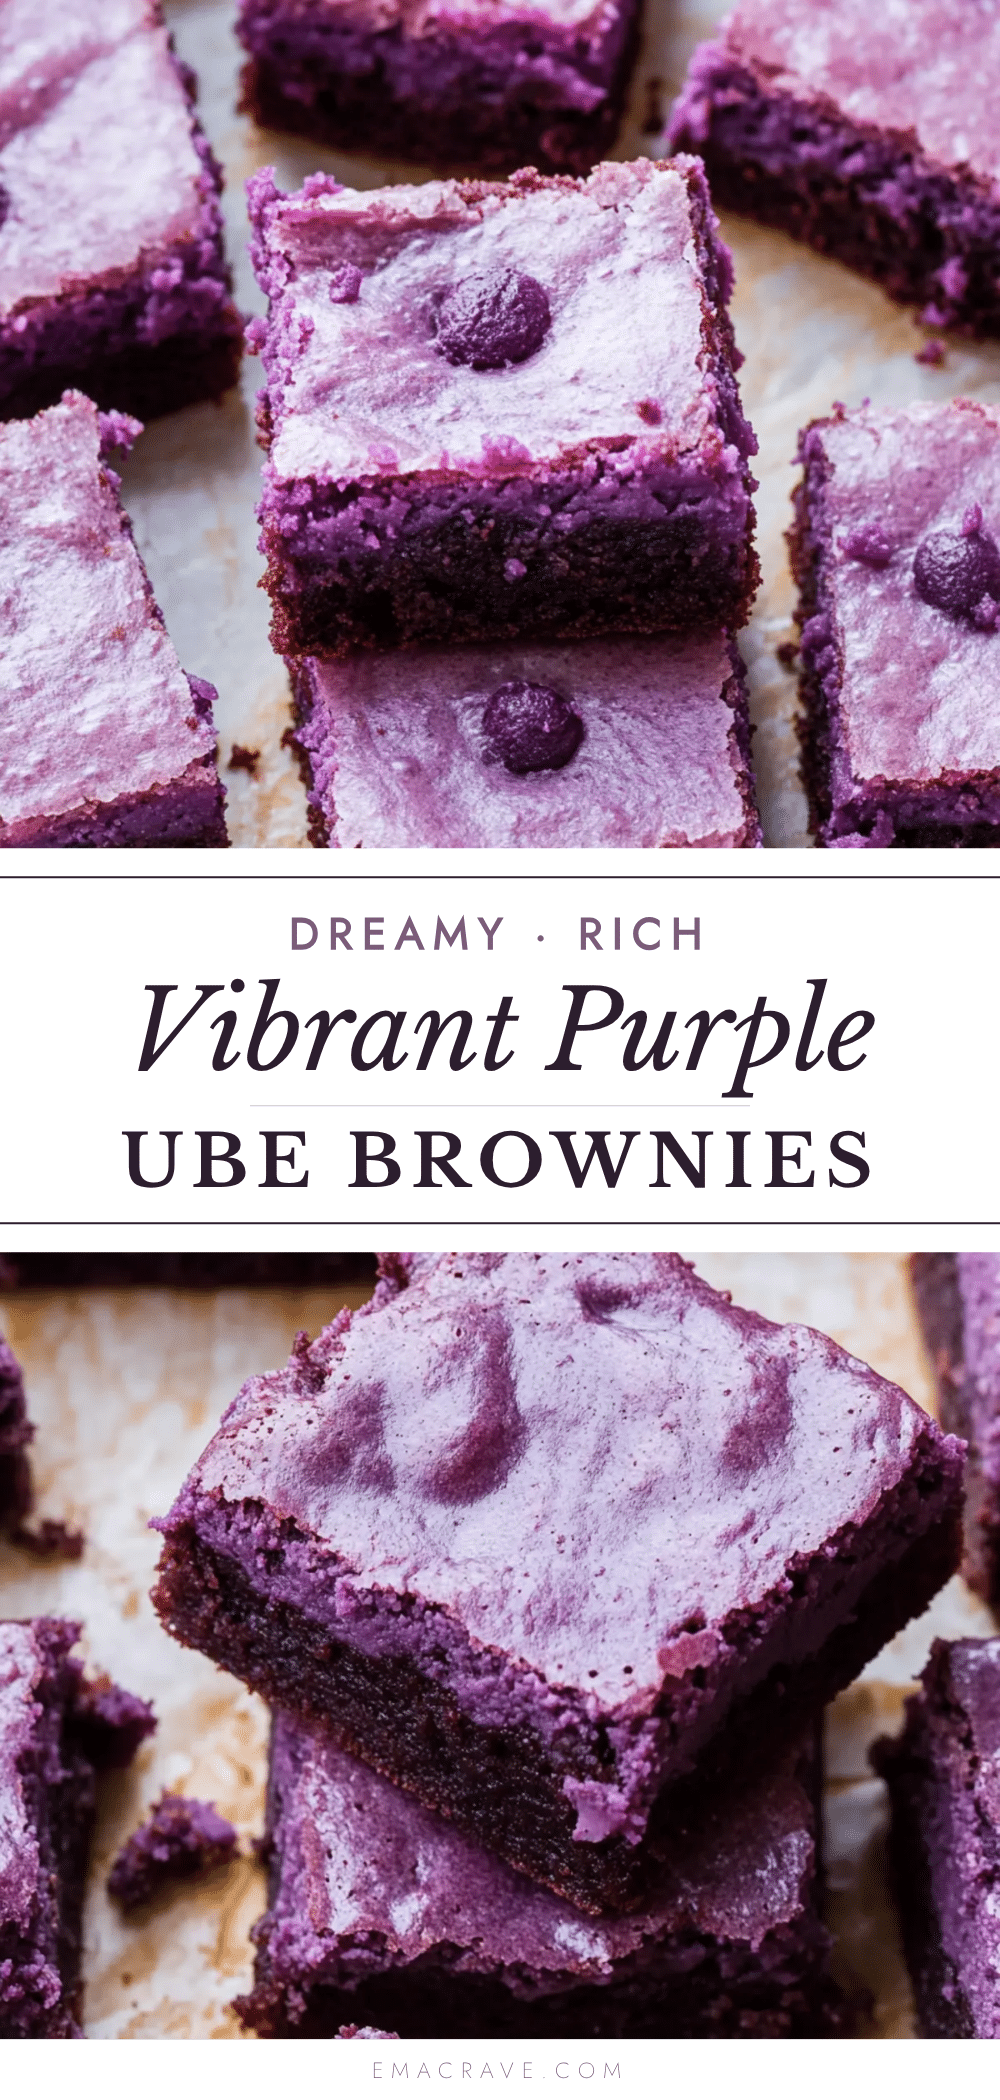
Easy Ube Brownies with Gooey Molten Center
These easy ube brownies with gooey molten center are the perfect combination of vibrant purple color and rich, fudgy texture. Made with ube extract and ube halaya, they deliver a nutty sweetness that pairs beautifully with chocolate, creating a dessert that’s both unexpected and comforting.
- Prep Time: 15 minutes
- Cook Time: 25 minutes
- Total Time: 40 minutes
- Yield: 9 servings 1x
- Category: Dessert
- Cuisine: Filipino-inspired
Ingredients
- ½ cup (113 g) unsalted butter, melted and slightly cooled
- 1 cup (200 g) granulated sugar
- 2 large eggs, at room temperature
- 2 teaspoons ube extract
- ¼ cup (80 g) ube halaya (ube jam)
- ¾ cup (90 g) all-purpose flour, spooned and leveled
- ¼ cup (20 g) unsweetened cocoa powder (preferably Dutch-processed)
- ½ teaspoon salt
- ¼ teaspoon baking powder
- ½ cup (85 g) white chocolate chips (optional)
- 2 tablespoons ube halaya or softened cream cheese (for gooey center)
Instructions
- Preheat your oven to 350°F (175°C). Line an 8×8-inch baking pan with parchment paper, leaving a 2-inch overhang on two opposite sides.
- In a large microwave-safe bowl, melt the butter in 30-second bursts, stirring between each, until just melted. Set aside to cool for 2-3 minutes.
- Add the sugar to the melted butter and whisk vigorously for about 1 minute until smooth and slightly thickened. Add the eggs one at a time, whisking well after each, until the batter is glossy and pale. Whisk in the ube extract and ¼ cup ube halaya until the color is deep purple.
- In a separate medium bowl, whisk together the flour, cocoa powder, salt, and baking powder until no lumps remain.
- Pour the dry ingredients into the wet mixture and fold gently with a rubber spatula until just combined. A few streaks of flour are okay. If using white chocolate chips, fold them in now.
- Set aside about ¼ cup of the batter in a small bowl. To the remaining batter, add 2 tablespoons of ube halaya (or softened cream cheese) and stir gently. Pour this ube-heavy batter into the prepared pan and spread evenly.
- Dollop the reserved plain batter on top in small spoonfuls. Use a knife or skewer to gently swirl it into the top layer, creating a marbled effect.
- Bake for 22-25 minutes. The edges should be set and the top shiny and cracked, but the center should still jiggle when shaken. A toothpick inserted into the center should come out with a few moist crumbs.
- Let the brownies cool in the pan on a wire rack for at least 30 minutes. The residual heat will set the gooey center.
- Use the parchment paper handles to lift the brownies out of the pan. Place on a cutting board and cut into 9 or 16 squares, wiping the knife clean between cuts.
Notes
Don’t overbake—the center should still jiggle when you pull them out. Use room temperature eggs to prevent the butter from seizing. Let the brownies cool completely before cutting to avoid a gooey mess. For best results, use high-quality ube extract like Butterfly brand. The brownies taste even better the next day as the ube flavor deepens.
Nutrition
- Serving Size: 1 brownie (based on
- Calories: 290
- Sugar: 26
- Sodium: 180
- Fat: 14
- Saturated Fat: 8
- Carbohydrates: 38
- Fiber: 2
- Protein: 4
Keywords: ube brownies, purple yam brownies, gooey brownies, fudgy brownies, ube dessert, Filipino dessert, easy brownie recipe



