Love this? Save it for later!
Share the inspiration with your friends
The first time I made sheet pan kebabs, it was honestly an accident. I had a pack of chicken thighs thawing in the fridge, a bell pepper on the brink of going soft, and absolutely zero patience for skewering anything. It was one of those weeknights where the idea of soaking wooden sticks and threading meat onto them felt like a personal insult. So I just dumped everything onto a sheet pan, tossed it with some spices, and slid it into the oven. My husband walked in, looked at the pan, and said, “Wait, where are the sticks?” I shrugged. Twenty-five minutes later, we were eating the best “kebab” dinner we’d had in months, and I haven’t looked back since.
That messy, last-minute dinner turned into a regular thing in our house. No soaking, no threading, no grill required. Just the same smoky, caramelized edges and juicy meat you expect from a traditional kebab, but with about half the effort. It’s the kind of recipe that makes you wonder why you ever bothered with skewers in the first place. And honestly, the clean-up is unbeatable—one pan, a quick rinse, and you’re done.
This easy sheet pan kebab recipe is now my go-to for busy weeknights when I need something fast, filling, and honestly, a little impressive. It’s also the meal I turn to when I want to use up whatever vegetables are lingering in the crisper drawer. The method is forgiving, the flavors are bold, and the timing is almost impossible to mess up. If you’ve ever wanted the taste of a grilled kebab without the hassle, this is your dinner.
Why You’ll Love This Recipe
This isn’t just another sheet pan dinner. After testing this method at least a dozen times (my family has been very patient), I can confidently say this is the best version. The high heat of the oven does something magical to the meat and veggies—it creates those deep, browned bits that taste like you spent hours over a charcoal grill.
- Quick & Easy: From start to finish, this meal is on the table in 25 minutes. No marinating required, though you can if you have the time.
- Simple Ingredients: You probably already have everything you need. Chicken, bell peppers, onion, olive oil, and a handful of pantry spices.
- Perfect for Busy Weeknights: Whether you’re juggling homework, meetings, or just want to eat dinner before 8 PM, this recipe delivers.
- Crowd-Pleaser: I’ve served this to picky kids, in-laws, and friends who “don’t really like chicken.” Empty plates every single time.
- Unbelievably Delicious: The caramelized edges on the chicken and the tender, slightly charred vegetables create a flavor combo that’s hard to beat.
What makes this recipe different from the rest? It’s the technique of roasting everything at a high temperature on a single pan, which concentrates the flavors without drying out the meat. The chicken stays juicy, the veggies get those beautiful charred spots, and everything cooks evenly. It’s comfort food reimagined—healthier, faster, but with the same soul-soothing satisfaction.
What Ingredients You Will Need
This recipe uses simple, wholesome ingredients to deliver bold flavor and satisfying texture without the fuss. Most of these are pantry staples, which makes this dish perfect for those nights when you haven’t planned dinner.
- 1.5 pounds boneless, skinless chicken thighs (or breasts): Chicken thighs are my preference here—they stay juicier and have more flavor. If you use breasts, keep an eye on them to avoid overcooking. Cut them into 1.5-inch cubes for even cooking.
- 2 bell peppers (any color): I like using a mix of red and yellow for sweetness and color. Green peppers work too, but they have a slightly more bitter edge. Cut them into 1-inch chunks.
- 1 large red onion: Red onion gets sweet and tender when roasted. Cut it into wedges, keeping the root intact slightly so the layers don’t fall apart.
- 2 tablespoons olive oil: A good quality extra virgin olive oil adds richness. You can also use avocado oil for a higher smoke point.
- 1 teaspoon smoked paprika: This is the secret to that “grilled” flavor. Regular paprika works in a pinch, but smoked is worth the splurge.
- 1 teaspoon garlic powder: Not fresh garlic here—powdered garlic coats the meat better and doesn’t burn as easily at high heat.
- 1 teaspoon onion powder: Adds a savory depth that complements the fresh onion.
- 1/2 teaspoon ground cumin: Warm, earthy notes that pair beautifully with the smoked paprika.
- 1/2 teaspoon dried oregano: A little herbaceous lift. You can use Italian seasoning if that’s what you have.
- Salt and black pepper to taste: I use about 1 teaspoon of salt and 1/2 teaspoon of pepper for this amount of meat and veggies.
- Optional: fresh lemon wedges and chopped parsley for serving: A squeeze of lemon right before eating brightens everything up.
Ingredient Selection Tips: For the best texture, look for chicken thighs that are uniform in size so they cook evenly. I personally prefer organic chicken from a trusted brand, but any good-quality chicken works. For the bell peppers, choose ones that feel heavy for their size and have firm, glossy skin. If you want to swap in other vegetables, zucchini (cut into thick rounds), cherry tomatoes, or even chunks of eggplant work beautifully.
Equipment Needed
You don’t need much for this recipe, which is part of the appeal. Here’s what you’ll need:
- Large sheet pan (half-sheet pan, 18×13 inches): This is the star of the show. A rimmed sheet pan prevents juices from spilling into your oven. I use a heavy-duty aluminum pan, but any sturdy baking sheet works.
- Parchment paper or aluminum foil (optional but recommended): Lining the pan makes cleanup even easier. If you use foil, give it a light spray of cooking oil to prevent sticking.
- Large mixing bowl: For tossing the chicken and veggies with oil and spices. A glass or stainless steel bowl works best.
- Sharp knife and cutting board: A good chef’s knife makes cutting the chicken and vegetables quick and safe.
- Measuring spoons: For the spices. Eyeballing it works too, but for consistency, I recommend measuring.
Budget-Friendly Options: If you don’t have a large sheet pan, you can use two smaller pans, just rotate them halfway through cooking. No parchment paper? No problem—just oil the pan well. I’ve made this on a cheap dollar-store baking sheet, and it turned out just fine. The key is not overcrowding the pan, so if your pan is small, spread things out across two pans.
Preparation Method
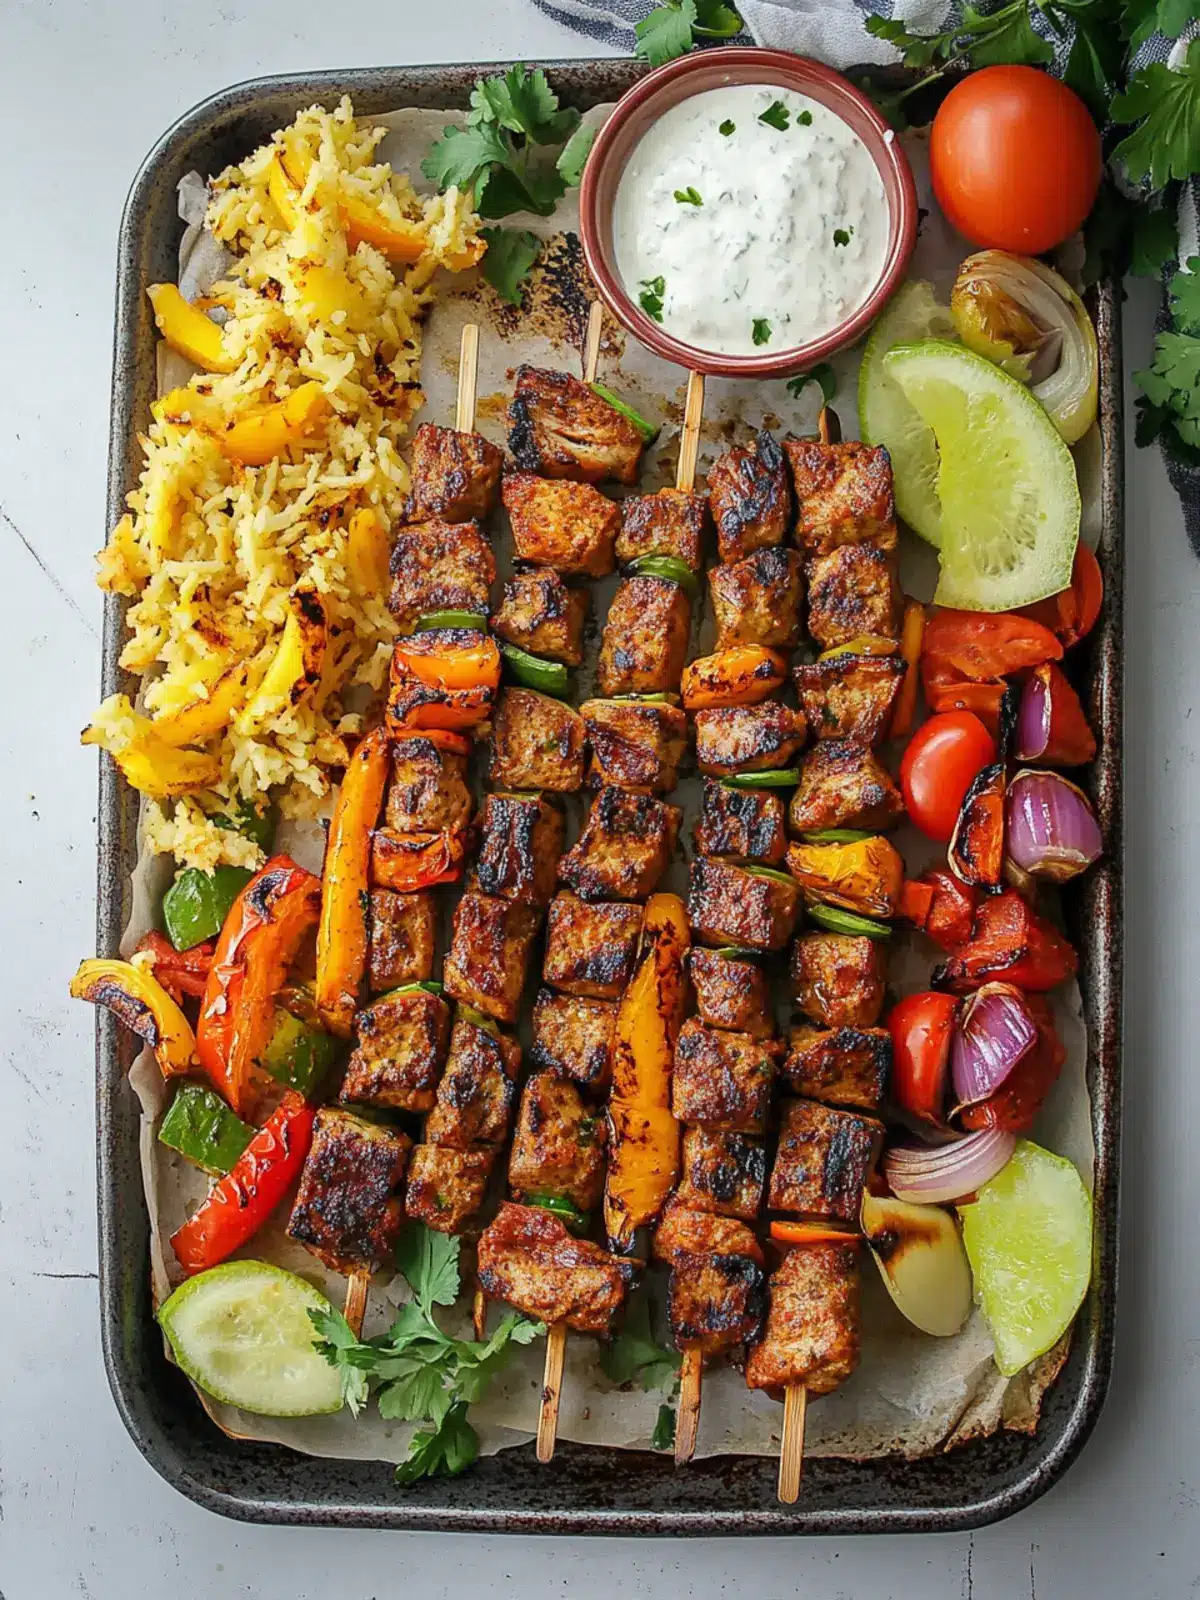
- Preheat your oven to 425°F (220°C). This high heat is crucial for getting those caramelized edges. Let the oven fully preheat—don’t rush this step. While it heats, line your sheet pan with parchment paper or foil for easy cleanup.
- Prep the chicken and vegetables. Cut 1.5 pounds of chicken thighs into 1.5-inch cubes. Cut 2 bell peppers into 1-inch chunks. Cut 1 large red onion into wedges—about 8 wedges per onion. Try to keep the pieces roughly the same size so everything cooks evenly.
- Season everything in a large bowl. Add the chicken, peppers, and onion to the bowl. Drizzle with 2 tablespoons of olive oil. Sprinkle with 1 teaspoon smoked paprika, 1 teaspoon garlic powder, 1 teaspoon onion powder, 1/2 teaspoon cumin, 1/2 teaspoon oregano, 1 teaspoon salt, and 1/2 teaspoon black pepper. Toss with your hands (or a spatula) until everything is evenly coated. Make sure the spices get into all the nooks and crannies of the chicken.
- Spread onto the sheet pan. Dump the mixture onto the prepared pan. Spread it into a single, even layer. Don’t overcrowd—if the pieces are touching too much, they’ll steam instead of roast. Leave a little space between each piece. If you’re using a smaller pan, use two pans or cook in batches.
- Roast for 20-25 minutes. Place the pan on the middle rack of the oven. Halfway through (at about 12 minutes), give the pan a shake or use a spatula to flip the pieces. This ensures even browning. At 20 minutes, check the chicken—it should be golden brown on the edges and cooked through (internal temperature of 165°F / 74°C). If you want more char, leave it for an extra 3-5 minutes.
- Rest and serve. Remove the pan from the oven and let it rest for 2-3 minutes. This allows the juices to redistribute. Squeeze fresh lemon juice over the top and sprinkle with chopped parsley if you like. Serve immediately over rice, in warm pita bread, or on its own with a side salad.
Sensory Cues: At the 12-minute mark, your kitchen should smell smoky and savory. The chicken will look golden with darker spots on the edges. The peppers will be softened and starting to wrinkle. The onions will be translucent with caramelized tips. If you hear a gentle sizzle when you open the oven, that’s a good sign—your pan is hot enough.
Cooking Tips & Techniques
I’ve made this recipe enough times to know exactly where things can go wrong. Here are my hard-earned tips:
- Don’t skip the high heat. I once tried this at 375°F because I was worried about burning. The result? Soggy, sad chicken. The 425°F heat is non-negotiable for that kebab-like char.
- Pat the chicken dry. Before cutting, pat the chicken thighs dry with paper towels. This removes excess moisture, which helps the spices stick and promotes browning. Wet chicken steams, dry chicken sears.
- Cut uniform pieces. This is the most common mistake I see. If your chicken pieces are all different sizes, some will be overdone while others are undercooked. Take the extra 30 seconds to make them uniform.
- Don’t overcrowd the pan. If the pieces are piled on top of each other, they’ll release steam and never get that beautiful char. Give them room to breathe. If you’re cooking for a crowd, use two pans.
- Use the bottom rack for extra char. If you want more browning, move the pan to the bottom rack for the last 5 minutes of cooking. Just watch it closely so it doesn’t burn.
- Let it rest. I know it’s tempting to dig in right away, but letting the chicken rest for a couple of minutes makes a huge difference. The juices settle, and the meat stays tender.
My Biggest Failure: The first time I made this, I used chicken breasts cut into tiny cubes. They cooked in about 10 minutes and turned into dry, rubbery bits. I learned that chicken thighs are more forgiving, and bigger pieces (1.5 inches) are the sweet spot for texture.
Variations & Adaptations
This recipe is incredibly flexible. Here are some ways to change it up:
- Make it Mediterranean: Swap the cumin and paprika for dried oregano, thyme, and a pinch of cinnamon. Add cherry tomatoes and chunks of zucchini. Serve with tzatziki sauce.
- Make it Spicy: Add 1/2 teaspoon of cayenne pepper or red pepper flakes to the spice mix. You can also toss in some sliced jalapeños before roasting.
- Make it Dairy-Free: This recipe is already dairy-free as written. Just make sure your pita or side dishes are also dairy-free.
- Try Different Proteins: This method works beautifully with beef sirloin (cut into 1-inch cubes), shrimp (reduce cooking time to 10-12 minutes), or firm tofu (press and cube, roast for 20 minutes).
- Vegetable Variations: Swap in mushrooms, cherry tomatoes, asparagus (cut into 2-inch pieces), or even pineapple chunks for a sweet twist. Just be mindful of cooking times—softer veggies like zucchini may need less time.
- Air Fryer Adaptation: If you have an air fryer, cook the seasoned chicken and veggies at 400°F (200°C) for 12-15 minutes, shaking the basket halfway through. You may need to cook in batches.
Personal Variation: My favorite version uses a marinade of yogurt, lemon juice, and garam masala for 30 minutes before roasting. It gives the chicken a tangy, Indian-inspired flavor that’s absolutely addictive. I serve it with easy Japanese seasoned rice for a fusion dinner that never gets old.
Serving & Storage Suggestions
This dish is incredibly versatile when it comes to serving. Here’s how I like to enjoy it:
- Serving Temperature: Serve hot, right out of the oven. The chicken and veggies are at their best when fresh and sizzling.
- Presentation: Arrange the chicken and vegetables on a large platter. Garnish with fresh parsley or cilantro and lemon wedges. It looks beautiful and rustic.
- Complementary Dishes: This pairs wonderfully with warm pita bread, fluffy basmati rice, or a simple green salad with lemon vinaigrette. For a heartier meal, serve it alongside cozy red lentil soup for a satisfying dinner combo.
- Storage: Store leftovers in an airtight container in the refrigerator for up to 3 days. The flavors actually meld together and get even better overnight.
- Reheating: The best way to reheat is in a hot skillet or back in the oven at 400°F (200°C) for 5-7 minutes. Avoid the microwave—it will make the chicken rubbery and the veggies soggy.
- Freezing: You can freeze the cooked chicken and veggies in a freezer-safe bag for up to 2 months. Thaw in the refrigerator overnight and reheat in a skillet.
Flavor Development: If you have leftovers, try chopping up the chicken and veggies and using them in a wrap with some hummus and fresh greens. It makes an incredible next-day lunch.
Nutritional Information & Benefits
This recipe is naturally high in protein and packed with vitamins from the colorful vegetables. Here’s an approximate breakdown per serving (based on 4 servings):
- Calories: 320-350
- Protein: 32g
- Fat: 18g
- Carbohydrates: 10g
- Fiber: 3g
- Sugar: 5g
Health Benefits: Chicken thighs are a great source of B vitamins, particularly B6 and B12, which support energy metabolism. Bell peppers are loaded with vitamin C—just one cup provides over 150% of your daily needs. Red onions contain quercetin, a powerful antioxidant that supports heart health. This meal is also naturally gluten-free and low-carb, making it suitable for a variety of dietary preferences.
Dietary Considerations: This recipe is dairy-free, nut-free, and egg-free. For a lower-fat option, use chicken breast instead of thighs. If you’re watching your sodium, reduce the added salt to 1/2 teaspoon and rely on the spices for flavor.
I personally love that this meal feels indulgent but is actually quite balanced. It’s the kind of dinner that leaves you feeling full and satisfied without being weighed down.
Conclusion
This easy sheet pan kebab recipe has honestly become a lifeline in my kitchen. It’s the meal I make when I’m tired, when I’m short on time, and when I want something that feels special without any of the fuss. The smoky, caramelized chicken and tender vegetables come together in just 25 minutes, and the clean-up is almost non-existent. What more could you ask for from a weeknight dinner?
I encourage you to make this recipe your own. Swap in your favorite vegetables, adjust the spices to your liking, or try it with a different protein. That’s the beauty of this method—it’s forgiving, flexible, and always delicious. If you’re looking for another quick and satisfying dinner option, you might also enjoy this quick honey garlic shrimp recipe for another high-protein meal that comes together in minutes.
I’d love to hear how this turns out for you! Drop a comment below and let me know what variations you tried. Did you add extra spice? Swap in beef? Serve it with a yogurt sauce? Share your creation and tag me on social media—I’m always looking for new ideas. Until next time, happy cooking!
Frequently Asked Questions
Can I use chicken breast instead of thighs?
Yes, you can! Just keep in mind that chicken breasts cook faster and can dry out more easily. Cut them into 1.5-inch cubes and check for doneness at 18 minutes instead of 20. Using a meat thermometer is your best friend here—165°F (74°C) is the target.
Do I need to marinate the chicken first?
Not at all. The spice rub provides plenty of flavor in the short roasting time. However, if you have 30 minutes to spare, you can toss the chicken with the oil and spices and let it sit in the fridge while you prep the vegetables. It adds a little extra depth, but it’s totally optional.
Can I make this recipe vegetarian?
Absolutely! Swap the chicken for firm tofu (pressed and cubed), halloumi cheese (cubed), or extra vegetables like mushrooms, zucchini, and eggplant. If using tofu or halloumi, roast for 20 minutes and check for doneness. The spice blend works beautifully with all of these options.
What can I serve with sheet pan kebabs?
The possibilities are endless! I love serving this with warm pita bread, fluffy basmati rice, or a simple cucumber and tomato salad. You can also wrap everything in a tortilla with some tzatziki or hummus for an easy kebab wrap. For a low-carb option, serve it over a bed of greens.
How do I prevent the vegetables from burning?
If you’re worried about the vegetables getting too dark, cut them into larger chunks (about 1.5 inches) so they cook at the same rate as the chicken. You can also add softer vegetables like zucchini or cherry tomatoes halfway through the cooking time. And remember, a little char is a good thing—it adds flavor!
Pin This Recipe!
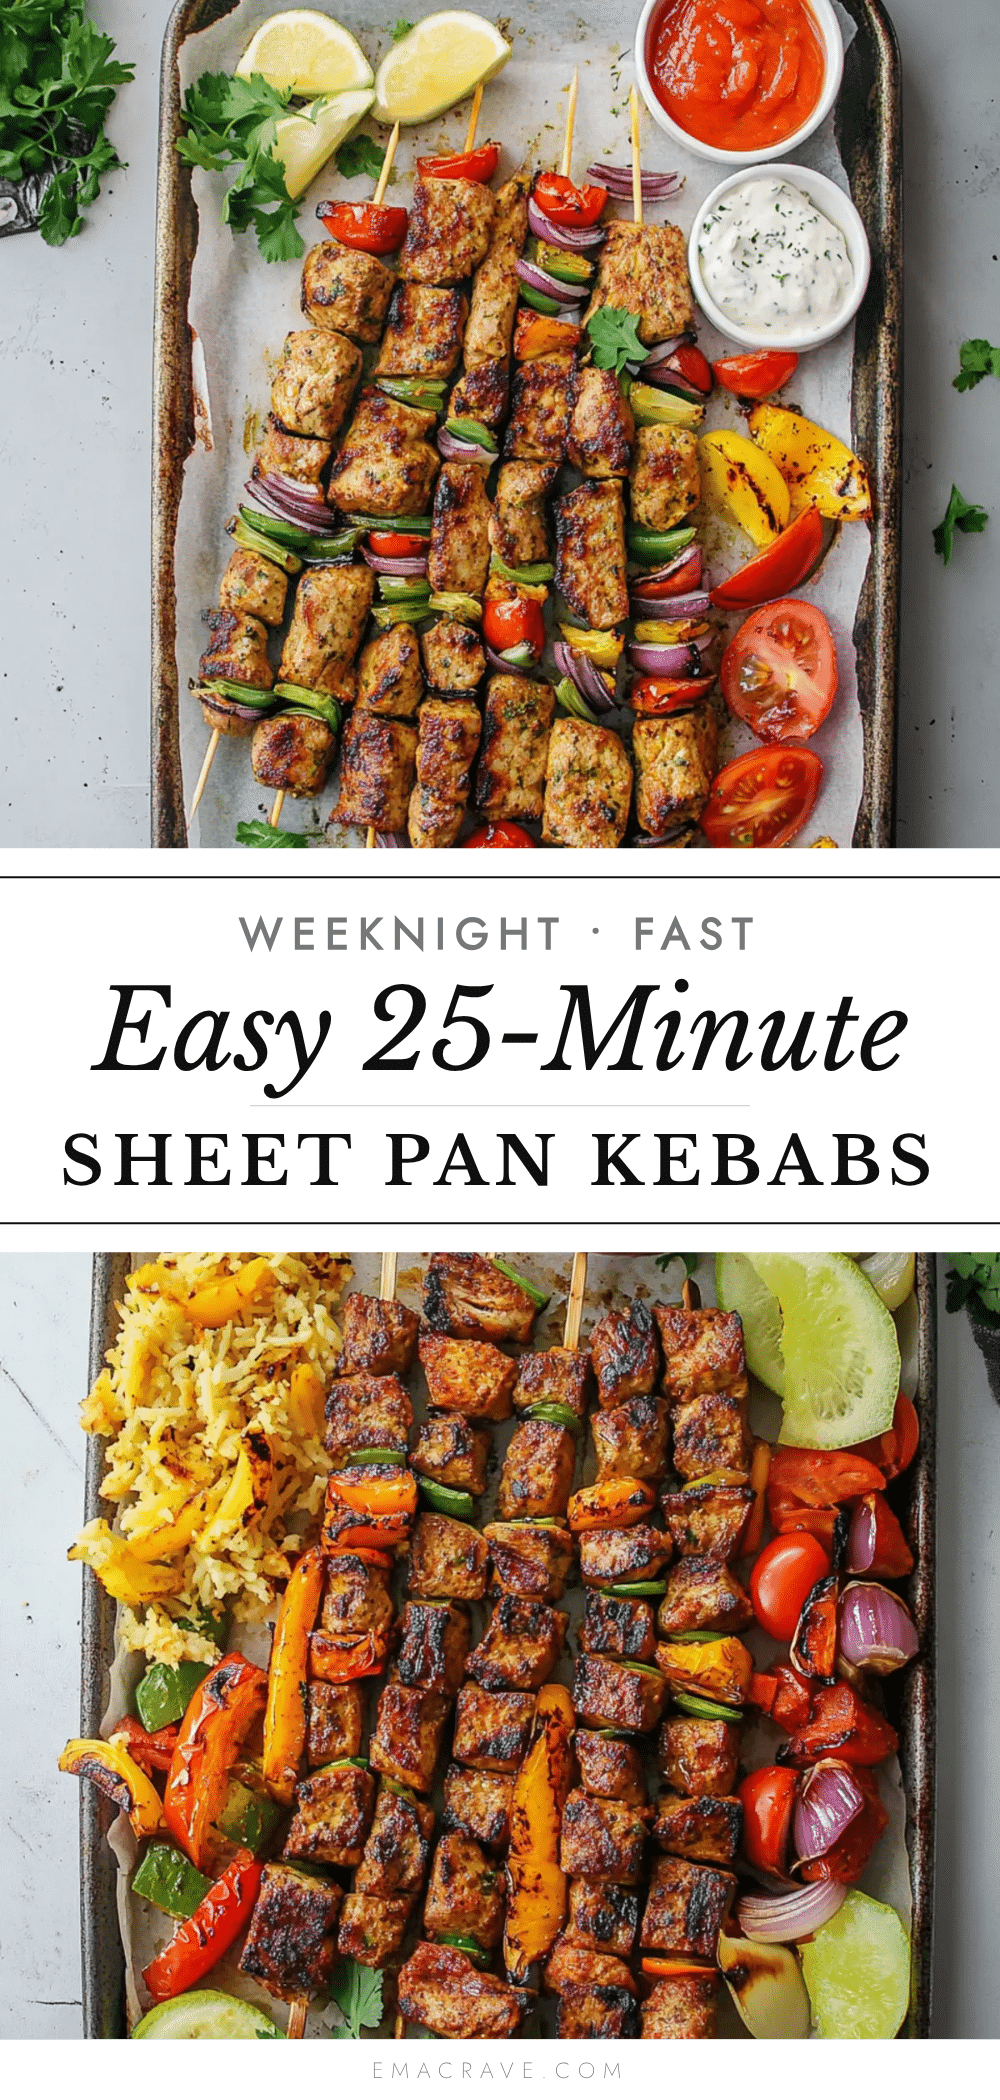
Easy Sheet Pan Kebabs: Best 25-Minute Dinner Recipe
This easy sheet pan kebab recipe delivers smoky, caramelized chicken and tender vegetables in just 25 minutes with minimal effort and cleanup. No skewers, no grill, just a single pan for a delicious weeknight dinner.
- Prep Time: 5 minutes
- Cook Time: 20-25 minutes
- Total Time: 25-30 minutes
- Yield: 4 servings 1x
- Category: Main Course
- Cuisine: Mediterranean-inspired
Ingredients
- 1.5 pounds boneless, skinless chicken thighs (or breasts), cut into 1.5-inch cubes
- 2 bell peppers (any color), cut into 1-inch chunks
- 1 large red onion, cut into wedges
- 2 tablespoons olive oil
- 1 teaspoon smoked paprika
- 1 teaspoon garlic powder
- 1 teaspoon onion powder
- 1/2 teaspoon ground cumin
- 1/2 teaspoon dried oregano
- 1 teaspoon salt
- 1/2 teaspoon black pepper
- Optional: fresh lemon wedges and chopped parsley for serving
Instructions
- Preheat your oven to 425°F (220°C). Line a large sheet pan with parchment paper or aluminum foil for easy cleanup.
- Cut 1.5 pounds of chicken thighs into 1.5-inch cubes. Cut 2 bell peppers into 1-inch chunks. Cut 1 large red onion into wedges (about 8 wedges per onion).
- In a large mixing bowl, combine the chicken, peppers, and onion. Drizzle with 2 tablespoons of olive oil. Sprinkle with 1 teaspoon smoked paprika, 1 teaspoon garlic powder, 1 teaspoon onion powder, 1/2 teaspoon cumin, 1/2 teaspoon oregano, 1 teaspoon salt, and 1/2 teaspoon black pepper. Toss until everything is evenly coated.
- Spread the mixture onto the prepared sheet pan in a single, even layer. Avoid overcrowding to ensure proper roasting.
- Roast for 20-25 minutes. Halfway through (at about 12 minutes), shake the pan or use a spatula to flip the pieces for even browning. The chicken should be golden brown and cooked through (internal temperature of 165°F / 74°C).
- Remove from the oven and let rest for 2-3 minutes. Squeeze fresh lemon juice over the top and sprinkle with chopped parsley if desired. Serve immediately over rice, in warm pita bread, or on its own with a side salad.
Notes
Pat chicken dry before cutting for better browning. Cut uniform pieces for even cooking. Don’t overcrowd the pan. For extra char, move pan to bottom rack for last 5 minutes. Let rest before serving. Leftovers keep in refrigerator for up to 3 days; reheat in a skillet or oven.
Nutrition
- Serving Size: 1 serving (about 1/4
- Calories: 320350
- Sugar: 5
- Sodium: 600
- Fat: 18
- Saturated Fat: 4
- Carbohydrates: 10
- Fiber: 3
- Protein: 32
Keywords: sheet pan kebab, easy weeknight dinner, 25-minute meal, chicken kebab, one-pan dinner, healthy dinner, gluten-free dinner



