Love this? Save it for later!
Share the inspiration with your friends
My phone buzzed at 10:47 PM on a Tuesday. It was my sister, and she sent a photo of a graveyard made entirely of pudding cups. “We need these for the Halloween party,” she typed. I stared at the screen for a second. She had little tombstone cookies sticking out of chocolate pudding, crushed Oreos sprinkled like dirt, and these goofy little mummy faces drawn on the cups with white icing. Honestly, I laughed out loud. It looked ridiculous in the best way possible.
I told her I could probably whip something similar up, but I had no idea how much my kids would lose their minds over them. I made a test batch the next afternoon. By the time the chocolate pudding had set, my six-year-old was already asking if he could eat “the dirt” for a snack. I love when a dessert feels more like a craft project than actual baking. These Easy Mummy’s Tomb Dirt Cups are exactly that — no oven required, minimal mess, and maximum creepy-cute factor.
You know how some Halloween treats look amazing but taste like cardboard? That is not the case here. These little cups are rich, creamy, and perfectly spooky. They come together in about twenty minutes of actual work, and the rest is just waiting for the pudding to set. If you are looking for a dessert that lets the kids help without turning your kitchen into a disaster zone, this is the one. Seriously, I have made these for two Halloweens in a row now, and they disappear faster than the candy bowl.
Why You’ll Love This Recipe
I have tested this recipe about four times now, tweaking the pudding consistency and the cookie-to-cream ratio. Here is why I keep coming back to it:
- No Baking Required: This is a no-bake dessert. You do not even need to turn on the oven. Perfect for hot October days or when you just do not feel like dealing with flour everywhere.
- Kid-Friendly Activity: My kids decorated their own mummy faces, and it kept them busy for a solid thirty minutes. The mess is contained to a few cups and some icing tubes.
- Make-Ahead Magic: You can assemble these the night before your party. The flavors actually get better as the cookies soften into the pudding overnight.
- Simple Ingredients: Chocolate pudding, Oreos, cream cheese, and some candy eyes. That is basically it. No weird specialty items.
- Customizable for Allergies: Swap in dairy-free pudding and vegan cookies, and you have a treat that almost everyone can enjoy.
- Portion-Controlled Fun: Each cup is its own serving. No cutting, no plates, no arguments over who got the bigger slice.
What makes these different from every other dirt cup recipe out there? It is the cream cheese layer. Most recipes just dump pudding on top of crushed cookies. I add a layer of sweetened cream cheese in the middle. It gives the whole thing a cheesecake-like richness that takes it from “kid snack” to “adult-approved dessert.” The first time I served these at a neighborhood gathering, three different people asked for the recipe. That never happens with my regular brownies.
What Ingredients You Will Need
This recipe uses simple, pantry-friendly ingredients, but each one plays a specific role in building that creamy, crunchy, spooky texture. I have tested a few variations, so I will share what works best.
For the Pudding Layer
- 2 (3.9-ounce) boxes instant chocolate pudding mix (I prefer Jell-O brand for consistent texture. The sugar-free version works fine too, but the texture is slightly less creamy.)
- 3 cups cold whole milk (Use 2% if you must, but whole milk gives the pudding that silky mouthfeel. For dairy-free, oat milk works surprisingly well here.)
For the Cream Cheese Layer

- 8 ounces cream cheese, softened (Full-fat is non-negotiable here. Low-fat cream cheese makes the layer too runny. Let it sit on the counter for thirty minutes before mixing.)
- 1/4 cup powdered sugar (Adds sweetness without grittiness. You can use honey, but it changes the consistency.)
- 1 teaspoon vanilla extract (Pure vanilla, not imitation. It makes a subtle but noticeable difference.)
- 1 cup heavy cream (Whipped to stiff peaks. This lightens the cream cheese layer so it is fluffy, not dense.)
For the “Dirt” and Decoration
- 1 (14.3-ounce) package Oreo cookies (Regular or Double Stuf both work. You will use the whole package, including the filling. Do not separate the cookies.)
- 1/2 cup unsalted butter, melted (This binds the crushed cookies so they form a slightly clumpy “dirt” texture instead of just dust.)
- 12 clear plastic cups (7-ounce size) (Clear cups are essential so you can see the layers. I found a pack of 50 at the dollar store.)
- 12 Milano cookies or rectangular shortbread cookies (These become the tombstones. Milano cookies have that perfect rectangular shape.)
- 1 tube white decorating icing (For drawing mummy bandages on the cups. The gel kind works better than stiff buttercream.)
- 24 candy eyeballs (You can find these at any craft store or in the baking aisle. They are cheap and last forever.)
- Black decorating gel (Optional, for writing “RIP” on the tombstones.)
Equipment Needed
You do not need fancy gadgets for this one. Here is what I use:
- Electric hand mixer or stand mixer (For whipping the cream and beating the cream cheese. A whisk works if you have strong arms, but I would not recommend it.)
- Food processor or zip-top bag and rolling pin (For crushing the Oreos. The food processor gives you a more uniform crumb, but smashing them in a bag is oddly satisfying.)
- Large mixing bowls (You will need at least two: one for the pudding and one for the cream cheese mixture.)
- Measuring cups and spoons (Standard set will do.)
- Spatula (For scraping every last bit of cream cheese out of the bowl. Do not waste it.)
- Small offset spatula or butter knife (For smoothing the layers in the cups.)
- 12 clear plastic cups (As mentioned above. You can use small mason jars if you want a more rustic look.)
If you do not have a food processor, just toss the Oreos into a gallon-sized zip-top bag and go to town with a rolling pin. My kids actually prefer this method because they get to smash things. It is a great stress reliever, honestly.
Preparation Method
I have broken this down into stages so you do not feel overwhelmed. The whole process takes about twenty minutes of active work, plus two hours of chilling time.
Step 1: Make the Pudding
In a large bowl, whisk together the two boxes of instant chocolate pudding mix and 3 cups of cold whole milk. Whisk vigorously for about two minutes until the mixture thickens. You will feel it get heavier as you stir. Let it sit for five minutes to set up fully. Do not skip this rest time. If you layer it too early, it will be too runny and mess up your dirt layers.
Step 2: Crush the Oreos
While the pudding sets, crush the entire package of Oreos. You want a mix of fine crumbs and slightly chunkier pieces. If you use a food processor, pulse about ten times. Do not turn it into dust. If you use the bag method, leave a few pea-sized chunks. Transfer the crumbs to a medium bowl and pour the 1/2 cup of melted butter over them. Stir with a fork until the butter is evenly distributed. The crumbs should look like wet sand. Set aside.
Step 3: Make the Cream Cheese Layer
In a separate large bowl, beat the softened cream cheese with an electric mixer on medium speed until it is smooth and fluffy, about two minutes. Add the powdered sugar and vanilla extract, and beat for another minute until combined. In another bowl, whip the heavy cream on high speed until stiff peaks form. This takes about three to four minutes. Be careful not to over-whip, or you will end up with butter. Gently fold the whipped cream into the cream cheese mixture using a spatula. Fold until no white streaks remain. This layer should be light and airy, almost like a mousse.
Step 4: Assemble the Cups
Grab your 12 clear cups. Spoon about two tablespoons of the Oreo “dirt” into the bottom of each cup. Press it down gently with the back of a spoon. This creates the base of the grave. Next, spoon about three tablespoons of the chocolate pudding on top of the dirt layer. Spread it evenly. Then, add a generous tablespoon of the cream cheese mixture. Smooth it out. Finally, top with another two tablespoons of the crushed Oreos. You want the top to look like a freshly dug grave, so do not press this layer down. Leave it loose and crumbly.
Step 5: Chill
Place the assembled cups in the refrigerator for at least two hours. Overnight is even better. The chilling time allows the layers to set and the flavors to meld together. If you try to decorate them immediately, the icing will slide right off the cold cups.
Step 6: Decorate the Mummies and Tombs
Once the cups are fully chilled, it is decoration time. Take your Milano cookies and use the black decorating gel to write “RIP” on each one. Stick one cookie into each cup like a tombstone. Now, for the mummies: using the white decorating icing, draw horizontal lines across the outside of each cup. Do not cover the entire cup — just the front half. Leave small gaps for the candy eyeballs. Press two candy eyeballs into the icing on each cup. The icing acts as glue. Let the decorated cups sit for ten minutes so the icing sets before serving.
Cooking Tips & Techniques
I have made these cups about six times now, and I have definitely learned a few things the hard way. Here are my best tips:
- Do not skip the butter in the Oreo crumbs. The first time I made these, I just used plain crushed Oreos. The “dirt” was dry and dusty, and it did not stick together at all. The melted butter gives it that realistic, slightly clumpy soil texture. Trust me on this one.
- Let the cream cheese soften completely. I once tried to speed things up by microwaving the cream cheese for thirty seconds. It melted in spots and made the whole layer grainy. Just let it sit out for thirty minutes. Patience pays off.
- Use a piping bag for the pudding. If you have one, it makes layering so much cleaner. Just snip the tip and fill each cup without dripping. If you do not have a piping bag, use a zip-top bag with a corner snipped off. No one will judge you.
- Make extra “dirt.” I always crush more Oreos than I think I need. Kids love to sprinkle extra on top, and it looks better when the grave is mounded slightly.
- Chill the cups before decorating. The first time I tried to draw mummy bandages on warm cups, the icing just melted into a puddle. Cold cups give you a clean canvas.
One failure I will admit: I once used store-bought chocolate pudding cups instead of making my own from a box. It was a disaster. The texture was too thin, and the layers all ran together. Instant pudding from a box is the way to go. It sets up firm enough to hold its shape.
Variations & Adaptations
This recipe is incredibly flexible. Here are a few ways I have changed it up:
- Peanut Butter Dirt Cups: Add 1/4 cup of creamy peanut butter to the cream cheese layer. It gives the whole thing a Reese’s cup vibe. My husband says this version is his favorite.
- Pumpkin Spice Version: Swap the chocolate pudding for vanilla pudding and add 1 teaspoon of pumpkin pie spice to the cream cheese layer. Use ginger snaps instead of Oreos for the dirt. It tastes like fall in a cup.
- Vegan Adaptation: Use dairy-free chocolate pudding (Simply Delish makes a good one), vegan cream cheese (Miyoko’s is my go-to), coconut cream instead of heavy cream, and vegan Oreos (the original ones are actually vegan). It works perfectly.
- Gluten-Free Option: Use gluten-free chocolate sandwich cookies (Glutino makes a decent version) and gluten-free shortbread cookies for the tombstones. No one will notice the difference.
- Spider Web Cups: Instead of mummy bandages, use black decorating gel to draw spider webs on the cups. Add a plastic spider ring to each cup for a creepy touch.
I tried a version last year where I added a layer of crushed s’mores crescent rolls in the middle, but honestly, it was too much. The cream cheese layer is the star here. Keep it simple.
Serving & Storage Suggestions
These cups are best served cold, straight from the fridge. The contrast between the creamy pudding, the fluffy cream cheese, and the crunchy Oreo dirt is perfect when everything is chilled. I like to set them out on a tray lined with fake spider webs or orange tissue paper for that full Halloween effect.
For a party, I recommend assembling the cups the night before and decorating them about an hour before guests arrive. The mummy icing can start to soften if it sits at room temperature for too long. If you are serving these at a school party or a potluck, transport them in a shallow box or a baking sheet with sides to keep them from tipping over.
Storage is simple. Cover the cups with plastic wrap or pop a lid on each one if your cups have lids. They will keep in the refrigerator for up to four days. The Oreo crumbs will soften over time, which actually gives the whole thing a cake-like texture. I personally love them on day two when the flavors have really melded together. Freezing is not recommended. The cream cheese layer gets watery when thawed, and nobody wants watery dirt.
If you are looking for a fun pairing, serve these alongside a warm batch of slow cooker pumpkin French toast casserole for a full Halloween brunch spread. The warm, spiced casserole balances the cold, creamy dirt cups beautifully.
Nutritional Information & Benefits
Let us be real: these are a treat, not a health food. But here is the estimated breakdown per cup (assuming 12 servings):
- Calories: Approximately 380
- Fat: 22g
- Carbohydrates: 42g
- Protein: 6g
- Sugar: 32g
- Fiber: 2g
On the bright side, the cream cheese and heavy cream provide a decent amount of calcium and vitamin A. The cocoa in the chocolate pudding contains antioxidants. And the Oreos? Well, they provide joy. That counts for something, right?
If you are watching your sugar intake, you can use sugar-free pudding mix and reduced-fat cream cheese. I have tested that version, and it is about 280 calories per cup. The texture is slightly less luxurious, but it still satisfies that Halloween craving. For a lighter option that still feels indulgent, these light forgotten cookies are another great guilt-free dessert to have in your rotation.
Conclusion
These Easy Mummy’s Tomb Dirt Cups are the kind of recipe that makes you look like a Halloween hero without actually working that hard. They are cute enough to impress at a party, simple enough to make with kids, and delicious enough that people will ask for seconds. The cream cheese layer is the secret weapon that sets them apart from every other dirt cup recipe out there.
I love that this recipe lets me get creative without stressing over baking times or complicated techniques. It is forgiving, flexible, and honestly, a little bit silly. That is what Halloween should be — a little bit spooky, a little bit silly, and a whole lot of fun. Whether you make them for a classroom party, a neighborhood gathering, or just a cozy night in with your family, I promise they will be a hit.
I would love to hear how yours turn out. Did you add any fun variations? Did your kids go wild with the candy eyeballs? Drop a comment below and let me know. And if you are looking for more easy Halloween treats, check out my decadent pumpkin chocolate cheesecake for another showstopping dessert. Happy haunting, friends!
Frequently Asked Questions
Can I use homemade chocolate pudding instead of instant?
You can, but I do not recommend it. Homemade pudding is thinner and takes much longer to set. Instant pudding gives you that firm, sliceable texture that holds the layers apart. If you insist on homemade, cook it until it is very thick and chill it for at least four hours before layering.
How far in advance can I make these?
You can assemble the cups up to two days before your event. Just wait to add the mummy decorations until the day you serve them. The icing can bleed into the cups if it sits for too long. The Oreo crumbs will soften over time, so if you want a crunchier texture, make them the morning of your party.
Can I use a different type of cookie for the tombstone?
Absolutely. Milano cookies are my favorite because they are the perfect size and shape, but you can use any rectangular cookie. Graham crackers work in a pinch, though they are a bit flimsy. You can also use chocolate wafer cookies or even homemade shortbread. Just make sure the cookie is sturdy enough to stand upright in the pudding.
What if I cannot find candy eyeballs?
No problem. You can draw eyes on the cups using black decorating gel, or skip the mummy theme entirely and make “zombie” cups instead. Just write “ZOMBIE” on the tombstones and draw messy black lines on the cups. You can also use mini chocolate chips pressed into the icing for a simpler eye effect.
Can I make these in a large dish instead of individual cups?
Yes, but the presentation changes completely. Use a 9×13-inch baking dish and layer the ingredients the same way. You will lose the individual mummy faces, but you can still decorate the top with tombstones and candy eyes. Just spoon it into bowls when serving. The texture and taste will be exactly the same.
Pin This Recipe!
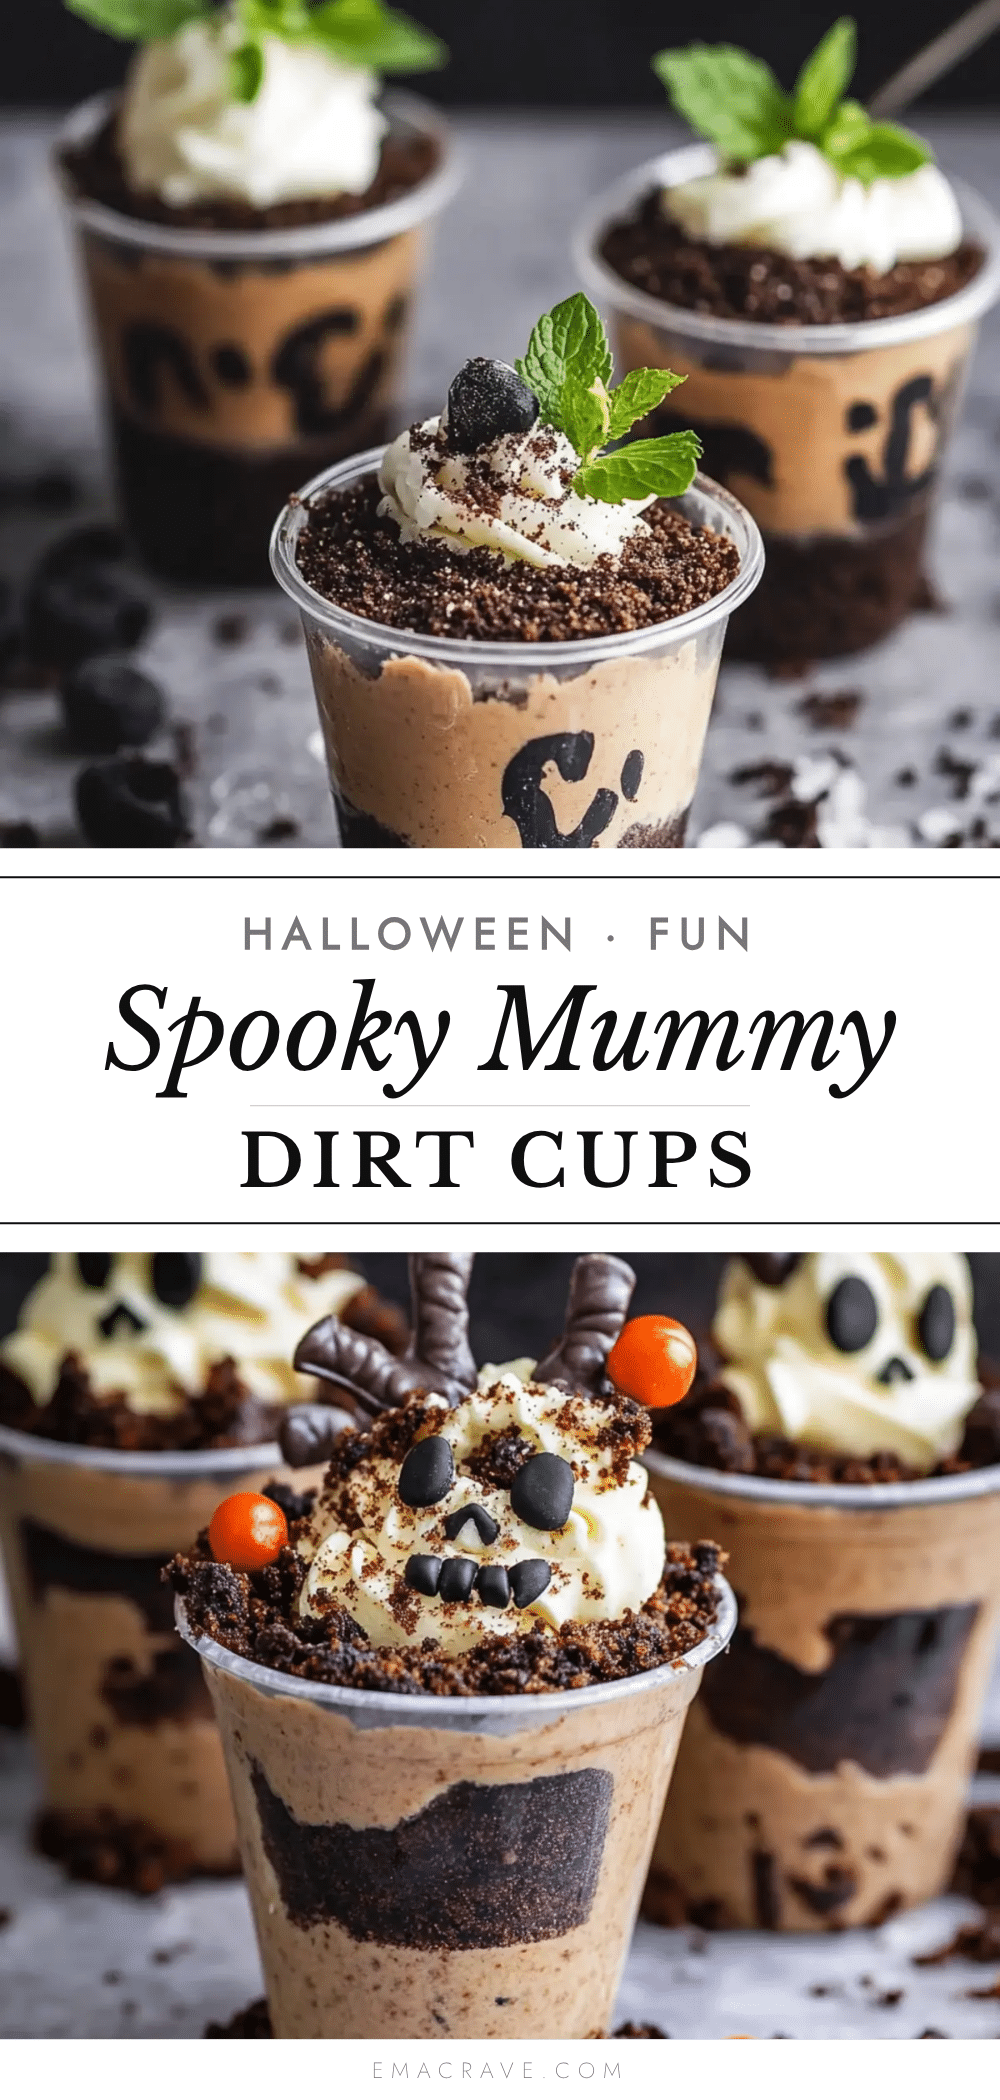
Easy Mummy’s Tomb Dirt Cups: Best Halloween Dessert Recipe

These no-bake Halloween treats feature layers of chocolate pudding, a creamy cheesecake-like layer, and crushed Oreo ‘dirt,’ topped with mummy-decorated cups and tombstone cookies. They are rich, creamy, and perfectly spooky, ready in about 20 minutes of active work.
- Prep Time: 20 minutes
- Cook Time: 0 minutes
- Total Time: 2 hours 20 minutes (includes chilling)
- Yield: 12 servings 1x
- Category: Dessert
- Cuisine: American
Ingredients
- 2 (3.9-ounce) boxes instant chocolate pudding mix
- 3 cups cold whole milk
- 8 ounces cream cheese, softened
- 1/4 cup powdered sugar
- 1 teaspoon vanilla extract
- 1 cup heavy cream
- 1 (14.3-ounce) package Oreo cookies
- 1/2 cup unsalted butter, melted
- 12 clear plastic cups (7-ounce size)
- 12 Milano cookies or rectangular shortbread cookies
- 1 tube white decorating icing
- 24 candy eyeballs
- Black decorating gel (optional)
Instructions
- In a large bowl, whisk together the instant chocolate pudding mix and cold whole milk for about 2 minutes until thickened. Let sit for 5 minutes to set.
- While the pudding sets, crush the entire package of Oreos into a mix of fine crumbs and slightly chunkier pieces. Transfer to a medium bowl and stir in the melted butter until the crumbs look like wet sand.
- In a separate large bowl, beat the softened cream cheese with an electric mixer on medium speed until smooth and fluffy, about 2 minutes. Add powdered sugar and vanilla extract, beat for another minute.
- In another bowl, whip the heavy cream on high speed until stiff peaks form, about 3-4 minutes. Gently fold the whipped cream into the cream cheese mixture until no white streaks remain.
- Assemble the cups: Spoon about 2 tablespoons of Oreo ‘dirt’ into the bottom of each cup and press down gently. Add about 3 tablespoons of chocolate pudding on top, then a generous tablespoon of the cream cheese mixture. Top with another 2 tablespoons of crushed Oreos, leaving the top loose and crumbly.
- Refrigerate the assembled cups for at least 2 hours, or overnight.
- Once chilled, decorate: Use black decorating gel to write ‘RIP’ on each Milano cookie and stick one into each cup like a tombstone. Use white decorating icing to draw horizontal lines across the front half of each cup, leaving small gaps for the candy eyeballs. Press two candy eyeballs into the icing on each cup. Let sit for 10 minutes before serving.
Notes
Do not skip the butter in the Oreo crumbs; it gives the dirt a realistic clumpy texture. Let cream cheese soften completely to avoid graininess. Use a piping bag for cleaner layering. Chill cups before decorating to prevent icing from melting. For best results, assemble the night before and decorate an hour before serving.
Nutrition
- Serving Size: 1 cup
- Calories: 380
- Sugar: 32
- Fat: 22
- Carbohydrates: 42
- Fiber: 2
- Protein: 6
Keywords: Halloween dessert, dirt cups, mummy tomb, no-bake, chocolate pudding, Oreo, cream cheese, kid-friendly, spooky treats



