Love this? Save it for later!
Share the inspiration with your friends
I was staring at a half-empty jar of lemon curd in my fridge, wondering what on earth to do with it. It was a Tuesday night, and I had zero plans for anything fancy. But that jar—it felt like a challenge. I could just spread it on toast, sure, but that felt boring. I wanted something cute, something that felt like a tiny celebration, even on a random weekday. That’s when I remembered the bag of frozen pastry dough in my freezer and the mini muffin tin gathering dust in the back of my cabinet.
Honestly, I wasn’t expecting much. I just pressed the dough into the little cups, baked them until they were golden, and filled them with that bright, tangy curd. The first bite stopped me mid-chew. The shell was impossibly buttery and flaky, shattering into a thousand perfect little crumbs. And the curd—well, it finally had a worthy vessel. It was one of those accidental wins that makes you feel like a genius, even though you did almost nothing. I made them again the next night, this time with a quick chocolate ganache. And the night after that, with some leftover pastry cream I had stashed away.
These easy mini tart shells have become my secret weapon. They are the answer to every “what should I bring?” text, every last-minute dessert craving, and every moment when you need something that looks like you spent hours in the kitchen when you really didn’t. They are simple, forgiving, and endlessly adaptable. Let me show you how to make them.
Why You’ll Love This Recipe
I have tested this method more times than I care to admit. I have tried all-butter doughs, cream cheese doughs, and even a few shortcut versions using refrigerated pie crusts. This recipe lands right in the sweet spot—foolproof enough for a beginner but with a texture that rivals any bakery shell. Here is why these little tarts are going to become a staple in your kitchen.
- Quick & Easy: From start to finish, these come together in about 30 minutes. No chilling the dough for hours, no complicated rolling techniques. Just press, bake, and fill.
- Simple Ingredients: You likely have everything you need already. Butter, flour, a little sugar, and maybe an egg. No specialty items or expensive extracts required.
- Perfect for Any Occasion: These are the ultimate chameleon dessert. Fill them with fresh berries and cream for a spring brunch, chocolate mousse for a dinner party, or a simple dollop of jam for an afternoon tea. They work for everything.
- Crowd-Pleaser: I have brought these to potlucks, birthday parties, and casual get-togethers. They disappear faster than almost anything else. Something about the individual size makes people reach for one, then another, then another.
- Unbelievably Delicious: The texture is what gets me every time. A good tart shell should be crisp enough to hold its shape but tender enough to melt in your mouth. These achieve that perfect balance without any fuss.
What makes these different from other recipes you might have tried? It is the fat-to-flour ratio and the simple press-in method. No rolling, no cutting, no pie weights needed. You just press the dough into the pan with your fingers, and it bakes up perfectly every time. It is the kind of recipe that makes you wonder why you ever bothered with complicated pastry techniques.
This isn’t just another tart shell recipe. It is the one that makes you feel like a pastry chef without the stress. It is the kind of dessert that makes people close their eyes after the first bite, and that is a beautiful thing.
What Ingredients You Will Need
This recipe uses simple, humble ingredients to create something truly special. The magic is in the method, not the grocery list. Here is everything you need to make about 24 mini tart shells.
- 1 ½ cups (188g) all-purpose flour – The backbone of the shell. I use unbleached all-purpose flour for the best texture. It gives the shells structure without making them tough. If you want a slightly nuttier flavor, you can substitute up to half a cup with white whole wheat flour, but I wouldn’t go further than that.
- ½ cup (113g) unsalted butter, cold and cubed – This is the most important ingredient. Cold butter creates steam as it bakes, which leads to flaky, tender layers. Make sure it is straight from the fridge. I prefer using a high-fat European-style butter like Kerrygold for an even richer flavor, but any unsalted butter will work beautifully.
- ¼ cup (50g) granulated sugar – Just enough sweetness to balance the buttery flavor. You can reduce this slightly if you are using a very sweet filling, but I wouldn’t go below 3 tablespoons. The sugar also helps with browning.
- 1 large egg yolk – Adds richness and helps bind the dough together. The yolk gives the shells a beautiful golden color and a tender, almost shortbread-like crumb. Save the egg white for an omelet or add it to your scrambled eggs the next morning.
- 1-2 tablespoons ice-cold water – You might not need all of it. The amount of water depends on the humidity in your kitchen and the moisture content of your flour. Add it one tablespoon at a time until the dough just comes together.
- ½ teaspoon vanilla extract – Pure vanilla extract adds a warm, aromatic depth that complements any filling. Avoid imitation vanilla if you can—it has a harsh, artificial taste that can throw off the delicate balance of the shells.
- ¼ teaspoon salt – Don’t skip this. Salt enhances the flavor of the butter and prevents the shells from tasting flat or one-dimensional. A fine sea salt or table salt works best.
Optional but recommended: A light dusting of powdered sugar for the finished shells, or a sprinkle of flaky sea salt on top of chocolate-filled tarts. It is a small touch that makes a big difference.
Ingredient selection tip: When choosing your butter, look for one that is fresh and has a high fat content. European-style butters have less water and more butterfat, which leads to flakier, more tender pastry. If you are dairy-free, you can use a high-quality vegan butter stick (not the spreadable kind in a tub), but the texture will be slightly different—still good, just not quite as flaky.
Equipment Needed
You do not need a lot of fancy gadgets for this recipe. Here is what you will need.
- Mini muffin tin (24-cup) – This is the key piece of equipment. I use a standard non-stick mini muffin pan. If you have a dark-colored pan, keep an eye on the shells towards the end of baking—they can brown faster. A light-colored aluminum pan gives the most even results.
- Mixing bowl – Any medium-sized bowl will do. I prefer a glass or stainless steel bowl because they don’t retain heat, which helps keep the butter cold.
- Pastry cutter or two forks – For cutting the butter into the flour. You can also use a food processor, but I find the hand method gives you more control and less chance of overworking the dough.
- Measuring cups and spoons – Accuracy matters in baking, even for something this simple. For best results, use the spoon-and-level method for your flour: spoon it into the measuring cup, then level it off with a straight edge.
- Small cookie scoop (optional) – This makes portioning the dough incredibly easy and consistent. A #60 or #70 scoop works perfectly for mini muffin cups. If you don’t have one, just use your hands to roll small balls of dough.
- Cooling rack – Essential for letting the shells cool completely before filling. If you try to fill them while they are still warm, the filling can make them soggy.
- Parchment paper or silicone baking mat – Not strictly necessary for the tins, but helpful if you are making a larger batch and need extra workspace.
I have made these shells with a cheap non-stick pan that was years old, and they still came out perfectly. Don’t overthink the equipment. If you have a mini muffin tin, you are ready to go.
Preparation Method
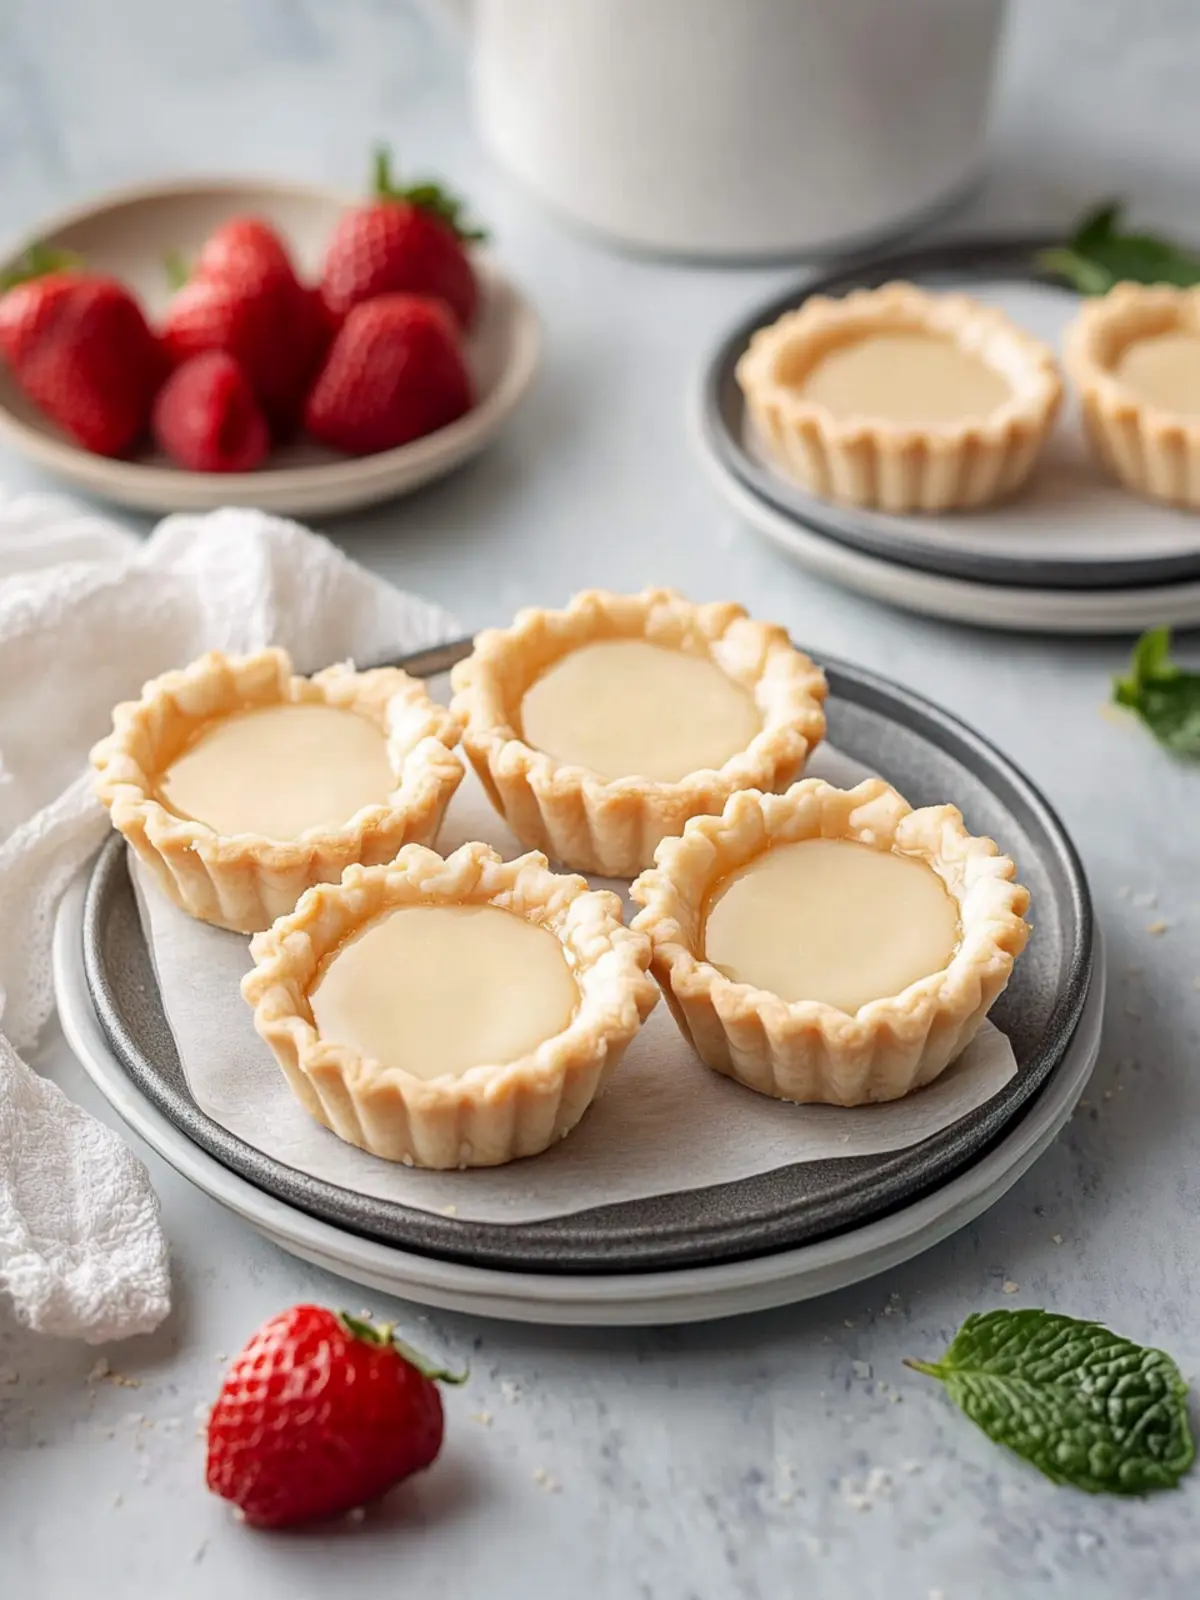
Making these tart shells is almost meditative. The dough comes together quickly, and the pressing step is oddly satisfying. Here is how to do it.
- Preheat your oven to 350°F (175°C). Position the rack in the center of the oven. While the oven is heating up, get your mini muffin tin ready. You do not need to grease it unless your pan is very prone to sticking. If you are unsure, a light spray of non-stick cooking spray won’t hurt.
- Make the dough. In a medium mixing bowl, whisk together the flour, sugar, and salt. Make sure there are no lumps. Add the cold, cubed butter to the flour mixture. Using a pastry cutter or two forks, cut the butter into the flour until the mixture looks like coarse meal with some pea-sized butter pieces remaining. You want to see visible bits of butter—this is what creates flakiness.
- Add the wet ingredients. In a small bowl, whisk together the egg yolk, vanilla extract, and 1 tablespoon of ice-cold water. Pour this mixture over the flour-butter mixture. Stir with a fork until the dough starts to come together. If it seems dry and crumbly, add the remaining tablespoon of water, one teaspoon at a time, until the dough holds together when you squeeze a bit in your hand. Do not overmix.
- Portion the dough. Scoop out about 1 tablespoon of dough (roughly 15-18 grams) and roll it into a smooth ball. Place it in one cup of the mini muffin tin. Repeat with the remaining dough. You should get about 24 balls. If you have extra dough, you can make a few more shells or just snack on the raw dough (I won’t tell).
- Press the dough into the cups. This is the fun part. Using your thumb or the back of a small measuring spoon (a ¼ teaspoon measure works perfectly), press each dough ball into the bottom and up the sides of the muffin cup. Try to make the thickness as even as possible. Aim for the edges to be slightly higher than the rim of the pan—this gives you room for filling. Don’t worry if they look a little rustic; that is part of the charm.
- Chill the shells. Place the muffin tin in the refrigerator for 10-15 minutes. This is a crucial step. Chilling the dough solidifies the butter, which prevents the shells from shrinking or losing their shape during baking. Do not skip this, even if you are in a hurry.
- Prick the bottoms. After chilling, take a fork and gently prick the bottom of each shell a few times. This is called docking and it allows steam to escape, preventing the shells from puffing up or forming bubbles. Be gentle so you don’t tear through the dough.
- Bake the shells. Place the muffin tin in the preheated oven and bake for 12-15 minutes, or until the shells are golden brown around the edges and lightly golden on the bottom. The centers should look dry and set. Every oven is different, so start checking at the 10-minute mark. If you see any shells puffing up, you can gently press them down with the back of a spoon while they are still hot.
- Cool completely. Remove the tin from the oven and let it cool on a wire rack for 5 minutes. Then, gently run a small offset spatula or a butter knife around the edges of each shell to loosen them. Carefully lift them out and transfer them to the cooling rack to cool completely. Do not fill them until they are completely cool to the touch, or the filling will make them soggy.
Sensory cue: When they are done, your kitchen will smell like a bakery. The shells should be a warm, golden brown and feel firm to the touch. If you tap one gently, it should sound hollow. The texture should be crisp and short, almost like a buttery shortbread cookie.
Cooking Tips & Techniques
I have made these shells more times than I can count, and I have learned a few things the hard way. Here are my best tips to ensure success every time.
Keep everything cold. This is the golden rule of pastry. If your butter starts to soften or melt before the shells go into the oven, the dough will spread and you will end up with flat, greasy discs instead of lovely little cups. If your kitchen is warm, pop the dough balls into the freezer for 5 minutes before pressing them into the pan. I have done this on hot summer days, and it works like a charm.
Don’t overwork the dough. I learned this lesson the hard way after making a batch of tough, chewy shells that tasted more like cardboard than pastry. Overworking the dough develops the gluten, which makes the shells tough instead of tender. Mix just until the dough comes together, and handle it as little as possible when pressing it into the cups.
Use a light hand when pressing. You want the dough to be even, but you don’t need to press it down with all your strength. A gentle, firm press is all it takes. If you press too hard, the shells can become dense and heavy.
Watch the edges. The rims of the shells tend to brown faster than the bottoms. If you notice the edges getting too dark before the centers are done, you can tent the pan loosely with a piece of aluminum foil for the last few minutes of baking.
Make them ahead. These shells are perfect for meal prep. You can bake them up to three days in advance and store them in an airtight container at room temperature. If you need them to last longer, you can freeze the baked, unfilled shells for up to a month. Just thaw them at room temperature for about 15 minutes before filling.
My biggest failure: The first time I made these, I skipped the chilling step because I was in a rush. The shells spread out into weird, flat blobs that looked nothing like tart shells. They still tasted okay, but they were a mess. I learned that day that patience is a non-negotiable ingredient in baking.
Variations & Adaptations
One of the best things about these mini tart shells is how endlessly adaptable they are. Here are some of my favorite variations.
Chocolate Tart Shells: Replace 2 tablespoons of the flour with 2 tablespoons of unsweetened cocoa powder. Sift it together with the flour to avoid any lumps. These are incredible filled with white chocolate mousse or fresh raspberries.
Gluten-Free Version: Use a 1:1 gluten-free baking flour blend (one that contains xanthan gum). I have tested this with Bob’s Red Mill 1-to-1 Baking Flour, and it works perfectly. The texture is slightly more crumbly than the original, but still delicious. Just handle the dough gently as it can be a bit more delicate.
Lemon Poppy Seed Shells: Add the zest of one lemon and 1 tablespoon of poppy seeds to the dry ingredients. The lemon adds a bright, fresh flavor that pairs beautifully with a simple lemon curd or berry filling. I made these for a spring brunch and they were gone in minutes.
Savory Tart Shells: Omit the sugar and add ½ teaspoon of dried herbs (thyme or rosemary work well) and ¼ teaspoon of black pepper. These are fantastic filled with a herbed goat cheese and cherry tomato mixture, or a classic quiche Lorraine filling. They also make amazing appetizers for a party.
Spiced Shells: Add ½ teaspoon of cinnamon, ¼ teaspoon of nutmeg, and a pinch of cloves to the dry ingredients. These are perfect for fall and winter. Fill them with pumpkin mousse, apple compote, or a simple maple whipped cream.
I once made a batch with a splash of rose water added to the dough and filled them with a pistachio cream. It was an experiment that turned out surprisingly well. Don’t be afraid to play around with flavors—these shells are a forgiving canvas.
Serving & Storage Suggestions
These shells are best served the day they are filled, but the unfilled shells can be stored for several days. Here is how to handle both.
Serving: Fill the shells just before serving for the best texture. If you fill them too far in advance, the moisture from the filling can soften the shells. I like to arrange them on a beautiful platter or cake stand. A dusting of powdered sugar or a drizzle of melted chocolate makes them look extra special. For a party, set out the shells and a few different fillings and let guests build their own—it is always a hit.
Storage for unfilled shells: Store completely cooled, unfilled shells in an airtight container at room temperature for up to 3 days. If you live in a humid climate, add a food-safe silica gel packet to the container to keep them crisp. For longer storage, freeze them in a single layer in a freezer-safe bag for up to 1 month.
Storage for filled shells: Most filled shells are best eaten within a few hours. If you are using a shelf-stable filling like chocolate ganache or a fruit curd, you can refrigerate them for up to 24 hours, but the shells will soften slightly. If you are using a cream-based filling like pastry cream or mousse, fill them no more than 2 hours before serving.
Reheating: Unfilled shells can be refreshed in a 300°F (150°C) oven for 3-5 minutes to restore their crispness. Let them cool completely before filling. Filled shells should not be reheated unless the filling is something that can handle the heat, like a baked custard.
Flavor development: The unfilled shells actually improve slightly after a day. The flavors meld together and the texture becomes even more tender. I often make a double batch on a Sunday and use them throughout the week for quick desserts.
Nutritional Information & Benefits
While these tart shells are definitely a treat, there are a few things worth noting if you are mindful of what you eat.
Estimated nutritional values per shell (unfilled): Approximately 80 calories, 5g fat, 8g carbohydrates, 1g protein, 3g sugar. These values will vary depending on the exact ingredients you use and the size of your shells. A standard mini tart shell is about 2 inches in diameter.
Health benefits of key ingredients: Butter, in moderation, is a source of fat-soluble vitamins like vitamin A and vitamin D. It also contains butyrate, a fatty acid that supports gut health. Eggs provide high-quality protein and important nutrients like choline, which is good for brain health. The flour provides energy in the form of complex carbohydrates.
Dietary considerations: This recipe is vegetarian. It contains gluten, dairy, and eggs. For a gluten-free option, see the variation above. For a dairy-free option, use a high-quality vegan butter stick. Be aware that vegan butters can have different water content, which may affect the texture slightly.
Potential allergens: This recipe contains wheat (gluten), dairy (butter), and eggs. If you are serving these to a crowd, it is always a good idea to label any allergens clearly, especially if you are making multiple variations.
I personally believe that dessert should be enjoyed without guilt. These shells are a small indulgence, and when you fill them with fresh fruit or a light cream, they can be part of a balanced diet. Life is too short to skip dessert.
Conclusion
These easy mini tart shells have saved me more times than I can count. They are the recipe I turn to when I need something that looks impressive but doesn’t require a lot of effort. They are the recipe that makes me look like a hero at potlucks and dinner parties. And honestly, they are the recipe I make just for myself on a quiet Tuesday night when I want something sweet and beautiful.
What I love most about them is their versatility. You can fill them with anything—fresh berries and whipped cream, a rich chocolate ganache, a tangy lemon curd, or even a scoop of ice cream for an impromptu ice cream sundae. They are a blank canvas waiting for your creativity. And because they are so small, they feel perfectly portioned—just enough to satisfy a sweet craving without going overboard.
I encourage you to make these your own. Play with the flavors, experiment with different fillings, and find your favorite combination. Maybe you will discover a new signature dessert that becomes your go-to for every occasion. That is the beauty of a simple, well-made recipe—it gives you a foundation to build on.
If you try this recipe, I would love to hear about it. Share your creations, your favorite fillings, and any variations you come up with. Leave a comment below and let me know how they turned out. And if you are looking for more sweet inspiration, you might enjoy my easy fudgy matcha blondies or these irresistibly soft cream cheese chocolate chip cookies for another quick dessert fix. Happy baking!
Frequently Asked Questions
Can I use a regular muffin tin instead of a mini muffin tin?
You can, but the baking time will change significantly. A regular muffin cup holds about four times the volume of a mini muffin cup. You will need to use more dough per cup (about ¼ cup) and bake them for 18-22 minutes. The shells will be larger and more like a standard tartlet. Just keep an eye on them towards the end of baking.
Why did my tart shells shrink during baking?
Shrinking is usually caused by one of two things: the dough was overworked, or it wasn’t chilled long enough before baking. Overworking the dough develops gluten, which makes it elastic and prone to shrinking. Not chilling the dough allows the butter to melt too quickly, which can also cause the shells to pull away from the pan. Make sure to chill the pressed shells for at least 10 minutes before baking.
Can I freeze the unbaked dough?
Absolutely. You can freeze the dough balls before pressing them into the pan. Place them on a baking sheet in a single layer and freeze until solid, then transfer them to a freezer-safe bag. When you are ready to bake, let them thaw in the refrigerator for about 30 minutes, then press them into the pan and proceed with the recipe. You can also freeze the pressed, unbaked shells in the pan. Just wrap the pan tightly in plastic wrap and freeze for up to a month. Bake directly from frozen, adding a few extra minutes to the baking time.
What is the best way to fill these tart shells?
The best fillings are ones that are not too wet. Thick pastry creams, ganaches, lemon curds, and fruit compotes work wonderfully. If you want to use fresh fruit, consider adding a thin layer of melted chocolate or jam to the bottom of the shell first—this creates a barrier that prevents the fruit juices from soaking into the pastry. For a quick and elegant option, fill them with a dollop of sweetened mascarpone or whipped cream and top with fresh berries.
My dough is too crumbly and won’t hold together. What did I do wrong?
This usually means the dough needs a little more moisture. Add ice-cold water one teaspoon at a time and mix gently until the dough comes together. Be careful not to add too much, though—you want the dough to just hold together when squeezed. If you have added the full 2 tablespoons of water and the dough is still crumbly, your flour might be very dry. In that case, add another teaspoon of water. The dough should feel like slightly damp sand that clumps together when pressed.
Pin This Recipe!
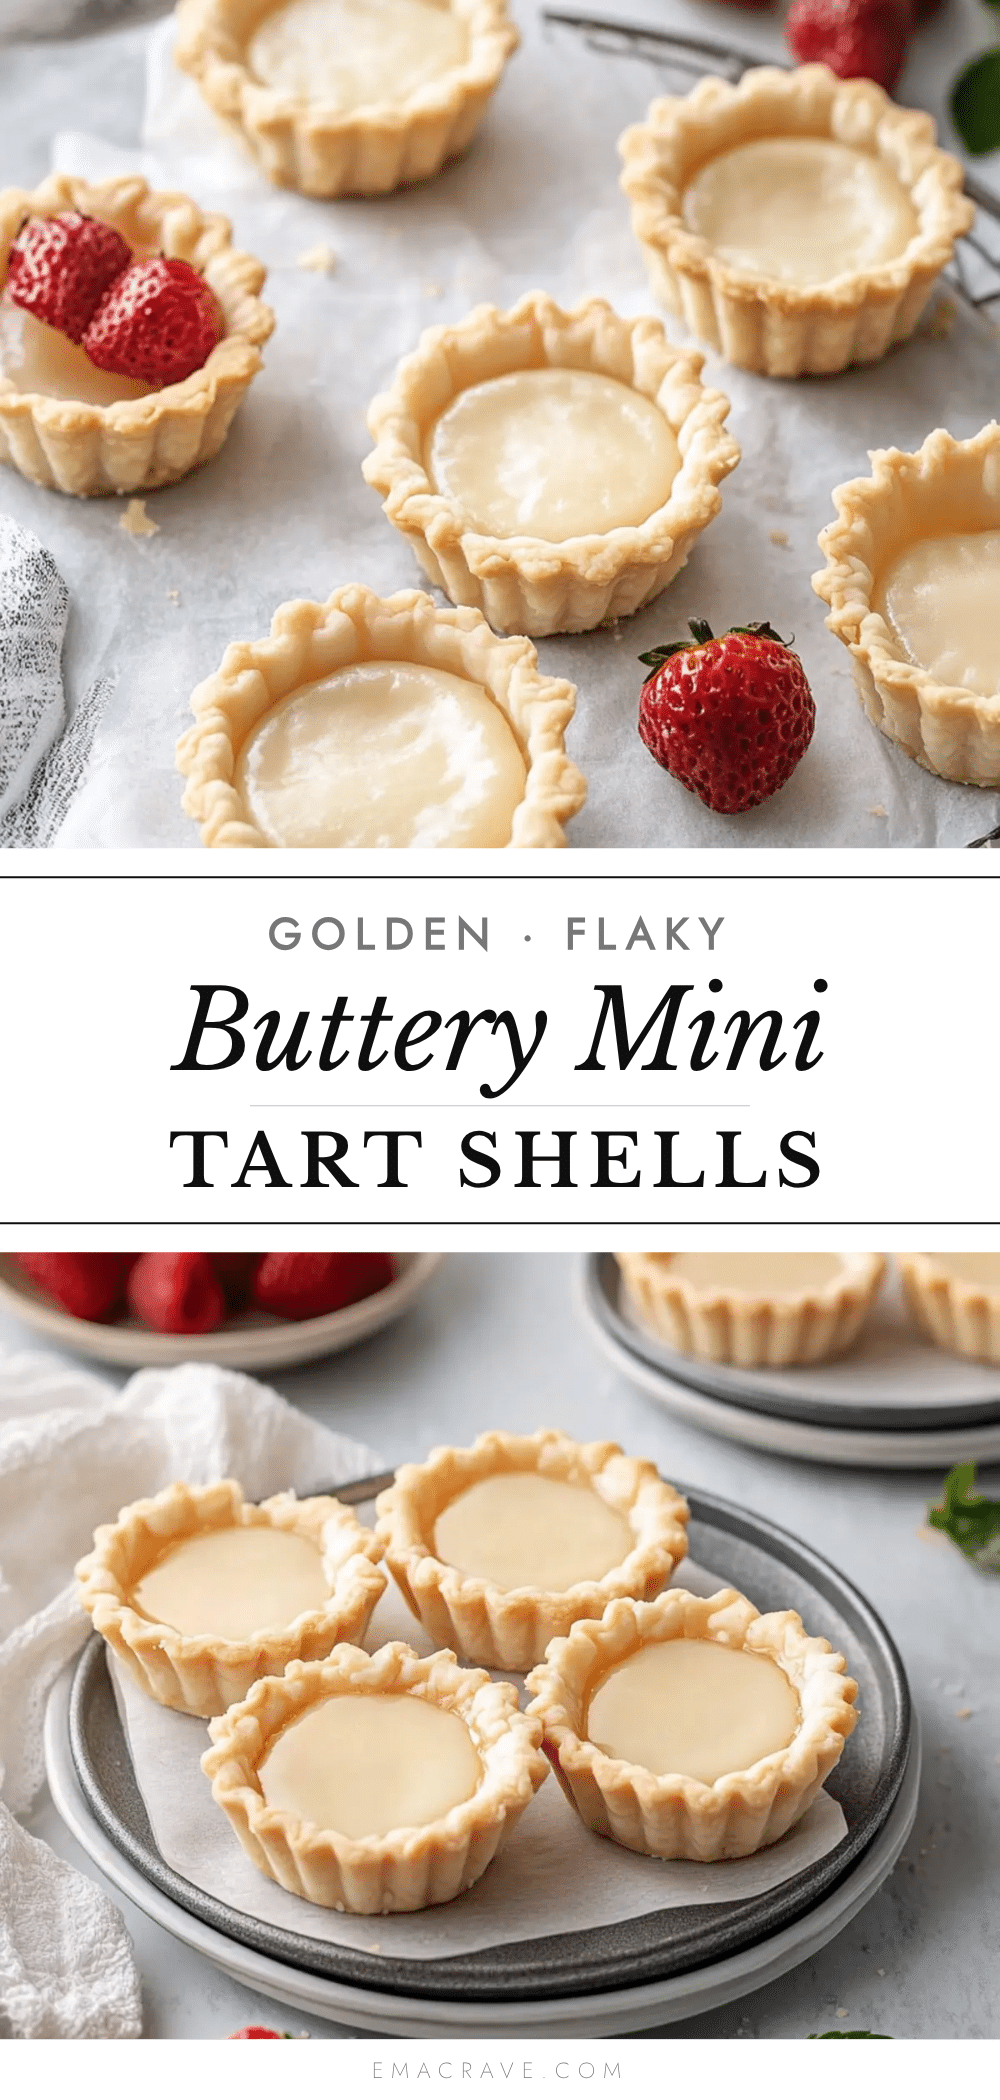
Easy Mini Tart Shells for Perfect Sweet Creations
These easy mini tart shells are buttery, flaky, and come together in about 30 minutes. Perfect for any filling, they are a foolproof, crowd-pleasing dessert that looks like you spent hours in the kitchen.
- Prep Time: 15 minutes
- Cook Time: 15 minutes
- Total Time: 30 minutes
- Yield: 24 servings 1x
- Category: Dessert
- Cuisine: American
Ingredients
- 1 ½ cups (188g) all-purpose flour
- ½ cup (113g) unsalted butter, cold and cubed
- ¼ cup (50g) granulated sugar
- 1 large egg yolk
- 1–2 tablespoons ice-cold water
- ½ teaspoon vanilla extract
- ¼ teaspoon salt
Instructions
- Preheat your oven to 350°F (175°C). Position the rack in the center of the oven.
- In a medium mixing bowl, whisk together the flour, sugar, and salt.
- Add the cold, cubed butter to the flour mixture. Using a pastry cutter or two forks, cut the butter into the flour until the mixture looks like coarse meal with some pea-sized butter pieces remaining.
- In a small bowl, whisk together the egg yolk, vanilla extract, and 1 tablespoon of ice-cold water. Pour this mixture over the flour-butter mixture. Stir with a fork until the dough starts to come together. If it seems dry and crumbly, add the remaining tablespoon of water, one teaspoon at a time, until the dough holds together when squeezed.
- Scoop out about 1 tablespoon of dough (roughly 15-18 grams) and roll it into a smooth ball. Place it in one cup of a mini muffin tin. Repeat with the remaining dough to make about 24 balls.
- Using your thumb or the back of a small measuring spoon, press each dough ball into the bottom and up the sides of the muffin cup. Aim for the edges to be slightly higher than the rim of the pan.
- Place the muffin tin in the refrigerator for 10-15 minutes to chill the shells.
- After chilling, gently prick the bottom of each shell a few times with a fork.
- Bake for 12-15 minutes, or until the shells are golden brown around the edges and lightly golden on the bottom.
- Remove the tin from the oven and let it cool on a wire rack for 5 minutes. Then, gently run a small offset spatula or a butter knife around the edges of each shell to loosen them. Carefully lift them out and transfer them to the cooling rack to cool completely before filling.
Notes
Keep all ingredients cold for best results. Do not overwork the dough. Chilling the pressed shells before baking is crucial to prevent shrinking. Unfilled shells can be stored in an airtight container at room temperature for up to 3 days or frozen for up to 1 month. Fill just before serving to maintain crispness.
Nutrition
- Serving Size: 1 mini tart shell
- Calories: 80
- Sugar: 3
- Sodium: 50
- Fat: 5
- Saturated Fat: 3
- Carbohydrates: 8
- Protein: 1
Keywords: mini tart shells, easy tart shells, mini tart recipe, press-in tart shells, buttery tart shells, mini dessert shells, tartlet shells



