Love this? Save it for later!
Share the inspiration with your friends
I was staring into my fridge on a Tuesday night, completely uninspired. A head of cauliflower sat staring back at me, along with some leftover rotisserie chicken and a half-empty bottle of buffalo sauce that had been lingering there since football season. Honestly, I was this close to ordering takeout. But then—and I don’t know where this came from—I thought about how good a creamy buffalo chicken dip tastes, and how much I love roasted cauliflower. What if I just… combined them into a full meal?
That night, I threw it all together in a baking dish, crossed my fingers, and slid it into the oven. Twenty-five minutes later, I was pulling out the most ridiculous, bubbly, golden-topped casserole I’d ever made. The cauliflower had soaked up all that tangy buffalo sauce and turned tender, the chicken made it hearty, and the creamy cheese situation on top? Absolute magic. I ate two servings standing at the counter. No regrets.
This Creamy Buffalo Chicken Cauliflower Casserole has now become my go-to for those nights when I want something that tastes indulgent but actually has some hidden veggies. It’s got all the bold, spicy, tangy flavor you crave from buffalo wings, but it’s way easier and honestly, way more satisfying. It’s the kind of meal that makes you forget you’re eating cauliflower—in the best way possible.
Why You’ll Love This Recipe
Let me tell you why this one is different. I’ve tested this casserole about seven times to get the balance just right—enough heat to wake up your taste buds, but still creamy enough to feel like comfort food. My family has been my official taste testers, and they’ve given it the stamp of approval every single time.
- Quick & Easy: This comes together in about 35 minutes total. Perfect for busy weeknights when you need dinner on the table fast.
- Simple Ingredients: No fancy grocery trips needed. You probably have most of this in your kitchen right now.
- Perfect for Meal Prep: It reheats beautifully, so make a big batch on Sunday and enjoy it all week.
- Crowd-Pleaser: Even picky eaters and people who “don’t like cauliflower” go back for seconds. It’s that good.
- Unbelievably Delicious: The combination of tender cauliflower, juicy chicken, and that creamy, tangy buffalo sauce is next-level comfort food.
What makes this recipe different from all the other buffalo chicken casseroles out there? It’s the cauliflower. Instead of using pasta or rice as the base, we’re using cauliflower florets that get perfectly tender and soak up all that buffalo flavor. It makes the dish lighter and more vegetable-forward without sacrificing any of the satisfaction. Plus, the cauliflower gets slightly caramelized around the edges, adding a subtle sweetness that balances the heat beautifully.
This is the kind of meal that makes you close your eyes after the first bite. It’s comfort food reimagined—healthier, faster, but with the same soul-soothing satisfaction. Perfect for impressing guests without stress, or turning a simple Tuesday night dinner into something memorable.
What Ingredients You Will Need
This recipe uses simple, wholesome ingredients to deliver bold flavor and satisfying texture without the fuss. Most of these are pantry staples or easy to find at any grocery store.
- Cauliflower (1 medium head, cut into florets): The star of the show. Look for a firm, white head with no brown spots. You can also use pre-cut florets from the produce section to save time.
- Cooked chicken (2 cups, shredded or diced): Rotisserie chicken is my go-to for convenience. Leftover grilled chicken works great too. Even canned chicken in a pinch—just drain it well.
- Buffalo sauce (½ cup): I prefer Frank’s RedHot Original for that classic vinegary tang. Feel free to use your favorite brand, but avoid sauces that are too thick or sweet.
- Cream cheese (4 oz, softened): This is what makes the sauce irresistibly creamy. Full-fat works best for texture, but Neufchâtel (low-fat) is a decent substitute.
- Sour cream (½ cup): Adds tanginess and helps thin the sauce. Greek yogurt works beautifully as a swap—just use plain, full-fat for best results.
- Shredded cheddar cheese (1 cup): Sharp cheddar gives the best flavor. I recommend shredding it yourself from a block—it melts so much smoother than pre-shredded.
- Shredded mozzarella cheese (½ cup): Adds that gooey, stretchy texture we all love. Low-moisture mozzarella is ideal.
- Blue cheese crumbles (¼ cup, optional): For that classic buffalo wing pairing. Gorgonzola works too if you prefer a milder flavor.
- Green onions (3-4, sliced): For garnish and a fresh, mild onion kick.
- Garlic powder (1 teaspoon): Adds savory depth without being overpowering.
- Onion powder (1 teaspoon): Rounds out the savory flavor profile.
- Salt and black pepper (to taste): Season the cauliflower before roasting for best results.
- Olive oil (1 tablespoon): For roasting the cauliflower. Avocado oil works too.
I recommend using Tillamook or Cabot for the cheddar—they melt like a dream. For the cream cheese, Philadelphia is my tried-and-true favorite. If you’re looking for a dairy-free option, Kite Hill makes a decent plant-based cream cheese alternative.
Equipment Needed
You don’t need any fancy gadgets for this one. Here’s what you’ll need:
- Large baking dish (9×13-inch): A 3-quart casserole dish works perfectly. Glass or ceramic both work great.
- Large mixing bowl: For tossing everything together before baking.
- Cutting board and sharp knife: For prepping the cauliflower and green onions.
- Measuring cups and spoons: For accuracy—especially with the buffalo sauce.
- Aluminum foil: For covering the dish during the first part of baking.
If you don’t have a 9×13 dish, you can use two smaller dishes or even a large cast-iron skillet. Just adjust the baking time slightly—smaller dishes will cook a bit faster. I’ve used my trusty Pyrex dish for years, and it’s never let me down. Budget-friendly tip: a good glass baking dish costs around $15 and lasts forever.
Preparation Method

Let’s get cooking. This comes together faster than you’d think.
Step 1: Preheat and Prep (5 minutes)
Preheat your oven to 400°F (200°C). Lightly grease your 9×13 baking dish with a little cooking spray or olive oil. While the oven heats, cut your cauliflower into bite-sized florets—about 1 to 1.5 inches each. You want them uniform so they cook evenly. Don’t go too small or they’ll turn mushy.
Step 2: Roast the Cauliflower (15 minutes)
Toss the cauliflower florets with 1 tablespoon olive oil, garlic powder, onion powder, and a pinch of salt and pepper. Spread them in a single layer on a baking sheet. Roast for 15 minutes, flipping halfway through. You want them just starting to get tender and lightly golden—not fully cooked through. They’ll finish cooking in the casserole. Your kitchen will start smelling amazing at this point.
Step 3: Make the Creamy Buffalo Sauce (5 minutes)
While the cauliflower roasts, make the sauce. In a medium bowl, beat the softened cream cheese with a fork until smooth. Add the sour cream and buffalo sauce, and stir until well combined. The mixture should be smooth and creamy with a slight orange tint. If it looks a little lumpy, that’s okay—it will smooth out as it bakes.
Step 4: Combine Everything (5 minutes)
In a large mixing bowl, combine the roasted cauliflower, shredded chicken, and the creamy buffalo sauce mixture. Gently fold everything together until the cauliflower and chicken are evenly coated. Taste a little piece of cauliflower (let it cool first!) and adjust seasoning if needed—maybe a pinch more salt or an extra dash of buffalo sauce if you like it spicier.
Step 5: Assemble and Bake (20 minutes)
Transfer the mixture to your prepared baking dish and spread it into an even layer. Sprinkle the shredded cheddar and mozzarella cheeses evenly over the top. Cover the dish with aluminum foil and bake at 400°F (200°C) for 15 minutes. Then remove the foil and bake for another 5-7 minutes, until the cheese is melted, bubbly, and starting to turn golden in spots. If you want a browner top, switch to broil for the last 1-2 minutes—but watch it closely so it doesn’t burn.
Step 6: Rest and Serve (5 minutes)
Let the casserole rest for 5 minutes after coming out of the oven. This helps the sauce set up a bit so it’s not too runny. Sprinkle with blue cheese crumbles (if using) and sliced green onions. Serve hot and watch it disappear.
Cooking Tips & Techniques
I’ve made this casserole enough times to learn a few things the hard way. Here are my best tips so you don’t have to make the same mistakes.
Don’t skip roasting the cauliflower. I tried it once with raw cauliflower, thinking it would cook through in the oven. Big mistake. The raw cauliflower released too much water and made the casserole watery. Roasting first concentrates the flavor and removes excess moisture. Trust me on this one.
Use room temperature cream cheese. Cold cream cheese will leave you with lumpy sauce. Let it sit on the counter for 20-30 minutes before you start. If you forgot, microwave it for 10-15 seconds—just don’t overdo it or it’ll melt.
Shred your own cheese. I know it’s tempting to buy the pre-shredded bags, but they’re coated with anti-caking agents that prevent smooth melting. Shredding a block of cheddar takes two extra minutes and makes a huge difference in texture.
Watch the spice level. Buffalo sauces vary wildly in heat. If you’re sensitive to spice, start with ⅓ cup of buffalo sauce and add more to taste. You can always add heat, but you can’t take it away. My first batch was almost too spicy for my kids—now I use a mild buffalo sauce and add a few drops of extra hot sauce to my own serving.
Let it rest. I know you’ll want to dig in immediately, but that 5-minute rest is crucial. It lets the sauce thicken up so you get clean servings instead of a soupy mess. Use that time to set the table or pour yourself a drink.
Variations & Adaptations
This recipe is super flexible. Here are some ways to make it your own:
Low-Carb / Keto Version: This recipe is already pretty low-carb thanks to the cauliflower base. To make it keto-friendly, use full-fat cream cheese and sour cream, and skip the blue cheese crumbles if they’re pre-made with added sugar. Serve with extra veggies on the side instead of bread or rice.
Vegetarian Option: Swap the chicken for 2 cups of cooked chickpeas or white beans. Roast them with the cauliflower for the last 10 minutes. The texture is different but still delicious. I’ve also used sautéed mushrooms for a meatier feel.
Extra Veggie Boost: Add 1 cup of chopped broccoli florets or bell peppers along with the cauliflower. Roast them together—the broccoli gets slightly crispy edges that are amazing. You can also stir in some fresh spinach right before baking; it wilts down beautifully.
Milder Version for Kids: Use only ¼ cup of buffalo sauce and add 2 tablespoons of melted butter to the sauce mixture. The butter mellows out the heat while keeping that buffalo flavor. My kids devour this version.
Spicier Version: Add 1-2 teaspoons of cayenne pepper or a chopped jalapeño to the sauce mixture. Drizzle extra buffalo sauce on top before baking for a double dose of heat.
Different Cheese Combos: Try pepper jack for extra heat, gouda for smokiness, or a Mexican blend for a different vibe. I made a version with smoked gouda and it was incredible—the smoky flavor paired perfectly with the buffalo sauce.
If you love bold, comforting flavors like this, you’ll also enjoy my BBQ Chicken Cornbread Casserole for another fun twist on a classic combo.
Serving & Storage Suggestions
This casserole is best served hot, straight from the oven. The cheese should be bubbly and the edges slightly golden. I like to serve it with a simple side salad dressed with ranch or blue cheese dressing to balance the heat. Celery sticks and carrot sticks on the side are also classic—and they add a nice crunch.
For a heartier meal, serve it over rice, quinoa, or cauliflower rice. It’s also amazing stuffed into warm tortillas for buffalo chicken tacos—trust me, try this once and you’ll be hooked.
Storage: Leftovers keep well in an airtight container in the refrigerator for up to 4 days. The flavors actually meld together and get even better overnight. I often make a double batch just for leftovers.
Freezing: This casserole freezes beautifully. Assemble it completely but don’t bake it. Cover tightly with foil and freeze for up to 3 months. When ready to eat, thaw overnight in the fridge and bake as directed, adding about 10 minutes to the covered baking time. You can also freeze baked leftovers in individual portions for quick lunches.
Reheating: The best way to reheat is in the oven at 350°F (175°C) for 10-15 minutes, covered with foil to prevent drying out. The microwave works in a pinch—just heat in 30-second bursts and stir between each. The texture won’t be quite as good, but it’s still delicious.
If you’re planning a game day spread, this casserole pairs perfectly with my Bloomin’ Onion Dip for a full appetizer lineup that will disappear fast.
Nutritional Information & Benefits
Here’s an approximate nutritional breakdown per serving (based on 6 servings):
- Calories: 385
- Protein: 28g
- Fat: 24g
- Carbohydrates: 12g
- Fiber: 4g
- Sugar: 5g
This casserole is packed with protein from the chicken and cheese, keeping you full and satisfied. Cauliflower is a nutritional powerhouse—it’s rich in vitamin C, vitamin K, and fiber, plus it contains antioxidants that support overall health. The buffalo sauce adds capsaicin, which may help boost metabolism slightly.
This recipe is naturally gluten-free and low-carb, making it suitable for a variety of dietary needs. If you’re watching your sodium, use low-sodium buffalo sauce and reduce the added salt. The blue cheese adds calcium and probiotics, but you can skip it to lower the fat content.
I love that this dish feels indulgent but actually has a solid nutritional profile. It’s comfort food that doesn’t leave you feeling guilty—just satisfied.
Conclusion
This Creamy Buffalo Chicken Cauliflower Casserole has become a staple in my kitchen for good reason. It’s quick, it’s packed with flavor, and it makes eating vegetables feel like a treat rather than a chore. Whether you’re looking for an easy weeknight dinner, a game day dish, or something to meal prep for the week, this recipe delivers every single time.
Don’t be afraid to play around with the ingredients. Make it spicier, milder, cheesier, or loaded with extra veggies—it’s hard to go wrong. The base recipe is forgiving and adaptable, which is exactly what a good casserole should be.
I’d love to hear how this turns out for you! Drop a comment below and let me know if you made any fun variations. Did you add extra heat? Swap the cheese? Serve it over something unexpected? Share your version—I’m always looking for new ideas to try. And if you loved it, please share this recipe with a friend who needs a little buffalo chicken magic in their life.
Happy cooking, friend. You’ve got this.
Frequently Asked Questions
Can I use frozen cauliflower instead of fresh?
Yes, but you’ll need to thaw it completely and pat it very dry with paper towels before roasting. Frozen cauliflower holds more water, so roasting it longer (about 20 minutes) helps remove excess moisture. Don’t skip this step or your casserole will be watery.
How do I make this recipe dairy-free?
Use dairy-free cream cheese (Kite Hill or Violife work well), dairy-free sour cream (Tofutti or homemade cashew cream), and dairy-free shredded cheese. The texture will be slightly different but still delicious. I’ve tested this with Daiya mozzarella shreds and it worked great.
Can I prep this casserole ahead of time?
Absolutely! Assemble the entire casserole (without baking) up to 24 hours in advance. Cover and refrigerate. When ready to bake, add about 10 minutes to the covered baking time since you’re starting from cold. You might also need to add 5 minutes to the uncovered portion.
What can I use instead of blue cheese?
If you’re not a blue cheese fan, skip it entirely or swap with feta cheese for a similar crumbly texture but milder flavor. Goat cheese also works beautifully—it adds a tangy creaminess that complements the buffalo sauce perfectly.
Is this recipe spicy?
It has a mild to medium heat level depending on your buffalo sauce. Most standard buffalo sauces are tangy with a gentle kick rather than intense heat. If you’re sensitive to spice, start with less sauce and add more to taste. For extra heat, add cayenne or serve with extra hot sauce on the side.
For another cozy, one-pan dinner that’s just as satisfying, try my Garlic Chicken and Potatoes—it’s another weeknight hero that cleans up fast.
Pin This Recipe!
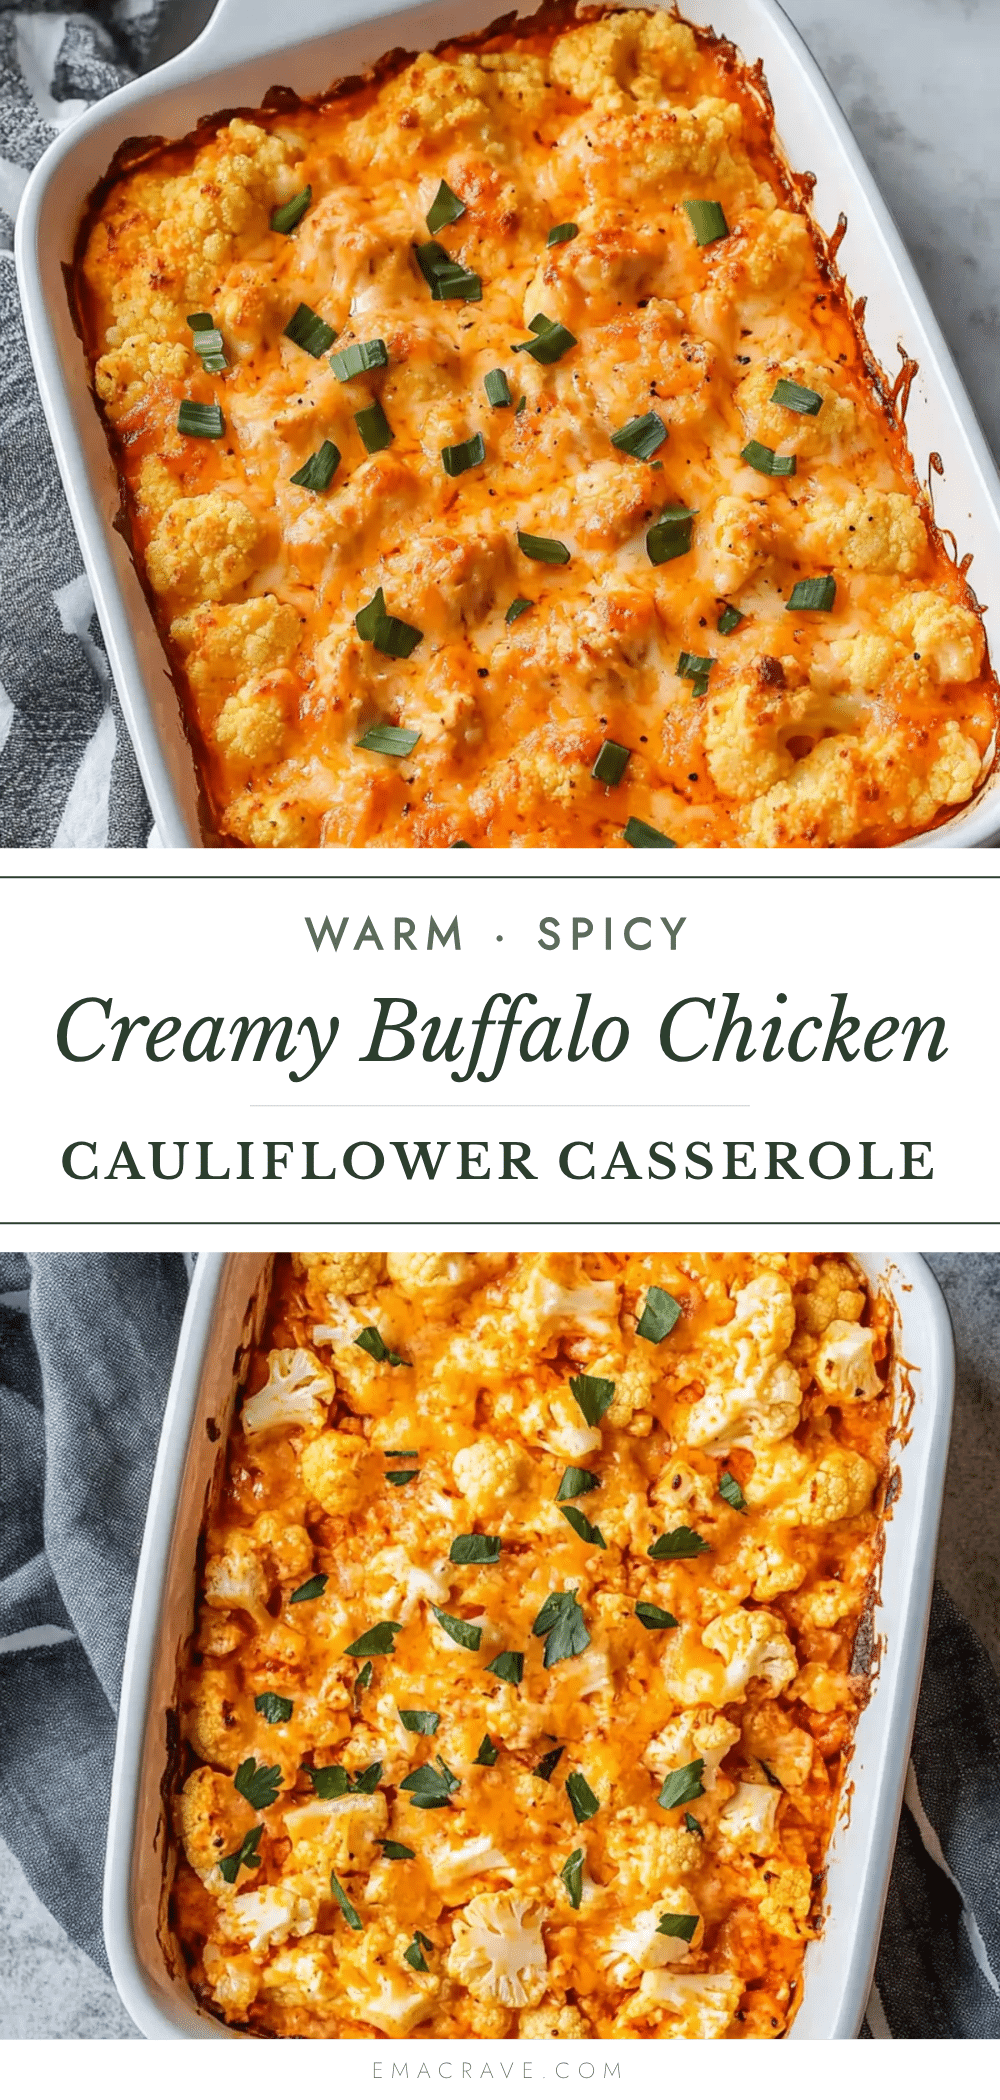
Easy Creamy Buffalo Chicken Cauliflower Casserole Recipe

A quick and easy casserole combining tender roasted cauliflower, shredded chicken, and a creamy buffalo sauce, topped with melted cheese for a comforting, vegetable-forward meal.
- Prep Time: 15 minutes
- Cook Time: 20 minutes
- Total Time: 35 minutes
- Yield: 6 servings 1x
- Category: Main Course
- Cuisine: American
Ingredients
- 1 medium head cauliflower, cut into florets
- 2 cups cooked chicken, shredded or diced
- ½ cup buffalo sauce
- 4 oz cream cheese, softened
- ½ cup sour cream
- 1 cup shredded cheddar cheese
- ½ cup shredded mozzarella cheese
- ¼ cup blue cheese crumbles (optional)
- 3–4 green onions, sliced
- 1 teaspoon garlic powder
- 1 teaspoon onion powder
- Salt and black pepper to taste
- 1 tablespoon olive oil
Instructions
- Preheat oven to 400°F (200°C). Lightly grease a 9×13-inch baking dish.
- Toss cauliflower florets with olive oil, garlic powder, onion powder, salt, and pepper. Spread on a baking sheet and roast for 15 minutes, flipping halfway, until just tender and lightly golden.
- In a medium bowl, beat softened cream cheese until smooth. Stir in sour cream and buffalo sauce until well combined.
- In a large mixing bowl, combine roasted cauliflower, shredded chicken, and creamy buffalo sauce mixture. Gently fold until evenly coated.
- Transfer mixture to prepared baking dish and spread evenly. Top with shredded cheddar and mozzarella cheeses.
- Cover with aluminum foil and bake for 15 minutes. Remove foil and bake for another 5-7 minutes, until cheese is melted, bubbly, and golden. Optionally, broil for 1-2 minutes for a browner top.
- Let casserole rest for 5 minutes. Sprinkle with blue cheese crumbles (if using) and sliced green onions. Serve hot.
Notes
Don’t skip roasting the cauliflower to avoid a watery casserole. Use room temperature cream cheese for a smooth sauce. Shred your own cheese for better melting. Adjust spice level by varying buffalo sauce amount. Let casserole rest 5 minutes before serving to allow sauce to thicken.
Nutrition
- Serving Size: 1 serving
- Calories: 385
- Sugar: 5
- Sodium: 800
- Fat: 24
- Saturated Fat: 12
- Carbohydrates: 12
- Fiber: 4
- Protein: 28
Keywords: buffalo chicken casserole, cauliflower casserole, creamy buffalo chicken, low-carb casserole, easy weeknight dinner



