Love this? Save it for later!
Share the inspiration with your friends
I was standing at the kitchen counter, staring at a pile of bread ends nobody wanted. You know the ones—the heel of the sourdough loaf, a couple of sad sandwich slices, and some leftover provolone from taco night. My son had just asked for grilled cheese, but honestly, I didn’t have the energy for the whole flipping-and-fussing routine. So I grabbed a knife, cut the crusts off, rolled everything up tight, and threw them in a hot skillet. That first batch of crispy grilled cheese roll-ups came out so golden and crunchy, I actually laughed out loud. My kid dipped one into a bowl of tomato soup and said, “Mom, why don’t you make them like this every time?” Fair question. I’ve been making them this way ever since.
These roll-ups are everything you want from a classic grilled cheese—but better. The bread gets shatteringly crisp on the outside while the cheese stays molten and stretchy inside. And because they’re rolled, every single bite has that perfect cheese-to-crust ratio. No more eating around the dry edges or dealing with burnt spots. Plus, they’re basically designed for dipping. I’m not exaggerating when I say they turn a simple bowl of soup into something you actually look forward to all day.
This isn’t some fancy restaurant trick either. It’s just a smarter way to make a weeknight staple. And once you try it, you’ll probably never go back to flat grilled cheese again. Trust me on this one.
Why You’ll Love This Recipe
I’ve tested these roll-ups at least a dozen times—sometimes with different breads, sometimes with cheese blends, and once even with a rogue slice of ham that my husband snuck in. Every single version worked. That’s the beauty of this method. It’s forgiving, fast, and incredibly reliable.
- Quick & Easy: From start to finish, you’re looking at about 15 minutes. That’s faster than most takeout deliveries.
- Simple Ingredients: Bread, cheese, butter. That’s it. You probably already have everything in your kitchen right now.
- Perfect for Dipping: These roll-ups were born for tomato soup. But honestly, they’re great with any soup, chili, or even just ketchup if that’s your thing.
- Crowd-Pleaser: Kids love the fun shape, adults love the crispy texture, and nobody complains about leftovers.
- Unbelievably Crispy: The rolling technique creates more surface area for browning. More surface area means more crunch. It’s simple math, really.
What sets this recipe apart from the standard grilled cheese is the texture. Because the bread is rolled rather than flat, the exterior gets evenly golden and crunchy while the cheese stays perfectly melted inside. No more soggy centers or uneven browning. It’s the kind of small tweak that makes a big difference—and once you taste it, you’ll understand why I stopped making regular grilled cheese altogether.
What Ingredients You Will Need
This recipe uses just a handful of pantry staples. Nothing fancy, nothing expensive. Just good, simple ingredients that work together beautifully.
- Bread (8 slices): Use soft white bread, sourdough, or even whole wheat. Fresh bread rolls better, but day-old works too. Just make sure it’s not too crusty or it might crack when you roll it. I personally love using a soft homemade garlic pita bread for a fun twist—it adds a subtle herby flavor that pairs beautifully with tomato soup.
- Cheese (8 slices or about 2 cups shredded): Cheddar, mozzarella, provolone, or a mix. Avoid pre-shredded cheese if you can—it doesn’t melt as smoothly because of the anti-caking agents. I usually go with sharp cheddar for flavor and mozzarella for that perfect stretch.
- Butter (3 to 4 tablespoons, softened): Salted or unsalted—both work. Softened butter spreads more easily and gives you a more even golden crust. If you’re in a rush, you can melt it and brush it on instead.
- Optional add-ins: A pinch of garlic powder, dried oregano, or a sprinkle of paprika on the butter adds extra flavor. You can also add thin slices of tomato, ham, or cooked bacon inside the roll-ups.
That’s really all you need. No fancy equipment, no obscure ingredients. Just the basics done right.
Equipment Needed
- Rolling pin or a clean wine bottle: To flatten the bread slices. You don’t need a fancy rolling pin—a smooth-sided bottle works perfectly.
- Sharp knife or pizza cutter: For cutting off the crusts. A pizza cutter makes the job faster, but a knife works just fine.
- Non-stick skillet or griddle: A 10-inch skillet works great. If you have a griddle, you can make more roll-ups at once.
- Spatula: A thin, flexible spatula makes flipping easier without squishing the roll-ups.
- Pastry brush (optional): For brushing melted butter onto the bread. A spoon works too, but a brush gives you a more even coat.
- Cutting board: For rolling and cutting the bread.
If you don’t have a rolling pin, just use your hands to gently press the bread flat. It’s not as even, but it still works. I’ve done it plenty of times when I couldn’t find my rolling pin.
Preparation Method

- Prepare the bread: Lay your bread slices on a cutting board. Using a sharp knife or pizza cutter, trim off the crusts from all four sides. Don’t throw the crusts away—save them for breadcrumbs or crispy grilled rice balls if you’re feeling creative.
- Flatten the bread: Gently roll over each slice with a rolling pin or bottle until it’s about 1/4-inch thick. This makes the bread pliable and easier to roll without cracking. You should be able to see the texture change slightly—it’ll look a little compressed.
- Add the cheese: Place 1 slice of cheese (or about 1/4 cup shredded cheese) on each flattened bread slice. Leave a small border around the edges so the cheese doesn’t leak out when it melts.
- Roll them up: Starting from one edge, tightly roll the bread around the cheese. Apply gentle pressure as you roll—you want it snug but not so tight that the bread tears. Place each roll-up seam-side down on a plate.
- Butter the outside: Using a pastry brush or your fingers, spread a thin layer of softened butter over the entire surface of each roll-up. Don’t skip this step—the butter is what gives you that golden, crispy crust.
- Heat the skillet: Place your non-stick skillet over medium heat. Let it warm up for about 1 minute. You want it hot but not smoking—a drop of water should sizzle gently when it hits the pan.
- Cook the roll-ups: Place the roll-ups seam-side down in the skillet. Don’t overcrowd the pan—leave a little space between each one so they brown evenly. Cook for 2 to 3 minutes, until the bottom is golden brown and crispy.
- Flip and finish: Using a thin spatula, carefully flip each roll-up. Cook for another 2 to 3 minutes, rotating occasionally for even browning. The cheese should be fully melted and oozing slightly at the ends.
- Rest before serving: Transfer the roll-ups to a plate and let them rest for 1 to 2 minutes. This lets the cheese set slightly so it doesn’t all run out when you bite into it. Serve warm with a bowl of creamy high-protein tomato soup for the ultimate dipping experience.
Cooking Tips & Techniques
I’ve burned my fair share of grilled cheese over the years. Here’s what I’ve learned so you don’t have to make the same mistakes.
Don’t rush the heat. Medium heat is your friend. Too high and the bread burns before the cheese melts. Too low and the bread gets soggy and tough. Medium heat gives you that perfect window where the outside crisps up at the same speed the cheese melts.
Flatten the bread evenly. If one side is thicker than the other, the roll-up won’t cook evenly. Take an extra 10 seconds to roll it out uniformly. Your future self will thank you when every bite is perfectly crunchy.
Use room temperature butter. Cold butter tears the bread. Melted butter makes it soggy. Softened butter spreads like a dream and creates the most even golden crust. If you forgot to take it out of the fridge, microwave it for 5 to 7 seconds—just enough to soften, not melt.
Seal the seam. When you place the roll-up in the pan seam-side down, the heat naturally seals it closed. But if your roll-up feels loose, give the seam a gentle press with your fingers before cooking. This prevents the cheese from leaking out.
Flip carefully. The roll-ups are delicate when half-cooked. Use a thin spatula and support the entire length of the roll-up when flipping. If it starts to unroll, just press it back together with the spatula—it’ll seal as it finishes cooking.
Variations & Adaptations
This recipe is incredibly flexible. Here are some of my favorite variations to keep things interesting.
Spicy Chipotle Version: Mix a teaspoon of chipotle paste or a pinch of cayenne pepper into the softened butter before spreading. The heat cuts through the richness of the cheese beautifully. Serve with a smoky tomato soup for a real flavor punch.
Herb & Garlic Twist: Add a pinch of dried oregano, basil, or rosemary to the butter. Sprinkle a little garlic powder over the cheese before rolling. It gives the roll-ups an Italian-inspired flavor that pairs perfectly with minestrone or creamy tomato basil soup.
Veggie-Packed Roll-Ups: Add thin slices of roasted red pepper, sautéed mushrooms, or fresh spinach inside the roll-up before rolling. Just make sure the veggies aren’t too wet or they’ll make the bread soggy. Pat them dry with a paper towel first.
Gluten-Free Option: Use gluten-free bread. Just be extra gentle when rolling—gluten-free bread tends to be more fragile. You might need to press it flat with your hands instead of a rolling pin. The results are still deliciously crispy.
Dairy-Free Version: Use vegan butter and dairy-free cheese shreds. Look for a brand that melts well—some vegan cheeses just get greasy instead of gooey. Miyoko’s and Violife are my go-to choices.
I once made a batch with leftover brie and fig jam for a last-minute appetizer. It was so good, my friend asked for the recipe before she even finished eating. Don’t be afraid to experiment—these roll-ups are forgiving.
Serving & Storage Suggestions
These roll-ups are best served immediately while the cheese is still warm and stretchy. But if you have leftovers (unlikely, but possible), here’s how to handle them.
Serving: Arrange the roll-ups on a plate with a small bowl of tomato soup for dipping. You can also serve them with marinara sauce, ranch dressing, or even a drizzle of honey if you’re feeling adventurous. For a fun presentation, cut each roll-up in half diagonally and fan them out on the plate.
Storage: Let any leftover roll-ups cool completely, then store them in an airtight container in the refrigerator for up to 3 days. Place a sheet of parchment paper between layers to prevent sticking.
Reheating: The best way to reheat these is in a skillet over medium heat for 2 to 3 minutes per side. The microwave makes them soggy. If you’re in a rush, an air fryer at 350°F for 3 to 4 minutes works beautifully—they come out almost as crispy as fresh.
Freezing: You can freeze unbaked roll-ups. Assemble them, place them on a baking sheet, and freeze until solid. Transfer to a freezer bag and store for up to 2 months. Cook directly from frozen, adding 1 to 2 minutes to the cooking time.
Flavor development: Honestly, these are best fresh. The bread loses its crunch after a few hours. But if you’re meal-prepping, freeze them unbaked and cook them fresh when you’re ready to eat.
Nutritional Information & Benefits
Per serving (2 roll-ups with 1 cup tomato soup):
Calories: ~380 | Protein: 16g | Carbohydrates: 32g | Fiber: 3g | Fat: 22g | Saturated Fat: 12g | Sodium: 680mg
These roll-ups aren’t health food, but they’re not junk either. The bread provides quick energy from carbohydrates, while the cheese offers protein and calcium. If you use whole wheat bread, you’ll get extra fiber and B vitamins.
Pairing these with tomato soup adds lycopene—a powerful antioxidant found in cooked tomatoes that supports heart health and reduces inflammation. It’s a comfort food combo that actually has some nutritional merit.
For a lighter version, use low-fat cheese and whole grain bread. You can also swap the butter for a light spread, though the crust won’t be quite as crispy. Everything in moderation, right?
Conclusion
These crispy grilled cheese roll-ups are proof that small changes can make a big difference. They’re faster, crunchier, and more fun than the classic version. Plus, they turn a simple meal into something you actually look forward to—especially when paired with a warm bowl of tomato soup.
I’d love to hear how yours turn out. Did you try a fun variation? Add something unexpected inside? Drop a comment below and let me know. And if you share a photo on social media, tag me so I can see your crispy creations. Happy cooking, friends!
Frequently Asked Questions
Can I make these in an air fryer?
Absolutely. Preheat your air fryer to 375°F. Place the buttered roll-ups in a single layer in the basket. Cook for 5 to 6 minutes, flipping halfway through. They come out extra crispy with less oil.
What’s the best cheese for grilled cheese roll-ups?
Sharp cheddar gives the most flavor, but mozzarella gives the best stretch. I like using a mix of both. American cheese melts beautifully too, if that’s your thing.
Why did my roll-ups unroll while cooking?
This usually happens if the bread wasn’t rolled tight enough or if the pan wasn’t hot enough when you placed them seam-side down. Make sure the seam is firmly pressed and the pan is at medium heat before adding the roll-ups.
Can I use gluten-free bread?
Yes, but handle it gently. Gluten-free bread is more fragile and can crack when rolled. Press it flat with your hands instead of a rolling pin, and don’t overfill it.
How do I keep the roll-ups warm if I’m making a big batch?
Place the cooked roll-ups on a baking sheet in a 200°F oven while you finish the rest. They’ll stay warm and crispy for up to 20 minutes without drying out.
Pin This Recipe!
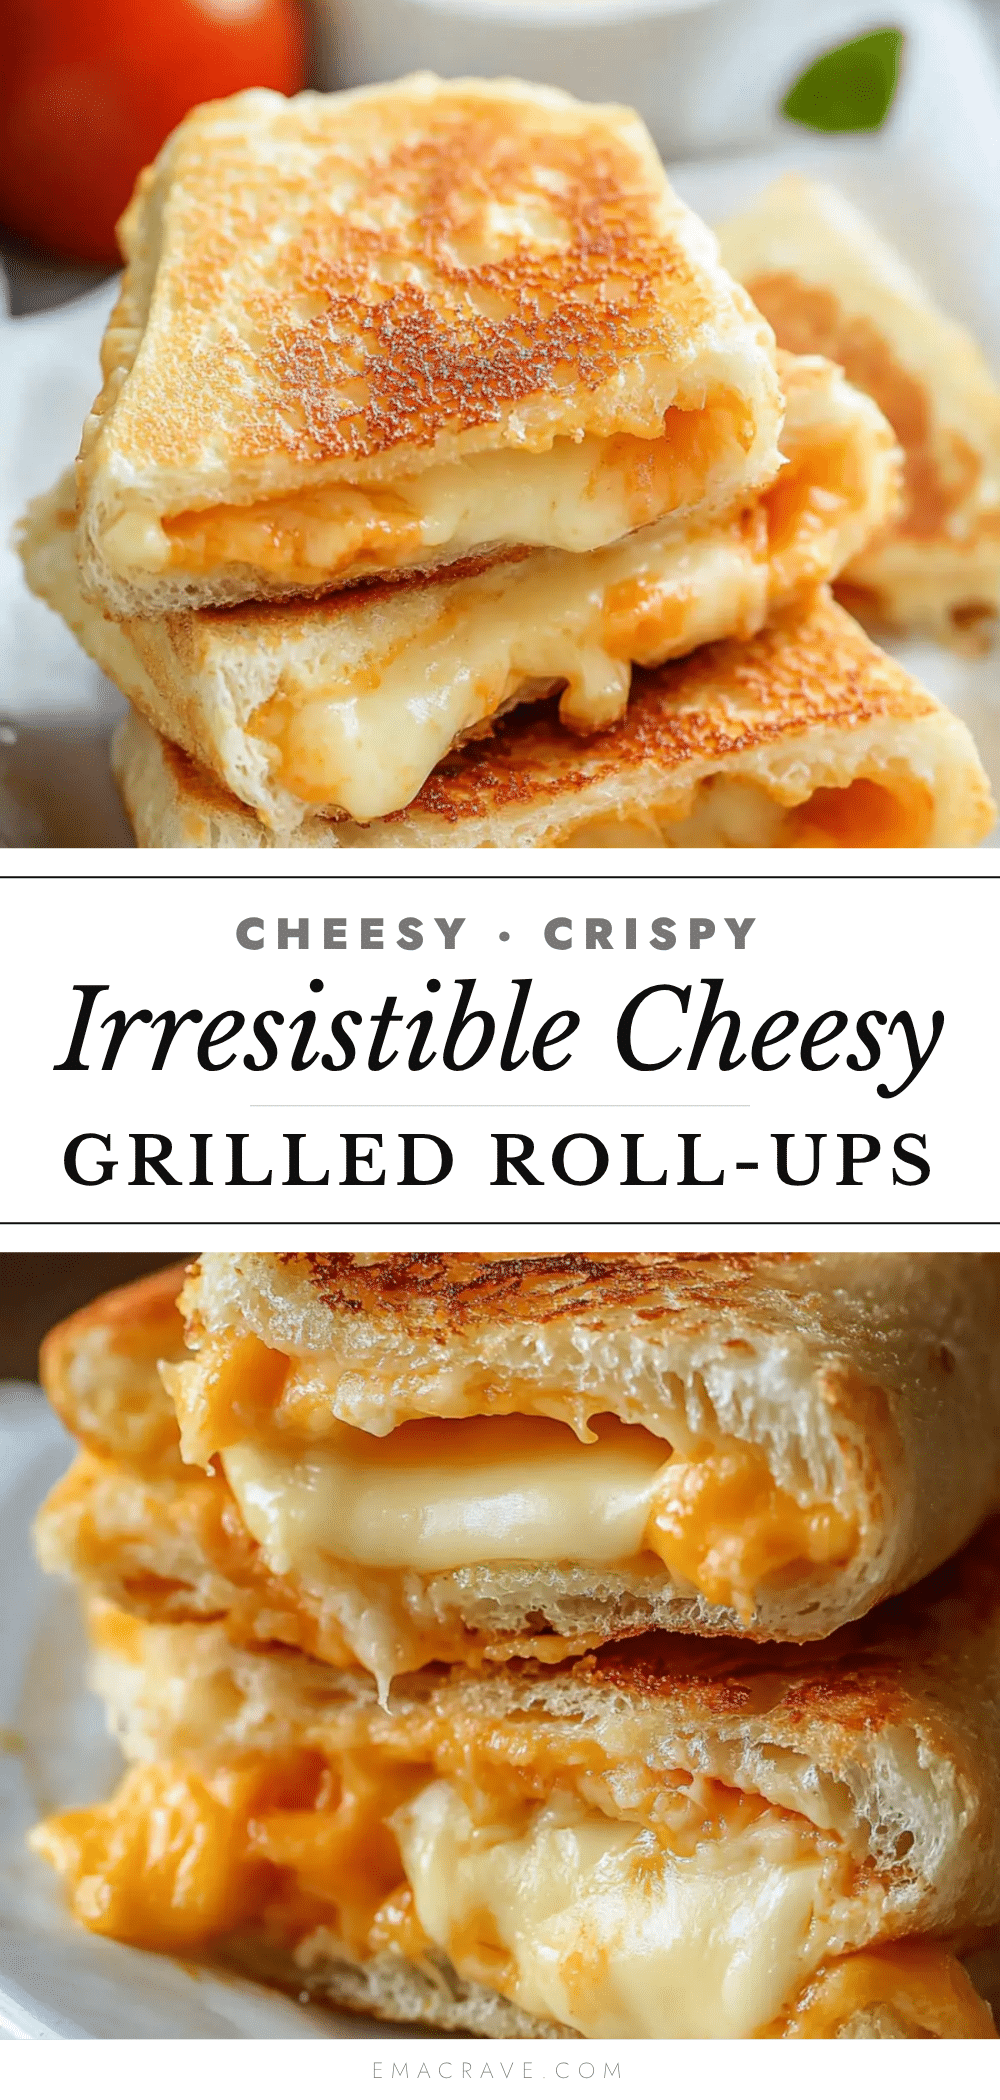
Crispy Grilled Cheese Roll-Ups Perfect for Tomato Soup

These crispy grilled cheese roll-ups are faster, crunchier, and more fun than the classic version. They turn a simple meal into something you actually look forward to—especially when paired with a warm bowl of tomato soup.
- Prep Time: 10 minutes
- Cook Time: 6 minutes
- Total Time: 16 minutes
- Yield: 4 servings (2 roll-ups per serving) 1x
- Category: Main Course
- Cuisine: American
Ingredients
- 8 slices bread (soft white, sourdough, or whole wheat)
- 8 slices cheese (or about 2 cups shredded; cheddar, mozzarella, provolone, or a mix)
- 3 to 4 tablespoons butter, softened
- Optional: garlic powder, dried oregano, paprika, thin slices of tomato, ham, or cooked bacon
Instructions
- Prepare the bread: Lay bread slices on a cutting board. Using a sharp knife or pizza cutter, trim off the crusts from all four sides.
- Flatten the bread: Gently roll over each slice with a rolling pin or bottle until it’s about 1/4-inch thick.
- Add the cheese: Place 1 slice of cheese (or about 1/4 cup shredded cheese) on each flattened bread slice, leaving a small border around the edges.
- Roll them up: Starting from one edge, tightly roll the bread around the cheese. Place each roll-up seam-side down on a plate.
- Butter the outside: Using a pastry brush or your fingers, spread a thin layer of softened butter over the entire surface of each roll-up.
- Heat the skillet: Place a non-stick skillet over medium heat and let it warm up for about 1 minute.
- Cook the roll-ups: Place the roll-ups seam-side down in the skillet. Cook for 2 to 3 minutes, until the bottom is golden brown and crispy.
- Flip and finish: Carefully flip each roll-up and cook for another 2 to 3 minutes, rotating occasionally for even browning.
- Rest before serving: Transfer the roll-ups to a plate and let them rest for 1 to 2 minutes. Serve warm with tomato soup.
Notes
Don’t rush the heat—medium heat is key. Flatten the bread evenly for uniform cooking. Use room temperature butter for best results. Seal the seam by placing roll-ups seam-side down in the pan. Flip carefully with a thin spatula.
Nutrition
- Serving Size: 2 roll-ups with 1 cu
- Calories: 380
- Sodium: 680
- Fat: 22
- Saturated Fat: 12
- Carbohydrates: 32
- Fiber: 3
- Protein: 16
Keywords: grilled cheese, roll-ups, crispy, tomato soup, easy, quick, kid-friendly



