Love this? Save it for later!
Share the inspiration with your friends
The first time I made this creamy cauliflower mac and cheese, it was a Tuesday night in early October. I had a head of cauliflower threatening to go soft in the crisper drawer, a block of sharp cheddar that needed using up, and absolutely zero patience for a complicated dinner. I’d tried cauliflower mac before—the kind that tries to be healthy and tastes like it, you know? Watery sauce, sad texture, that faint cabbage-y smell that lingers. I wasn’t expecting much. I just needed something warm and cheesy to end a long day.
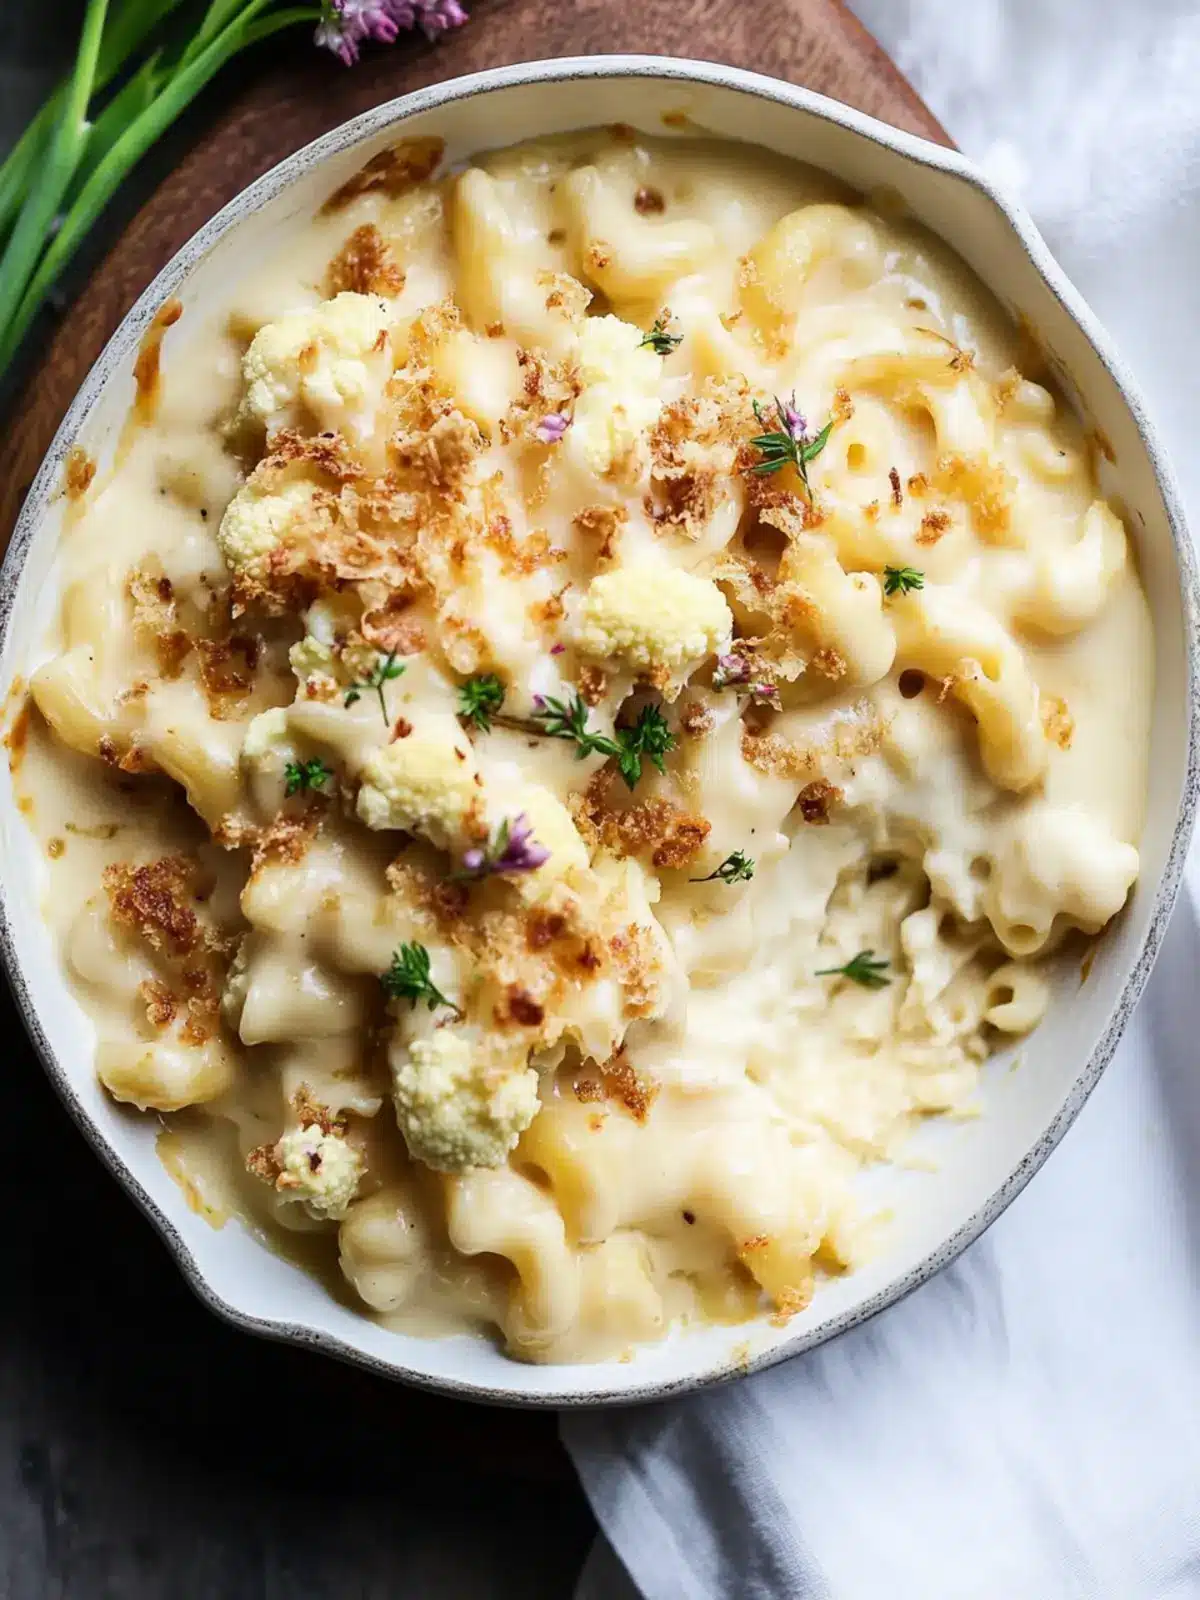
So I did what I always do when I’m skeptical but determined: I roasted the cauliflower first instead of boiling it. That little decision changed everything. The florets got all golden and nutty, and when I blended them into the cheese sauce, they just disappeared. No weird texture, no veggie chunks floating around. Just a ridiculously creamy, velvety sauce that clung to every piece of pasta. I topped it with a mix of panko and Parmesan, popped it under the broiler, and honestly? I stood at the counter eating it straight from the baking dish. My husband walked in and asked what smelled so good, and I just handed him a fork.
That night, I texted my sister a photo with the caption, “I think I accidentally made the best mac and cheese of my life.” She didn’t believe me until she made it herself the next weekend. Now she makes it more than I do. This isn’t one of those recipes where you’re sacrificing flavor for health. It’s one where you get both, and nobody at the table has to know there’s a whole vegetable hiding in that luscious, golden sauce. It’s the kind of recipe that just quietly becomes part of your regular rotation—the one you make on a random Tuesday and suddenly realize you can’t imagine your kitchen without it.
Why You’ll Love This Recipe
Let’s be real for a second. Mac and cheese is already perfect. So why mess with it? Because this version gives you everything you love about the classic—the creamy sauce, the crispy topping, the pure comfort—but it also makes you feel genuinely good about eating it. I’ve tested this recipe at least seven times to get the balance just right, and here’s what makes it stand out from every other cauliflower mac I’ve tried:
- Unbelievably Creamy Without the Guilt : The roasted cauliflower blends into the cheese sauce so smoothly that you’d never guess it’s there. It adds richness without needing a ton of heavy cream or extra butter.
- Simple Ingredients, No Fuss : You probably have most of this in your kitchen right now. No weird health-food swaps, no obscure powders. Just real cheese, milk, pasta, and a head of cauliflower.
- Perfect for Sneaky Veggie Nights : This is the recipe you make when you want to eat more vegetables but also want something that feels like a hug in a bowl. Kids, picky partners, and skeptical friends all fall for it.
- That Irresistible Crispy Topping : The panko-Parmesan crust gets golden and crunchy under the broiler, creating that perfect contrast against the silky sauce. It’s non-negotiable, honestly.
- Crowd-Pleaser Status : I’ve brought this to potlucks and family dinners, and it disappears every single time. People ask for the recipe, and they’re always surprised when I mention the cauliflower.
What makes this recipe different from all the other cauliflower macs out there? It’s the roasting step. Most recipes boil or steam the cauliflower, which leaves it watery and dilutes the cheese flavor. Roasting concentrates the natural sweetness and gives the sauce a deeper, nuttier profile. It’s a small extra step that makes a massive difference. This isn’t just a healthier version of mac and cheese—it’s the version you’ll actually crave, cauliflower and all.
What Ingredients You Will Need
This recipe relies on simple, everyday ingredients that work together to create something greater than the sum of their parts. The cauliflower does the heavy lifting for creaminess, while the cheese brings the soul-satisfying flavor we all want.
- 1 medium head of cauliflower (about 2 pounds) – Look for a firm head with tight, creamy-white florets and fresh green leaves. Avoid any with brown spots or a strong smell. You’ll break it into small florets for roasting.
- 8 ounces elbow macaroni (about 2 cups dry) – Classic elbows work perfectly, but feel free to use cavatappi, shells, or gluten-free pasta if that’s your thing. I’ve even used small shells in a pinch, and they held the sauce beautifully.
- 2 tablespoons unsalted butter – For the roux and for tossing with the breadcrumbs. You can use salted butter, just reduce the added salt slightly.
- 2 tablespoons all-purpose flour – This thickens the cheese sauce. For a gluten-free version, use a 1:1 gluten-free flour blend or cornstarch slurry instead.
- 2 cups whole milk – Whole milk gives the creamiest result, but 2% works too. Avoid skim milk—it makes the sauce thinner and less luxurious.
- 1 cup shredded sharp cheddar cheese – I recommend Tillamook or Cabot for their bold flavor and excellent meltability. Pre-shredded cheese has anti-caking agents that can make the sauce grainy, so shred your own if possible.
- 1 cup shredded Gruyère cheese – This is my secret weapon. Gruyère melts like a dream and adds a nutty, slightly sweet depth that cheddar alone can’t match. You can substitute with Gouda or Fontina if needed.
- 1/2 cup grated Parmesan cheese – Divided. Half goes into the sauce, half gets mixed with the breadcrumbs for the topping.
- 1/2 cup panko breadcrumbs – They’re lighter and crunchier than regular breadcrumbs. If you only have regular, they’ll work, but panko gives that superior crispy texture.
- 1 teaspoon Dijon mustard – Don’t skip this. It doesn’t make the sauce taste like mustard; it just brightens the cheese flavor and adds a subtle tang.
- 1/2 teaspoon garlic powder – For a gentle savory note that complements the cheese without overpowering it.
- 1/4 teaspoon smoked paprika – Optional but recommended. It adds a warm, smoky undertone that pairs beautifully with the roasted cauliflower.
- Salt and black pepper to taste – I use about 1 teaspoon of salt total, but adjust based on your cheese and personal preference.
- Fresh parsley for garnish (optional) – A sprinkle of green makes it look pretty and adds a fresh pop of flavor.
Equipment Needed
You don’t need a fancy kitchen to pull this off. Here’s what you’ll need:
- Baking sheet – For roasting the cauliflower. A rimmed sheet pan works best to catch any juices.
- Large pot – For boiling the pasta. A 4- to 6-quart pot is ideal.
- Medium saucepan – For making the cheese sauce. A heavy-bottomed pan prevents scorching.
- Blender or food processor – This is key for pureeing the roasted cauliflower into the sauce. An immersion blender works too, but a countertop blender gives the smoothest result.
- 9×13-inch baking dish – Or a similar 3-quart casserole dish. A 9×9-inch dish works if you prefer a thicker, more decadent mac.
- Whisk – For a lump-free roux and smooth sauce.
- Cheese grater – Seriously, grate your own cheese. It makes a noticeable difference in texture.
- Colander – For draining pasta.
If you don’t have a blender, you can mash the roasted cauliflower with a fork or potato masher, but the sauce won’t be as silky. I’ve done it that way in a pinch, and it’s still good—just a little rustic.
Preparation Method
- Preheat your oven to 400°F (200°C). Line a baking sheet with parchment paper for easy cleanup.
- Prep the cauliflower: Cut the cauliflower into small florets, about 1 to 1.5 inches each. You want them bite-sized. Toss the florets with 1 tablespoon of olive oil, a pinch of salt, and a few cracks of black pepper. Spread them in a single layer on the baking sheet. Roast for 20-25 minutes, flipping halfway through, until the florets are golden brown and tender when pierced with a fork. The edges should be slightly caramelized—that’s where the flavor lives.
- Cook the pasta: While the cauliflower roasts, bring a large pot of salted water to a boil. Add the elbow macaroni and cook according to package directions until al dente (about 7-8 minutes). Drain the pasta, but reserve about 1/2 cup of the pasta water. Don’t rinse the pasta—the starch helps the sauce stick.
- Make the roux: In a medium saucepan over medium heat, melt the 2 tablespoons of butter. Once it’s foamy, whisk in the flour and cook for 1-2 minutes, stirring constantly. You’re looking for a pale golden color—don’t let it brown. This step cooks out the raw flour taste.
- Build the sauce base: Slowly pour in the milk while whisking continuously to prevent lumps. Keep whisking until the mixture thickens slightly, about 3-4 minutes. It should coat the back of a spoon. Remove from heat.
- Blend the cauliflower: Transfer the roasted cauliflower to a blender. Add the milk mixture, Dijon mustard, garlic powder, and smoked paprika. Blend on high until completely smooth. This should take about 30-45 seconds. The sauce will look pale and creamy—almost like a thick soup.
- Add the cheese: Pour the blended sauce back into the saucepan over low heat. Add the shredded cheddar, Gruyère, and half of the Parmesan. Stir gently until the cheeses are fully melted and the sauce is smooth. Taste and adjust salt and pepper. If the sauce seems too thick, stir in a splash of the reserved pasta water until it reaches your desired consistency.
- Combine pasta and sauce: Pour the cooked macaroni into the saucepan with the cheese sauce. Gently fold everything together until every piece of pasta is coated. The sauce will seem a little loose at this point—that’s okay. It will thicken as it bakes.
- Prepare the crispy topping: In a small bowl, melt the remaining 1 tablespoon of butter. Stir in the panko breadcrumbs and the remaining Parmesan. Mix until the crumbs are evenly coated.
- Assemble and bake: Transfer the mac and cheese to your greased 9×13-inch baking dish. Spread it into an even layer. Sprinkle the panko mixture evenly over the top. Place the dish in the oven and bake at 375°F (190°C) for 15-18 minutes, until the sauce is bubbly around the edges.
- Broil for the golden crust: Switch your oven to broil and watch carefully. Broil for 2-3 minutes until the topping is deep golden brown and crispy. This happens fast, so don’t walk away.
- Rest and serve: Let the dish sit for 5 minutes before serving. This allows the sauce to set slightly so it’s not too runny. Garnish with fresh parsley if desired.
Cooking Tips & Techniques
I’ve made this recipe enough times to know where things can go sideways. Here’s what I’ve learned the hard way so you don’t have to:
Don’t skip roasting the cauliflower. I know it’s tempting to boil it for speed, but boiling adds water that thins out your sauce. Roasting concentrates the flavor and gives you that nutty, sweet base that makes this dish special. Trust me on this one—it’s the difference between “pretty good” and “I can’t stop eating this.”
Grate your own cheese. Pre-shredded cheese is coated with cellulose and starches to prevent clumping, which also prevents it from melting smoothly. Your sauce will be grainier. I’ve tested it side by side, and freshly grated cheese wins every time. It takes two extra minutes and it’s absolutely worth it.
Watch your heat when making the sauce. Cheese sauce is delicate. If your heat is too high, the dairy can separate and turn greasy. Keep the flame on low when you add the cheese, and stir gently until it’s just melted. Patience here pays off in velvety smoothness.
Season in layers. Add salt at each stage—when roasting the cauliflower, when boiling the pasta, and when finishing the sauce. This builds flavor from the ground up rather than relying on a last-minute pinch.
Don’t overbake. The mac and cheese continues to cook as it rests. If you bake it until it’s bubbling aggressively, it can dry out. Pull it from the oven when the edges are bubbly and the center is still slightly jiggly. The carryover heat will finish the job.
Variations & Adaptations
One of the best things about this recipe is how flexible it is. Here are some ways to make it your own:
- Make it gluten-free: Use gluten-free pasta and a 1:1 gluten-free flour blend for the roux. The rest of the recipe stays the same. I’ve done this for a friend with celiac disease, and she couldn’t tell the difference.
- Add protein: Stir in 2 cups of shredded rotisserie chicken, crispy bacon bits, or leftover pulled pork before baking. It turns this side dish into a full meal. I once added leftover smoky BBQ pulled mushrooms on top, and it was incredible.
- Vegan version: Use plant-based milk (unsweetened oat or cashew works best), vegan butter, and your favorite dairy-free cheddar shreds. Nutritional yeast adds a cheesy flavor boost. The sauce won’t be as thick, but it’s still delicious.
- Spice it up: Add 1/4 teaspoon of cayenne pepper or a diced jalapeño to the sauce for a kick. Smoked paprika and chipotle powder also pair beautifully with the roasted cauliflower.
- Vegetable boost: Fold in steamed broccoli, sautéed mushrooms, or roasted cherry tomatoes before baking. I’ve also added a handful of baby spinach at the end, and it wilts perfectly into the hot sauce.
- Different cheese combos: Try smoked Gouda, Monterey Jack, or a sharp white cheddar. A mix of Gruyère and Fontina is my personal favorite for extra creaminess.
Serving & Storage Suggestions
This creamy cauliflower mac and cheese is best served hot, straight from the oven, with that crispy topping still crackling. Let it rest for 5 minutes so the sauce sets slightly—it makes serving much cleaner. I like to scoop it into shallow bowls and sprinkle a little fresh parsley or chives on top for color.
It pairs beautifully with a simple green salad dressed with lemon vinaigrette, or alongside roasted vegetables like crispy Japanese fried tofu patties for a cozy, plant-forward dinner. For a heartier meal, serve it with grilled chicken or a piece of seared salmon.
Storage: Leftovers keep well in an airtight container in the refrigerator for up to 4 days. The topping will lose some of its crunch, but the flavor remains fantastic. To reheat, I recommend the oven or toaster oven at 350°F for 10-15 minutes. The microwave works in a pinch, but it softens the topping further.
Freezing: This recipe freezes surprisingly well. Assemble the dish completely but don’t bake it. Cover tightly with foil and freeze for up to 3 months. When you’re ready to eat, bake from frozen at 375°F for 40-45 minutes, then broil for the crispy top. You can also freeze individual portions in freezer-safe containers for quick lunches.
Flavor development: Honestly, this mac and cheese tastes even better the next day. The flavors meld overnight, and the sauce thickens beautifully. If you’re meal-prepping, make it a day ahead and reheat—you won’t regret it.
Nutritional Information & Benefits
Per serving (based on 8 servings): Approximately 380 calories, 18g protein, 35g carbohydrates, 20g fat, 55mg cholesterol, 620mg sodium, 4g fiber, 8g sugar.
This recipe packs a serious nutritional punch compared to traditional mac and cheese. The cauliflower adds fiber, vitamin C, vitamin K, and a host of antioxidants. It also reduces the overall calorie and fat content without sacrificing the creamy texture we all crave. The Gruyère and cheddar provide calcium and protein, while the whole milk offers a good dose of vitamin D and B12.
If you’re watching your carb intake, this recipe fits well into a balanced diet. The cauliflower essentially replaces some of the pasta volume, so you get more vegetables and fewer refined carbs per bite. It’s also naturally vegetarian and can be adapted for gluten-free or low-lactose diets.
Conclusion
If you’ve ever been skeptical about vegetable-based comfort food, this creamy cauliflower mac and cheese is the recipe that will change your mind. It’s not a compromise—it’s an upgrade. You get all the nostalgic, soul-warming satisfaction of classic mac and cheese, plus the bonus of roasted cauliflower making everything silkier and more flavorful. The crispy panko topping is just the cherry on top.
I love this recipe because it proves you don’t have to choose between eating well and eating something that feels like a treat. It’s the kind of dish that makes you feel clever for sneaking in vegetables, but also makes you want to lick the baking dish clean. Try it once, and I think you’ll find yourself making it on repeat—for weeknight dinners, holiday potlucks, or just because you need a little comfort in your life.
I’d love to hear how it turns out for you! Drop a comment below if you tried a fun variation, or tag me in your photos. And if you’re looking for another cozy, veggie-packed meal, you might enjoy this creamy zucchini soup that comes together in just 30 minutes. Happy cooking, friends!
Frequently Asked Questions
Can I use frozen cauliflower instead of fresh?
You can, but I don’t recommend it. Frozen cauliflower releases a lot of water as it thaws, which makes it harder to roast properly. You’ll end up with steamed, watery florets instead of caramelized, nutty ones. If you’re in a pinch, thaw the frozen cauliflower completely, pat it very dry with paper towels, and then roast at a higher temperature (425°F) to encourage browning.
Why did my cheese sauce turn out grainy?
Grainy sauce usually happens for one of three reasons: the heat was too high when you added the cheese, you used pre-shredded cheese with anti-caking agents, or you added the cheese too quickly. Keep the heat on low, stir gently, and add the cheese in small handfuls, letting each batch melt before adding more. Freshly grated cheese is your best friend here.
Can I make this ahead of time for a party?
Absolutely. Assemble the mac and cheese completely (including the topping) but don’t bake it. Cover and refrigerate for up to 24 hours. When you’re ready, bake at 375°F for 25-30 minutes (add 5-10 minutes since it starts cold), then broil for the crispy top. You might need to add a splash of milk if the sauce seems thick after refrigeration.
How do I make the topping extra crispy?
The key is the butter-to-breadcrumb ratio and the broiler. Make sure every panko crumb is coated in melted butter. Don’t skimp on the Parmesan—it adds flavor and helps the crumbs crisp up. When broiling, watch like a hawk. You want deep golden brown, not burnt. Rotate the dish halfway through if your oven has hot spots.
Is this recipe suitable for kids?
Yes, and that’s one of my favorite things about it. Kids who normally balk at vegetables eat this without question because it looks and tastes like regular mac and cheese. The cauliflower is completely hidden in the sauce. If your kids are extra observant, you can roast the cauliflower until it’s very dark and blend it thoroughly so there’s no trace of green or texture. Serve it with a smile and don’t mention the cauliflower until after they’ve asked for seconds!
Pin This Recipe!
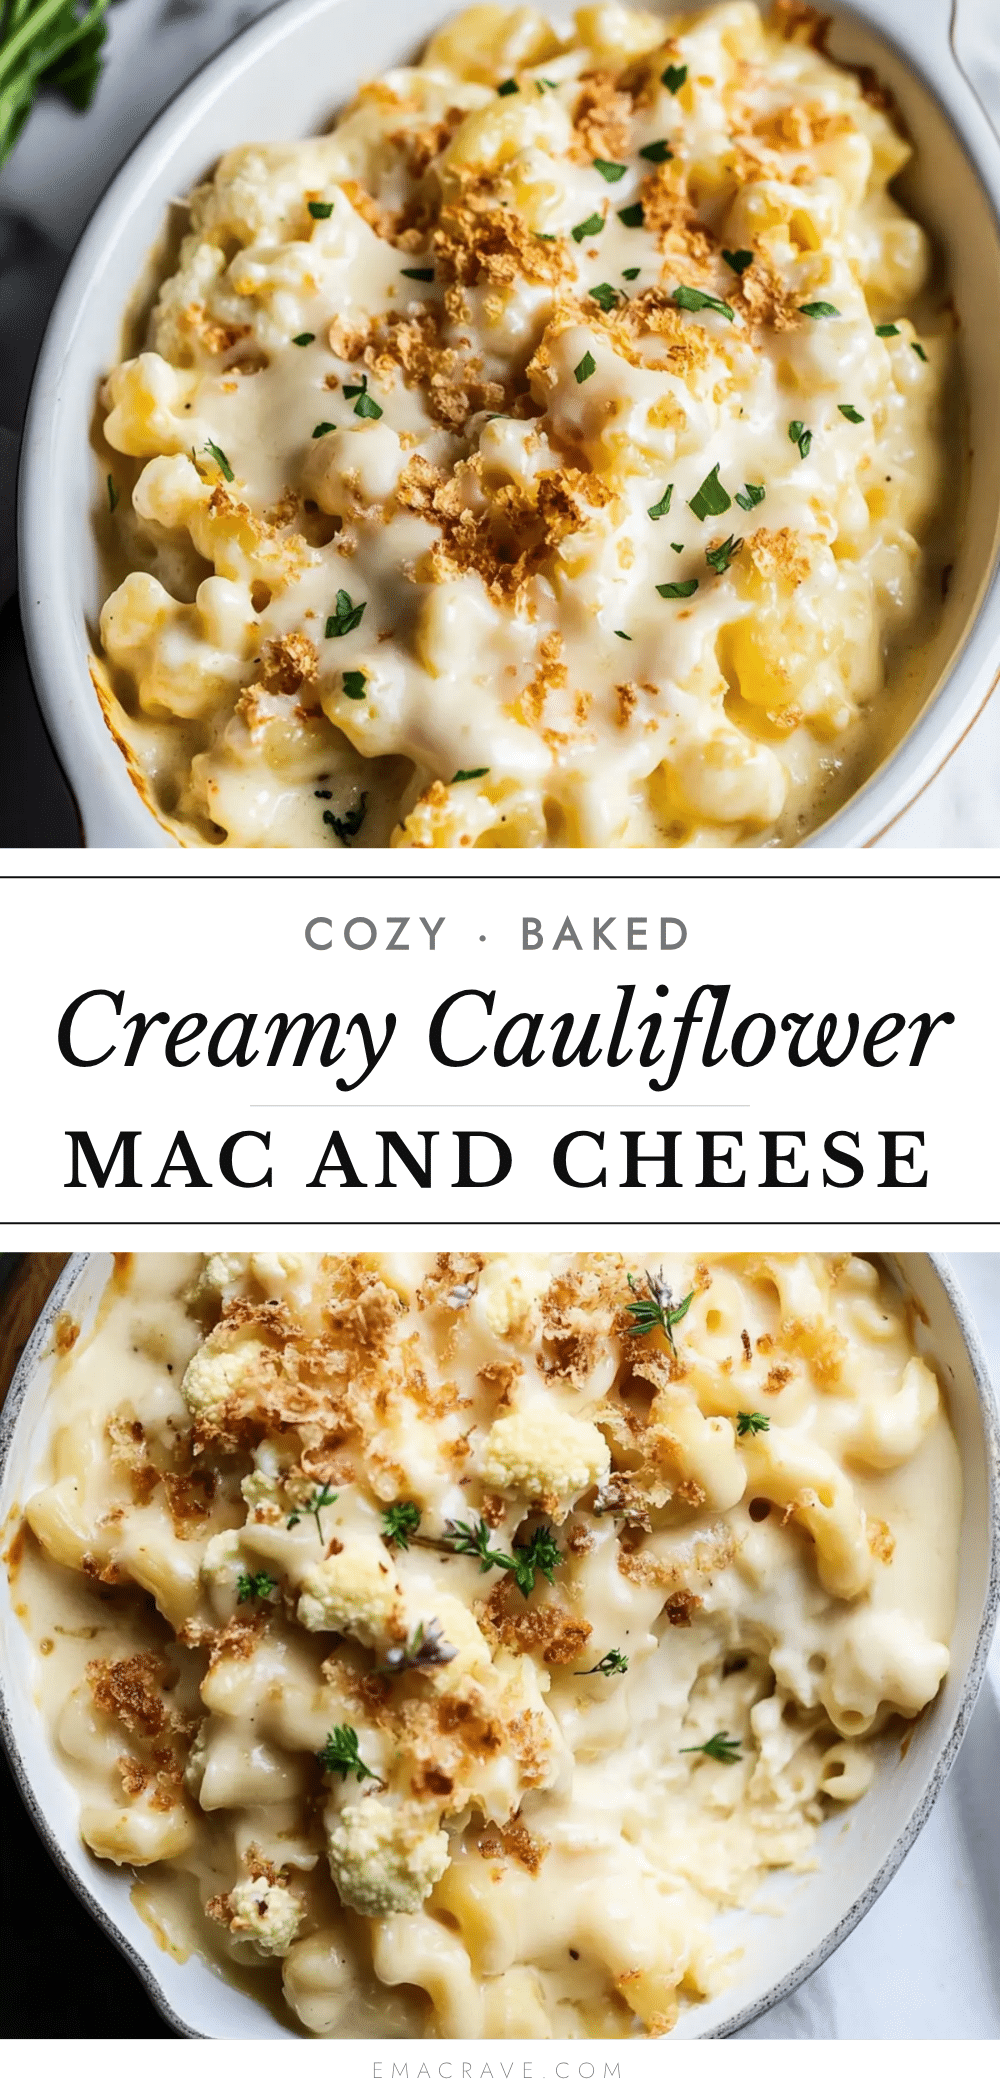
Creamy Cauliflower Mac and Cheese: Best Easy Recipe

This creamy cauliflower mac and cheese combines roasted cauliflower with a velvety cheese sauce for a healthier twist on the classic comfort food. It’s so delicious that no one will guess there’s a whole vegetable hiding in the golden, luscious sauce.
- Prep Time: 15 minutes
- Cook Time: 45 minutes
- Total Time: 1 hour
- Yield: 8 servings 1x
- Category: Main Course
- Cuisine: American
Ingredients
- 1 medium head of cauliflower (about 2 pounds)
- 8 ounces elbow macaroni (about 2 cups dry)
- 2 tablespoons unsalted butter
- 2 tablespoons all-purpose flour
- 2 cups whole milk
- 1 cup shredded sharp cheddar cheese
- 1 cup shredded Gruyère cheese
- 1/2 cup grated Parmesan cheese, divided
- 1/2 cup panko breadcrumbs
- 1 teaspoon Dijon mustard
- 1/2 teaspoon garlic powder
- 1/4 teaspoon smoked paprika (optional)
- Salt and black pepper to taste
- 1 tablespoon olive oil (for roasting cauliflower)
- Fresh parsley for garnish (optional)
Instructions
- Preheat your oven to 400°F (200°C). Line a baking sheet with parchment paper.
- Cut the cauliflower into small florets, about 1 to 1.5 inches each. Toss with 1 tablespoon olive oil, a pinch of salt, and black pepper. Spread in a single layer on the baking sheet. Roast for 20-25 minutes, flipping halfway, until golden brown and tender.
- While cauliflower roasts, bring a large pot of salted water to a boil. Cook elbow macaroni according to package directions until al dente (about 7-8 minutes). Drain, reserving 1/2 cup pasta water. Do not rinse.
- In a medium saucepan over medium heat, melt 2 tablespoons butter. Whisk in flour and cook for 1-2 minutes until pale golden.
- Slowly pour in milk while whisking continuously. Cook until thickened, about 3-4 minutes. Remove from heat.
- Transfer roasted cauliflower to a blender. Add milk mixture, Dijon mustard, garlic powder, and smoked paprika. Blend until completely smooth, about 30-45 seconds.
- Pour blended sauce back into saucepan over low heat. Add cheddar, Gruyère, and half of the Parmesan. Stir until melted and smooth. Adjust salt and pepper. If too thick, add a splash of reserved pasta water.
- Pour cooked macaroni into the saucepan with cheese sauce. Fold until every piece is coated.
- In a small bowl, melt remaining 1 tablespoon butter. Stir in panko breadcrumbs and remaining Parmesan until evenly coated.
- Transfer mac and cheese to a greased 9×13-inch baking dish. Spread evenly. Sprinkle panko mixture over the top.
- Bake at 375°F (190°C) for 15-18 minutes until bubbly around edges.
- Switch oven to broil. Broil for 2-3 minutes until topping is deep golden brown and crispy. Watch carefully.
- Let dish rest for 5 minutes before serving. Garnish with fresh parsley if desired.
Notes
Don’t skip roasting the cauliflower—it concentrates flavor and prevents a watery sauce. Grate your own cheese for the smoothest sauce. Watch the heat when making the sauce to avoid graininess. The mac and cheese tastes even better the next day.
Nutrition
- Serving Size: 1 serving
- Calories: 380
- Sugar: 8
- Sodium: 620
- Fat: 20
- Saturated Fat: 12
- Carbohydrates: 35
- Fiber: 4
- Protein: 18
Keywords: cauliflower mac and cheese, healthy mac and cheese, creamy mac and cheese, roasted cauliflower mac and cheese, comfort food, vegetarian mac and cheese



