Love this? Save it for later!
Share the inspiration with your friends
I was standing at the counter, butter softening in a bowl, when my phone buzzed. My brother, three states away, had sent a photo of a sad, bendy piece of store-bought pita with a single crumb of garlic butter melting off the edge. “I miss your bread,” he typed. That was it. No greeting, no context. Just a man, a floppy pita, and a plea.
I laughed, but I also understood. There is something about garlic bread that feels like a hug on a plate. But regular bread? It can be heavy, dense, and honestly, a little too much for a weeknight. I wanted something lighter, softer, and faster. Something you could pull apart with your hands and dip into soup or wrap around a grilled veggie without it cracking in half.
So I started messing around in my kitchen. I wanted a pita that was pillowy, not chewy. One that could hold a generous smear of garlic butter without getting soggy. And I wanted it done in under an hour, start to finish. After a few trials (and one batch that came out more like crackers), I landed on this homemade garlic pita bread. It’s soft, buttery, and honestly, it ruined store-bought for me.
This isn’t just bread. It’s the kind of thing you make when you want to feel like you’ve got it together, even if the rest of your day was chaos. And the smell? It’ll pull everyone into the kitchen before you even pull the pan out of the oven.
Why You’ll Love This Recipe
I’ve tested this recipe more times than I care to admit. Here’s why I keep coming back to it—and why you will too.
- Quick & Easy: From mixing to eating in under 45 minutes. No complicated folding or proofing required.
- Simple Ingredients: You probably have everything already. Flour, yeast, butter, garlic. That’s it.
- Perfect for Any Meal: Serve it alongside soups, salads, stews, or just eat it straight out of the oven. It works for breakfast, lunch, and dinner.
- Crowd-Pleaser: I’ve brought these to potlucks and family dinners. They disappear fast. Kids love them, adults love them, everyone loves them.
- Unbelievably Soft: The texture is what sets this apart. It’s not dry or tough. It’s tender, almost cloud-like, with a buttery garlic crust that makes you close your eyes after the first bite.
What makes this different from other recipes? It’s the technique. Instead of rolling the dough paper-thin, I keep it slightly thicker so the pita stays soft and fluffy. And the garlic butter isn’t just brushed on after baking—it’s layered into the dough itself, so every bite is infused with flavor. This isn’t just another bread recipe. It’s the one you’ll save and make again.
What Ingredients You Will Need
This recipe relies on a handful of pantry staples that come together to create something truly special. Here’s what you’ll need and why each ingredient matters.
- All-Purpose Flour (2 ½ cups / 315g): The backbone of the dough. I use unbleached all-purpose flour for the best texture. You can substitute bread flour for a slightly chewier pita, but stick with all-purpose for that soft, tender crumb.
- Warm Water (1 cup / 240ml): Activates the yeast and hydrates the flour. Make sure it’s warm—about 110°F (43°C)—not hot. Too hot and you’ll kill the yeast. Too cold and the dough won’t rise properly.
- Active Dry Yeast (2 ¼ teaspoons / 7g): One standard packet. This is what gives the pita its lift. I prefer Red Star or Fleischmann’s for consistent results. If you use instant yeast, you can skip the proofing step and mix it directly with the flour.
- Honey or Sugar (1 tablespoon): Feeds the yeast and adds a whisper of sweetness that balances the garlic. Honey is my go-to, but white sugar works just fine.
- Salt (1 teaspoon): Don’t skip it. Salt controls the yeast activity and strengthens the gluten structure. I use fine sea salt.
- Olive Oil (2 tablespoons): Adds richness and keeps the dough soft. Extra virgin olive oil gives a subtle fruity note, but regular olive oil is perfectly fine.
- Unsalted Butter (4 tablespoons / 57g, softened): This is the star of the garlic butter. Use unsalted so you can control the salt level. Let it come to room temperature before mixing.
- Fresh Garlic (4-5 cloves, minced): Please, please use fresh garlic. The jarred stuff won’t give you the same punch. I mince it finely so it melts into the butter without leaving harsh chunks.
- Dried Parsley (1 teaspoon, optional): For color and a mild herbaceous note. Fresh parsley works too—just double the amount.
- Flaky Sea Salt (for finishing): A sprinkle on top right after baking makes a huge difference. Maldon is my favorite.
Equipment Needed
You don’t need a fancy kitchen to make this bread. Here’s what I use every time.
- Large Mixing Bowl: For combining the dough. Glass or stainless steel works best.
- Wooden Spoon or Dough Whisk: For mixing the ingredients before kneading.
- Measuring Cups and Spoons: Accuracy matters, especially with yeast and salt.
- Kitchen Scale (optional but helpful): I like weighing my flour for consistent results. If you don’t have one, fluff your flour with a spoon before scooping.
- Rolling Pin: For shaping the pitas. A wine bottle works in a pinch—I’ve done it.
- Baking Sheet: One large sheet or two smaller ones. No need to grease it.
- Parchment Paper: Prevents sticking and makes cleanup easy.
- Pastry Brush: For spreading the garlic butter. A silicone brush is best, but a regular one works too.
- Clean Kitchen Towel: For covering the dough while it rises.
Preparation Method
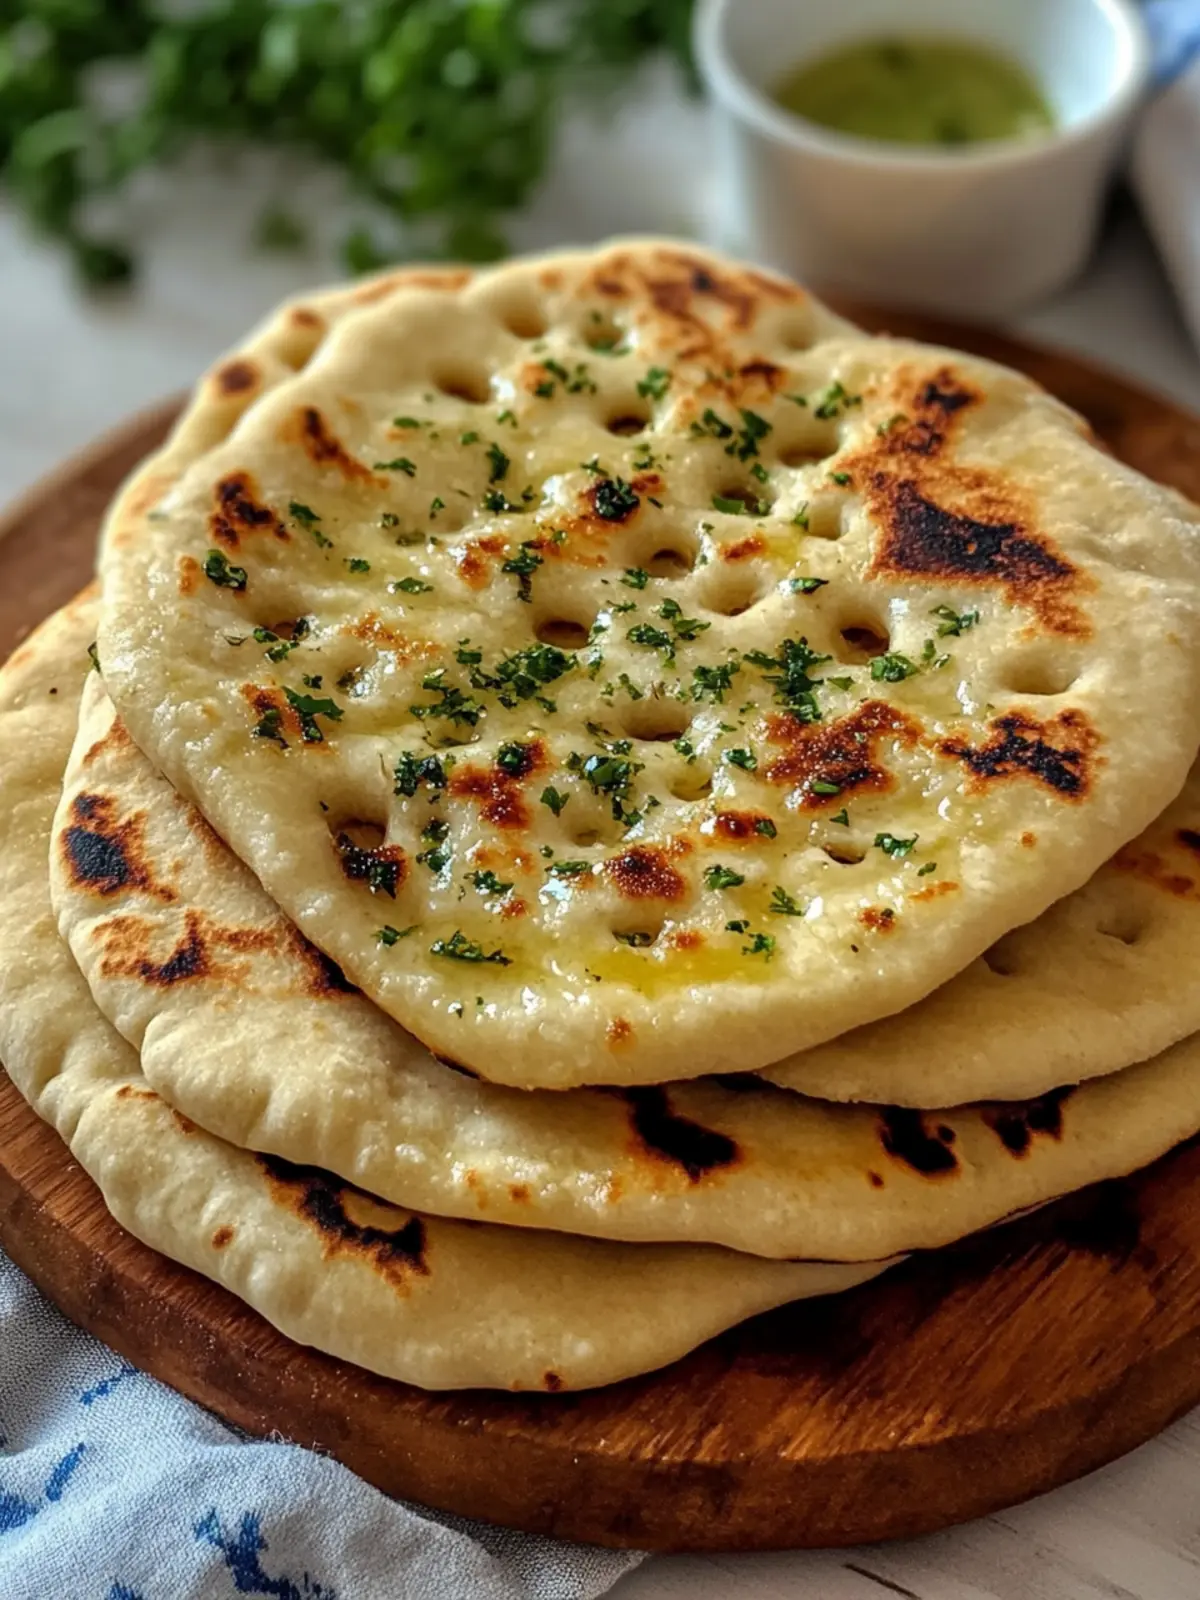
Let’s make some bread. I’ll walk you through every step so you feel confident.
- Proof the yeast. In your mixing bowl, combine the warm water and honey (or sugar). Sprinkle the yeast on top and let it sit for 5-10 minutes until it’s foamy. If it doesn’t foam, your yeast might be dead—start over with fresh yeast. I’ve learned this the hard way.
- Mix the dough. Add 2 cups of flour and the salt to the yeast mixture. Stir with a wooden spoon until a shaggy dough forms. Then add the olive oil and continue mixing. Gradually add the remaining ½ cup of flour, a little at a time, until the dough pulls away from the sides of the bowl. It should be slightly sticky but manageable.
- Knead. Turn the dough onto a lightly floured surface. Knead for 6-8 minutes, pushing the dough away from you with the heel of your hand, then folding it back. If it sticks too much, sprinkle a tiny bit more flour. The dough should feel smooth and elastic when you’re done. You’ll know it’s ready when you press it with your finger and it springs back.
- First rise. Place the dough in a lightly oiled bowl, cover with a clean kitchen towel, and let it rise in a warm spot for 30-40 minutes. It should double in size. I set my oven to the lowest setting for 2 minutes, then turn it off and put the bowl inside. Works every time.
- Make the garlic butter. While the dough rises, combine the softened butter, minced garlic, and dried parsley in a small bowl. Mash it together with a fork until smooth. Set aside at room temperature.
- Shape the pitas. Punch down the dough and turn it onto a floured surface. Divide it into 8 equal pieces (about 70g each). Roll each piece into a ball, then use a rolling pin to flatten it into a round disc about ¼-inch thick. Don’t make them too thin, or they’ll be crispy instead of soft.
- Second rise. Place the shaped pitas on a parchment-lined baking sheet, leaving a little space between them. Cover loosely with the towel and let them rest for 15 minutes. This relaxes the gluten and makes them extra tender.
- Preheat the oven. About 5 minutes before the second rise is done, preheat your oven to 425°F (220°C). If you have a pizza stone, put it in now to heat up.
- Bake. Bake the pitas for 6-8 minutes, until they’re puffed up and lightly golden. They won’t brown much on top, but the bottoms should be golden. Don’t overbake, or they’ll dry out.
- Brush with garlic butter. As soon as the pitas come out of the oven, brush them generously with the garlic butter while they’re still hot. The butter will melt into the bread. Sprinkle with flaky sea salt.
- Serve warm. Let them cool for 2 minutes, then tear into them. I dare you to stop at one.
Cooking Tips & Techniques
I’ve made this recipe more times than I can count, and I’ve learned a few things along the way. Here are my best tips.
- Don’t skip the yeast proof. I know it’s tempting to just dump everything together, but proofing the yeast first ensures it’s alive and active. If your water is too hot or too cold, the yeast won’t work, and your pitas will be flat and dense. I’ve ruined a batch this way—trust me, it’s worth the extra 5 minutes.
- Knead with confidence. Under-kneaded dough leads to tough, dense bread. Don’t be afraid to really work it. If your arms get tired, you’re doing it right. The dough should feel smooth and bouncy, like a baby’s cheek.
- Watch the oven like a hawk. These pitas bake fast. I’ve walked away for a minute and come back to slightly overbaked bread. Set a timer for 6 minutes, then check. They’re done when they’re puffed and the bottoms are golden.
- Brush immediately. The garlic butter goes on right out of the oven while the pitas are still hot. This helps the butter soak into the bread instead of just sitting on top. If you wait, the butter won’t melt as well.
- Double the batch. These freeze beautifully, so I always make extra. Just don’t brush the ones you plan to freeze with butter—do that after reheating.
Variations & Adaptations
This recipe is a great base, but don’t be afraid to play around. Here are some variations I’ve tried and loved.
- Herb & Garlic Pita: Add 1 teaspoon of dried oregano or rosemary to the garlic butter. It gives the bread a Mediterranean vibe that pairs perfectly with this fresh tomato garlic salad.
- Cheesy Garlic Pita: Sprinkle grated Parmesan or mozzarella on top of the pitas during the last 2 minutes of baking. The cheese melts into the bread and gets slightly crispy. It’s dangerous.
- Spicy Garlic Pita: Add a pinch of red pepper flakes or a drizzle of sriracha to the garlic butter. The heat cuts through the richness beautifully.
- Whole Wheat Version: Substitute 1 cup of all-purpose flour with whole wheat flour. The texture will be a bit denser, but it’s still delicious. You might need an extra tablespoon of water.
- Gluten-Free Option: Use a 1:1 gluten-free baking flour blend. The dough will be stickier, so add a little extra flour as needed. The texture won’t be exactly the same, but it’s still good.
Serving & Storage Suggestions
These pitas are best served warm, but they’re still good at room temperature. Here’s how I like to serve and store them.
- Serving: Serve them straight out of the oven with a bowl of soup, stew, or curry. They’re also amazing alongside this creamy cauliflower mac and cheese for the ultimate comfort meal. Or just tear them apart and dip them in olive oil and balsamic vinegar.
- Storage: Store leftover pitas in an airtight container at room temperature for up to 2 days. Don’t refrigerate them—it dries them out. If you’ve already brushed them with butter, place a piece of parchment paper between each pita to prevent sticking.
- Freezing: Freeze unbuttered pitas in a single layer on a baking sheet, then transfer them to a freezer bag. They’ll keep for up to 3 months. To reheat, pop them in a 350°F (175°C) oven for 5-7 minutes, then brush with garlic butter.
- Reheating: The best way to reheat is in a dry skillet over medium heat for about 30 seconds per side. It brings back the softness without making them soggy. The microwave works in a pinch, but they’ll be a little chewy.
I’ve noticed that the flavors actually get better after a few hours. The garlic butter soaks into the bread, and the salt mellows out. They’re still delicious the next day, especially if you toast them lightly.
Nutritional Information & Benefits
Here’s an approximate nutritional breakdown for one pita (based on 8 servings). Keep in mind this is an estimate.
- Calories: 220
- Fat: 9g
- Carbohydrates: 30g
- Protein: 5g
- Fiber: 1g
- Sugar: 2g
While this isn’t a health food, it does have some redeeming qualities. Garlic is known for its immune-boosting properties and anti-inflammatory effects. The olive oil provides healthy monounsaturated fats. And making bread from scratch means you control the ingredients—no preservatives or weird additives.
If you’re watching your salt intake, you can reduce the flaky sea salt on top or use a salt-free butter. For a lower-fat version, use a butter substitute, though the texture won’t be quite as rich. I personally believe in enjoying food in moderation, and this bread is worth every bite.
Frequently Asked Questions
Can I make this dough ahead of time?
Yes! You can prepare the dough through the first rise, then punch it down and refrigerate it for up to 24 hours. Let it come to room temperature before shaping and baking.
Why didn’t my pitas puff up?
Several reasons. Your yeast might be dead, your water was too hot, or you overworked the dough. Make sure your yeast is fresh and your water is warm, not hot. Also, don’t skip the second rise—it’s crucial for puffiness.
Can I use garlic powder instead of fresh garlic?
You can, but the flavor won’t be as bright or punchy. Fresh garlic is really the star here. If you’re in a pinch, use ½ teaspoon of garlic powder mixed into the butter.
How do I make these vegan?
Use vegan butter or olive oil instead of butter, and substitute the honey with maple syrup or agave. The dough itself is already vegan-friendly.
Can I grill these instead of baking?
Absolutely. Cook them on a hot grill or grill pan for about 2 minutes per side. You’ll get beautiful char marks and a slightly smoky flavor. Brush with garlic butter after grilling.
Conclusion
This homemade garlic pita bread has become a staple in my kitchen, and I think it deserves a spot in yours too. It’s the kind of recipe that feels special without being complicated. You don’t need to be a bread expert to pull it off. You just need a little patience, a little butter, and a lot of garlic.
I love how versatile it is. One day it’s the perfect side for a cozy bowl of soup, and the next it’s the star of a quick lunch with hummus and veggies. It’s forgiving, adaptable, and honestly, it makes your kitchen smell like a dream. If you’re looking for another way to use up that garlic, try pairing these pitas with these spicy tofu wontons in chili broth for a meal that’s pure comfort.
I’d love to hear how yours turn out. Did you add cheese? Did you make them spicy? Did you eat three in one sitting (no judgment)? Drop a comment below and let me know. And if you share a photo on social media, tag me—I want to see your beautiful, buttery pitas.
Happy baking, friend. You’ve got this.
Pin This Recipe!
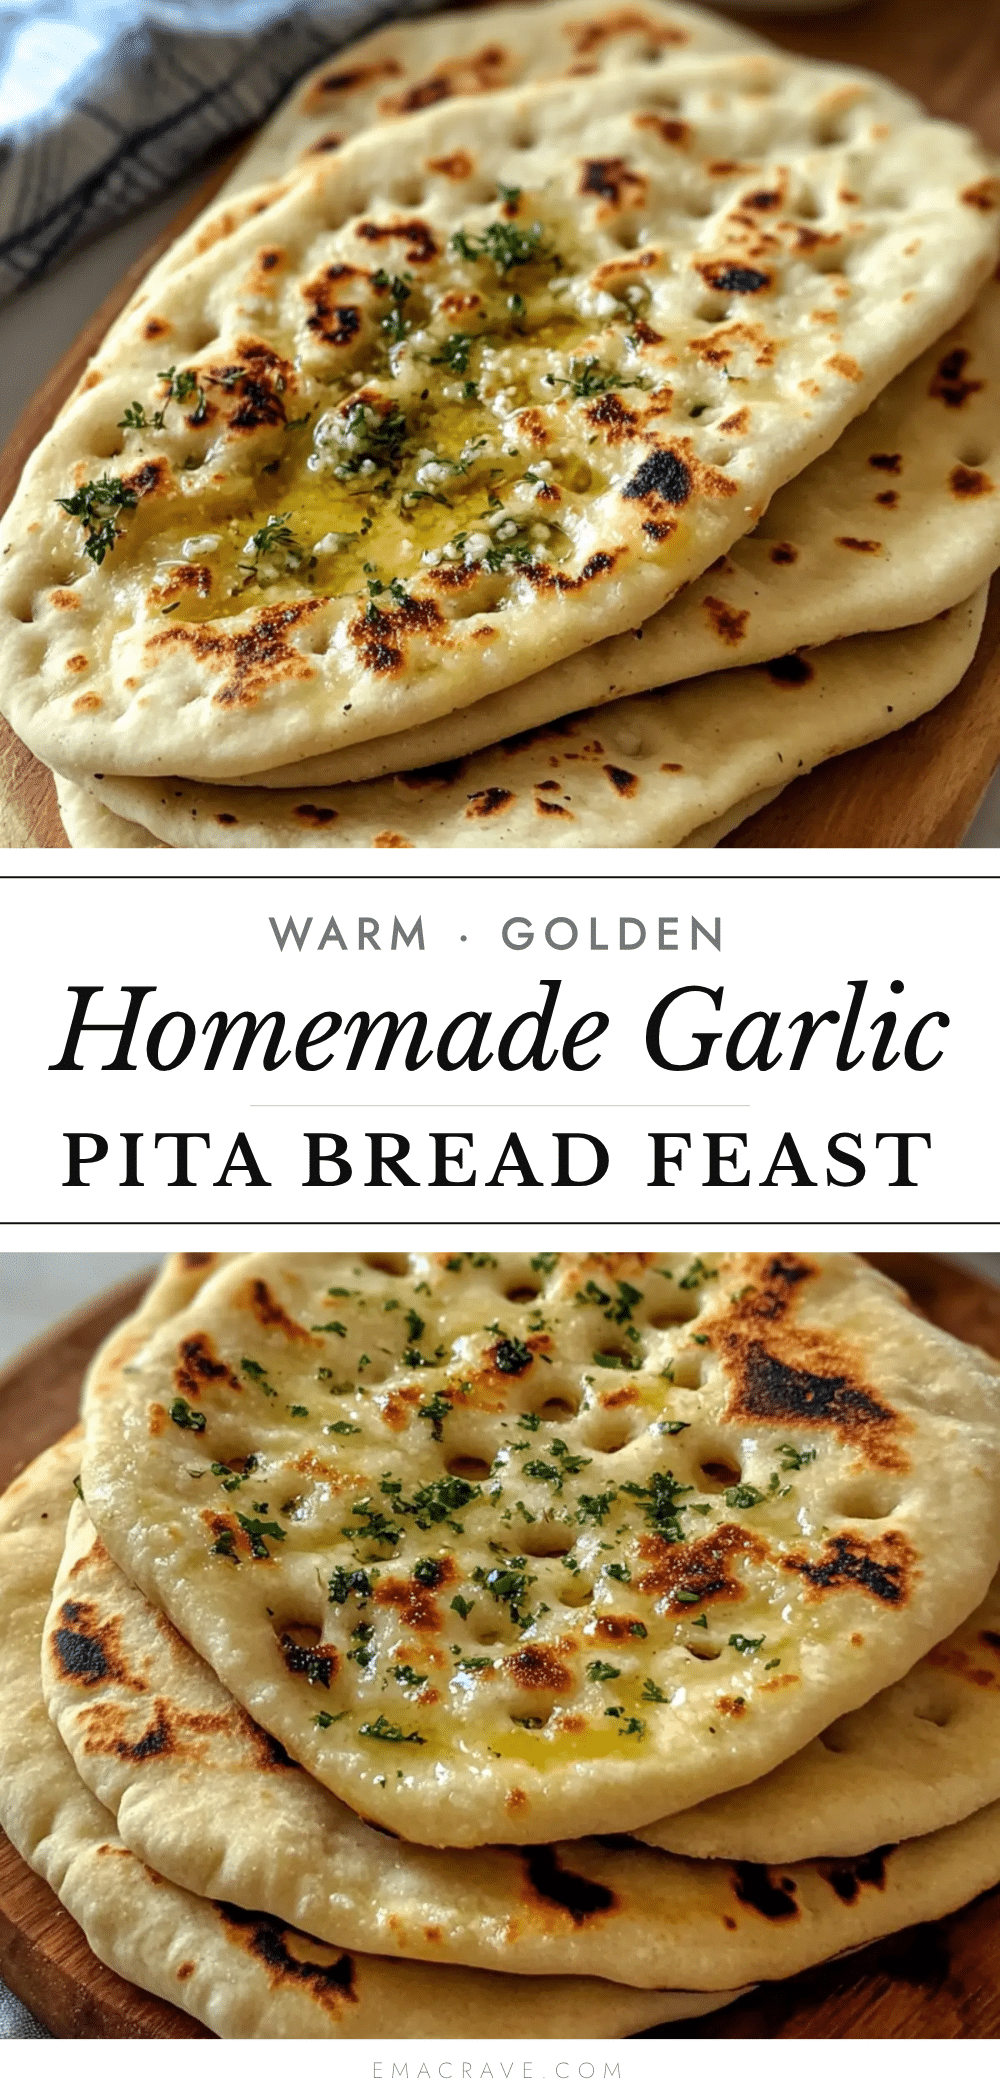
Easy Homemade Garlic Pita Bread – Soft & Buttery
Soft, buttery homemade garlic pita bread that’s quick and easy to make. Perfect for dipping, wrapping, or enjoying straight out of the oven.
- Prep Time: 15 minutes
- Cook Time: 8 minutes
- Total Time: 45 minutes
- Yield: 8 servings 1x
- Category: Bread
- Cuisine: Mediterranean
Ingredients
- 2 ½ cups (315g) all-purpose flour
- 1 cup (240ml) warm water (about 110°F/43°C)
- 2 ¼ teaspoons (7g) active dry yeast
- 1 tablespoon honey or sugar
- 1 teaspoon fine sea salt
- 2 tablespoons olive oil
- 4 tablespoons (57g) unsalted butter, softened
- 4–5 cloves fresh garlic, minced
- 1 teaspoon dried parsley (optional)
- Flaky sea salt for finishing
Instructions
- Proof the yeast: In a large mixing bowl, combine warm water and honey (or sugar). Sprinkle yeast on top and let sit for 5-10 minutes until foamy.
- Mix the dough: Add 2 cups of flour and salt to the yeast mixture. Stir with a wooden spoon until a shaggy dough forms. Add olive oil and continue mixing. Gradually add remaining ½ cup flour until dough pulls away from the sides of the bowl.
- Knead: Turn dough onto a lightly floured surface and knead for 6-8 minutes until smooth and elastic.
- First rise: Place dough in a lightly oiled bowl, cover with a clean kitchen towel, and let rise in a warm spot for 30-40 minutes until doubled in size.
- Make garlic butter: In a small bowl, combine softened butter, minced garlic, and dried parsley. Mash with a fork until smooth. Set aside at room temperature.
- Shape pitas: Punch down dough and turn onto a floured surface. Divide into 8 equal pieces (about 70g each). Roll each into a ball, then flatten into a ¼-inch thick disc.
- Second rise: Place shaped pitas on a parchment-lined baking sheet, cover loosely with towel, and let rest for 15 minutes.
- Preheat oven to 425°F (220°C) about 5 minutes before second rise is done.
- Bake: Bake pitas for 6-8 minutes until puffed and lightly golden on the bottom.
- Brush with garlic butter: As soon as pitas come out of the oven, brush generously with garlic butter while still hot. Sprinkle with flaky sea salt.
- Serve warm: Let cool for 2 minutes before serving.
Notes
Don’t skip the yeast proof. Brush garlic butter immediately after baking. For freezing, don’t brush with butter before freezing; brush after reheating.
Nutrition
- Serving Size: 1 pita
- Calories: 220
- Sugar: 2
- Sodium: 290
- Fat: 9
- Saturated Fat: 4
- Carbohydrates: 30
- Fiber: 1
- Protein: 5
Keywords: garlic pita bread, homemade pita, easy bread recipe, garlic bread, soft pita



