Love this? Save it for later!
Share the inspiration with your friends
The first time I made this crème brûlée cheesecake, I was actually trying to get rid of a half-used block of cream cheese before it turned into a science experiment. You know how it goes—you buy the big block for a recipe, use a third of it, and then it sits there staring at you from the fridge shelf for two weeks. I had a torch I’d bought on a whim (blame a late-night shopping scroll) and some heavy cream that needed using up. So I thought, why not throw them together and see what happens?
I honestly didn’t expect much. I figured I’d get a decent cheesecake with a weirdly caramelized top. But then I cracked that first spoonful through the glassy sugar shell and hit the silky cream cheese layer underneath, and I just stood there in my kitchen, eating straight from the ramekin. No judgment, please.
That was three batches ago. In the same week.
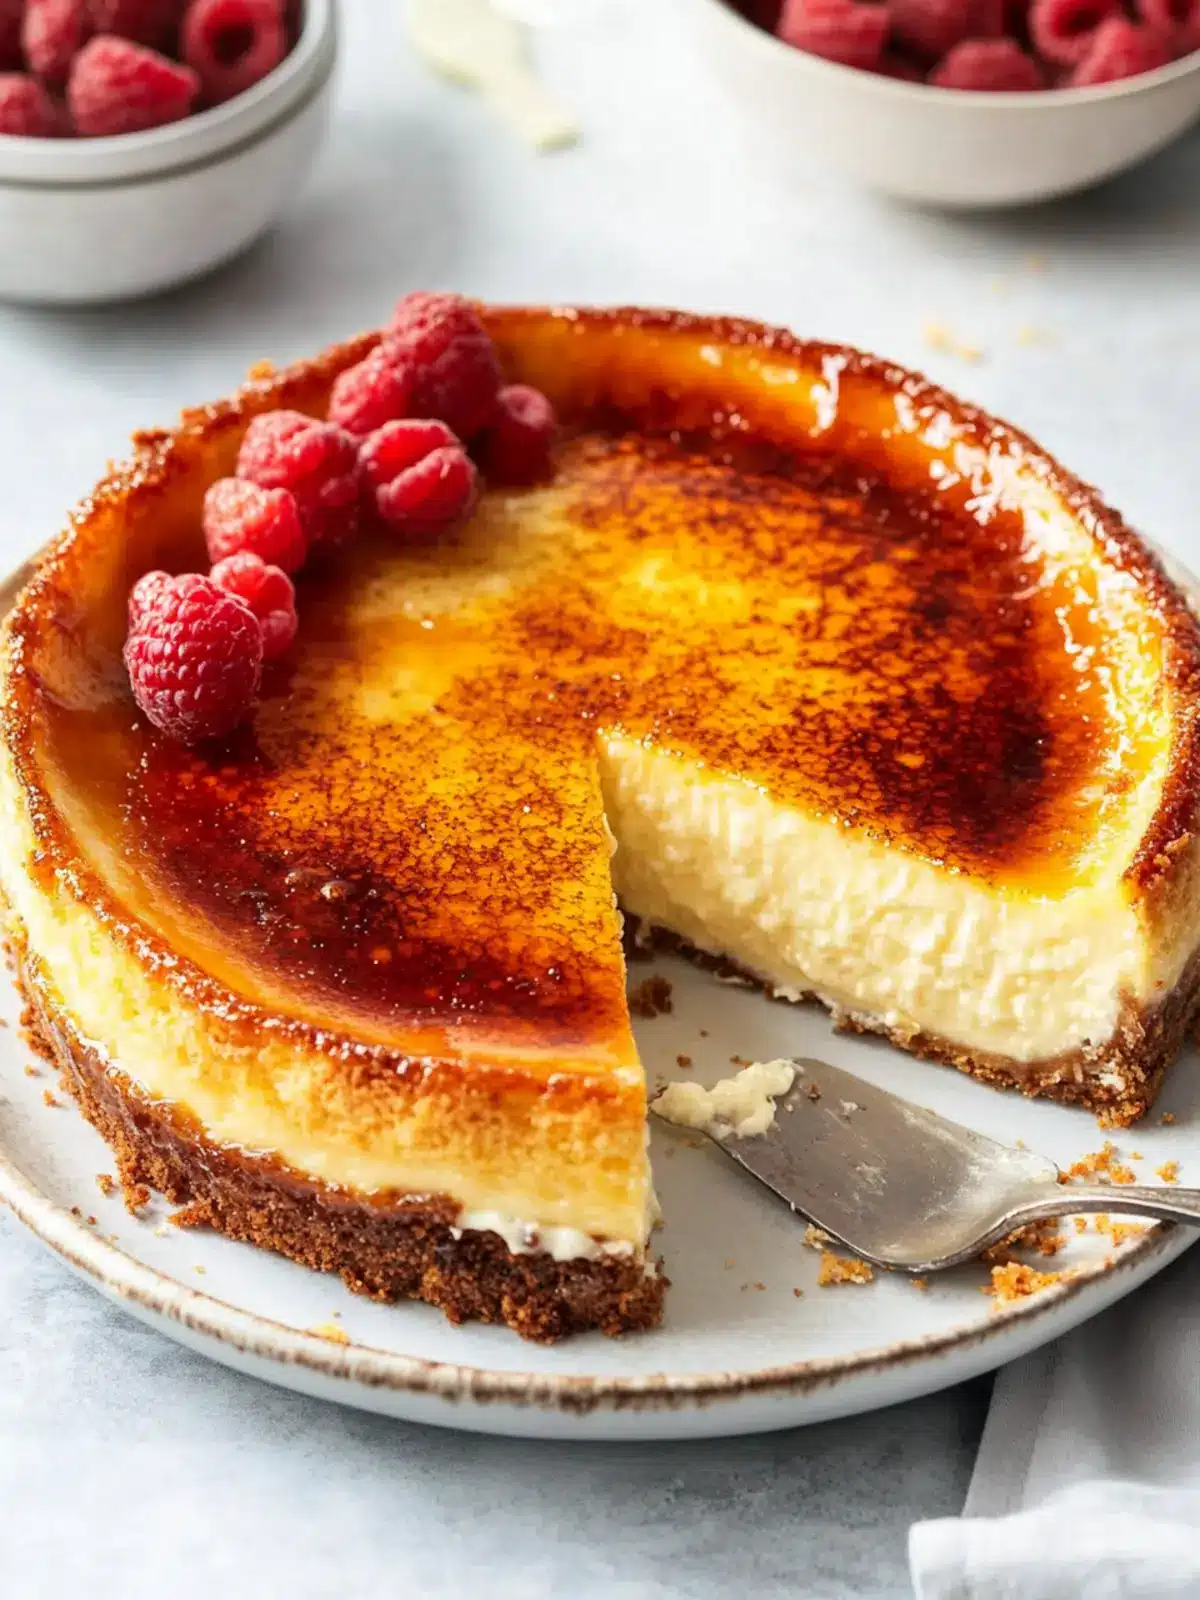
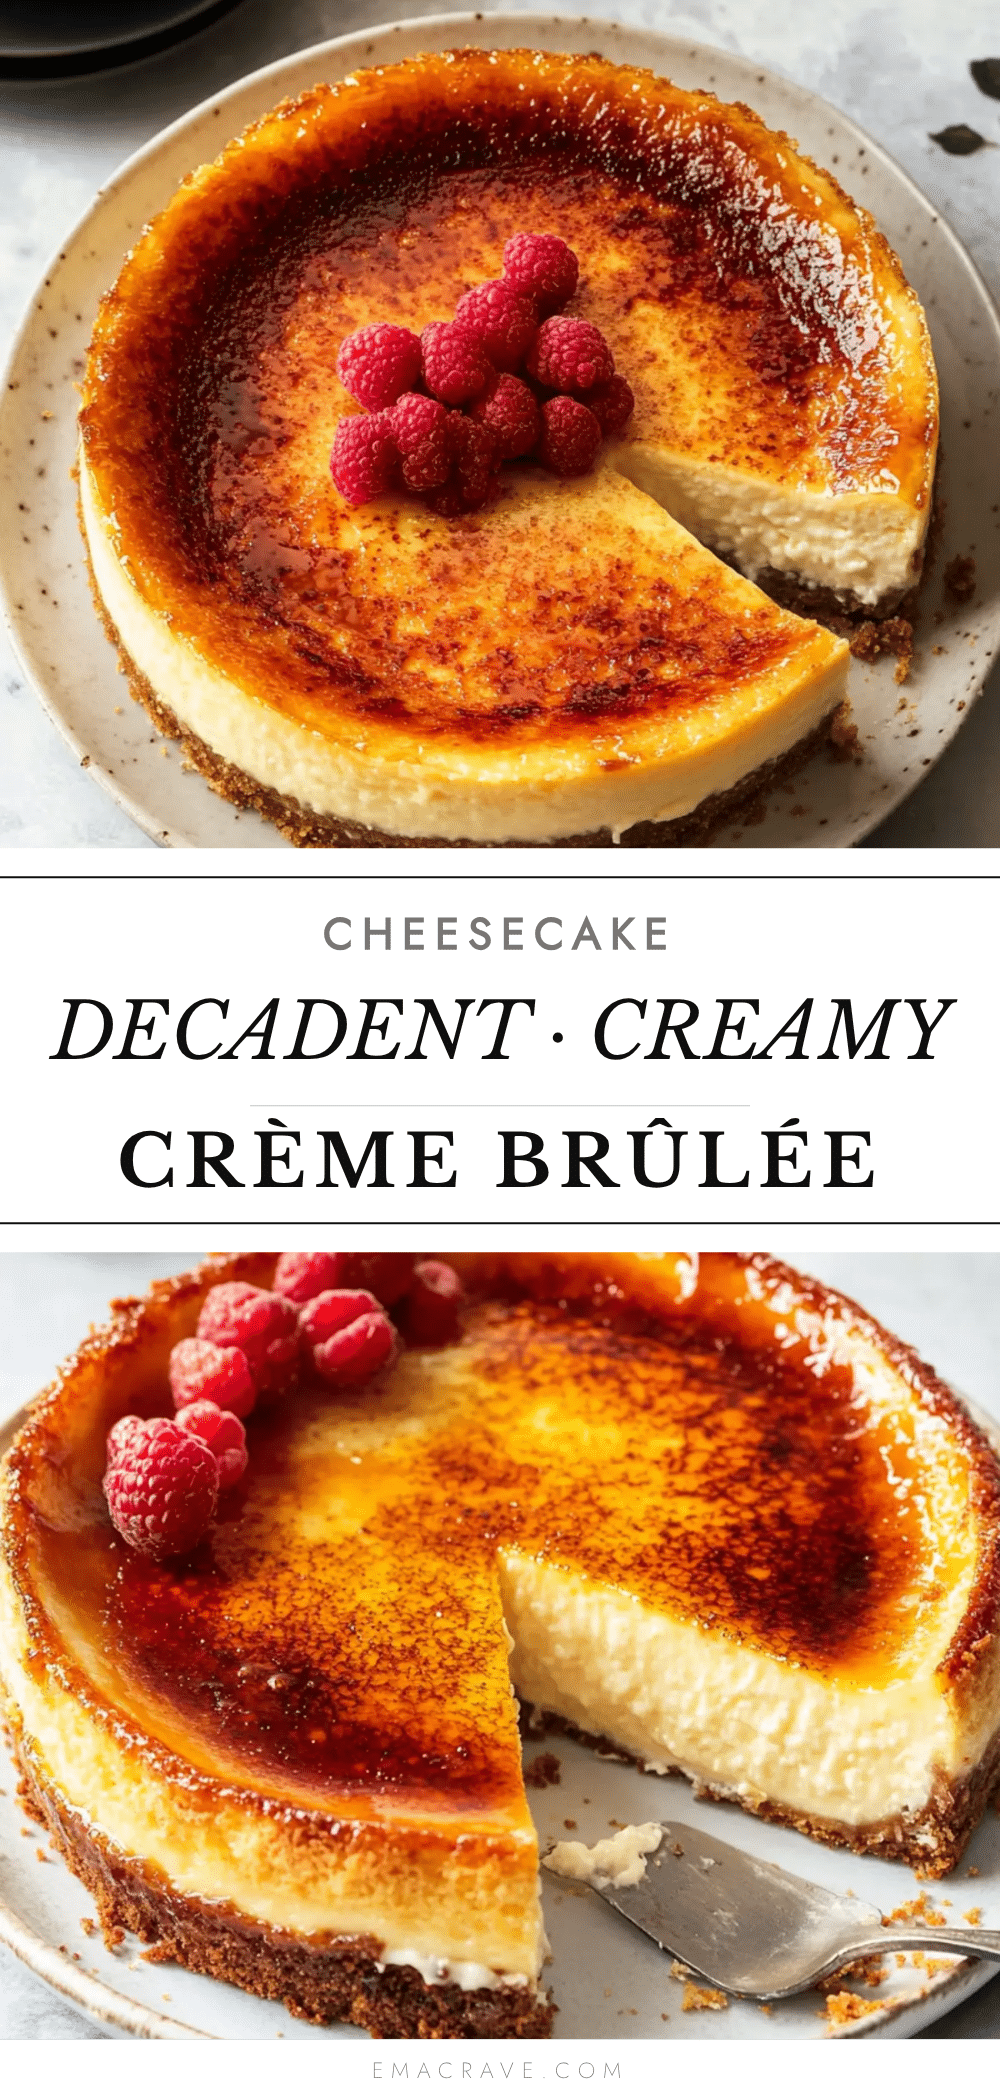
This crème brûlée cheesecake isn’t complicated or fussy. It takes the dense, creamy richness of a classic cheesecake and gives it that dramatic burnt-sugar crust that cracks open with a satisfying *thwack*. The filling is luscious without being heavy, and the vanilla flavor is warm and familiar. It feels fancy—like something you’d order at a restaurant and then try to recreate at home. But honestly, it’s just a few simple ingredients doing their thing really well together.
And that first bite? It’s the kind of quiet moment that makes you forget whatever else was stressing you out that day.
Why You’ll Love This Recipe
I’ve tested this crème brûlée cheesecake more times than I care to admit. I’ve overbaked it (dry and sad), underbaked it (soupy mess), and forgotten the water bath entirely (crack city). But now I’ve got it down, and I’m pretty proud of this version. Here’s why it works:
- Two Desserts in One : You get the velvety richness of cheesecake plus that signature caramelized sugar shell. It’s like a hybrid baby that actually works.
- No Fancy Skills Required : If you can stir and pour, you can make this. The torch part feels intimidating, but it takes about 30 seconds once you try it.
- Make-Ahead Friendly : This cheesecake needs to chill for at least 4 hours anyway, so you can absolutely prep it the day before and torch it right before serving.
- Simple Pantry Ingredients : Cream cheese, eggs, sugar, vanilla, heavy cream—nothing weird or hard to find. You probably have most of it already.
- Always a Showstopper : People lose their minds when you bring this out. The torch moment alone gets gasps. It’s pure dinner party gold.
- Perfectly Portioned : I make these in ramekins, so everyone gets their own little personal dessert. No fighting over the last slice.
What makes this recipe different from others I’ve tried is the texture. A lot of crème brûlée cheesecakes end up too dense or too eggy. I use a water bath and room-temperature ingredients to keep things silky smooth. And I add just a touch of sour cream to the filling—it cuts the richness and gives the cheesecake that slight tang that makes the caramelized sugar pop even more.
This isn’t just another dessert recipe. It’s the one people text you about the next day. The one your friends ask you to bring to every gathering. The one that makes you feel like a pastry chef even though you’re just a person with an oven and a torch.
What Ingredients You Will Need
This crème brûlée cheesecake uses simple, everyday ingredients that come together to create something genuinely luxurious. Nothing weird, nothing expensive—just good basics doing their job.
For the Cheesecake Filling
- 16 oz (450g) full-fat cream cheese, softened to room temperature—this is non-negotiable. Cold cream cheese gives you lumpy batter. I use Philadelphia because it’s consistently creamy.
- 1/2 cup (100g) granulated sugar—regular white sugar. It dissolves easily and doesn’t compete with the vanilla.
- 2 large eggs, room temperature—cold eggs will seize up the batter. Leave them on the counter for 30 minutes.
- 1 teaspoon vanilla extract—pure, not imitation. It makes a difference. I like Nielsen-Massey.
- 1/2 cup (120ml) heavy cream—adds richness and helps create that silky texture.
- 1/4 cup (60g) sour cream—this is my secret ingredient. It adds tang and keeps the cheesecake from being too heavy.
- Pinch of salt—just a tiny one. It balances the sweetness.
For the Crust
- 1 cup (120g) graham cracker crumbs—you can crush your own or buy them pre-crushed. I’ve used both.
- 3 tablespoons (42g) unsalted butter, melted—binds the crumbs and adds buttery flavor.
- 1 tablespoon granulated sugar—just a little sweetness for the base.
For the Crème Brûlée Topping
- 2-3 tablespoons granulated sugar per ramekin—this gets torched into that glassy shell. Regular white sugar works best. Don’t use powdered sugar; it won’t caramelize properly.
Ingredient Tips: For the best texture, make sure everything is truly at room temperature. I take my cream cheese, eggs, and sour cream out of the fridge about an hour before I start. If you’re in a rush, you can warm the cream cheese in the microwave in 10-second bursts, but go easy—you don’t want it melted. Also, I recommend using full-fat everything here. Low-fat cream cheese or sour cream will make the filling watery, and nobody wants a sad, weepy cheesecake.
Equipment Needed
You don’t need a ton of fancy gear for this crème brûlée cheesecake, but a few things make life easier:
- 4-6 ramekins (6 oz each)—standard size. You can also use a single 6-inch springform pan if you prefer one big cheesecake.
- Electric hand mixer or stand mixer—you can mix by hand, but it takes elbow grease and you might end up with lumps.
- Mixing bowls—one large, one medium.
- Kitchen torch—this is the fun part. A small culinary torch costs about $15-20 and is totally worth it. If you don’t have one, you can use your oven’s broiler, but it’s trickier to control.
- 9×13 inch baking dish—for the water bath.
- Aluminum foil—to wrap the ramekins so water doesn’t seep in.
- Measuring cups and spoons—standard stuff.
- Spatula—for scraping every last bit of batter.
If you don’t have ramekins, you can use oven-safe custard cups or even small mason jars. Just adjust the baking time slightly—smaller vessels bake faster. And if you don’t own a torch yet, trust me, once you make this, you’ll find excuses to use it on everything. I’ve torched brown sugar on oatmeal, marshmallows on hot chocolate, and even the top of a store-bought flan just for fun.
Preparation Method
Take your time with this crème brûlée cheesecake. The steps are simple, but rushing leads to cracks and lumps. I’ve learned that the hard way.
Step 1: Prep the Crust
Preheat your oven to 325°F (160°C). In a small bowl, mix the graham cracker crumbs, melted butter, and 1 tablespoon of sugar until it looks like wet sand. Divide the mixture evenly among your ramekins—about 2 tablespoons each. Press it down firmly with the back of a spoon or the bottom of a glass. You want it compact, not loose. Pop the ramekins in the fridge while you make the filling. This helps the crust set and prevents it from crumbling later.
Step 2: Make the Cheesecake Filling
In a large bowl, beat the softened cream cheese with an electric mixer on medium speed until it’s smooth and creamy—about 2 minutes. Scrape down the sides and bottom of the bowl with a spatula. Add the sugar and beat for another minute until it’s fully incorporated and fluffy.
Add the eggs one at a time, beating on low after each addition just until combined. Don’t overmix here—you don’t want to whip too much air into the batter, which can cause cracks later. Add the vanilla extract, heavy cream, sour cream, and a pinch of salt. Mix on low until everything is smooth and uniform. Scrape the bowl again. The batter should be thick, silky, and pale ivory in color.
Step 3: Assemble and Bake
Take the ramekins out of the fridge. Divide the cheesecake filling evenly among them, filling each about 3/4 full. Smooth the tops with a spatula if needed.
Place the ramekins in a large baking dish. Carefully pour hot water into the dish until it reaches about halfway up the sides of the ramekins. This water bath keeps the cheesecake gentle and even, preventing that dreaded cracked surface. Be careful not to splash water into the ramekins.
Bake at 325°F (160°C) for 35-40 minutes. The edges should be set but the centers should still jiggle slightly when you gently shake the pan. They’ll continue to set as they cool. Overbaking is the #1 mistake—dry cheesecake is sad cheesecake.
Step 4: Cool and Chill
Carefully remove the ramekins from the water bath. Let them cool on a wire rack for about 30 minutes at room temperature. Then cover each ramekin with plastic wrap and refrigerate for at least 4 hours, but overnight is better. This is the hardest part—waiting. But trust me, the texture needs this time to fully develop.
Step 5: Torch the Topping
Right before serving, sprinkle about 2 tablespoons of granulated sugar evenly over the top of each chilled cheesecake. Tilt the ramekin to spread it in an even layer. Shake off any excess.
Use your kitchen torch to melt and caramelize the sugar. Hold the flame about 2 inches away and move it in a circular motion. You’ll see the sugar bubble, darken, and turn amber. Don’t let it burn black—you want a deep golden brown. Let it sit for 1-2 minutes to harden into that glassy shell. Then crack into it immediately.
Cooking Tips & Techniques
I’ve ruined a fair share of cheesecakes in my day, so let me save you some trouble. Here’s what I’ve learned:
Room temperature ingredients are not optional. I know, I sound like a broken record. But cold cream cheese creates lumps that no amount of beating will fix. And cold eggs can make the batter curdle. Set everything out an hour before you start. Set a timer if you have to.
Don’t overmix the batter. Once you add the eggs, mix just until combined. Overmixing incorporates too much air, which expands in the oven and then collapses, leaving you with cracks. You want a dense, creamy texture, not a fluffy one.
The water bath is your friend. I tried skipping it once because I was lazy. Never again. The water bath insulates the cheesecake and keeps the oven temperature gentle and even. Without it, the edges bake too fast while the center stays raw. Wrap the ramekins in foil first to keep water out.
Watch the bake time closely. Every oven is different. Start checking at 30 minutes. The cheesecake is done when the edges are set and the center jiggles like Jell-O, not like liquid. If you see cracks forming, pull them out immediately—they’re already overdone.
Torch with confidence. The first time I used a torch, I held it too close and burned the sugar black. It tasted bitter and awful. Keep the flame moving and stay patient. If you don’t have a torch, you can use the broiler—just watch it like a hawk because it can go from perfect to burnt in seconds.
Variations & Adaptations
This crème brûlée cheesecake is pretty perfect as-is, but I’ve played around with a few twists that turned out surprisingly great:
Lemon Crème Brûlée Cheesecake : Add 1 tablespoon of lemon zest and 2 tablespoons of fresh lemon juice to the filling. It brightens everything up and cuts through the richness beautifully. I made this version for a spring brunch and it disappeared fast.
Chocolate Crème Brûlée Cheesecake : Melt 4 oz of dark chocolate and fold it into the batter after you’ve mixed everything else. Use a little less sugar since the chocolate adds sweetness. The caramelized sugar on top pairs amazingly with the chocolate—like a fancy chocolate pot de crème.
Gluten-Free Version : Use gluten-free graham crackers or crushed gluten-free cookies for the crust. The filling itself has no gluten, so this is an easy swap. I’ve used gluten-free vanilla wafers before and they worked great.
Dairy-Free Option : Use dairy-free cream cheese (I like Kite Hill or Violife), full-fat coconut cream instead of heavy cream, and a dairy-free sour cream alternative. The texture won’t be exactly the same—it’ll be slightly less firm—but it’s still delicious.
Single Large Cheesecake : Instead of ramekins, pour the batter into a 6-inch springform pan. Bake for 50-60 minutes in the water bath. Torch the top right before serving. This is great if you’re feeding a crowd.
Serving & Storage Suggestions
This crème brûlée cheesecake is best served immediately after torching, while the sugar shell is still warm and crackly. The contrast between the cold, creamy filling and the warm, glassy top is the whole point. I like to serve it with a few fresh berries on the side—raspberries or strawberries cut through the richness nicely.
If you’re making these for a party, you can prep everything up to the torching step a day ahead. Keep the cheesecakes covered in the fridge. Then, right before serving, torch the sugar and let them sit for a minute. Your guests will hear that crack and lose their minds.
Storage: Leftover cheesecakes (if you have any) can be stored in the fridge, covered, for up to 3 days. The sugar topping will soften over time, so it won’t be as crackly the next day. You can re-torch it if you want, but it won’t be quite the same. Honestly, these are best eaten fresh.
Freezing: You can freeze the baked, unchilled cheesecakes (without the sugar topping) for up to 2 months. Wrap each ramekin tightly in plastic wrap and then foil. Thaw in the fridge overnight, then torch before serving. The texture holds up surprisingly well.
Flavors actually deepen after a day in the fridge. The vanilla becomes more pronounced and the tang from the sour cream mellows out. So if you can wait, make these a day ahead. Your patience will be rewarded.
Nutritional Information & Benefits
Let’s be real—this crème brûlée cheesecake is a treat, not a health food. But here’s the estimated breakdown per serving (based on 6 ramekins):
- Calories: ~420
- Fat: 32g
- Carbohydrates: 30g
- Protein: 8g
- Sugar: 24g
That said, there are a few redeeming qualities. Cream cheese provides a decent amount of protein and calcium. Eggs are packed with choline, which is great for brain health. And hey, sometimes you just need a dessert that feels like a hug.
If you’re watching your sugar intake, you can reduce the sugar in the filling slightly (try 1/3 cup instead of 1/2), but don’t skimp on the topping sugar—that’s the whole point of crème brûlée. For a lower-calorie option, you could use Neufchâtel cream cheese, which has about a third less fat. The texture will be slightly less rich, but it still works.
This recipe contains dairy, eggs, and gluten (from the graham crackers). Not suitable for vegans unless you use the dairy-free adaptations mentioned above.
Conclusion
This crème brûlée cheesecake is one of those recipes that looks way more impressive than it actually is. You get the dramatic crack of the caramelized sugar, the velvety smooth cheesecake underneath, and that warm vanilla hug that makes everything feel right. And you made it. In your own kitchen. With a torch you probably bought on a whim.
I love this recipe because it feels special without being stressful. It’s the kind of dessert you make when you want to impress someone but also want to actually enjoy the evening instead of sweating over a complicated pastry. It’s forgiving, it’s adaptable, and it always gets the reaction you’re hoping for.
I’d love to hear how yours turns out. Did you try a variation? Did you burn the sugar on your first attempt like I did? Drop a comment below and let me know. And if you’re looking for more dessert inspiration, you might enjoy our perfect blueberry cheesecake cupcakes or our decadent blackberry velvet cake for another showstopping treat.
Go grab your torch. You’ve got this.
Frequently Asked Questions
Can I make this crème brûlée cheesecake without a torch?
Yes! You can use your oven’s broiler instead. Place the ramekins on a baking sheet and broil on high for 1-2 minutes, watching very closely. The sugar can burn in seconds, so don’t walk away. A torch gives you more control, but the broiler works in a pinch.
Why did my cheesecake crack on top?
Cracks usually happen from overbaking or overmixing. Make sure you’re using a water bath and not overbeating the batter after adding the eggs. Also, let the cheesecake cool slowly at room temperature before refrigerating. Sudden temperature changes cause cracks.
Can I use a different crust?
Absolutely. Vanilla wafers, shortbread cookies, or even crushed Oreos work great. Just adjust the sugar slightly—Oreos are already sweet, so you might want to skip the extra sugar in the crust. I’ve used Biscoff cookies before and it was amazing.
How long does this cheesecake need to chill?
At least 4 hours, but overnight is best. The texture sets and becomes creamier the longer it chills. If you’re in a rush, 2 hours will work, but the filling will be softer and harder to torch without melting.
Can I double this recipe?
Yes! Just make sure your mixer bowl is big enough. You can also bake them in batches if you only have one oven. The recipe scales beautifully for parties or holiday gatherings. Just don’t crowd the water bath—leave a little space between ramekins for even baking.
Pin This Recipe!
Perfect Crème Brûlée Cheesecake: Easy Homemade Dessert
This crème brûlée cheesecake combines the dense, creamy richness of a classic cheesecake with a dramatic burnt-sugar crust that cracks open with a satisfying thwack. Made with simple pantry ingredients and no fancy skills required, it’s a showstopping dessert that feels fancy but is surprisingly easy to make.
- Prep Time: 20 minutes
- Cook Time: 35-40 minutes
- Total Time: 5 hours (including chilling time)
- Yield: 4-6 servings 1x
- Category: Dessert
- Cuisine: French-American
Ingredients
- 16 oz (450g) full-fat cream cheese, softened to room temperature
- 1/2 cup (100g) granulated sugar
- 2 large eggs, room temperature
- 1 teaspoon vanilla extract
- 1/2 cup (120ml) heavy cream
- 1/4 cup (60g) sour cream
- Pinch of salt
- 1 cup (120g) graham cracker crumbs
- 3 tablespoons (42g) unsalted butter, melted
- 1 tablespoon granulated sugar
- 2–3 tablespoons granulated sugar per ramekin (for topping)
Instructions
- Preheat oven to 325°F (160°C). In a small bowl, mix graham cracker crumbs, melted butter, and 1 tablespoon sugar until it looks like wet sand. Divide mixture evenly among ramekins (about 2 tablespoons each) and press down firmly. Refrigerate while making filling.
- In a large bowl, beat softened cream cheese with an electric mixer on medium speed until smooth and creamy, about 2 minutes. Scrape down sides and bottom of bowl.
- Add sugar and beat for another minute until fully incorporated and fluffy.
- Add eggs one at a time, beating on low after each addition just until combined. Do not overmix.
- Add vanilla extract, heavy cream, sour cream, and a pinch of salt. Mix on low until smooth and uniform. Scrape bowl again.
- Remove ramekins from fridge. Divide cheesecake filling evenly among them, filling each about 3/4 full. Smooth tops with a spatula.
- Place ramekins in a large baking dish. Carefully pour hot water into the dish until it reaches halfway up the sides of the ramekins.
- Bake at 325°F (160°C) for 35-40 minutes. Edges should be set but centers should still jiggle slightly when shaken.
- Carefully remove ramekins from water bath. Let cool on a wire rack for 30 minutes at room temperature.
- Cover each ramekin with plastic wrap and refrigerate for at least 4 hours, preferably overnight.
- Right before serving, sprinkle about 2 tablespoons granulated sugar evenly over the top of each chilled cheesecake. Tilt to spread in an even layer.
- Use a kitchen torch to melt and caramelize the sugar. Hold flame about 2 inches away and move in a circular motion until sugar turns deep golden brown.
- Let sit for 1-2 minutes to harden into a glassy shell. Serve immediately.
Notes
Room temperature ingredients are essential for a smooth texture. Do not overmix the batter to avoid cracks. The water bath helps prevent cracking. For best results, chill overnight. The sugar topping will soften over time, so torch just before serving. If you don’t have a torch, you can use the oven broiler, but watch carefully to avoid burning.
Nutrition
- Serving Size: 1 ramekin
- Calories: 420
- Sugar: 24
- Sodium: 320
- Fat: 32
- Saturated Fat: 18
- Carbohydrates: 30
- Protein: 8
Keywords: crème brûlée cheesecake, cheesecake recipe, easy dessert, baked cheesecake, caramelized sugar dessert, homemade cheesecake, ramekin dessert



