Love this? Save it for later!
Share the inspiration with your friends
“Can you believe this broth started out as a happy accident?” my friend joked the night I first shared my homemade ramen broth. Honestly, I was skeptical myself. I’d been craving ramen but didn’t want to wait for the all-day simmering most recipes call for. So, on a busy Saturday afternoon, with a fridge half-full and patience running thin, I tossed together some bones, aromatics, and a few pantry staples—then let it cook for just five hours. The result? A bowl of deeply flavorful ramen broth that surprised even me with its rich complexity and comforting warmth.
What stuck with me wasn’t just the taste but the simplicity of the process. It wasn’t a rushed instant fix, but neither was it an all-day ordeal that forced me to rearrange my schedule. Instead, it became my go-to comfort when I wanted something nourishing without fuss. Each time I made it, the kitchen filled with that cozy, savory scent that felt like an embrace after a long day. And yes, it’s been a quiet staple in my cooking rotation ever since.
There’s something about this flavorful homemade ramen broth in just 5 hours that makes it feel both indulgent and approachable. No need for fancy equipment or hard-to-find ingredients—this broth invites you to slow down just enough, reward yourself with authenticity, and savor the moment.
Why You’ll Love This Recipe
Having tested countless ramen broths, I know this one stands out—and here’s why:
- Quick & Easy: Comes together in under 5 hours, perfect for when you want homemade flavor without an all-day commitment.
- Simple Ingredients: Uses everyday pantry staples and fresh produce you can find easily—no exotic shopping required.
- Perfect for Cozy Nights: Ideal for curling up with a warm bowl after busy days or casual weekend dinners.
- Crowd-Pleaser: Friends and family always ask for the recipe after tasting this broth—kids included!
- Unbelievably Delicious: The broth has a rich, layered taste with a silky mouthfeel that feels like a hug in a bowl.
What really makes this recipe different is the balance of deep umami from a carefully roasted bone base paired with fresh aromatics. The method captures those long-simmered flavors but in a fraction of the time, thanks to a slow simmer and a strategic roasting step. Plus, I’ve experimented with different bones and tweaks, landing on a version that’s flavorful without being too heavy or greasy. It’s the kind of broth that makes you close your eyes and savor every sip, yet you can whip it up without stress or special equipment.
Whether you’re impressing guests with a homemade touch or just want a delicious, soul-soothing meal on a weeknight, this broth fits the bill. It’s comfort food done thoughtfully and realistically, and I’m confident it’ll find a spot in your recipe collection, just like it did for me.
What Ingredients You Will Need
This recipe uses simple, wholesome ingredients to deliver bold flavor and a satisfying texture without fuss. Most are pantry staples or easy to find at your local market. Here’s what you’ll gather:
- Beef or pork bones (about 3 pounds / 1.4 kg) – I prefer a mix of marrow and knuckle bones for richness and body.
- Water (around 12 cups / 3 liters) – filtered if possible for clean taste.
- Onion, halved – adds sweetness and depth when roasted.
- Garlic (6 cloves, smashed) – a must for aromatic warmth.
- Ginger (2-inch piece, sliced) – fresh ginger brightens the broth with a subtle zing.
- Green onions (3 stalks, tied) – for savory notes and easy removal later.
- Dried shiitake mushrooms (4 pieces) – essential for umami complexity.
- Kombu (dried kelp) (1 piece, about 4×4 inches / 10×10 cm) – optional but recommended for authentic depth.
- Soy sauce (2 tablespoons) – for balanced saltiness.
- Sake or mirin (2 tablespoons) – adds subtle sweetness and complexity.
- Salt to taste – essential for seasoning, adjust at the end.
For the bones, if you want to swap pork for chicken or beef, that’s totally doable—each brings a unique flavor. Kombu can be tricky to find but Asian markets or online retailers usually have it. If you skip it, the broth will still be great, just less layered. I like to roast the bones and veggies beforehand for a nuttier, deeper flavor, which is a step that really sets this broth apart from simpler recipes.
Equipment Needed
To make this flavorful homemade ramen broth, you don’t need fancy gear—just a few basics:
- Large stockpot (at least 8-quart / 7.5-liter capacity) – sturdy and wide for even roasting and simmering.
- Sheet pan – for roasting bones and vegetables.
- Fine mesh strainer or cheesecloth – to strain the broth for a clear finish.
- Kitchen twine – to tie green onions and keep them easy to remove.
- Slotted spoon – helpful for skimming impurities during simmering.
If you don’t have a large stockpot, a heavy-bottomed Dutch oven works great. For straining, cheesecloth gives the clearest broth, but a fine mesh sieve is fine if that’s what’s on hand. I’ve tried roasting bones directly in the pot but found the separate sheet pan yields better caramelization and easier cleanup. Keep your roasting pan seasoned and clean to avoid stuck bits next time.
Preparation Method
- Preheat your oven to 425°F (220°C). Arrange bones on a sheet pan in a single layer. Roast for 45 minutes until deeply browned, turning halfway through for even caramelization. The aroma will be irresistible—nutty and meaty.
- Roast onions, garlic, and ginger. After the bones come out, add halved onions, smashed garlic cloves, and sliced ginger to the pan. Roast an additional 20 minutes. This step builds the sweet and savory base.
- Transfer roasted bones and aromatics to your stockpot. Pour out any excess fat from the roasting pan into a heatproof bowl (save for other cooking!). Pour about 12 cups (3 liters) of cold filtered water into the pot with bones and veggies.
- Add dried shiitake mushrooms and kombu. Let kombu soak in the water for 30 minutes before heating. This helps release its umami without bitterness.
- Heat over medium-high until just before boiling. Once tiny bubbles appear, remove kombu to prevent bitterness. Reduce heat to low and simmer gently for 4 hours, uncovered. Skim foam and impurities every 30 minutes with a slotted spoon to keep broth clear.
- At the 4-hour mark, add tied green onions, soy sauce, and sake or mirin. Continue simmering for another hour. This final hour deepens flavor and rounds out the seasoning.
- Strain the broth. Carefully pour broth through a fine mesh strainer lined with cheesecloth into a large bowl or pot. Discard solids.
- Taste and adjust salt. Add salt gradually to your liking—start with 1 teaspoon and go from there. The broth should be savory with a gentle balance of sweetness and umami.
By roasting and simmering with care, the broth develops layers of flavor that taste like they took all day—without the hassle. If the broth tastes too strong, add hot water to dilute. If it’s too light, simmer uncovered for 15-20 minutes to concentrate flavors. The broth should smell rich, slightly sweet, and inviting, perfect for building your ramen bowl.
Cooking Tips & Techniques
Getting ramen broth just right can be a bit of a dance, but here are some seasoned tips that make my version reliable and delicious:
- Don’t rush the roasting. Browning bones and veggies adds caramelized depth you can’t get otherwise. If you’re short on time, roast bones first then add veggies later, but roasting them together is best.
- Simmer gently. A rolling boil will cloud the broth and break down collagen too fast, resulting in a greasy texture. Keep it at a low simmer with occasional skimming.
- Skim often. Foam and scum build up early and dull the broth’s clarity. Using a fine mesh skimmer or spoon helps keep the broth clean and bright.
- Be patient with kombu. Soaking before heating releases umami without bitterness. Remove it once simmering starts to avoid off-flavors.
- Use fresh aromatics. Fresh ginger and garlic make a world of difference. I’ve tried powdered substitutes, but the broth always falls flat without fresh.
- Make ahead and refrigerate. The broth tastes even better the next day once flavors have melded. Skim off any solidified fat from the top before reheating.
I once tried speeding this up by skipping roasting and simmering only 2 hours. The result was okay but lacked soul. That taught me that patience and technique matter. Also, multitasking—like prepping your toppings or noodles while the broth simmers—makes the process much smoother.
Variations & Adaptations
This recipe is flexible, so you can adjust it to fit your preferences or dietary needs:
- Vegetarian/Vegan: Swap bones for a mix of roasted mushrooms, kombu, dried shiitake, and miso paste for savory depth. Simmer with onions, garlic, and ginger as usual.
- Chicken-Based Broth: Use chicken carcasses and wings instead of beef or pork bones. Roast and simmer similarly but reduce simmering time to about 3 hours.
- Spicy Twist: Add a few dried chili flakes or a spoonful of chili oil towards the end for a gentle heat that complements the savory broth.
- Gluten-Free: Use tamari instead of soy sauce. Make sure kombu and mushrooms are free from cross-contamination.
- Rich Tonkotsu Style: For a creamier broth, include pork trotters and simmer longer (6+ hours), stirring occasionally to emulsify collagen into the stock.
One personal favorite is adding a splash of apple cider vinegar during simmering—it brightens the broth and enhances umami. Feel free to experiment and make it your own. For a full guide on noodle and topping pairings, check out my Cozy Korean Radish Soup Recipe, which shares some great ideas on complementary flavors.
Serving & Storage Suggestions
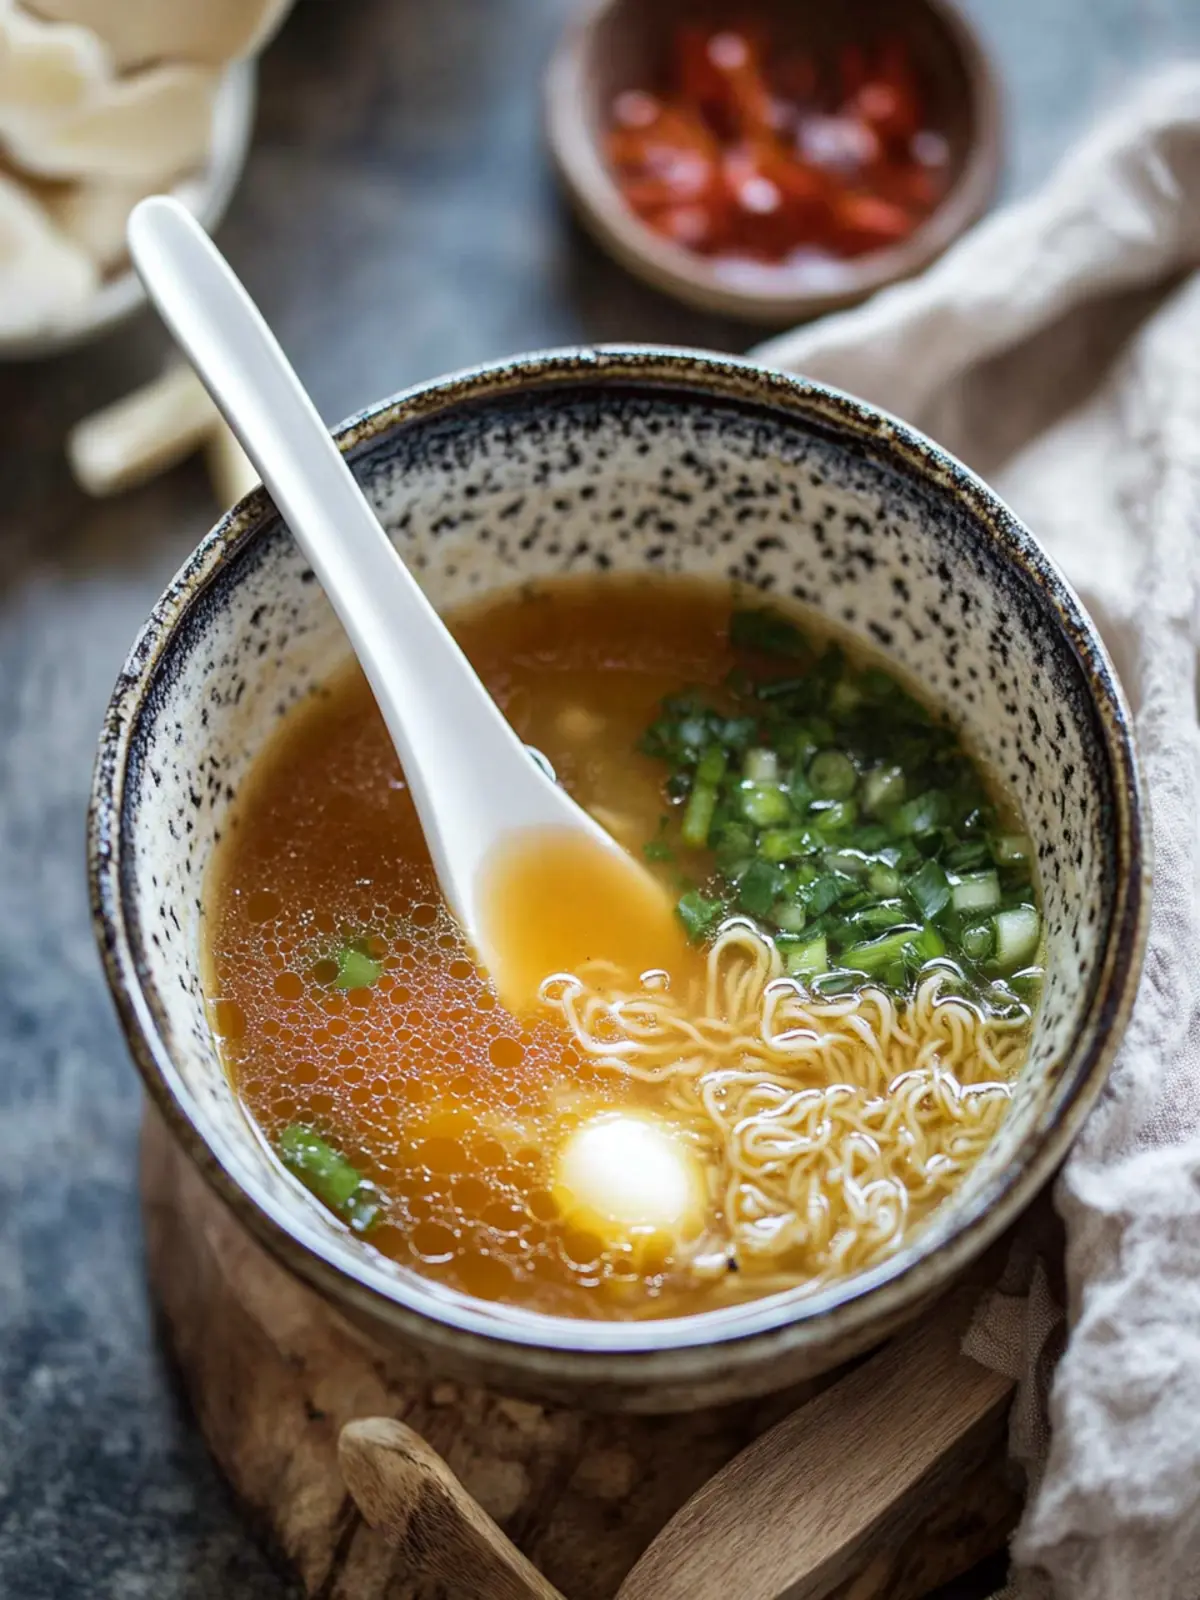
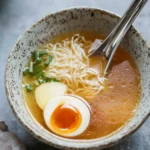
This broth shines best served hot and fresh. Ladle it over cooked ramen noodles and your favorite toppings like soft-boiled eggs, sliced pork, green onions, and nori. A drizzle of toasted sesame oil or a few drops of chili oil can add another layer of flavor just before serving.
If you have leftovers, cool the broth quickly and store it in airtight containers in the refrigerator for up to 4 days. The fat will solidify on top—simply skim it off or stir it in before reheating. For longer storage, freeze in portions for up to 3 months.
When reheating, warm gently on the stovetop to preserve the delicate flavors. Avoid boiling again, which can break down the broth’s clarity. Over time, the flavors deepen, making it even better the next day. I often make a big batch and use it as a base for other dishes, like a quick noodle soup or to enrich sauces. It pairs beautifully with simple sides like steamed vegetables or even crispy air-fried snacks if you want a fun appetizer on the side.
Nutritional Information & Benefits
This ramen broth is nourishing and relatively light, packed with protein and collagen from the bones, which supports joint and skin health. The ginger and garlic provide antioxidants and anti-inflammatory benefits, while kombu adds minerals like iodine.
Per serving (about 1 cup / 240 ml), the broth contains roughly 80-100 calories, minimal fat (mostly healthy fats), and no carbs. It’s naturally gluten-free if you skip soy sauce or use tamari. This makes it a great choice for low-carb or paleo-friendly diets.
Since it’s homemade, you control the sodium level, making it a healthier alternative to store-bought ramen broths. I appreciate how it fits into a balanced diet—comforting without being heavy or overly processed. For a refreshing contrast, pairing this broth with a tangy beverage like the Creamy Condensed Milk Lemonade can be a delightful combo, especially on warmer days.
Conclusion
This flavorful homemade ramen broth in just 5 hours proves that you don’t need to spend an entire day in the kitchen to enjoy rich, comforting ramen at home. It’s a recipe that rewards a bit of patience with layers of taste and warmth that feel truly special. I love how it balances simplicity with depth and how it invites creativity with toppings and variations.
Feel free to tweak it to your taste—maybe more garlic, a splash of spice, or a different bone base. It’s your kitchen, after all. I hope this broth becomes a quiet staple for you the way it has for me, bringing those cozy moments and satisfying bowls whenever you need them.
Let me know how your broth turns out, or if you have any creative twists—sharing recipes and stories like these is what makes cooking fun and communal.
Frequently Asked Questions
How can I make this ramen broth vegetarian?
Replace bones with a mix of dried shiitake mushrooms, kombu, roasted vegetables like carrots and onions, and add miso paste for richness. Simmer for about 2-3 hours to extract flavors.
Can I prepare the broth in a slow cooker?
Yes! Roast bones and aromatics first, then transfer to a slow cooker with water and other ingredients. Cook on low for 5-6 hours, skimming occasionally for best clarity.
What’s the best way to store leftover broth?
Cool quickly, then refrigerate in airtight containers for up to 4 days or freeze in portions for up to 3 months. Skim solidified fat before reheating.
Is it necessary to roast the bones and vegetables?
Roasting adds a nutty, caramelized flavor that deepens the broth. You can skip it if short on time, but the broth will taste lighter and less complex.
Can I use chicken bones instead of pork or beef?
Absolutely! Chicken bones produce a lighter broth. Adjust simmering time to about 3 hours for best results.
Pin This Recipe!
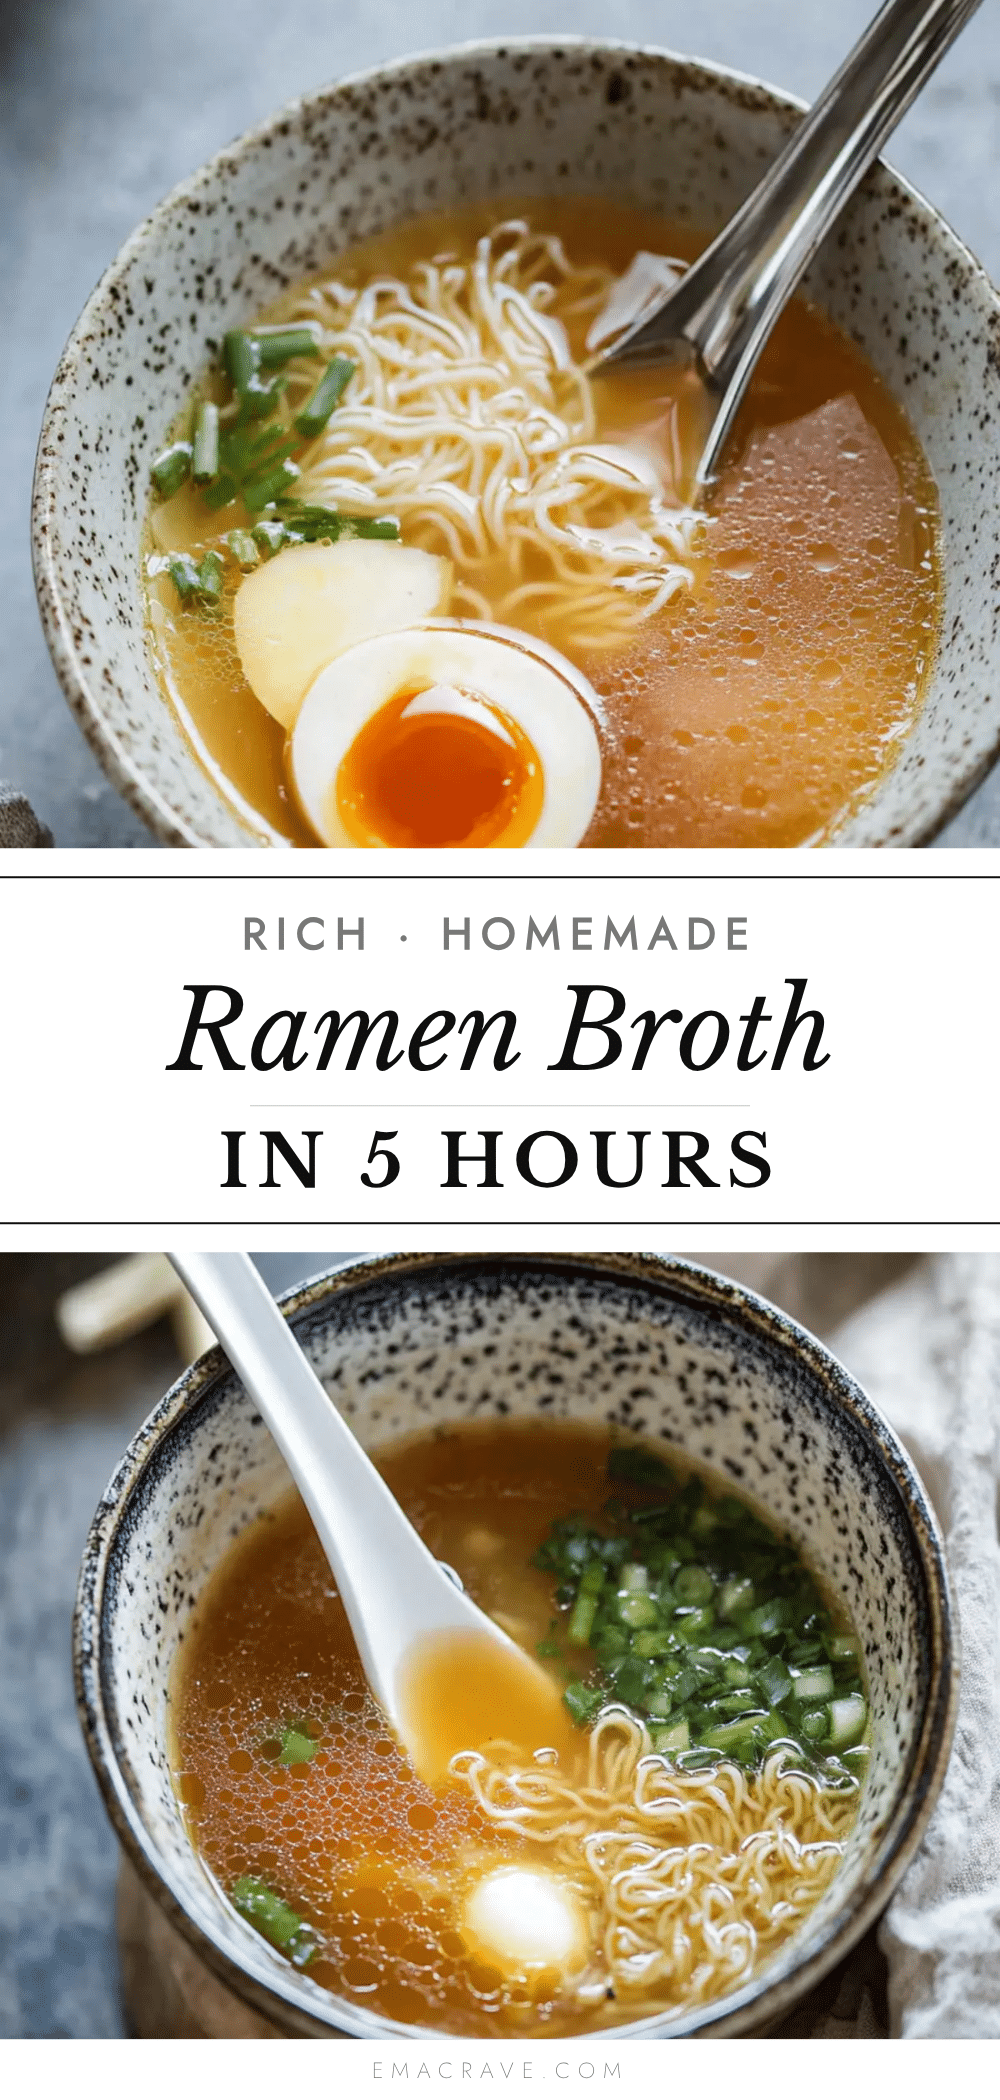
Flavorful Homemade Ramen Broth Recipe Easy 5 Hour Cooking Guide
A rich and deeply flavorful homemade ramen broth that can be prepared in just 5 hours, using simple ingredients and straightforward techniques for a comforting and authentic taste.
- Prep Time: 15 minutes
- Cook Time: 5 hours
- Total Time: 5 hours 15 minutes
- Yield: 8 servings 1x
- Category: Soup
- Cuisine: Japanese
Ingredients
- 3 pounds beef or pork bones (preferably a mix of marrow and knuckle bones)
- 12 cups (3 liters) filtered water
- 1 onion, halved
- 6 cloves garlic, smashed
- 2-inch piece fresh ginger, sliced
- 3 stalks green onions, tied
- 4 dried shiitake mushrooms
- 1 piece kombu (dried kelp), about 4x4 inches (10x10 cm), optional
- 2 tablespoons soy sauce
- 2 tablespoons sake or mirin
- Salt to taste
Instructions
- Preheat your oven to 425°F (220°C). Arrange bones on a sheet pan in a single layer. Roast for 45 minutes until deeply browned, turning halfway through for even caramelization.
- Roast onions, garlic, and ginger on the same pan for an additional 20 minutes after removing the bones.
- Transfer roasted bones and aromatics to a large stockpot. Pour out excess fat from the roasting pan into a heatproof bowl and reserve.
- Add about 12 cups (3 liters) of cold filtered water to the pot with bones and vegetables.
- Add dried shiitake mushrooms and kombu. Let kombu soak in the water for 30 minutes before heating.
- Heat over medium-high until just before boiling. Remove kombu once tiny bubbles appear to prevent bitterness.
- Reduce heat to low and simmer gently, uncovered, for 4 hours. Skim foam and impurities every 30 minutes with a slotted spoon.
- At the 4-hour mark, add tied green onions, soy sauce, and sake or mirin. Continue simmering for another hour.
- Strain the broth through a fine mesh strainer lined with cheesecloth into a large bowl or pot. Discard solids.
- Taste and adjust salt gradually to your liking, starting with 1 teaspoon.
Notes
Roasting bones and vegetables adds a deep caramelized flavor that is essential for a rich broth. Simmer gently to avoid cloudiness and greasy texture. Skim foam regularly for clarity. Kombu should be soaked before heating and removed before boiling to prevent bitterness. The broth tastes better the next day after flavors meld. Adjust salt at the end. Can dilute with hot water if too strong or simmer uncovered to concentrate if too light.
Nutrition
- Serving Size: 1 cup (240 ml)
- Calories: 90
- Sodium: 600
- Fat: 4
- Saturated Fat: 1
- Carbohydrates: 1
- Protein: 12
Keywords: ramen broth, homemade ramen, easy ramen broth, quick ramen broth, Japanese soup, bone broth, umami broth