Love this? Save it for later!
Share the inspiration with your friends
I pulled the baking sheet out of the oven and just stood there for a second, staring. The kitchen smelled like a bakery that had somehow collided with a chocolate factory—warm yeast, rich cocoa, and a faint tang of buttermilk hanging in the steam. My husband leaned over my shoulder and said, “Wait, are those… red?” I just nodded, still processing what I’d accidentally created. That morning, I had been craving cinnamon rolls—the soft, pillowy kind that pull apart in ribbons—but I also had half a bottle of red food coloring staring at me from the pantry door. A leftover from a cake disaster two months ago. And honestly? I thought, why not? Worst case, I’d have weird-looking cinnamon rolls. Best case? I’d never make regular cinnamon rolls again.
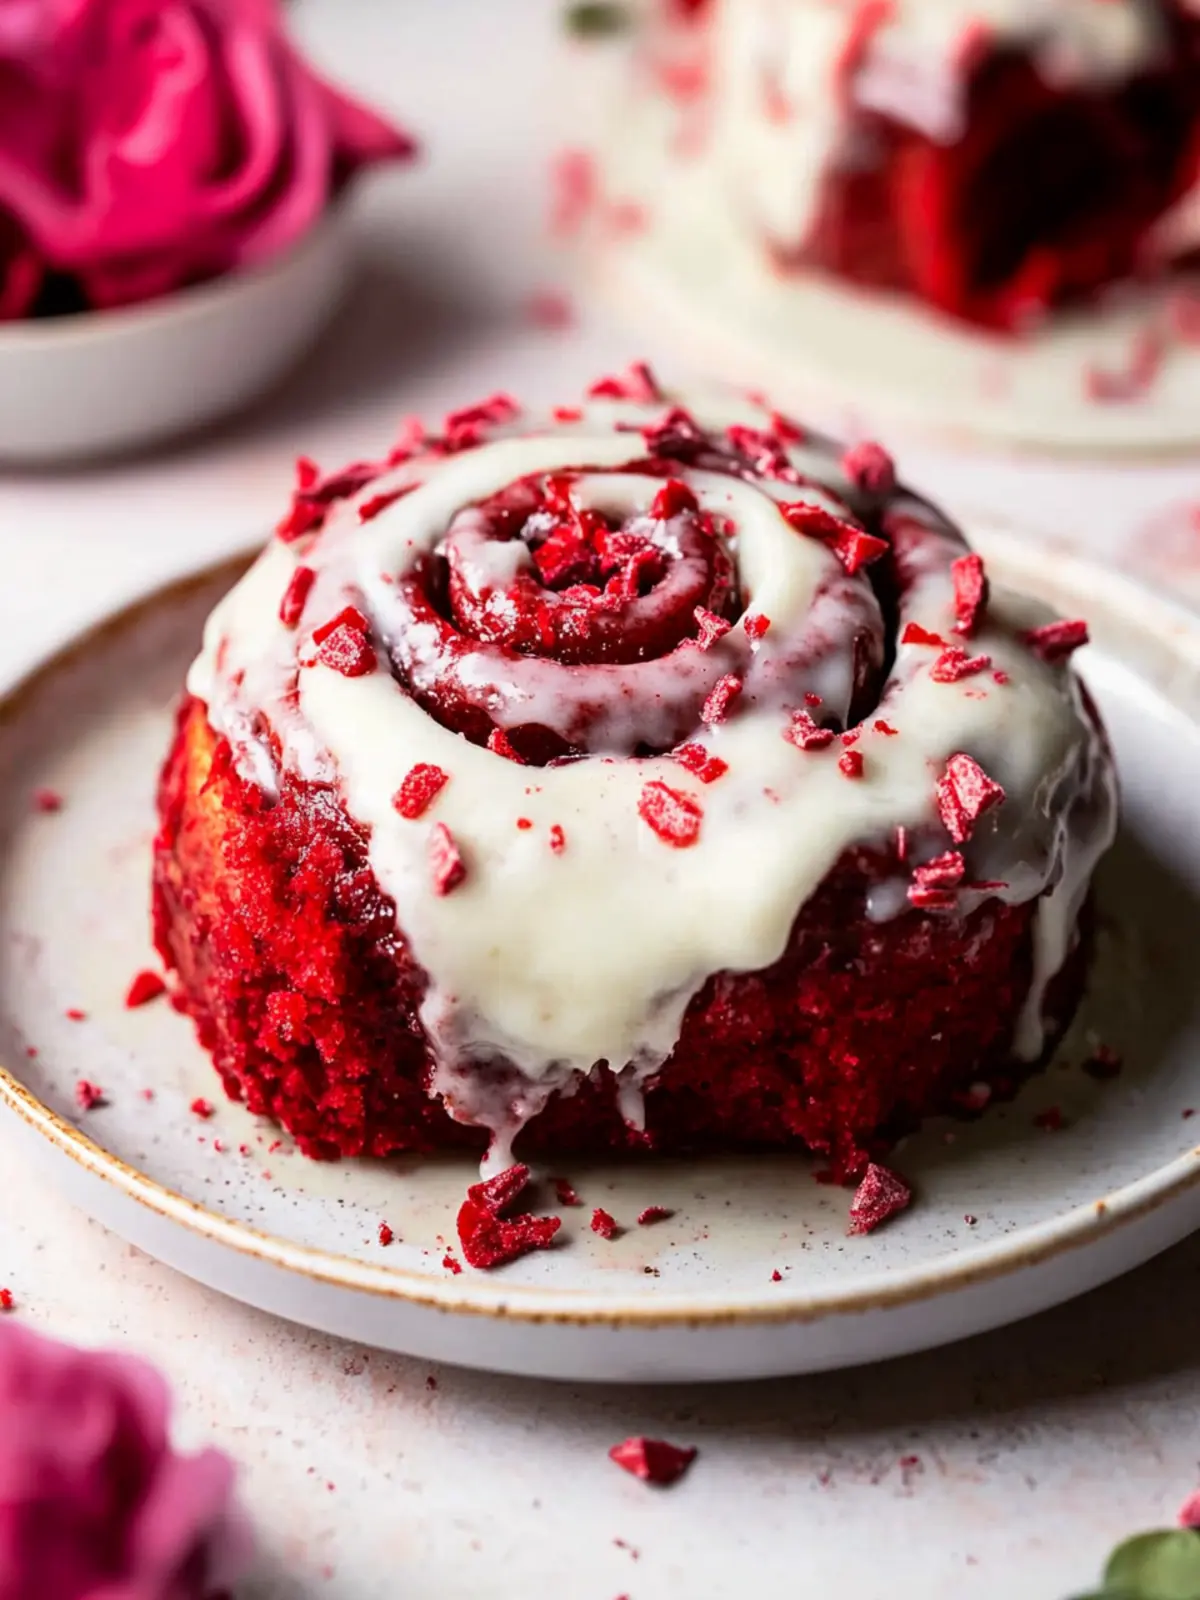
This is how the best homemade red velvet cinnamon rolls recipe was born—out of a lazy Sunday, a pantry full of mismatched ingredients, and a refusal to go to the grocery store. I’ve made a lot of cinnamon rolls in my life. From the canned kind that pop open with a thump to from-scratch versions that take an entire afternoon. But these? These are different. The cocoa in the dough gives them this subtle depth that regular sweet rolls just don’t have. And when you swirl that cinnamon-sugar filling through the red-tinted dough and top it all with a cream cheese frosting that’s equal parts tangy and sweet? Let’s just say I’ve been asked to bring these to three different brunches in the last month alone.
There’s something about the contrast that gets people every time. The deep red crumb against the white frosting. The way the cinnamon cuts through the mild chocolate flavor. It feels fancy without actually being complicated. And honestly, that’s my favorite kind of recipe—the one that makes you look like you spent hours in the kitchen when really, you just followed a few smart steps. I’ve tweaked this batch multiple times to get the dough just right: soft enough to roll, sturdy enough to hold the swirl, and tender enough to melt on your tongue. This version is the one I keep coming back to. It’s the one my family requests for holidays, sleepovers, and random Tuesday mornings when we all need a little extra comfort.
Why You’ll Love This Recipe
I’ve tested this recipe more times than I care to admit—some batches were too dry, others didn’t rise enough, and a few were so sticky I almost gave up. But after all that trial and error, I landed on a version that works every single time. Here’s why these are worth the effort:
- Quick & Easy: The total active time is about 30 minutes. The rest is just waiting for the dough to rise (and honestly, that’s a great time to make coffee or clean up the kitchen).
- Simple Ingredients: No exotic extracts or hard-to-find items. You probably have most of this in your pantry right now—flour, sugar, butter, cinnamon, cocoa powder, and buttermilk.
- Perfect for Special Occasions: These are showstoppers for Valentine’s Day brunch, Christmas morning, or even a birthday breakfast. The red color makes them feel festive without being over-the-top.
- Crowd-Pleaser: I’ve served these to kids, picky eaters, and serious foodies. Everyone goes back for seconds. The cream cheese frosting is the first thing to disappear.
- Unbelievably Delicious: The texture is what gets me every time—pillowy soft with a slight chew, a warm cinnamon center, and that tangy-sweet frosting on top. It’s next-level comfort food.
What makes this recipe different from all the other cinnamon roll recipes out there? It’s the balance. The cocoa doesn’t overpower the cinnamon, and the red velvet flavor is subtle enough that it complements rather than competes. I’ve also figured out the exact ratio of buttermilk to butter that keeps the dough tender without making it greasy. And the cream cheese frosting? I use a higher cream cheese-to-butter ratio than most recipes, which gives it that signature tang that cuts through the sweetness perfectly. This isn’t just another cinnamon roll recipe—it’s the one I’d serve to anyone I wanted to impress.
This recipe is the kind that makes you close your eyes after the first bite. It’s comfort food reimagined—familiar enough to feel like home, but special enough to feel like a treat. Perfect for impressing guests without stress, or turning a simple weekend morning into something memorable.
What Ingredients You Will Need
This recipe uses simple, wholesome ingredients to deliver that signature red velvet flavor and soft, fluffy texture. Most of these are pantry staples, and I’ve included notes on substitutions where they work best.
For the Dough
- All-purpose flour (3 ½ cups / 440g): Provides structure without making the rolls too dense. I prefer Gold Medal or King Arthur for consistent results.
- Unsweetened cocoa powder (2 tablespoons / 10g): Use natural cocoa powder, not Dutch-processed. It gives the rolls that subtle chocolate flavor and helps create the deep red color. Hershey’s works great here.
- Granulated sugar (¼ cup / 50g): Just enough to feed the yeast and add a touch of sweetness to the dough.
- Active dry yeast (1 packet / 2 ¼ teaspoons): Make sure your yeast is fresh. If you’re unsure, proof it in warm milk with a pinch of sugar first.
- Warm milk (¾ cup / 180ml): Whole milk works best for richness, but 2% also works. Heat it to about 110°F—warm to the touch but not hot.
- Buttermilk (¼ cup / 60ml): This is key for the red velvet flavor. It adds tanginess and helps activate the baking soda later. If you don’t have buttermilk, add 1 teaspoon of lemon juice or vinegar to regular milk and let it sit for 5 minutes.
- Unsalted butter (4 tablespoons / 56g), melted: Adds richness and tenderness to the dough. Salted butter works in a pinch—just reduce the added salt by ¼ teaspoon.
- Large egg (1): Binds the dough and adds structure. Use room temperature for better incorporation.
- Red food coloring (1 tablespoon / 15ml): This is what gives the rolls their signature color. I use gel food coloring for a more vibrant result without thinning the dough. Start with 2 teaspoons and add more if needed.
- Salt (½ teaspoon): Balances the sweetness and enhances the chocolate flavor.
For the Cinnamon Filling
- Light brown sugar (¾ cup / 150g), packed: Adds deep caramel notes that pair beautifully with the cocoa in the dough.
- Ground cinnamon (1 ½ tablespoons / 12g): Use fresh cinnamon for the best flavor. I prefer Saigon cinnamon—it’s warmer and more aromatic.
- Unsalted butter (4 tablespoons / 56g), softened: Helps the sugar mixture stick to the dough and creates those gooey layers.
For the Cream Cheese Frosting
- Cream cheese (4 oz / 113g), softened: Full-fat cream cheese gives the best texture and tang. Philadelphia is my go-to brand.
- Unsalted butter (2 tablespoons / 28g), softened: Adds richness and helps the frosting hold its shape.
- Powdered sugar (1 cup / 120g): Sift it to avoid lumps. You can adjust the amount based on how sweet you like your frosting.
- Vanilla extract (1 teaspoon): Pure vanilla extract makes a noticeable difference. Avoid imitation vanilla here.
- Milk (1-2 tablespoons): Use as needed to reach your desired consistency. Start with 1 tablespoon and add more if the frosting is too thick.
Equipment Needed
You don’t need a professional bakery setup to make these rolls. Here’s what I use every time:
- Stand mixer with dough hook: Makes kneading effortless, but you can absolutely do this by hand. It’ll just take about 10 minutes of arm work.
- Large mixing bowl: For rising the dough. Glass or ceramic works best—metal can sometimes react with the buttermilk.
- Rolling pin: A standard wooden or marble rolling pin works perfectly. If you don’t have one, a wine bottle works in a pinch.
- 9×13-inch baking dish: Glass or ceramic helps the rolls bake evenly. I’ve also used a cast-iron skillet for a rustic look.
- Sharp knife or dental floss: For cutting the rolls cleanly. Unflavored dental floss gives the cleanest cuts without squishing the dough.
- Pastry brush: For spreading the melted butter on the dough. A silicone brush is easiest to clean.
- Kitchen scale: Optional but recommended for consistent results, especially with flour measurements.
Preparation Method
Let’s walk through this step by step. I’ve included visual cues at each stage so you know exactly what to look for.
- Activate the yeast: In the bowl of your stand mixer, combine the warm milk (110°F) with 1 tablespoon of the granulated sugar. Sprinkle the yeast on top and let it sit for 5-7 minutes until it becomes foamy. If it doesn’t foam, your yeast might be dead—start over with fresh yeast.
- Mix the wet ingredients: Add the melted butter, buttermilk, egg, red food coloring, and remaining sugar to the yeast mixture. Whisk gently until combined. The mixture should be a deep reddish-pink at this point.
- Add the dry ingredients: In a separate bowl, whisk together the flour, cocoa powder, and salt. Gradually add this to the wet mixture, 1 cup at a time, mixing on low speed with the dough hook. The dough will look shaggy at first—don’t worry, that’s normal.
- Knead the dough: Once all the flour is incorporated, increase the speed to medium and knead for 5-7 minutes. The dough should pull away from the sides of the bowl and feel smooth and slightly tacky to the touch. If it’s too sticky, add flour 1 tablespoon at a time. If it’s too dry, add warm milk 1 teaspoon at a time.
- First rise: Shape the dough into a ball and place it in a lightly greased bowl. Cover with plastic wrap or a clean kitchen towel and let it rise in a warm, draft-free place for 1 to 1 ½ hours, or until doubled in size. I usually put mine in the microwave with the door slightly cracked—it stays warm and cozy in there.
- Make the filling: While the dough rises, mix the brown sugar and cinnamon in a small bowl. Set aside. Let the 4 tablespoons of butter come to room temperature so it spreads easily.
- Roll out the dough: After the first rise, punch the dough down gently and turn it out onto a lightly floured surface. Roll it into a 12×18-inch rectangle, about ¼-inch thick. Don’t worry if the edges aren’t perfect—you’ll trim them later if you want.
- Spread the filling: Using a spatula or pastry brush, spread the softened butter evenly over the entire surface of the dough, leaving a ½-inch border on one long edge. Sprinkle the cinnamon-sugar mixture over the butter, pressing it gently into the dough so it sticks.
- Roll it up: Starting from the long edge closest to you, roll the dough tightly into a log. Use your fingers to pinch the seam closed. Roll the log gently to seal it completely. The log should be about 18 inches long.
- Cut the rolls: Using a sharp knife or unflavored dental floss, cut the log into 12 equal pieces (about 1 ½ inches each). If using floss, slide it under the log, cross the ends over the top, and pull—it cuts through cleanly without squishing.
- Second rise: Place the rolls in a greased 9×13-inch baking dish, cut-side up, leaving a little space between each one. Cover with plastic wrap and let them rise for another 30-45 minutes, until they’re puffy and touching each other.
- Bake: Preheat your oven to 350°F (175°C). Bake the rolls for 20-25 minutes, until they’re golden brown on top and the center rolls feel set when gently pressed. If the tops are browning too quickly, tent loosely with foil after 15 minutes.
- Make the frosting: While the rolls bake, beat the softened cream cheese and butter together until smooth and creamy. Add the powdered sugar and vanilla, then beat on low speed until combined. Add milk 1 tablespoon at a time until the frosting reaches a thick but spreadable consistency.
- Frost and serve: Let the rolls cool for 5-10 minutes in the pan. Spread the cream cheese frosting generously over the warm rolls. The frosting will melt slightly into the crevices—that’s the best part. Serve warm.
Cooking Tips & Techniques
I’ve ruined enough batches of cinnamon rolls to know exactly where things can go wrong. Here are the lessons I learned the hard way:
Don’t over-knead the dough. I know it’s tempting to keep mixing until it’s perfectly smooth, but over-kneading develops too much gluten and makes the rolls tough. Stop when the dough is smooth and springs back when you poke it. If it tears easily, you’ve gone too far.
Temperature matters more than you think. Cold dough doesn’t roll out evenly, and cold butter doesn’t spread. Let your butter and cream cheese come to room temperature before you start. And when proofing the dough, make sure your rising spot isn’t too hot—above 120°F will kill the yeast. I aim for a cozy 75-80°F.
Use a scale for the flour. I cannot stress this enough. Measuring flour by volume (scooping with a cup) can give you wildly different amounts depending on how packed it is. A kitchen scale costs less than $15 and will save you from dry, dense rolls. I learned this after three failed batches in one week.
Don’t skip the second rise. I know you’re hungry, and the rolls look beautiful after you’ve cut them. But that second rise is what makes them light and fluffy instead of dense and bready. Set a timer and walk away. Make coffee. Read a book. Trust the process.
Cut with floss, not a knife. A sharp knife works okay, but it still squishes the dough slightly. Unflavored dental floss gives you clean, even cuts without any squishing. Just slide it under the log, cross the ends, and pull. It’s a game-changer.
Variations & Adaptations
One of the best things about this recipe is how easy it is to adapt. Here are a few variations I’ve tried (and loved):
Gluten-Free Version: Substitute the all-purpose flour with a 1:1 gluten-free baking flour blend. I’ve had good results with Bob’s Red Mill. Add 1 teaspoon of xanthan gum if your blend doesn’t already include it. The dough will be slightly stickier, so flour your surface generously.
Dairy-Free Adaptation: Use plant-based milk (oat or almond work best) and vegan butter. For the cream cheese frosting, try a dairy-free cream cheese like Kite Hill or Miyoko’s. The texture will be slightly softer, but the flavor is still incredible.
Chocolate Lover’s Twist: Add ½ cup of mini chocolate chips to the cinnamon-sugar filling. The chocolate melts into the layers and creates these gooey pockets of richness. I did this for a birthday brunch and they disappeared in 10 minutes.
Make-Ahead Option: After cutting the rolls and placing them in the baking dish, cover tightly with plastic wrap and refrigerate overnight. In the morning, let them sit at room temperature for 30 minutes before baking. The cold rise actually develops more flavor.
Spiced Variation: Add ½ teaspoon of nutmeg, ¼ teaspoon of cardamom, and a pinch of cloves to the cinnamon-sugar filling. It gives the rolls a warm, holiday-inspired flavor that pairs beautifully with the cocoa.
Serving & Storage Suggestions
These rolls are best served warm, straight from the oven, with the cream cheese frosting still slightly melty. I like to pull them apart with my fingers and dip each piece into extra frosting (don’t judge me).
For a complete brunch spread, serve these alongside a cold brew coffee for a perfect morning pairing. The bitterness of the coffee cuts through the sweetness of the frosting beautifully. If you’re feeling extra indulgent, add some crispy bacon or scrambled eggs on the side.
Storage: Leftover rolls (if you have any) keep well in an airtight container at room temperature for up to 2 days. After that, refrigerate them for up to 5 days. The frosting will firm up in the fridge, so let them come to room temperature before serving or reheat gently.
Reheating: The best way to reheat individual rolls is in the microwave for 15-20 seconds. For a larger batch, wrap the dish in foil and warm in a 300°F oven for 10-12 minutes. The rolls will taste almost as fresh as the day you made them.
Freezing: You can freeze the unbaked rolls after cutting them. Place them on a baking sheet and freeze until solid, then transfer to a freezer bag. When ready to bake, let them thaw in the refrigerator overnight, then do the second rise at room temperature for 45 minutes before baking. The baked rolls also freeze well for up to 3 months—just wrap tightly in plastic wrap and foil.
Flavor development: Honestly, these rolls taste even better the next day. The cinnamon and cocoa flavors meld together overnight, and the texture stays surprisingly soft. If you can resist eating them all on day one, you’re in for a treat on day two.
Nutritional Information & Benefits
Let’s be real—these are a treat, not a health food. But here’s what you’re working with per roll (based on 12 servings):
| Nutrient | Amount per Roll |
|---|---|
| Calories | 385 |
| Total Fat | 16g |
| Saturated Fat | 10g |
| Cholesterol | 55mg |
| Sodium | 210mg |
| Total Carbohydrates | 55g |
| Dietary Fiber | 2g |
| Sugars | 30g |
| Protein | 6g |
On the bright side, the cocoa powder provides a small amount of antioxidants, and the cinnamon has anti-inflammatory properties. The cream cheese adds a bit of calcium and protein. If you’re watching your sugar intake, you can reduce the sugar in the filling by 2 tablespoons without affecting the texture too much. And if you’re looking for a lighter option, try pairing one roll with a bowl of tomato soup for a sweet-savory lunch combo that feels balanced.
Potential allergens: wheat (gluten), dairy, eggs. For a nut-free version, simply avoid any nut-based milk substitutes in the dairy-free adaptation.
Conclusion
These red velvet cinnamon rolls are the kind of recipe that makes you feel like you’ve discovered a secret. They’re familiar enough to be comforting, but different enough to feel special. The cocoa gives them depth, the cinnamon keeps them classic, and that cream cheese frosting ties everything together in the best possible way. I’ve made these for Christmas morning, Valentine’s Day brunch, and random Tuesday nights when I needed a little joy. Every single time, they deliver.
I’d love to hear how yours turn out. Did you add any twists? Did you double the frosting (no judgment here)? Drop a comment below and let me know—I read every single one and I’m always looking for new ideas to try. And if you share a photo on social media, tag me so I can see your beautiful creation. These rolls deserve to be shown off.
Go ahead, preheat that oven. Your kitchen is about to smell incredible.
Frequently Asked Questions
Can I make these red velvet cinnamon rolls without a stand mixer?
Absolutely. You can knead the dough by hand on a lightly floured surface for about 10 minutes. It’s a great arm workout! Just make sure the dough is smooth and elastic before the first rise.
Why did my dough not rise?
There are a few common culprits: your yeast might be expired, your milk was too hot (over 120°F kills yeast), or your kitchen was too cold. Always proof your yeast first, and find a warm, draft-free spot for rising.
Can I use natural food coloring instead of artificial?
Yes! You can use beet powder or natural red food coloring. Keep in mind that natural colorings are less vibrant, so the rolls will have a more muted pinkish-red hue. The flavor won’t be affected.
How do I prevent the filling from leaking out?
Make sure you roll the dough tightly and pinch the seam closed firmly. Also, don’t overfill the rolls—stick to the measurements in the recipe. If some filling does leak, it’ll caramelize in the pan and create a delicious sticky bottom.
Can I double this recipe?
Yes, but I recommend making two separate batches rather than doubling the dough in one mixer. The dough can be hard to knead evenly in large quantities. Alternatively, make the dough in batches and bake one pan immediately while refrigerating the second pan for the next day.
Pin This Recipe!
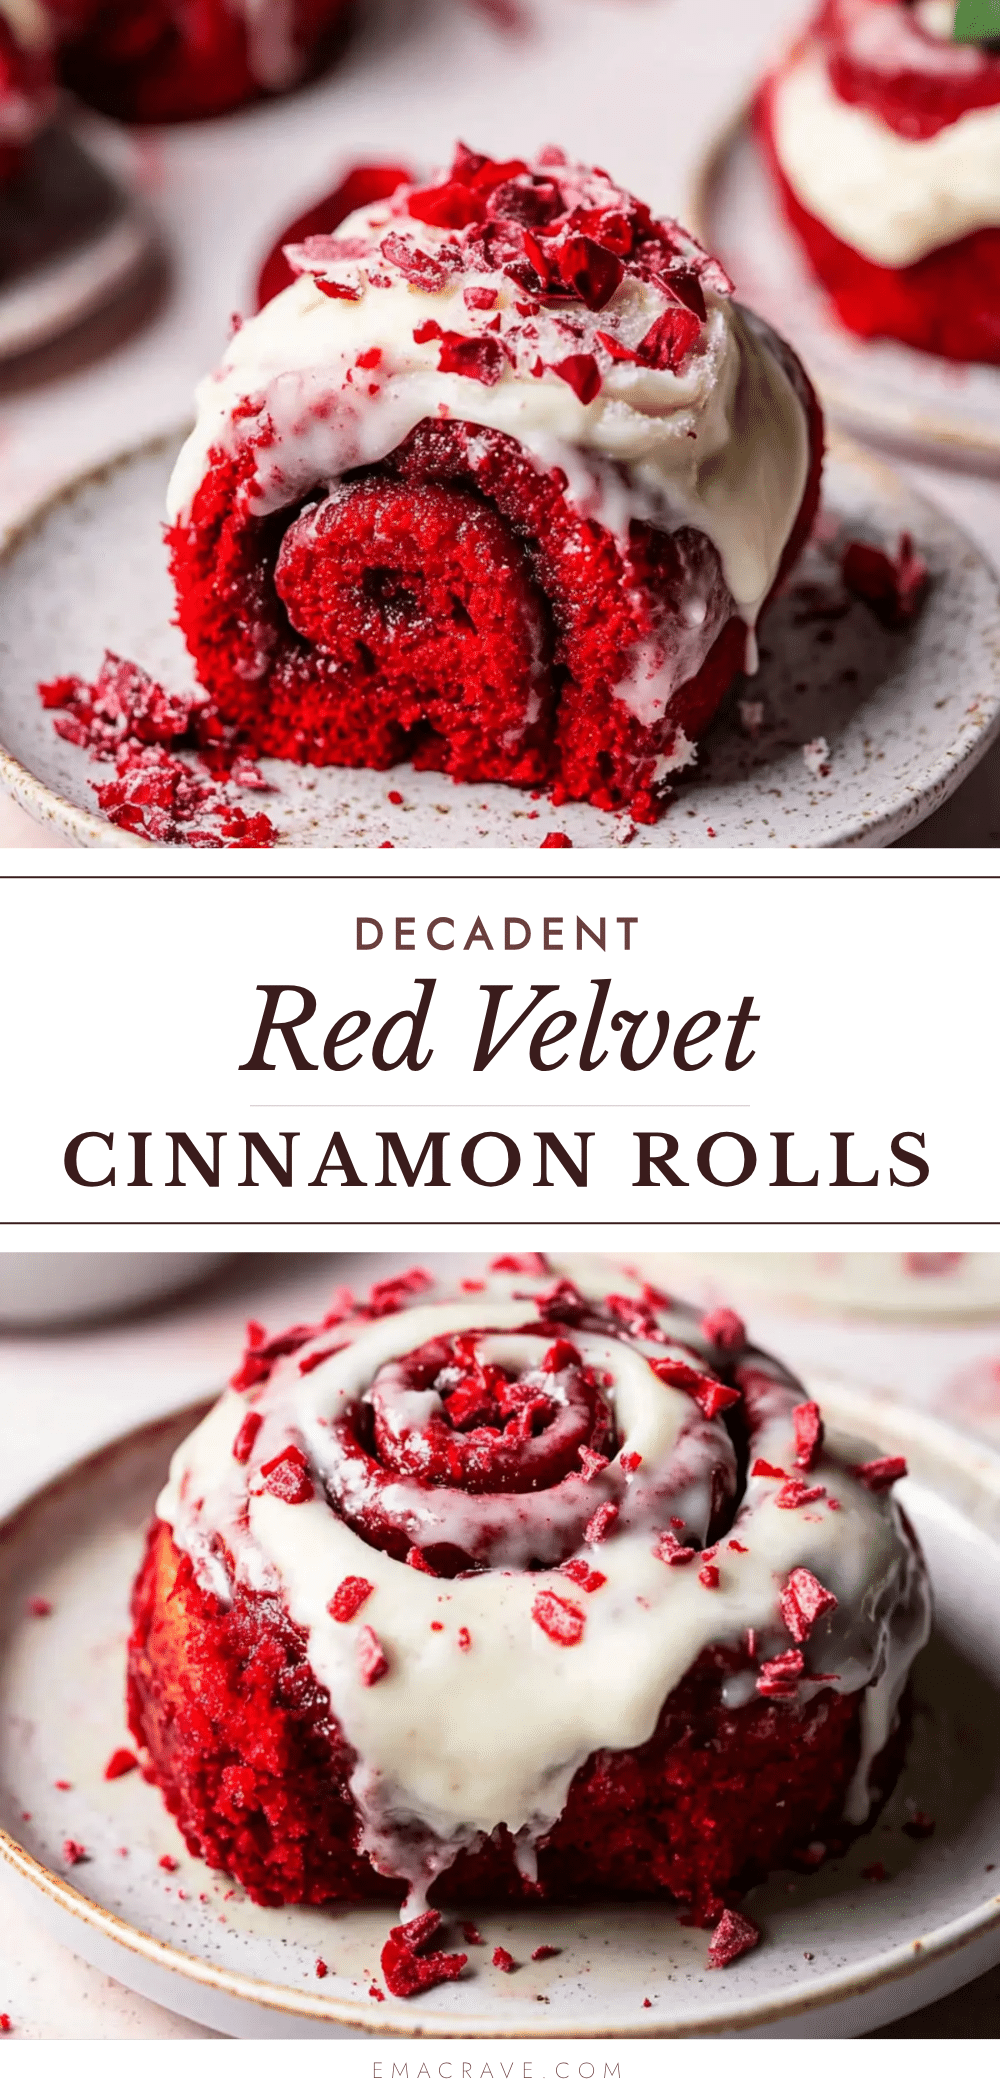
Best Homemade Red Velvet Cinnamon Rolls Recipe

These red velvet cinnamon rolls combine the classic flavors of red velvet cake with soft, pillowy cinnamon rolls, topped with a tangy cream cheese frosting. Perfect for special occasions or a comforting weekend treat.
- Prep Time: 30 minutes
- Cook Time: 25 minutes
- Total Time: 2 hours 40 minutes
- Yield: 12 servings 1x
- Category: Breakfast
- Cuisine: American
Ingredients
- 3 ½ cups (440g) all-purpose flour
- 2 tablespoons (10g) unsweetened cocoa powder
- ¼ cup (50g) granulated sugar
- 1 packet (2 ¼ teaspoons) active dry yeast
- ¾ cup (180ml) warm milk (110°F)
- ¼ cup (60ml) buttermilk
- 4 tablespoons (56g) unsalted butter, melted
- 1 large egg, room temperature
- 1 tablespoon (15ml) red food coloring (gel preferred)
- ½ teaspoon salt
- ¾ cup (150g) packed light brown sugar
- 1 ½ tablespoons (12g) ground cinnamon
- 4 tablespoons (56g) unsalted butter, softened
- 4 oz (113g) cream cheese, softened
- 2 tablespoons (28g) unsalted butter, softened
- 1 cup (120g) powdered sugar, sifted
- 1 teaspoon vanilla extract
- 1–2 tablespoons milk
Instructions
- Activate the yeast: In the bowl of a stand mixer, combine warm milk (110°F) with 1 tablespoon of granulated sugar. Sprinkle yeast on top and let sit for 5-7 minutes until foamy.
- Mix wet ingredients: Add melted butter, buttermilk, egg, red food coloring, and remaining sugar to the yeast mixture. Whisk gently until combined.
- Add dry ingredients: In a separate bowl, whisk together flour, cocoa powder, and salt. Gradually add to wet mixture, 1 cup at a time, mixing on low with dough hook until shaggy.
- Knead dough: Increase speed to medium and knead for 5-7 minutes until dough is smooth and slightly tacky. Add flour or warm milk as needed.
- First rise: Shape dough into a ball, place in a greased bowl, cover, and let rise in a warm place for 1 to 1 ½ hours until doubled in size.
- Make filling: Mix brown sugar and cinnamon in a small bowl. Let 4 tablespoons butter come to room temperature.
- Roll out dough: Punch down dough and roll on a lightly floured surface into a 12×18-inch rectangle, about ¼-inch thick.
- Spread filling: Spread softened butter over dough, leaving a ½-inch border on one long edge. Sprinkle cinnamon-sugar mixture over butter, pressing gently.
- Roll it up: Starting from the long edge closest to you, roll dough tightly into a log. Pinch seam to seal.
- Cut rolls: Cut log into 12 equal pieces (about 1 ½ inches each) using a sharp knife or unflavored dental floss.
- Second rise: Place rolls in a greased 9×13-inch baking dish, cut-side up. Cover and let rise for 30-45 minutes until puffy and touching.
- Bake: Preheat oven to 350°F (175°C). Bake for 20-25 minutes until golden brown and center rolls feel set. Tent with foil after 15 minutes if browning too quickly.
- Make frosting: Beat softened cream cheese and butter until smooth. Add powdered sugar and vanilla, beat until combined. Add milk 1 tablespoon at a time until spreadable.
- Frost and serve: Let rolls cool for 5-10 minutes. Spread cream cheese frosting generously over warm rolls. Serve warm.
Notes
For best results, use a kitchen scale for flour. Let butter and cream cheese come to room temperature. Don’t skip the second rise. Cut rolls with dental floss for clean cuts. Rolls can be made ahead: after cutting, refrigerate overnight, then let sit at room temperature for 30 minutes before baking.
Nutrition
- Serving Size: 1 roll
- Calories: 385
- Sugar: 30
- Sodium: 210
- Fat: 16
- Saturated Fat: 10
- Carbohydrates: 55
- Fiber: 2
- Protein: 6
Keywords: red velvet cinnamon rolls, cinnamon rolls, red velvet, cream cheese frosting, breakfast, brunch, homemade cinnamon rolls



