Love this? Save it for later!
Share the inspiration with your friends
I was staring at a container of leftover rice in the fridge, wondering what on earth to do with it. It was one of those evenings where I didn’t have the energy for another complicated meal, but I also didn’t want to just toss it. A can of tuna sat in the pantry, practically begging to be used. And then it hit me—why not turn this humble combination into something you could actually pick up and eat? Something crispy on the outside, soft and buttery on the inside, and totally satisfying. That’s how these buttery tuna rice muffins were born, and honestly, they’ve become a staple in my kitchen ever since.
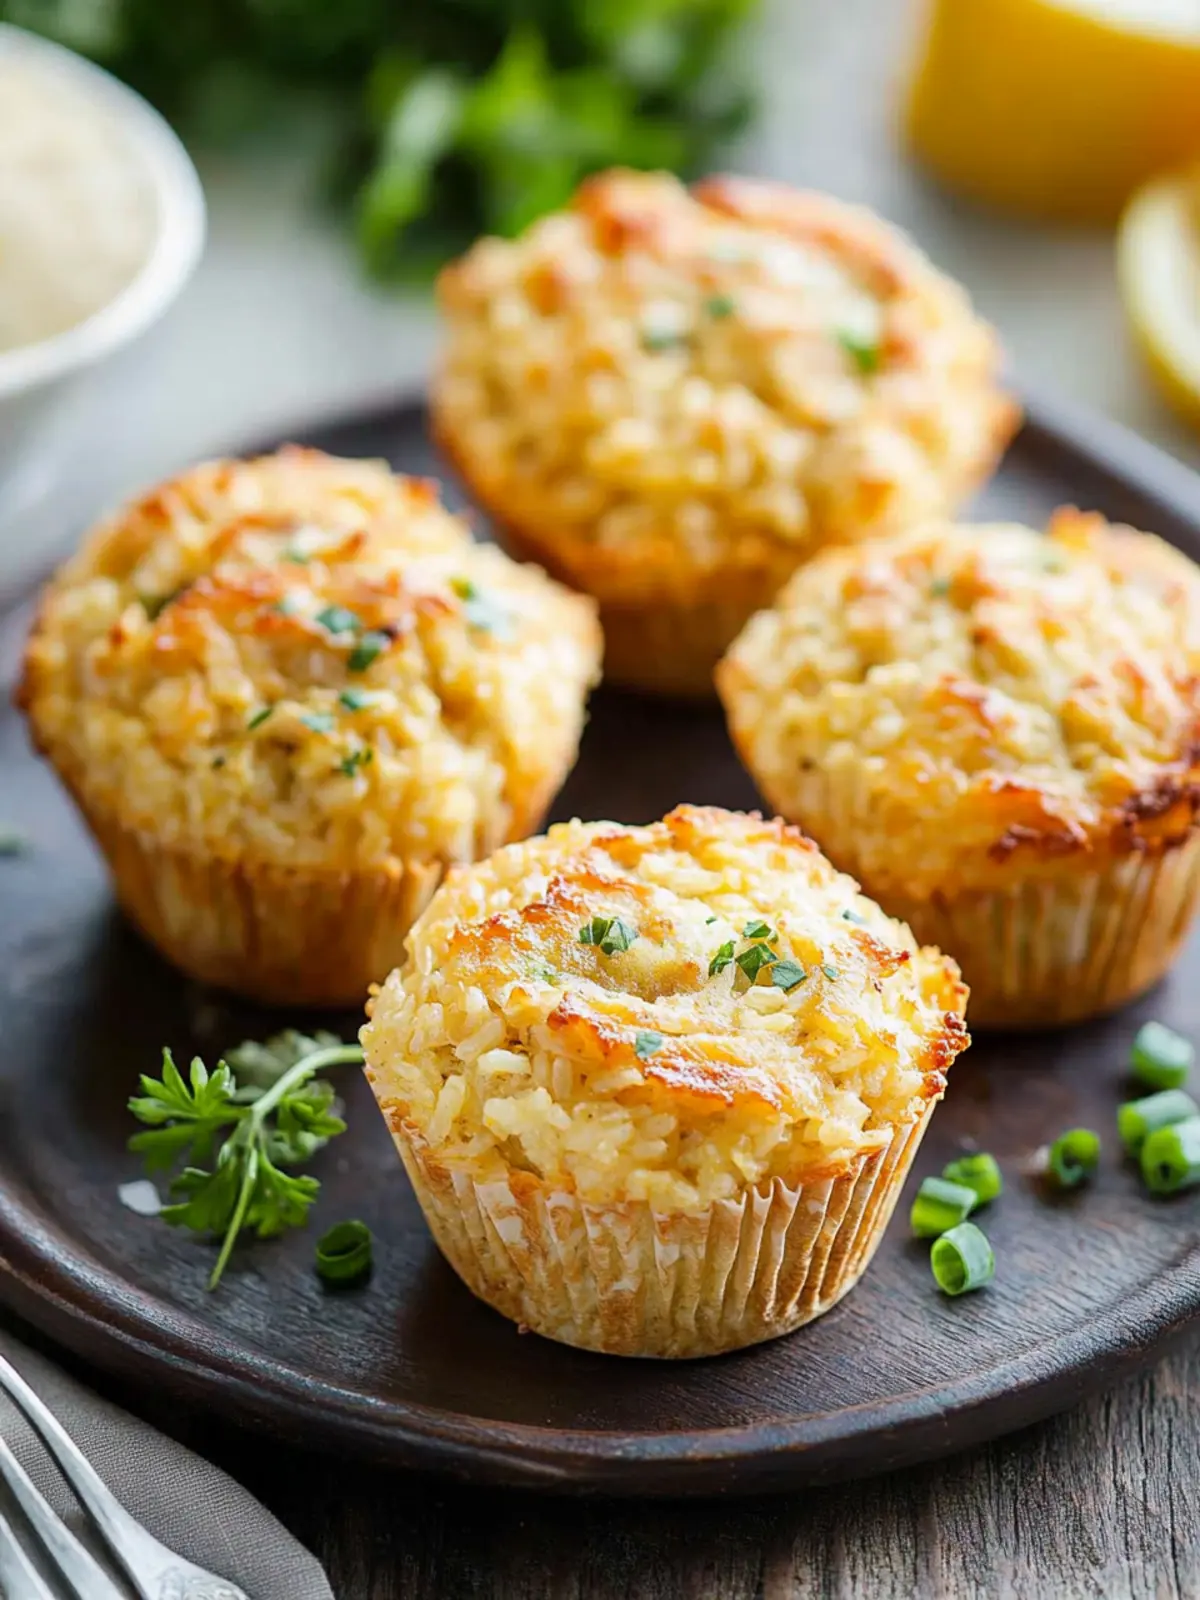
I remember pulling the first batch out of the oven, a little skeptical. Would they hold together? Would they taste like more than just leftovers? The smell that filled the kitchen was incredible—warm, buttery, and savory. I let them cool for a minute, popped one out of the tin, and took a bite. The edges were golden and slightly crisp, while the center was tender and rich. It was comfort food in a whole new form. No plates needed, no fuss. Just a perfect little muffin that felt like a hug.
These aren’t your typical sweet muffins, and that’s exactly why I love them. They’re savory, filling, and come together in about 30 minutes. Whether you need a quick lunch, a snack that actually keeps you full, or something to pack for a road trip, these little guys deliver. I’ve made them for my kids, for myself on busy weeknights, and even for a friend who stopped by unannounced. Every single time, they disappear fast. There’s just something about that combination of tender rice, flaky tuna, and melted butter that hits the spot every time.
So if you’ve got some leftover rice and a can of tuna, you’re already halfway there. These buttery tuna rice muffins are the kind of recipe that reminds you why simple cooking is often the best cooking. No fancy techniques, no long ingredient lists—just real food that tastes amazing and makes you feel good about what you’re eating. Let’s get started.
Why You’ll Love This Recipe
I’ve tested this recipe more times than I can count, tweaking the ratios and playing with the bake time until everything clicked. Here’s why I keep coming back to it, and why I think you will too.
- Quick & Easy: From start to finish, you’re looking at about 30 minutes. That’s less time than it takes to decide what to order for delivery. Perfect for those nights when you need dinner on the table fast.
- Simple Ingredients: You probably already have everything you need in your pantry and fridge. Rice, tuna, butter, eggs, cheese—that’s it. No special trips to the store required.
- Perfect for Meal Prep: These muffins store beautifully and reheat like a dream. Make a batch on Sunday, and you’ve got breakfast, lunch, or snacks ready for the week. They’re also great for lunchboxes.
- Crowd-Pleaser: I’ve served these to kids, picky eaters, and adults who usually turn their noses up at canned tuna. Everyone loves them. They’re mild, buttery, and just plain good.
- Unbelievably Delicious: The texture is what gets me every time. The edges get golden and slightly crispy while the inside stays soft and almost creamy. It’s comfort food you can hold in your hand.
What sets this recipe apart from other tuna and rice dishes is the method. Instead of just mixing everything together and baking it in a casserole dish, we’re using a muffin tin. This gives you perfectly portioned, grab-and-go servings with maximum crispy surface area. Plus, the butter in each cup creates a golden crust that you just can’t get any other way. Trust me, once you try these, you’ll never look at leftover rice the same way again.
What Ingredients You Will Need
This recipe uses simple, wholesome ingredients to deliver big flavor and satisfying texture without any fuss. Most of these are pantry staples, which makes these muffins perfect for last-minute cooking.
- Cooked white rice (2 cups): Leftover rice works best here because it’s slightly drier and holds together better than freshly cooked rice. You can use jasmine, basmati, or plain long-grain rice. Brown rice works too, though the texture will be a bit chewier.
- Canned tuna (2 cans, drained): I prefer tuna packed in water for a lighter result, but oil-packed tuna works as well—just drain it well. Flake the tuna with a fork before mixing so it distributes evenly throughout the muffins.
- Unsalted butter (4 tablespoons, melted): This is the star of the show. The butter adds richness and helps create that golden, crispy exterior. I use unsalted so I can control the salt level, but salted butter works in a pinch—just reduce the added salt slightly.
- Large eggs (2): Eggs act as the binder, holding everything together so the muffins don’t fall apart. Make sure they’re at room temperature for easier mixing.
- Shredded cheddar cheese (1 cup): Sharp cheddar adds a nice tangy flavor that complements the tuna beautifully. You can also use mozzarella for a milder taste or pepper jack for a little kick. Grate your own cheese if possible—it melts better than pre-shredded.
- Panko breadcrumbs (½ cup): These help absorb excess moisture and give the muffins a light, tender crumb. Regular breadcrumbs work too, but panko gives a better texture. For a gluten-free option, use gluten-free panko or almond flour.
- Salt (½ teaspoon): Just enough to enhance all the flavors. Adjust to your taste.
- Black pepper (¼ teaspoon): Adds a subtle warmth. Freshly ground is always best.
- Garlic powder (½ teaspoon): This adds a savory depth without being overpowering. Onion powder works well as a substitute.
- Fresh parsley (2 tablespoons, chopped) (optional): A little freshness goes a long way. Parsley brightens up the muffins and adds a pop of color. Chives or green onions work great too.
I always recommend using a good-quality canned tuna for this recipe. My personal go-to is Wild Planet or Safe Catch—they’re sustainably sourced and have a clean, mild flavor. If you’re watching your sodium, look for no-salt-added tuna and adjust the seasoning accordingly.
Equipment Needed
You don’t need any fancy gadgets for this recipe, which is exactly how I like it. Here’s what you’ll need:
- Standard 12-cup muffin tin: This is non-negotiable. A non-stick pan works best, but if yours isn’t non-stick, just grease it well with butter or cooking spray. I’ve used both metal and silicone tins, and both work fine—though metal gives you a crisper bottom.
- Large mixing bowl: You need enough room to combine all the ingredients without making a mess. A glass or stainless steel bowl works perfectly.
- Fork or spatula: For mixing everything together. A fork is great for flaking the tuna and breaking up any rice clumps.
- Measuring cups and spoons: Accuracy matters here, especially with the breadcrumbs and cheese. I’ve eyeballed it before and ended up with muffins that didn’t hold together well.
- Pastry brush or paper towel: For greasing the muffin tin. Butter works best for flavor, but a neutral oil like avocado or vegetable oil will do the job.
- Cooling rack: Letting the muffins cool in the tin for a few minutes before transferring them to a rack helps them set properly. If you skip this step, they might fall apart.
If you don’t have a muffin tin, you can bake this mixture in a greased 8×8-inch baking dish. Just spread it evenly and bake for about 25-30 minutes. You won’t get the individual portions, but the flavor will be just as good. For a budget-friendly option, look for a basic non-stick muffin tin at your local discount store—they usually cost under $10 and last for years.
Preparation Method
This recipe comes together quickly, so I like to have everything prepped and measured before I start. It makes the whole process smooth and stress-free.
- Preheat your oven to 375°F (190°C). While it’s heating up, generously grease a 12-cup muffin tin with melted butter or non-stick spray. Don’t skimp here—the butter helps create that golden crust we’re after. Set the tin aside.
- In a large mixing bowl, combine the cooked rice and drained tuna. Use a fork to break up any large clumps of rice and flake the tuna into small pieces. You want everything to be evenly distributed so every muffin gets a good mix of both.
- Add the melted butter, eggs, shredded cheddar cheese, panko breadcrumbs, salt, pepper, and garlic powder. Stir everything together with a spatula or fork until fully combined. The mixture should look cohesive and slightly sticky. If it seems too dry, add a tablespoon of milk or water. If it’s too wet, add another tablespoon of breadcrumbs.
- Fold in the fresh parsley if you’re using it. This adds a nice freshness, but it’s totally optional. Give it one last gentle stir to make sure everything is incorporated.
- Spoon the mixture evenly into the prepared muffin cups. I use a cookie scoop for this—it makes portioning super easy and keeps things neat. Press the mixture down gently with the back of the spoon so it’s compact. This helps the muffins hold their shape.
- Bake for 20-25 minutes, or until the tops are golden brown and the edges look crispy. Your kitchen will smell amazing at this point. Let the muffins cool in the tin for 5 minutes—this is crucial for them to set properly. Then, carefully run a knife around the edges and transfer them to a wire rack to cool slightly.
- Serve warm or at room temperature. These muffins are delicious on their own, but I love dipping them in a little sriracha mayo or ranch dressing. They’re also great alongside a simple salad or a bowl of soup.
Here’s a tip I learned the hard way: don’t overmix the batter. Stir just until everything is combined. Overmixing can make the muffins dense and tough. Also, if you’re using leftover rice that’s been in the fridge for a few days, let it come to room temperature before mixing. Cold rice can make the batter uneven and harder to work with.
Cooking Tips & Techniques
I’ve made these buttery tuna rice muffins more times than I can count, and I’ve picked up a few tricks along the way that make a real difference.
Use day-old rice. Freshly cooked rice is too moist and sticky, which can make the muffins mushy. Leftover rice that’s been in the fridge overnight has dried out slightly, so it holds its shape better and absorbs the other flavors more evenly. If you only have fresh rice, spread it out on a baking sheet and let it cool completely before using.
Don’t skip the butter. I know it’s tempting to use cooking spray to save a few calories, but the butter is what gives these muffins their signature golden crust and rich flavor. Brush the muffin tin generously with melted butter, and even drizzle a little extra over the tops before baking. Trust me, it’s worth it.
Press the mixture down firmly. When you spoon the batter into the muffin cups, use the back of a spoon or your fingers to press it down. This ensures the muffins are compact and hold together after baking. If the mixture is too loose, they might crumble when you try to remove them.
Let them cool before removing. I made the mistake of trying to pop one out right out of the oven once, and it fell apart in my hands. Let the muffins cool in the tin for at least 5 minutes. This allows them to set and firm up. After that, run a thin knife or offset spatula around the edges to loosen them, and they should come out easily.
Experiment with add-ins. These muffins are a great base for customization. I’ve added finely chopped bell peppers, corn kernels, and even a pinch of cayenne for heat. Just make sure any add-ins are finely chopped so they don’t throw off the texture. A little goes a long way.
Variations & Adaptations
One of the best things about this recipe is how versatile it is. Here are some of my favorite ways to change it up.
Gluten-Free Version: Swap the panko breadcrumbs for gluten-free breadcrumbs or almond flour. The texture will be slightly different—almond flour makes them a bit denser—but they’ll still be delicious. I’ve also used crushed gluten-free crackers in a pinch, and it worked great.
Dairy-Free Version: Replace the butter with a plant-based butter or olive oil, and use dairy-free cheese shreds. I’ve tried this with vegan cheddar, and while the flavor is milder, the texture holds up well. Just make sure to grease the muffin tin generously with oil to prevent sticking.
Spicy Kick: Add ½ teaspoon of red pepper flakes or a diced jalapeño to the mixture. I love making these with a little heat—it pairs so well with the buttery richness. You can also serve them with a spicy dipping sauce like sriracha mayo or chipotle ranch.
Herb-Infused: Swap the parsley for fresh dill, chives, or basil. Dill and tuna are a classic combination, and it works beautifully here. I’ve also added a teaspoon of dried Italian seasoning for a more savory profile.
Protein Boost: Add ½ cup of cooked, crumbled bacon or diced ham to the mixture. This makes the muffins even more filling and turns them into a complete meal. I’ve done this for brunch before, and everyone went back for seconds.
Vegetable-Packed: Finely dice some zucchini, bell peppers, or spinach and sauté them lightly before adding to the mixture. This adds moisture and nutrients without overpowering the flavor. Just make sure to squeeze out any excess liquid from the vegetables first.
Serving & Storage Suggestions
These buttery tuna rice muffins are incredibly versatile when it comes to serving. I love them warm, straight out of the oven, with a dollop of sour cream or a squeeze of lemon juice. They’re also fantastic at room temperature, which makes them perfect for picnics, lunchboxes, or road trips. Pair them with a simple green salad, a bowl of tomato soup, or some creamy dill pickle tuna pasta salad for a complete meal that’s both satisfying and easy.
For storage, let the muffins cool completely before placing them in an airtight container. They’ll keep in the refrigerator for up to 4 days. I like to layer them with parchment paper so they don’t stick together. To reheat, pop them in a 350°F (175°C) oven for about 5-7 minutes, or until warmed through. You can also microwave them for 30-45 seconds, though the edges won’t be as crispy.
These muffins freeze beautifully. Place the cooled muffins on a baking sheet and freeze for about an hour, then transfer them to a freezer-safe bag or container. They’ll keep for up to 3 months. To reheat from frozen, bake at 350°F (175°C) for 10-12 minutes, or microwave for 1-2 minutes. I often make a double batch and keep half in the freezer for those days when I need a quick, no-fuss meal.
One thing I’ve noticed is that the flavors meld together even more after a day in the fridge. The rice absorbs the buttery, cheesy goodness, and the texture becomes even more cohesive. So don’t be afraid to make these ahead of time—they might even taste better the next day.
Nutritional Information & Benefits
Here’s an approximate nutritional breakdown for one muffin (based on 12 servings):
- Calories: 180
- Protein: 12g
- Fat: 9g
- Carbohydrates: 14g
- Fiber: 1g
- Sugar: 1g
- Sodium: 280mg
These muffins are a great source of lean protein from the tuna, which is also rich in omega-3 fatty acids that support heart and brain health. The rice provides steady energy, while the eggs and cheese add calcium and vitamin D. If you’re looking for a lower-carb option, you can reduce the rice by half and increase the breadcrumbs and cheese slightly.
I love that this recipe is naturally nut-free and can easily be made gluten-free or dairy-free. It’s also a fantastic way to use up leftover rice and reduce food waste. From a wellness perspective, these muffins are balanced enough to enjoy as a snack or light meal without feeling heavy or greasy.
Conclusion
These buttery tuna rice muffins have become one of my most-requested recipes, and for good reason. They’re simple, satisfying, and endlessly adaptable. Whether you’re feeding a hungry family, meal-prepping for a busy week, or just looking for a new way to use up leftover rice, this recipe delivers every single time. The combination of tender rice, flaky tuna, melted cheese, and that golden buttery crust is pure comfort in muffin form.
I hope you give these a try and make them your own. Add your favorite herbs, throw in some veggies, or dial up the heat—whatever sounds good to you. Cooking should be fun, and this recipe is the perfect canvas for your creativity. If you make them, I’d love to hear how they turned out. Drop a comment below and let me know your favorite variation. And if you’re looking for more easy, comforting recipes, don’t miss my savory rice meatballs or this easy Instant Pot spinach rice—they’re both perfect for busy nights.
Happy cooking, and remember: the best meals are the ones you share.
Frequently Asked Questions
Can I use brown rice instead of white rice?
Absolutely. Brown rice works well in this recipe, though the texture will be a bit chewier and the muffins may be slightly denser. Just make sure the rice is fully cooked and cooled before using.
Can I make these muffins ahead of time?
Yes, they’re perfect for meal prep. Bake them, let them cool completely, and store them in an airtight container in the fridge for up to 4 days. They also freeze beautifully for up to 3 months.
Why did my muffins fall apart?
This usually happens if the mixture is too dry or if you didn’t press it down firmly enough in the muffin cups. Make sure your rice isn’t too dry, and don’t skip the eggs—they’re essential for binding everything together. Letting the muffins cool in the tin for 5 minutes also helps them set.
Can I add vegetables to the mixture?
Yes, finely chopped vegetables like bell peppers, zucchini, or spinach work great. Just sauté them lightly first to remove excess moisture, and make sure they’re finely diced so they don’t affect the texture.
What can I serve with these muffins?
They’re delicious on their own, but I love serving them with a simple salad, roasted vegetables, or a bowl of soup. They also pair wonderfully with a dipping sauce like sriracha mayo, ranch, or even a tangy yogurt dip.
Pin This Recipe!

Best Buttery Tuna Rice Muffins: Easy 30-Minute Recipe

These buttery tuna rice muffins are a quick and easy 30-minute recipe that transforms leftover rice and canned tuna into crispy, golden, and savory muffins. Perfect for meal prep, lunchboxes, or a satisfying snack.
- Prep Time: 10 minutes
- Cook Time: 20-25 minutes
- Total Time: 30 minutes
- Yield: 12 muffins 1x
- Category: Main Course
- Cuisine: American
Ingredients
- 2 cups cooked white rice (leftover preferred)
- 2 cans (5 oz each) canned tuna, drained
- 4 tablespoons unsalted butter, melted
- 2 large eggs, room temperature
- 1 cup shredded cheddar cheese
- ½ cup panko breadcrumbs
- ½ teaspoon salt
- ¼ teaspoon black pepper
- ½ teaspoon garlic powder
- 2 tablespoons fresh parsley, chopped (optional)
Instructions
- Preheat oven to 375°F (190°C). Generously grease a 12-cup muffin tin with melted butter or non-stick spray.
- In a large mixing bowl, combine cooked rice and drained tuna. Use a fork to break up any clumps and flake the tuna.
- Add melted butter, eggs, shredded cheddar cheese, panko breadcrumbs, salt, pepper, and garlic powder. Stir until fully combined. The mixture should be cohesive and slightly sticky. If too dry, add a tablespoon of milk or water; if too wet, add another tablespoon of breadcrumbs.
- Fold in fresh parsley if using.
- Spoon the mixture evenly into the prepared muffin cups, pressing down gently with the back of a spoon to compact.
- Bake for 20-25 minutes, until tops are golden brown and edges look crispy. Let cool in the tin for 5 minutes, then run a knife around edges and transfer to a wire rack.
- Serve warm or at room temperature.
Notes
Use day-old rice for best texture. Don’t overmix the batter. Let muffins cool in the tin for 5 minutes before removing to prevent crumbling. For a gluten-free version, use gluten-free panko or almond flour. For dairy-free, use plant-based butter and dairy-free cheese.
Nutrition
- Serving Size: 1 muffin
- Calories: 180
- Sugar: 1
- Sodium: 280
- Fat: 9
- Saturated Fat: 5
- Carbohydrates: 14
- Fiber: 1
- Protein: 12
Keywords: tuna rice muffins, buttery tuna muffins, leftover rice recipe, easy tuna recipe, savory muffins, meal prep



