Love this? Save it for later!
Share the inspiration with your friends
I was standing in my kitchen, staring at a half-empty jar of Biscoff spread and a bunch of overripe bananas that were definitely not going into another smoothie. It was one of those afternoons where I needed something sweet, but the thought of turning on the mixer felt exhausting. I wanted brownies—the fudgy, crackly-top kind that make you close your eyes after the first bite—but I also wanted them to be vegan because my fridge was suspiciously bare of eggs and butter. So I just started throwing things together. Flour, cocoa powder, sugar, oil, and then my eyes landed on that jar of cookie butter. I dolloped a generous spoonful into the batter without really thinking about it, swirled it around, and hoped for the best.
Thirty-five minutes later, I pulled out a pan of the most absurdly rich, fudgy brownies I had ever made. The Biscoff had melted into these little pockets of caramelized, spiced sweetness throughout the dark chocolate base. My husband walked in, grabbed one while it was still warm, and just stood there chewing silently for a solid ten seconds. Then he asked me to make them again the next day. And the day after that. Honestly, I think I made these Fudgy Vegan Biscoff Brownies four times in one week before I finally wrote down the measurements. They were that good. And the best part? Nobody at the table ever guessed they were vegan. Not once.
That accidental win turned into my most-requested dessert. Friends started asking for the recipe at parties. My sister-in-law texted me at 10 PM demanding to know the secret. So here it is—the recipe that proves you don’t need eggs, butter, or dairy to get that perfect, fudgy brownie texture. Just a jar of Biscoff and a little bit of faith in the process.
Why You’ll Love This Recipe
Let me tell you why these brownies have become my go-to for every occasion, from casual weeknight cravings to dinner parties where I need to impress without stress.
- Fudgy, Not Cakey: This recipe nails that dense, melt-in-your-mouth texture that brownie lovers chase. The combination of melted coconut oil and a specific flour-to-liquid ratio ensures every bite is rich and moist, never dry or crumbly.
- Simple Ingredients, No Fuss: You don’t need any weird vegan substitutes like flax eggs or aquafaba. Just pantry staples—flour, sugar, cocoa powder, oil, and that jar of Biscoff spread you probably already have hiding in your cupboard.
- Perfect for Any Occasion: These brownies work for birthday parties, potlucks, holiday cookie exchanges, or just a quiet Tuesday night when you need chocolate therapy. They also happen to be a fantastic dessert option when you’re hosting friends with dietary restrictions.
- Crowd-Pleaser Guaranteed: I’ve served these to hardcore dairy lovers, skeptical relatives, and self-proclaimed brownie snobs. Every single person has asked for seconds. The Biscoff swirl adds a layer of sophistication that makes them feel fancy without any extra effort.
- Quick and Easy: From start to finish, you’re looking at about 40 minutes. No chilling, no complicated steps, no special equipment. Just one bowl, a whisk, and a pan.
What sets this recipe apart from other vegan brownies is the technique. Instead of using applesauce or mashed bananas (which can make brownies taste fruity or gummy), I rely on the natural richness of coconut oil and the magic of a simple emulsion. The Biscoff swirl isn’t just decoration—it creates these ribbons of spiced caramel that contrast beautifully with the deep, dark chocolate base. It’s the kind of brownie that makes you close your eyes after the first bite, not because it’s healthy, but because it’s that good.
What Ingredients You Will Need
This recipe uses simple, wholesome ingredients that come together to create something truly special. Here’s what you’ll need and why each one matters.
- All-Purpose Flour (1 cup / 120g): Provides structure without making the brownies tough. For a gluten-free version, you can substitute a 1:1 gluten-free flour blend, but I recommend sticking with all-purpose for the best texture.
- Granulated Sugar (3/4 cup / 150g): Adds sweetness and helps create that beautiful crackly top. I use organic sugar to keep it vegan-friendly, as some conventional sugars are processed with bone char.
- Unsweetened Cocoa Powder (1/2 cup / 50g): The star of the show. I prefer Dutch-processed cocoa for a deeper, more mellow chocolate flavor, but natural cocoa works perfectly too. My go-to brand is Rodelle or Guittard.
- Coconut Oil (1/3 cup / 80ml), melted: Provides the fat needed for that fudgy texture. It’s flavorless when baked, so don’t worry about coconut taste. You can substitute any neutral vegetable oil or even melted vegan butter.
- Unsweetened Almond Milk (1/2 cup / 120ml): Adds moisture and helps bind everything together. Any plant-based milk works—oat milk, soy milk, or even canned coconut milk for extra richness.
- Biscoff Spread (1/3 cup / 80g), plus extra for swirling: The secret ingredient. This spiced cookie butter adds caramel-like sweetness and a warm cinnamon-nutmeg flavor that pairs beautifully with chocolate. I recommend the original creamy version, not the crunchy.
- Vanilla Extract (1 teaspoon): Enhances the chocolate flavor and rounds out the sweetness. Always use pure vanilla extract, not imitation.
- Baking Powder (1/2 teaspoon): Gives just a tiny bit of lift to prevent the brownies from being too dense. Don’t skip it, but don’t add more—you want fudgy, not fluffy.
- Salt (1/4 teaspoon): Balances the sweetness and intensifies the chocolate flavor. A pinch of flaky sea salt on top before baking is also a lovely touch.
- Optional: Dark Chocolate Chips (1/2 cup / 90g): For extra chocolate pockets throughout the brownies. Make sure they’re dairy-free if you’re keeping it vegan. I love Enjoy Life brand.
When selecting your Biscoff spread, look for jars that aren’t separated or oily on top. Give it a good stir before measuring to ensure it’s smooth and spreadable. If you’re in a pinch, you can use any cookie butter brand, but Lotus Biscoff is the classic choice and delivers the most consistent flavor.
Equipment Needed
You don’t need a fancy kitchen to make these brownies, which is part of their charm. Here’s what you’ll need:
- 8×8-inch Baking Pan: This is the perfect size for thick, fudgy brownies. A 9×9-inch pan will work too, but your brownies will be slightly thinner and might bake a few minutes faster.
- Parchment Paper: Absolutely essential for easy removal. Leave some overhang on two sides to create “handles” for lifting the entire block out of the pan.
- Mixing Bowls: One large bowl for the dry ingredients and one medium bowl for the wet ingredients. I use glass or stainless steel.
- Whisk: For combining everything smoothly. A wooden spoon or spatula works too, but a whisk helps avoid lumps.
- Measuring Cups and Spoons: Accurate measurements matter in baking, so use proper measuring cups for dry and liquid ingredients.
- Spatula: For folding in chocolate chips and spreading the batter evenly in the pan.
- Butter Knife or Toothpick: For creating the Biscoff swirl pattern on top.
- Cooling Rack: Helps the brownies cool evenly and prevents the bottoms from getting soggy.
If you don’t have an 8×8 pan, you can use a loaf pan for thicker, almost brownie-bar-style treats—just increase the baking time by 5-8 minutes. And honestly, I’ve made these in a disposable foil pan when traveling, and they turned out just fine.
Preparation Method
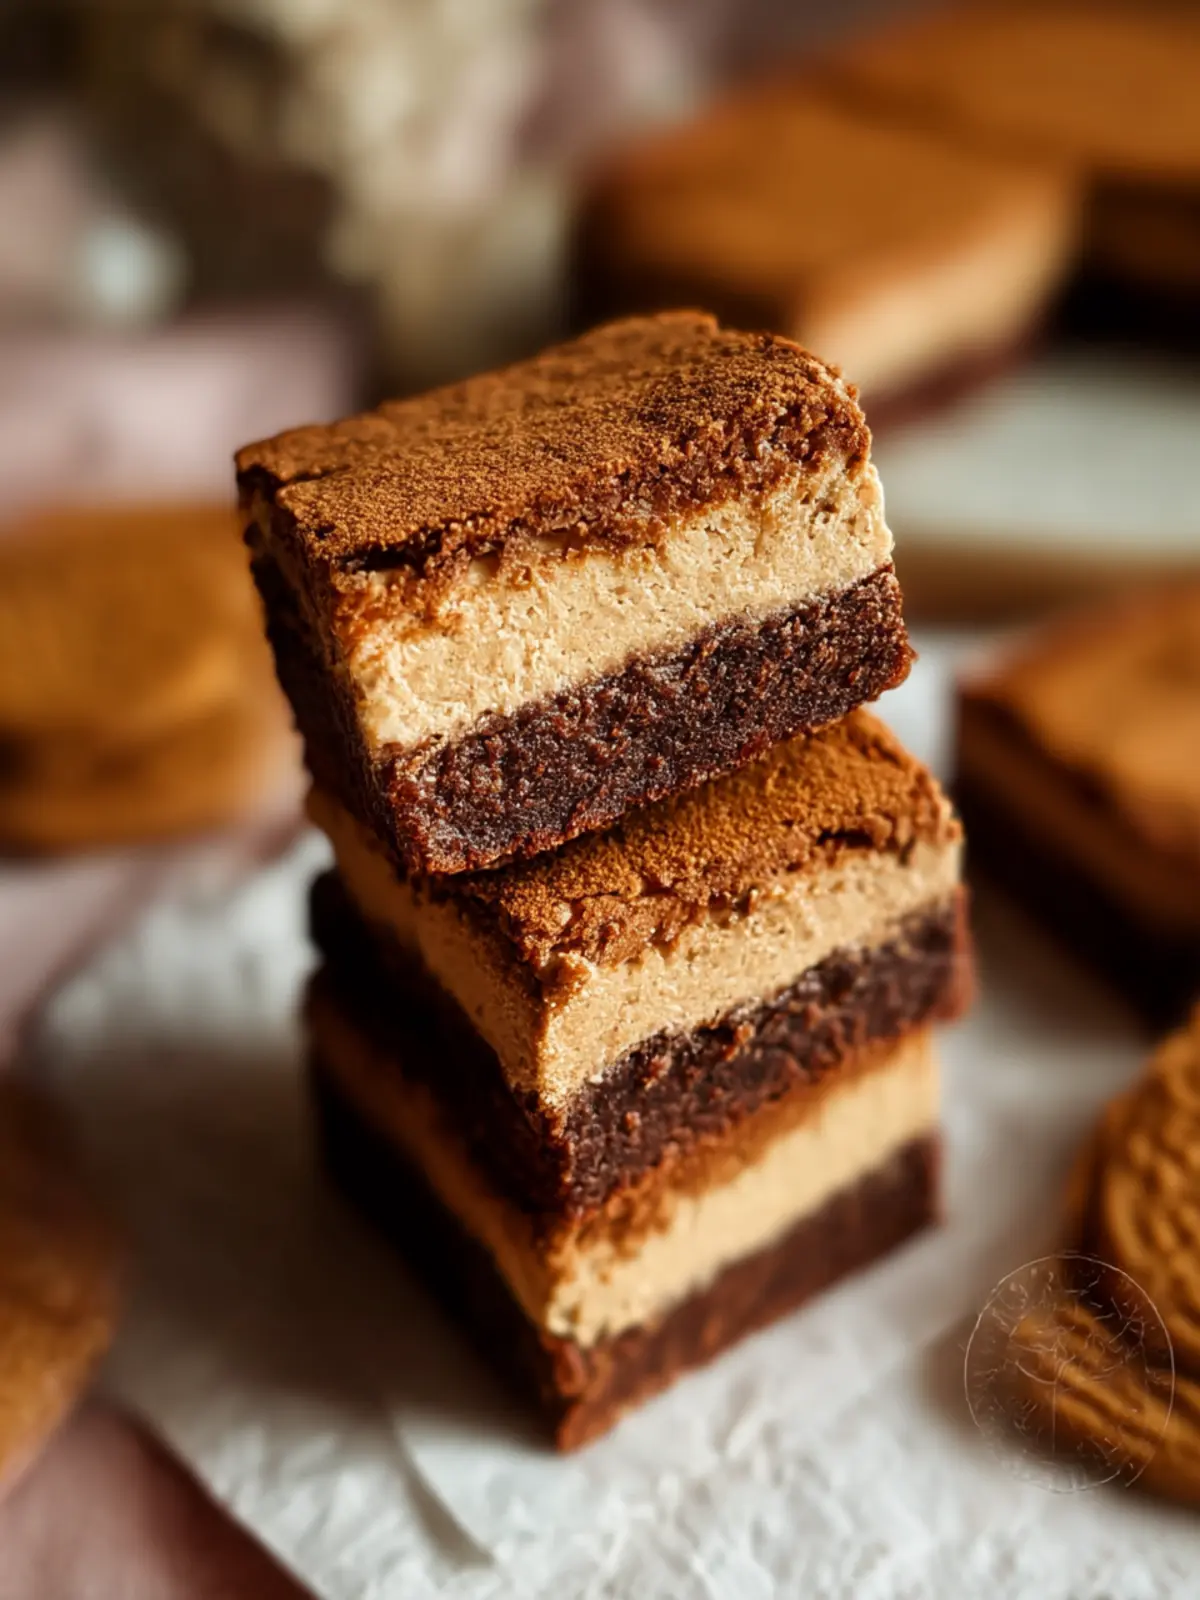
Let’s get baking. Follow these steps carefully, and you’ll have perfect fudgy vegan Biscoff brownies every time.
- Preheat and Prep: Preheat your oven to 350°F (175°C). Line your 8×8-inch baking pan with parchment paper, leaving about 2 inches of overhang on two opposite sides. This will make lifting the brownies out a breeze later.
- Mix Dry Ingredients: In a large mixing bowl, whisk together the all-purpose flour, unsweetened cocoa powder, baking powder, and salt. Make sure there are no lumps—cocoa powder tends to clump, so take an extra minute to break them up. The mixture should look like dark, uniform sand.
- Combine Wet Ingredients: In a separate medium bowl, whisk together the melted coconut oil, granulated sugar, almond milk, and vanilla extract. Whisk vigorously for about 30 seconds until the sugar starts to dissolve and the mixture looks slightly thickened and glossy. This emulsion is key to that crackly top.
- Bring It Together: Pour the wet ingredients into the dry ingredients. Stir with a spatula or wooden spoon until just combined. Do not overmix! A few streaks of flour are okay—overmixing will develop gluten and make your brownies tough. The batter will be thick and fudgy, almost like a paste.
- Add Chocolate Chips (Optional): If using, fold in the dark chocolate chips gently. Reserve a handful to sprinkle on top before baking for a prettier presentation.
- Layer the Batter: Spread about half of the brownie batter into the prepared pan using your spatula. It will be thick, so take your time to spread it evenly all the way to the corners.
- Add the Biscoff Swirl: Drop spoonfuls of the Biscoff spread (about 1/3 cup total) over the first layer of batter. Use about 5-6 dollops spaced evenly apart. Then, carefully spread the remaining brownie batter on top. Don’t worry if some Biscoff peeks through—that’s part of the charm.
- Create the Swirl Pattern: Take a butter knife or toothpick and gently drag it through the batter in a figure-eight or zigzag pattern. Don’t over-swirl, or the Biscoff will blend completely into the batter and lose its distinct ribbons. You want distinct pockets of cookie butter.
- Bake to Perfection: Place the pan on the middle rack of your preheated oven. Bake for 28-32 minutes. The brownies are done when the edges look set and slightly pulled away from the pan, the top is shiny and cracked, and a toothpick inserted into the center comes out with a few moist crumbs attached—not wet batter. If it comes out clean, you’ve overbaked them.
- Cool Completely: This is the hardest part. Let the brownies cool in the pan on a wire rack for at least 30 minutes. Then, using the parchment overhang, lift the entire block out and transfer to the cooling rack to cool completely before slicing. If you cut them while they’re warm, they’ll fall apart. Trust me, I learned this the hard way.
- Slice and Serve: Use a sharp knife to cut into 9 or 16 squares, wiping the blade clean between cuts for neat edges. For extra-clean slices, refrigerate the cooled brownies for 20 minutes before cutting.
Cooking Tips & Techniques
After making these brownies more times than I care to admit, I’ve picked up a few tricks that make a real difference.
Don’t Overmix the Batter: I know it’s tempting to keep stirring until everything is perfectly smooth, but stop as soon as the flour disappears. Overmixing develops gluten, which leads to tough, cakey brownies instead of fudgy ones. A few lumps are perfectly fine—they’ll bake out.
The Toothpick Test Is Everything: Brownies continue to cook from residual heat even after you pull them out of the oven. So when that toothpick comes out with a few moist crumbs, that’s your cue to stop baking. If you wait until the toothpick is completely clean, you’ll end up with dry, crumbly brownies. I’ve ruined two batches this way before I learned to trust the crumbs.
Room Temperature Ingredients Matter: Make sure your almond milk is at room temperature before mixing. Cold liquid can cause the melted coconut oil to solidify and seize up, creating a grainy texture. If you forgot to take it out ahead of time, microwave it for 10-15 seconds.
Biscoff Swirl Technique: Warm the Biscoff spread for about 10 seconds in the microwave before dolloping it onto the batter. This makes it easier to swirl without tearing the batter apart. Also, don’t press the knife too deep—you want the swirl to stay near the surface for visual effect.
Timing and Multitasking: While the brownies are baking, you can prepare a quick dusting of powdered sugar or whip up a simple vegan chocolate ganache for drizzling. But honestly, these brownies are perfect on their own.
Variations & Adaptations
One of the best things about this recipe is how easily it adapts to different tastes and dietary needs.
- Gluten-Free Version: Substitute the all-purpose flour with a high-quality 1:1 gluten-free baking flour blend. I’ve had great success with Bob’s Red Mill. Add 1/4 teaspoon of xanthan gum if your blend doesn’t already include it.
- Nut-Free Option: Use oat milk or soy milk instead of almond milk. The texture remains exactly the same, and the flavor is just as rich.
- Extra Decadent Brownies: Swirl in 2 tablespoons of peanut butter or almond butter along with the Biscoff for a double-nut butter experience. The combination of chocolate, Biscoff, and peanut butter is absolutely ridiculous in the best way.
- Mint Chocolate Twist: Add 1/2 teaspoon of peppermint extract to the wet ingredients and top the baked brownies with crushed vegan mint candies. It’s like a vegan Girl Scout Thin Mint in brownie form.
- Spiced Variation: Add 1 teaspoon of cinnamon and 1/4 teaspoon of nutmeg to the dry ingredients for a warmer, cozier flavor profile that pairs beautifully with the Biscoff.
- No-Biscoff Version: If you don’t have Biscoff spread, you can substitute with any cookie butter, Nutella (check for dairy-free), or even a thick caramel sauce. The swirl will still be delicious.
I once tried a variation where I replaced half the coconut oil with mashed avocado (don’t knock it till you try it). The brownies were incredibly moist and fudgy, with a subtle green tint that nobody noticed after they were baked. It’s a great way to add some healthy fats if you’re feeling adventurous.
Serving & Storage Suggestions
These brownies are versatile when it comes to serving, and they store beautifully—if they last that long.
Serving Suggestions: Serve these brownies at room temperature for the best texture. They’re incredible on their own, but a scoop of vegan vanilla ice cream or a dollop of coconut whipped cream takes them to another level. For a fancy presentation, dust them with powdered sugar and drizzle with melted Biscoff spread. They also pair wonderfully with a hot cup of coffee or a glass of cold oat milk.
Storage Instructions: Store leftover brownies in an airtight container at room temperature for up to 4 days. If your kitchen runs warm, you can refrigerate them for up to a week—just let them come to room temperature before serving for the best texture. I find they actually taste even better on day two, as the flavors have more time to meld together.
Freezing Instructions: These brownies freeze like champions. Wrap individual squares tightly in plastic wrap, then place them in a freezer-safe bag or container. They’ll keep for up to 3 months. To thaw, just leave them on the counter for about 30 minutes, or pop them in the microwave for 15-20 seconds for that just-baked warmth.
Reheating Tips: For a warm, gooey brownie experience, microwave a single square for 10-15 seconds. You can also reheat them in a 300°F (150°C) oven for 5-7 minutes if you’re reheating a whole batch.
One thing I’ve noticed is that the Biscoff swirl becomes even more pronounced and caramel-like after the brownies have sat for a day. So if you can resist the urge to eat them all immediately, you’re in for a real treat.
Nutritional Information & Benefits
While these are definitely a treat, here’s a rough estimate of what you’re looking at per brownie (based on 9 servings):
- Calories: Approximately 320-350
- Fat: 16g (mostly from coconut oil and Biscoff)
- Carbohydrates: 45g
- Fiber: 3g
- Sugar: 28g
- Protein: 4g
Health Benefits: Dark cocoa powder is rich in antioxidants called flavonoids, which can help reduce inflammation and support heart health. Coconut oil contains medium-chain triglycerides (MCTs) that may provide a quick energy source. And while Biscoff spread isn’t exactly a health food, it does contain some iron and calcium from the spices and wheat flour.
Dietary Considerations: This recipe is naturally dairy-free, egg-free, and vegan. It can easily be made gluten-free with a flour swap. It contains wheat and potentially nuts (depending on your milk choice), so keep that in mind for allergies.
I like to think of these brownies as a way to enjoy dessert without the heavy, bloated feeling that often comes with traditional butter-and-egg-laden recipes. They’re rich and satisfying, but they don’t weigh you down.
Conclusion
These Fudgy Vegan Biscoff Brownies have become a staple in my kitchen for good reason. They’re everything you want in a brownie—fudgy, rich, deeply chocolatey, and studded with pockets of spiced cookie butter that make every bite interesting. And the fact that they happen to be vegan? That’s just a bonus. No one will ever know unless you tell them.
I encourage you to make these your own. Swap in different nut butters, add chocolate chips, or experiment with spices. The base recipe is forgiving and adaptable, which is exactly what a good brownie recipe should be. And if you’re looking for another vegan dessert that’s equally impressive, you should try my best vegan Biscoff tiramisu—it takes just 10 minutes and uses similar ingredients.
I’d love to hear how these turn out for you. Drop a comment below and let me know if you tried any fun variations, or tag me in your photos if you share them online. These brownies have brought a lot of joy to my kitchen, and I hope they do the same for yours. Happy baking, friend!
Frequently Asked Questions
Can I use regular butter instead of coconut oil?
Yes, you can substitute melted vegan butter or regular dairy butter (if you’re not keeping it vegan) in equal amounts. The texture will be slightly different—butter contains water and milk solids, which can affect the fudginess—but it will still be delicious.
Why did my brownies turn out cakey instead of fudgy?
This usually happens for one of two reasons: you overmixed the batter, or you overbaked them. Mix until just combined, and pull them out of the oven when the toothpick comes out with moist crumbs, not clean. Also, make sure you’re using the correct amount of flour—too much will dry them out.
Can I make these brownies oil-free?
You can substitute the coconut oil with an equal amount of unsweetened applesauce or mashed banana. The texture will be slightly more cake-like and less fudgy, but they’ll still be tasty. For a richer oil-free option, try using full-fat coconut cream.
How do I get clean, neat slices?
Let the brownies cool completely, then refrigerate them for 20-30 minutes before slicing. Use a sharp knife and wipe it clean with a damp paper towel between each cut. This prevents the brownies from crumbling and gives you those beautiful, bakery-style edges.
Can I double this recipe for a larger batch?
Absolutely! Double all ingredients and bake in a 9×13-inch pan. You’ll need to increase the baking time to about 35-40 minutes. Keep an eye on them and use the toothpick test to determine doneness. And if you’re planning a big gathering, these pair wonderfully with my creamy Oreo overnight oats for a full dessert spread.
Pin This Recipe!
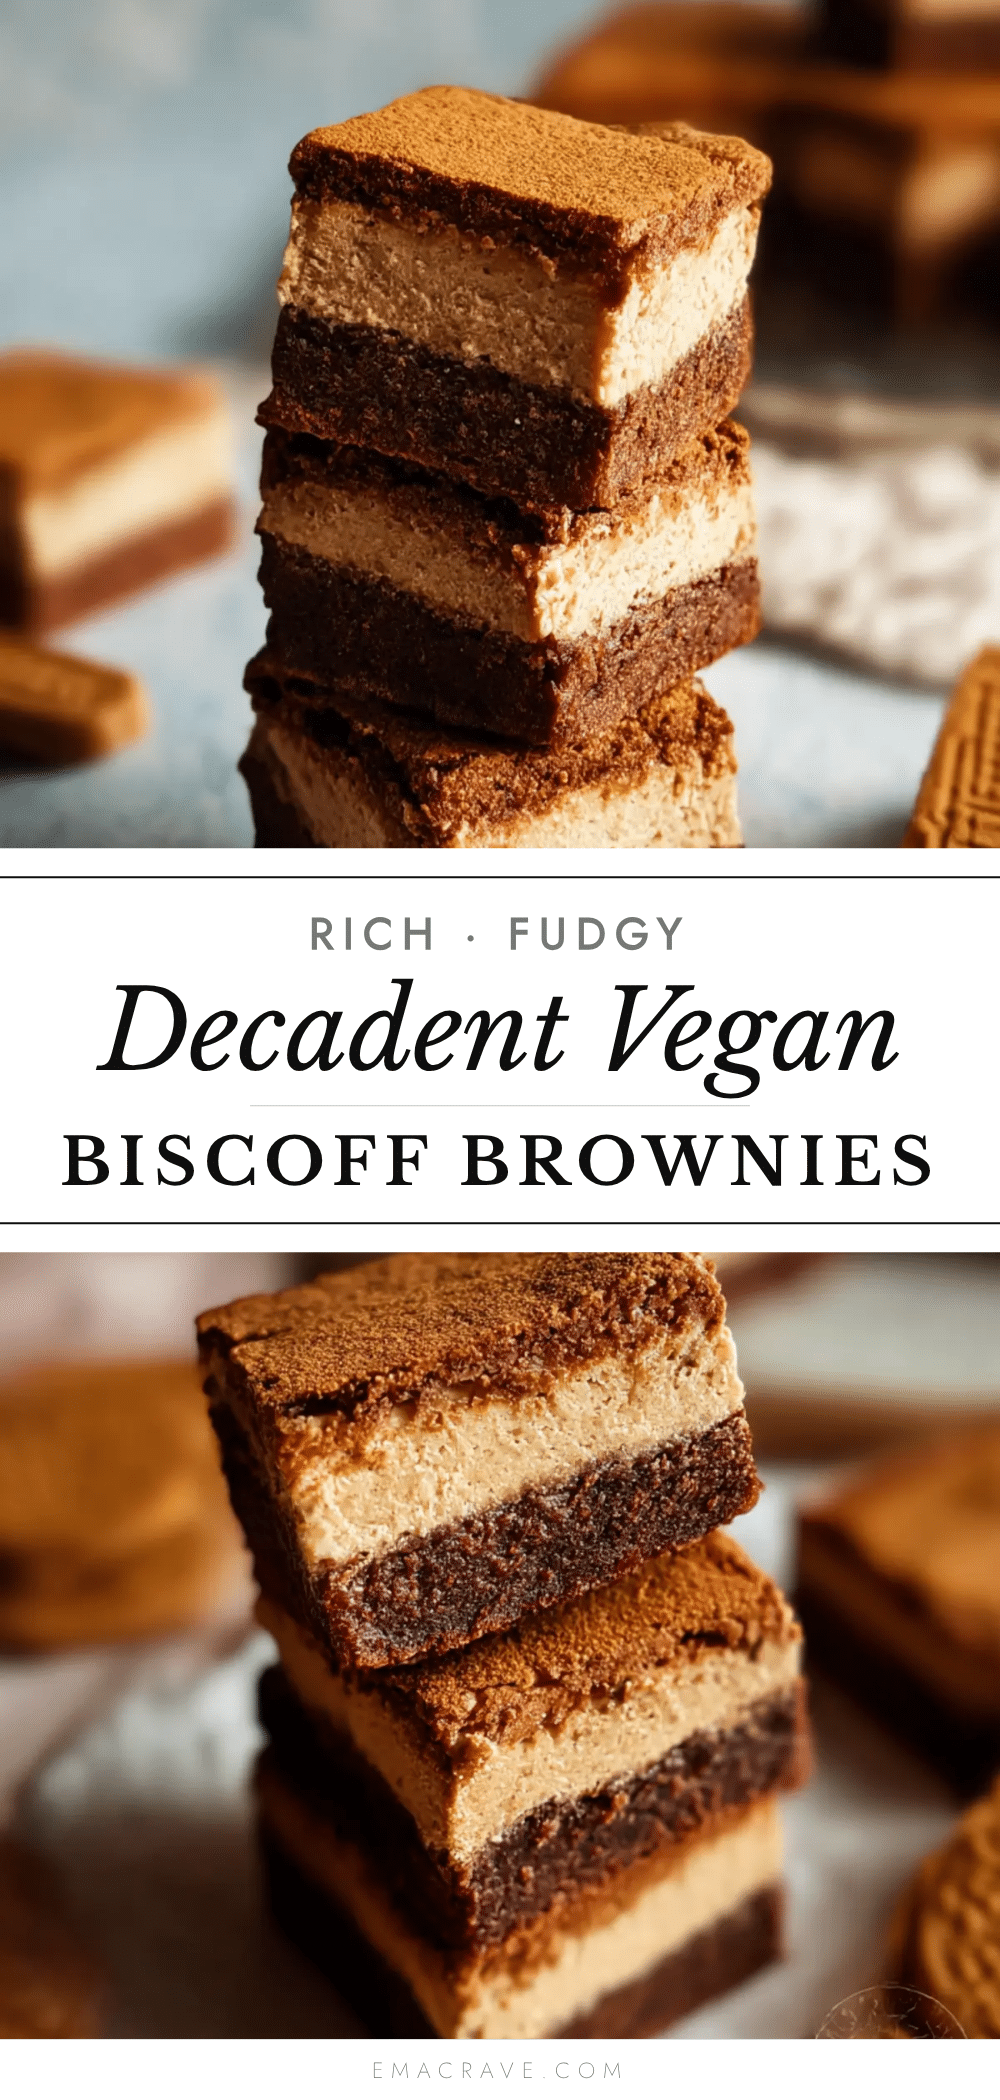
Fudgy Vegan Biscoff Brownies
These fudgy vegan Biscoff brownies are rich, decadent, and studded with pockets of spiced cookie butter. Made with simple pantry staples, they’re the perfect dessert for any occasion and guaranteed to please everyone, vegan or not.
- Prep Time: 10 minutes
- Cook Time: 30 minutes
- Total Time: 40 minutes
- Yield: 9 servings 1x
- Category: Dessert
- Cuisine: American
Ingredients
- 1 cup (120g) all-purpose flour
- 3/4 cup (150g) granulated sugar (organic for vegan)
- 1/2 cup (50g) unsweetened cocoa powder (Dutch-processed preferred)
- 1/3 cup (80ml) coconut oil, melted
- 1/2 cup (120ml) unsweetened almond milk (or other plant-based milk)
- 1/3 cup (80g) Biscoff spread (plus extra for swirling)
- 1 teaspoon vanilla extract
- 1/2 teaspoon baking powder
- 1/4 teaspoon salt
- 1/2 cup (90g) dark chocolate chips (optional, dairy-free)
Instructions
- Preheat oven to 350°F (175°C). Line an 8×8-inch baking pan with parchment paper, leaving overhang on two sides.
- In a large bowl, whisk together flour, cocoa powder, baking powder, and salt until no lumps remain.
- In a separate medium bowl, whisk together melted coconut oil, sugar, almond milk, and vanilla extract for about 30 seconds until slightly thickened and glossy.
- Pour wet ingredients into dry ingredients and stir with a spatula until just combined. Do not overmix; a few streaks of flour are okay.
- If using, fold in dark chocolate chips, reserving a handful for topping.
- Spread half of the batter evenly into the prepared pan.
- Drop spoonfuls of Biscoff spread (about 1/3 cup total) over the first layer. Spread remaining batter on top.
- Use a butter knife or toothpick to gently swirl the Biscoff into the batter in a figure-eight or zigzag pattern. Do not over-swirl.
- Bake for 28-32 minutes, until edges are set, top is shiny and cracked, and a toothpick inserted in the center comes out with a few moist crumbs.
- Cool in the pan on a wire rack for at least 30 minutes. Then lift out using parchment and cool completely before slicing.
- Slice into 9 or 16 squares, wiping the knife clean between cuts for neat edges.
Notes
For clean slices, refrigerate cooled brownies for 20 minutes before cutting. Warm the Biscoff spread for 10 seconds in the microwave before swirling for easier incorporation. Brownies taste even better the next day as flavors meld.
Nutrition
- Serving Size: 1 brownie (based on
- Calories: 335
- Sugar: 28
- Sodium: 120
- Fat: 16
- Saturated Fat: 10
- Carbohydrates: 45
- Fiber: 3
- Protein: 4
Keywords: vegan brownies, Biscoff brownies, fudgy brownies, cookie butter brownies, dairy-free brownies, easy vegan dessert



