Love this? Save it for later!
Share the inspiration with your friends
The first time I made this crispy cauliflower crusted grilled cheese sandwich, I was honestly just trying to use up a head of cauliflower that had been sitting in my fridge for way too long. You know that moment when you open the crisper drawer and something just stares back at you, begging to be used before it turns into a science experiment? That was this cauliflower.
I had been craving a grilled cheese sandwich all week—the kind with perfectly golden, crunchy bread and that glorious, stringy cheese pull. But I also knew I needed to eat something with a vegetable in it. So I got a little stubborn with myself. What if I could have both? What if I could get that same satisfying crunch but wrap it around something that actually counts as a serving of veggies?
So I grabbed my food processor, threw in some raw cauliflower florets, and started experimenting. The first attempt was a disaster—the crust just fell right off the bread. The second one was better, but the flavor was a little flat. By the third try, I had figured out the trick. You need to squeeze the moisture out of the cauliflower like your life depends on it. And you need the right ratio of cheese mixed into the crust itself.
What came out of that pan was honestly better than I expected. The outside was shatteringly crisp, the inside was gooey and warm, and I barely missed the regular bread. My husband walked into the kitchen while I was taking photos and asked if he could have the rest. That never happens. He’s a classic white-bread-grilled-cheese purist, and he ate the entire second sandwich without a single complaint.
This recipe stuck because it solved a real problem. It gave me the comfort food I wanted without the heavy, bloated feeling I sometimes get after a regular grilled cheese. And it turned a sad, forgotten vegetable into the star of the show.
Why You’ll Love This Recipe
Let me be real with you for a second. I have tested this recipe more times than I care to count. I have burned the crust, I have undercooked the cauliflower, and I have ended up with a soggy mess that made me want to cry. But after all that trial and error, I can confidently say this version is foolproof—as long as you follow a few key steps.
- Surprisingly Easy : This comes together in under 30 minutes, which is faster than ordering takeout in most neighborhoods. No complicated techniques, no fancy equipment. Just a food processor and a hot skillet.
- Simple Ingredients : You probably already have everything you need. Cauliflower, cheese, bread, eggs, and a few pantry staples. No weird health food store ingredients that cost fifteen dollars a bag.
- Perfect for Meal Prep : You can make the cauliflower crust mixture ahead of time and keep it in the fridge for up to three days. Then just assemble and cook when you are ready to eat. It is a lifesaver on busy weeknights.
- Crowd-Pleaser : I have served this to picky eaters, health-conscious friends, and cheese lovers. Every single person has asked for the recipe. Even my niece, who swears she hates vegetables, ate an entire sandwich and asked for another.
- Unbelievably Delicious : The combination of the crispy, cheesy cauliflower crust with the melty interior cheese is honestly addictive. It has all the satisfaction of a classic grilled cheese but with an extra layer of texture and flavor that makes it feel special.
What makes this recipe different from the hundreds of other cauliflower grilled cheese recipes out there? It is the technique. Most recipes don’t tell you to squeeze the cauliflower dry enough, and they end up with a soggy crust. Or they skip the step of mixing cheese directly into the crust, which is what gives it that golden, crispy texture. I have dialed in the exact moisture content and cooking time so you get perfect results every single time.
This is not just another healthy version of a comfort food classic. It is the kind of recipe that makes you forget you are eating vegetables in the first place. It is comfort food reimagined—lighter, crunchier, but with the same soul-soothing satisfaction that only a grilled cheese can deliver.
What Ingredients You Will Need
This recipe uses simple, wholesome ingredients to deliver bold flavor and satisfying texture without the fuss. Most of these are pantry staples or easy to find at any grocery store.
For the Cauliflower Crust:
- 1 medium head of cauliflower (about 4 cups of florets) – Look for a firm, white head with no brown spots. Fresh cauliflower works best here; frozen cauliflower has too much moisture and will make your crust soggy.
- 1 large egg (lightly beaten) – This acts as the binder that holds the crust together. If you need an egg-free version, you can try a flax egg, but the texture will be slightly less crispy.
- 1/2 cup shredded mozzarella cheese – I recommend using full-fat mozzarella for the best melt and flavor. Pre-shredded cheese works in a pinch, but freshly shredded melts more smoothly.
- 1/4 cup grated Parmesan cheese – The salty, nutty flavor of Parmesan adds depth to the crust. I prefer the real stuff in the refrigerated section, not the green can.
- 1/2 teaspoon garlic powder – Adds a subtle savory note without being overpowering.
- 1/2 teaspoon onion powder – Rounds out the flavor and adds a little sweetness.
- 1/4 teaspoon salt – Use fine sea salt or table salt for even distribution.
- 1/4 teaspoon black pepper – Freshly ground is always better, but pre-ground works fine.
- 1/4 teaspoon dried oregano (optional) – Adds a hint of Italian flavor that pairs beautifully with the cheese.
For the Sandwich:
- 8 slices of your favorite bread – Sourdough, whole wheat, or gluten-free bread all work well. I personally love using a sturdy sourdough because it holds up to the crust without getting soggy.
- 4 slices of cheese – Cheddar, provolone, gouda, or a combination. Use whatever melts well. I often use a mix of sharp cheddar and provolone for the best flavor and melt.
- 2 tablespoons butter or olive oil – For cooking the sandwiches. Butter gives you that classic golden crust, while olive oil is a great dairy-free option.
Ingredient Substitution Notes:
If you are dairy-free, you can use vegan mozzarella and Parmesan alternatives, though the crust might be slightly less crispy. For a gluten-free version, use your favorite gluten-free bread and make sure your spices are certified gluten-free. You can also swap the mozzarella in the crust for cheddar or pepper jack if you want a different flavor profile.
I have found that using a good quality cheese makes a noticeable difference in the final result. I personally love using Tillamook or Kerrygold cheeses for their superior melt and flavor. It is one of those small upgrades that really pays off.
Equipment Needed
You do not need a lot of fancy equipment to make this recipe, which is one of the reasons I love it. Here is what you will need:
- Food processor or box grater – A food processor makes quick work of turning cauliflower into rice-sized pieces. If you do not have one, you can use a box grater, but it takes a bit more elbow grease.
- Clean kitchen towel or cheesecloth – This is absolutely essential for squeezing the moisture out of the cauliflower. Do not skip this step, or your crust will be soggy.
- Large mixing bowl – For combining the crust ingredients.
- Non-stick skillet or cast iron pan – A non-stick skillet is ideal for even browning, but a well-seasoned cast iron pan works beautifully too.
- Spatula – A thin, flexible spatula makes flipping the sandwiches much easier.
- Measuring cups and spoons – For accurate ingredient measurements.
- Knife and cutting board – For prepping the cauliflower.
If you do not have a food processor, do not worry. You can grate the cauliflower on the large holes of a box grater. It takes a little longer, but it works just as well. I have done it both ways, and the texture is nearly identical.
One tip I learned the hard way: make sure your skillet is hot before you add the sandwiches. If the pan is not hot enough, the crust will absorb oil and become greasy instead of crispy. Medium heat is your friend here—too high and the crust will burn before the cheese melts.
Preparation Method
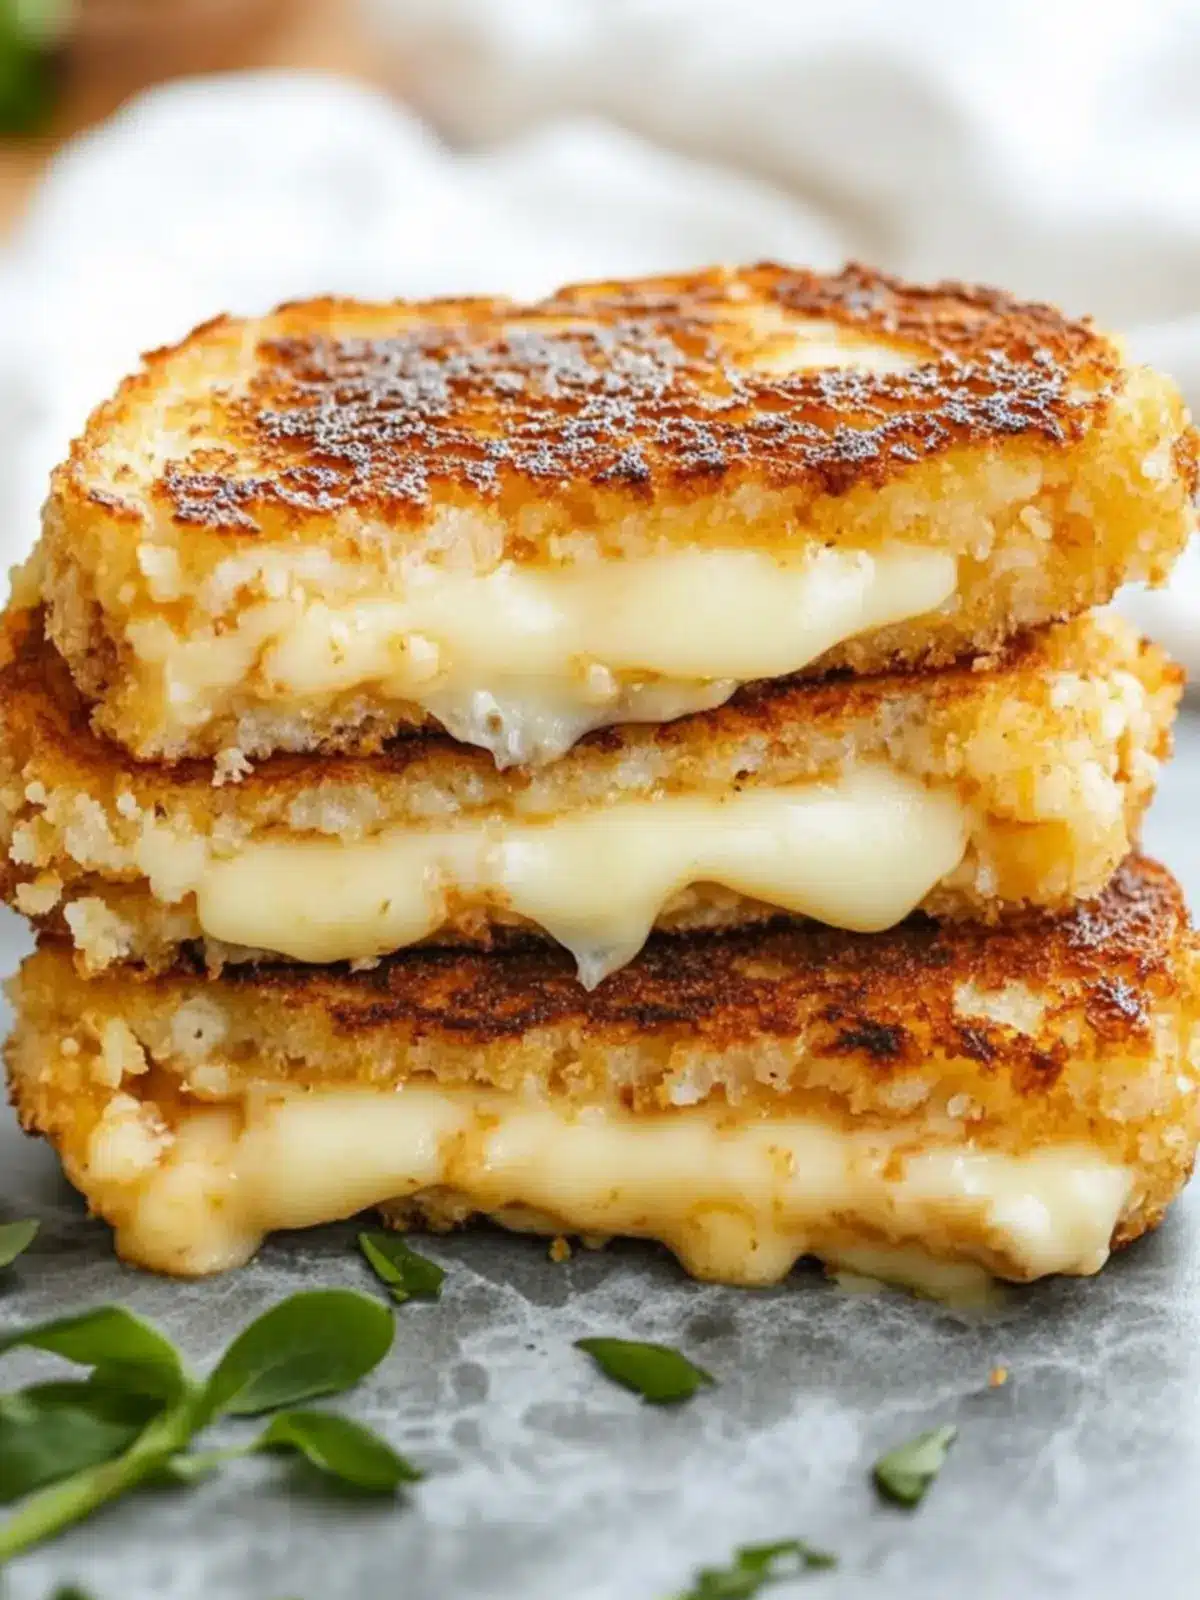
- Prepare the cauliflower: Remove the leaves and core from the cauliflower and cut it into small florets. You should have about 4 cups of florets. Working in batches if needed, pulse the florets in a food processor until they resemble rice or coarse crumbs. Do not over-process, or you will end up with a paste.
- Squeeze out the moisture: This is the most important step. Transfer the riced cauliflower to a clean kitchen towel or cheesecloth. Gather the corners and twist tightly over the sink, squeezing out as much liquid as you can. You will be shocked at how much water comes out. Keep squeezing until no more liquid drips out. This step is non-negotiable.
- Microwave the cauliflower: Place the squeezed cauliflower in a microwave-safe bowl and microwave on high for 3 minutes. This helps soften the cauliflower and release even more moisture. Let it cool slightly, then squeeze it again in the towel to remove any additional liquid.
- Make the crust mixture: In a large mixing bowl, combine the squeezed cauliflower, beaten egg, shredded mozzarella, grated Parmesan, garlic powder, onion powder, salt, pepper, and oregano if using. Mix well until everything is evenly combined. The mixture should be moist but not wet, and it should hold together when pressed between your fingers.
- Form the crust: Divide the cauliflower mixture into 4 equal portions. On a piece of parchment paper or a clean surface, press each portion into a thin, flat patty that is roughly the same size as your bread slices. You want it to be about 1/4 inch thick—not too thick, or it won’t cook through properly.
- Pre-cook the crust: Heat a non-stick skillet over medium heat and add a little butter or oil. Carefully transfer one cauliflower patty to the skillet and cook for 3-4 minutes per side, until golden brown and crispy. Repeat with the remaining patties. Set them aside on a plate.
- Assemble the sandwiches: Take two slices of bread. Place a slice of cheese on one piece of bread, then top with a cooked cauliflower patty. Add another slice of cheese on top of the patty, then close the sandwich with the second slice of bread. Press down gently to help everything stick together.
- Cook the sandwiches: Wipe out the skillet and add a fresh pat of butter or drizzle of oil. Place the assembled sandwich in the skillet and cook over medium heat for 3-4 minutes per side, until the bread is golden brown and crispy and the cheese is fully melted. Use a spatula to press down gently on the sandwich as it cooks—this helps the crust adhere to the bread.
- Rest and serve: Remove the sandwich from the skillet and let it rest for 1-2 minutes before cutting. This allows the cheese to set slightly and prevents it from oozing out everywhere when you cut into it. Slice diagonally and serve immediately.
Sensory cues to watch for: When the cauliflower crust is cooking, you should hear a gentle sizzle. The edges will start to turn golden brown after about 2 minutes. When you flip it, the cooked side should be a deep golden color with darker brown spots. The sandwich itself should feel firm and crispy when you press on it with the spatula, and the cheese should be visibly melted and oozing out the sides.
Time estimates: Prepping the cauliflower takes about 10 minutes. Cooking the crust patties takes about 8 minutes total. Assembling and cooking the sandwiches takes another 8-10 minutes. Total time from start to finish is about 30 minutes, which is totally manageable even on a busy weeknight.
Cooking Tips & Techniques
I have made this recipe at least a dozen times, and I have made every mistake you can imagine. Let me save you some trouble.
Do not skip the double squeeze. I know it is tempting to just squeeze once and call it done, but the microwave step releases a surprising amount of additional moisture. If you skip the second squeeze, your crust will be dense and soggy instead of light and crispy. Trust me on this one—I learned the hard way after making a sad, wet patty that fell apart in the pan.
Use medium heat, not high. I am a naturally impatient person, so my first instinct is always to crank up the heat. But high heat will burn the cauliflower crust before the cheese inside has a chance to melt. Medium heat gives you that perfect golden crust with a fully melted, gooey interior. It takes an extra minute or two, and it is worth every second.
Let the crust patties cool slightly before assembling. If you put a hot patty directly onto the bread, it can make the bread soggy. Let them rest on a plate for 2-3 minutes before you build the sandwich. This also gives the cheese inside the crust a chance to set, making the patty easier to handle.
Press down gently while cooking. Use your spatula to press the sandwich down a couple of times during cooking. This helps the cauliflower crust adhere to the bread and ensures even browning. Do not press too hard, or you will squeeze out the cheese.
Use a lid for the last minute. If the cheese is not fully melted by the time the bread is golden, cover the skillet with a lid for the last minute of cooking. The trapped steam will melt the cheese without burning the bread. This is a pro tip I picked up from making regular grilled cheese, and it works perfectly here too.
Make extra crust patties. The cauliflower mixture keeps well in the fridge for up to three days, and the cooked patties freeze beautifully. I always make a double batch so I can have quick lunches ready to go. Just reheat the patties in a skillet or air fryer before assembling the sandwich.
Variations & Adaptations
One of the best things about this recipe is how easily it adapts to different tastes and dietary needs. Here are some of my favorite variations:
Spicy Jalapeño Popper Version: Add 2 tablespoons of finely chopped pickled jalapeños and 2 ounces of cream cheese (softened) to the cauliflower mixture. Use pepper jack cheese inside the sandwich. The creamy, spicy, crunchy combination is absolutely incredible. I made this version for a game day party, and it disappeared in minutes.
Italian Herb and Mozzarella: Add 1 teaspoon of dried Italian seasoning and 1/4 cup of sun-dried tomatoes (finely chopped) to the cauliflower mixture. Use fresh mozzarella slices inside the sandwich. Serve with a side of warm marinara sauce for dipping. This tastes like a deconstructed eggplant parmesan, but way easier to make.
Bacon and Cheddar: Cook 4 slices of bacon until crispy, then crumble them into the cauliflower mixture. Use sharp cheddar cheese inside the sandwich. The smoky, salty bacon pairs beautifully with the mild cauliflower and rich cheddar. This is my husband’s favorite version, and I honestly cannot blame him.
Dairy-Free Adaptation: Use vegan mozzarella and Parmesan alternatives in the crust, and use olive oil instead of butter for cooking. I have tested this with several brands of vegan cheese, and the best results come from using a combination of Violife mozzarella shreds and Follow Your Heart Parmesan. The texture is slightly less crispy, but still very good.
Gluten-Free Adaptation: Use your favorite gluten-free bread. I recommend a sturdy brand like Canyon Bakehouse or Schar, as some gluten-free breads can fall apart under the weight of the crust. Make sure your spices are certified gluten-free, and you are good to go.
Air Fryer Method: If you want an even crispier crust, cook the cauliflower patties in an air fryer at 375°F for 6-8 minutes, flipping halfway through. Then assemble the sandwich and cook it in the air fryer for another 3-4 minutes per side. The air fryer gives the crust an extra-crunchy texture that is hard to beat.
I have personally tried the spicy jalapeño popper version at least five times, and it is my go-to when I want something with a little kick. The cream cheese adds a creaminess that balances out the heat perfectly. If you like things spicy, I highly recommend giving it a try.
Serving & Storage Suggestions
Serving Temperature and Presentation: These sandwiches are best served hot, straight from the skillet. The cheese is at its meltiest and the crust is at its crispiest within the first five minutes. Cut the sandwich diagonally for that classic grilled cheese look, and serve it on a plate with a side of your favorite dipping sauce. I love pairing it with warm marinara, creamy tomato soup, or even a simple balsamic glaze for dipping.
Complementary Dishes: This sandwich pairs beautifully with a light, refreshing side. I often serve it with a simple arugula salad dressed with lemon vinaigrette, or a bowl of cozy spicy sausage lentil soup for a heartier meal. The acidity of the salad or soup cuts through the richness of the cheese and balances the whole meal. If you are looking for something even quicker, a handful of cherry tomatoes and some pickles work great too.
Storage Instructions: If you have leftovers (which is rare in my house), let the sandwich cool completely, then wrap it tightly in aluminum foil or plastic wrap. Store it in the refrigerator for up to 2 days. The crust will lose some of its crispiness, but it will still taste great.
Reheating Methods: The best way to reheat these sandwiches is in a skillet over medium heat. Add a little butter or oil to the pan and cook for 2-3 minutes per side until heated through and crispy. You can also use an air fryer at 350°F for 3-4 minutes. Avoid the microwave at all costs—it will turn the crust into a sad, soggy mess.
Freezer Instructions: You can freeze the cooked cauliflower patties for up to 3 months. Place them in a single layer on a baking sheet and freeze until solid, then transfer them to a freezer-safe bag. When you are ready to use them, reheat the patties in a skillet or air fryer, then assemble the sandwich as usual. The patties thaw and reheat beautifully.
Flavor Development: The cauliflower crust actually tastes better the next day in some ways. The flavors have time to meld together, and the garlic and onion powder become more pronounced. If you are meal prepping, I recommend cooking the patties ahead of time and assembling the sandwiches fresh. That way you get the best of both worlds—developed flavor and maximum crispiness.
Nutritional Information & Benefits
I am not a nutritionist, but I do pay attention to what I put in my body. Here is a rough estimate of the nutritional values for one sandwich (using sourdough bread, cheddar cheese, and butter for cooking):
- Calories: Approximately 420-480 calories per sandwich
- Protein: 22-26 grams
- Carbohydrates: 35-40 grams
- Fiber: 6-8 grams
- Fat: 22-26 grams
- Calcium: 35-40% of the daily value
Health Benefits of Key Ingredients: Cauliflower is a nutritional powerhouse. It is packed with vitamin C, vitamin K, folate, and fiber. It is also a cruciferous vegetable, which means it contains compounds that have been linked to reduced inflammation and improved heart health. By using cauliflower as the base for the crust, you are getting a serving of vegetables in a format that feels indulgent and satisfying.
Dietary Considerations: This recipe is naturally low-carb and keto-friendly if you use a low-carb bread alternative. It is also vegetarian. For a gluten-free version, use gluten-free bread. For a dairy-free version, use vegan cheese alternatives. The flexibility of this recipe makes it accessible to a wide range of dietary needs.
Potential Allergens: This recipe contains dairy (cheese, butter) and eggs. It also contains gluten if you use traditional bread. If you have allergies, please check all ingredient labels carefully.
I personally love that this recipe lets me enjoy a classic comfort food without the heavy, bloated feeling I sometimes get from a regular grilled cheese. It is filling and satisfying, but I do not feel like I need to take a nap afterward. That is a win in my book.
Frequently Asked Questions
Can I use frozen cauliflower for this recipe?
I do not recommend it. Frozen cauliflower has a much higher moisture content than fresh, and it is nearly impossible to get it dry enough for a crispy crust. The texture will be mushy and the crust will fall apart. Stick with fresh cauliflower for the best results.
Can I make the cauliflower crust ahead of time?
Absolutely! You can prepare the cauliflower mixture up to three days in advance and store it in an airtight container in the refrigerator. You can also cook the patties ahead of time and reheat them in a skillet or air fryer before assembling the sandwiches. This is a great option for meal prep or busy weeknights.
Why did my cauliflower crust fall apart?
This usually happens for one of two reasons: either you did not squeeze enough moisture out of the cauliflower, or the crust patties were too thick. Make sure you squeeze the cauliflower until no more liquid drips out, and press the patties to about 1/4 inch thick. If the mixture still seems too wet, you can add an extra tablespoon of Parmesan cheese to help bind it.
Can I use this cauliflower crust for other recipes?
Yes! This cauliflower crust is incredibly versatile. You can use it as a base for mini pizzas, as a topping for casseroles, or even as a crunchy coating for chicken tenders. I have also used it to make cauliflower “tortillas” for tacos, and it worked beautifully. Just adjust the cooking time based on the application.
What is the best cheese to use inside the sandwich?
I love using a combination of sharp cheddar and provolone. The cheddar adds a bold, tangy flavor, and the provolone melts into a silky, stretchy layer. Gouda, havarti, and mozzarella are also excellent choices. Avoid using pre-sliced American cheese, as it does not melt as smoothly and has a less complex flavor.
Conclusion
This crispy cauliflower crusted grilled cheese sandwich is one of those recipes that proves you do not have to choose between healthy and delicious. It gives you all the comfort and satisfaction of a classic grilled cheese, but with an extra layer of texture, flavor, and actual nutrition. The crust is crispy, the cheese is melty, and the whole thing comes together in under 30 minutes.
I have made this recipe for picky kids, skeptical adults, and cheese snobs, and every single person has been surprised by how good it is. It is the kind of recipe that makes you feel like you are getting away with something—like you are eating junk food, but you are actually eating vegetables. And honestly, that feeling never gets old.
I would love to hear how this recipe turns out for you! Have you tried any fun variations? Did you add bacon or jalapeños or sun-dried tomatoes? Drop a comment below and let me know. And if you loved this recipe, please share it with a friend who needs a little more cauliflower in their life. You can also tag me on social media when you make it—I love seeing your creations.
If you enjoyed this recipe, you might also love my easy low-carb pizza stuffed peppers for another creative way to use vegetables in comfort food. And for a sweet treat to balance out all that savory goodness, try my decadent red velvet french toast for weekend brunch.
Happy cooking, and remember—sometimes the best recipes come from a sad cauliflower and a stubborn attitude.
Pin This Recipe!
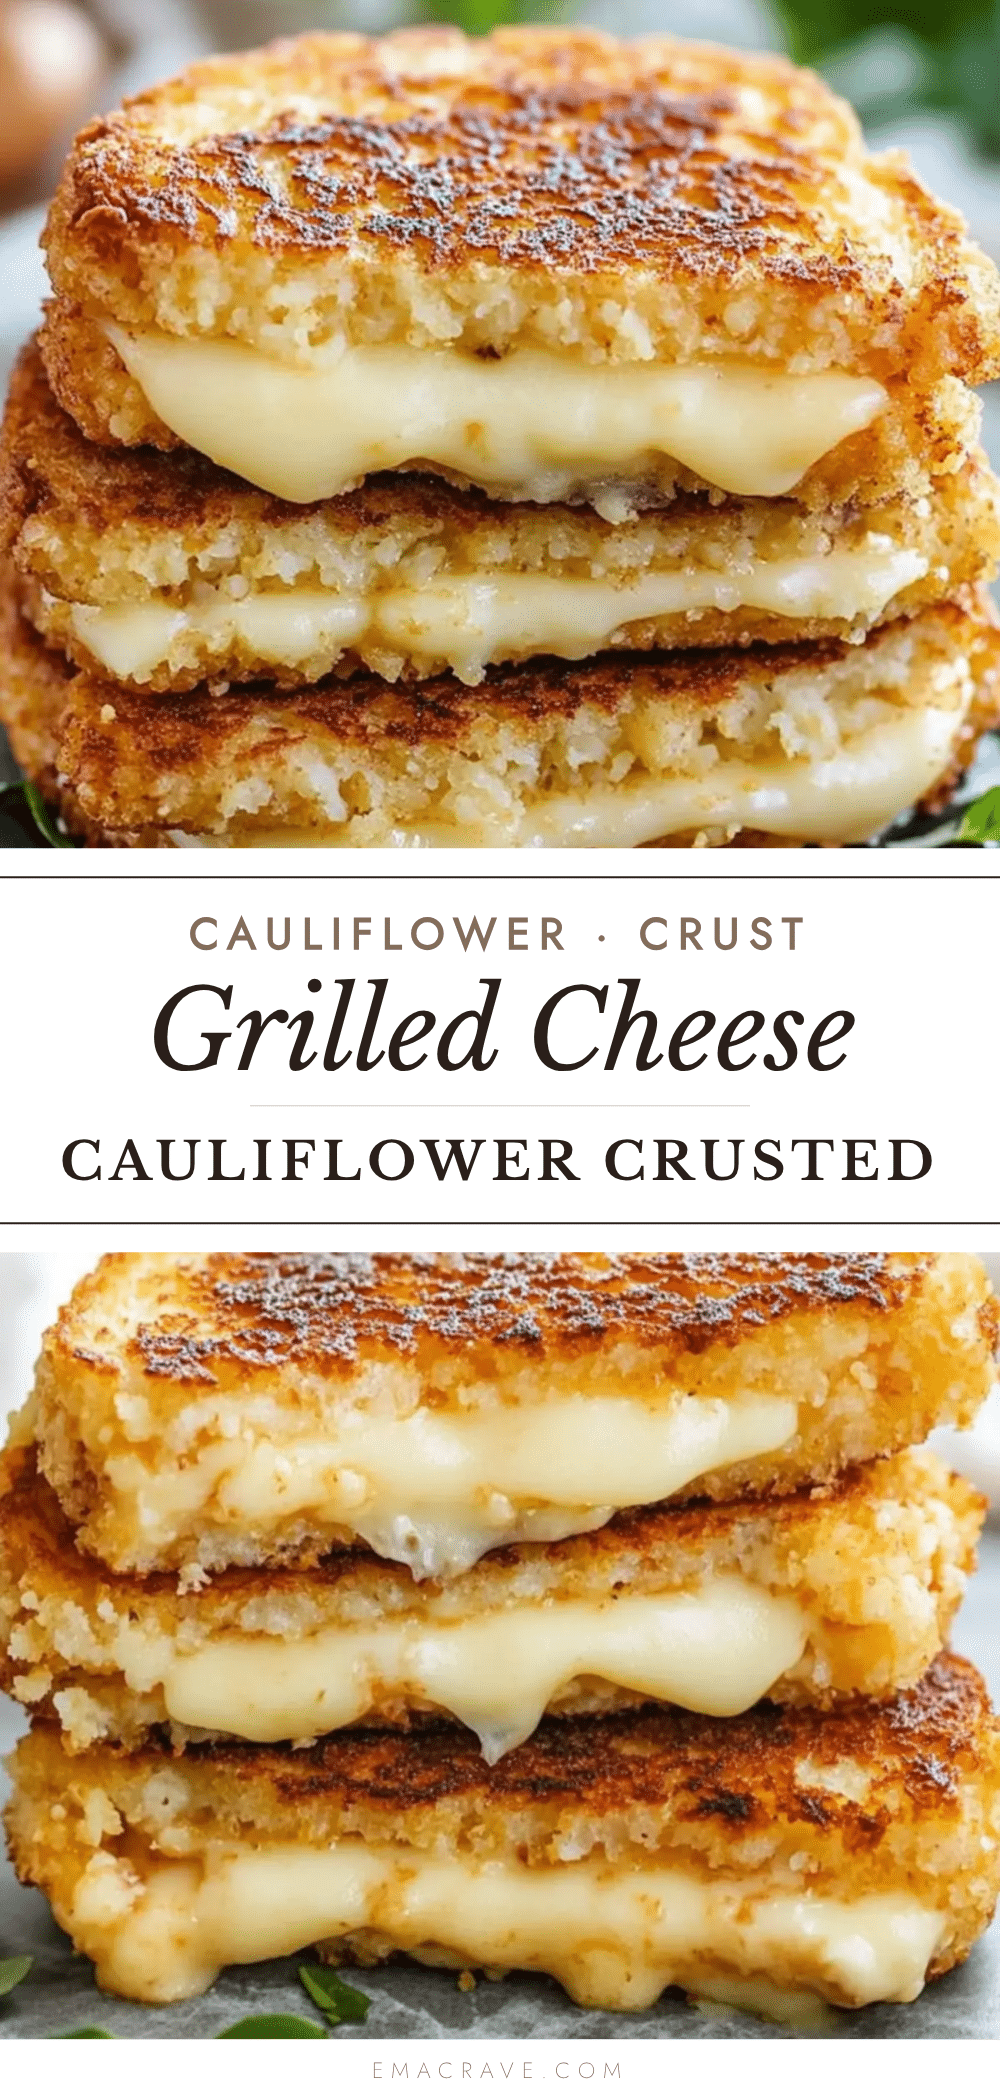
Easy Crispy Cauliflower Grilled Cheese Recipe

A crispy, cheesy cauliflower crust replaces traditional bread in this healthier twist on a classic grilled cheese sandwich. Ready in under 30 minutes, it’s a crowd-pleasing comfort food that sneaks in a serving of vegetables.
- Prep Time: 10 minutes
- Cook Time: 20 minutes
- Total Time: 30 minutes
- Yield: 4 servings 1x
- Category: Main Course
- Cuisine: American
Ingredients
- 1 medium head of cauliflower (about 4 cups of florets)
- 1 large egg, lightly beaten
- 1/2 cup shredded mozzarella cheese
- 1/4 cup grated Parmesan cheese
- 1/2 teaspoon garlic powder
- 1/2 teaspoon onion powder
- 1/4 teaspoon salt
- 1/4 teaspoon black pepper
- 1/4 teaspoon dried oregano (optional)
- 8 slices of your favorite bread (sourdough, whole wheat, or gluten-free)
- 4 slices of cheese (cheddar, provolone, gouda, or a combination)
- 2 tablespoons butter or olive oil
Instructions
- Prepare the cauliflower: Remove the leaves and core from the cauliflower and cut it into small florets. You should have about 4 cups of florets. Working in batches if needed, pulse the florets in a food processor until they resemble rice or coarse crumbs. Do not over-process, or you will end up with a paste.
- Squeeze out the moisture: This is the most important step. Transfer the riced cauliflower to a clean kitchen towel or cheesecloth. Gather the corners and twist tightly over the sink, squeezing out as much liquid as you can. You will be shocked at how much water comes out. Keep squeezing until no more liquid drips out. This step is non-negotiable.
- Microwave the cauliflower: Place the squeezed cauliflower in a microwave-safe bowl and microwave on high for 3 minutes. This helps soften the cauliflower and release even more moisture. Let it cool slightly, then squeeze it again in the towel to remove any additional liquid.
- Make the crust mixture: In a large mixing bowl, combine the squeezed cauliflower, beaten egg, shredded mozzarella, grated Parmesan, garlic powder, onion powder, salt, pepper, and oregano if using. Mix well until everything is evenly combined. The mixture should be moist but not wet, and it should hold together when pressed between your fingers.
- Form the crust: Divide the cauliflower mixture into 4 equal portions. On a piece of parchment paper or a clean surface, press each portion into a thin, flat patty that is roughly the same size as your bread slices. You want it to be about 1/4 inch thick—not too thick, or it won’t cook through properly.
- Pre-cook the crust: Heat a non-stick skillet over medium heat and add a little butter or oil. Carefully transfer one cauliflower patty to the skillet and cook for 3-4 minutes per side, until golden brown and crispy. Repeat with the remaining patties. Set them aside on a plate.
- Assemble the sandwiches: Take two slices of bread. Place a slice of cheese on one piece of bread, then top with a cooked cauliflower patty. Add another slice of cheese on top of the patty, then close the sandwich with the second slice of bread. Press down gently to help everything stick together.
- Cook the sandwiches: Wipe out the skillet and add a fresh pat of butter or drizzle of oil. Place the assembled sandwich in the skillet and cook over medium heat for 3-4 minutes per side, until the bread is golden brown and crispy and the cheese is fully melted. Use a spatula to press down gently on the sandwich as it cooks—this helps the crust adhere to the bread.
- Rest and serve: Remove the sandwich from the skillet and let it rest for 1-2 minutes before cutting. This allows the cheese to set slightly and prevents it from oozing out everywhere when you cut into it. Slice diagonally and serve immediately.
Notes
Do not skip the double squeeze of the cauliflower to remove moisture—this is key for a crispy crust. Use medium heat to avoid burning the crust before the cheese melts. Let the crust patties cool slightly before assembling to prevent soggy bread. Press down gently while cooking to help the crust adhere. If cheese isn’t fully melted, cover the skillet with a lid for the last minute. The cauliflower mixture can be made ahead and stored in the fridge for up to 3 days. Cooked patties freeze well for up to 3 months.
Nutrition
- Serving Size: 1 sandwich
- Calories: 420480
- Sugar: 57
- Sodium: 600800
- Fat: 2226
- Saturated Fat: 1014
- Carbohydrates: 3540
- Fiber: 68
- Protein: 2226
Keywords: cauliflower grilled cheese, crispy cauliflower crust, healthy grilled cheese, low-carb grilled cheese, vegetarian grilled cheese, cauliflower recipe



