Love this? Save it for later!
Share the inspiration with your friends
I was standing in my kitchen, staring at a package of frozen pierogies and a pound of ground beef, wondering if I could trick my family into eating something that wasn’t pizza or tacos for the fifth night in a row. The pierogies were bought on a whim—I’d been craving those little potato-filled pillows ever since my neighbor dropped off a batch of her grandma’s homemade ones last winter. The ground beef was just… there. Staring at me from the fridge like it had opinions.
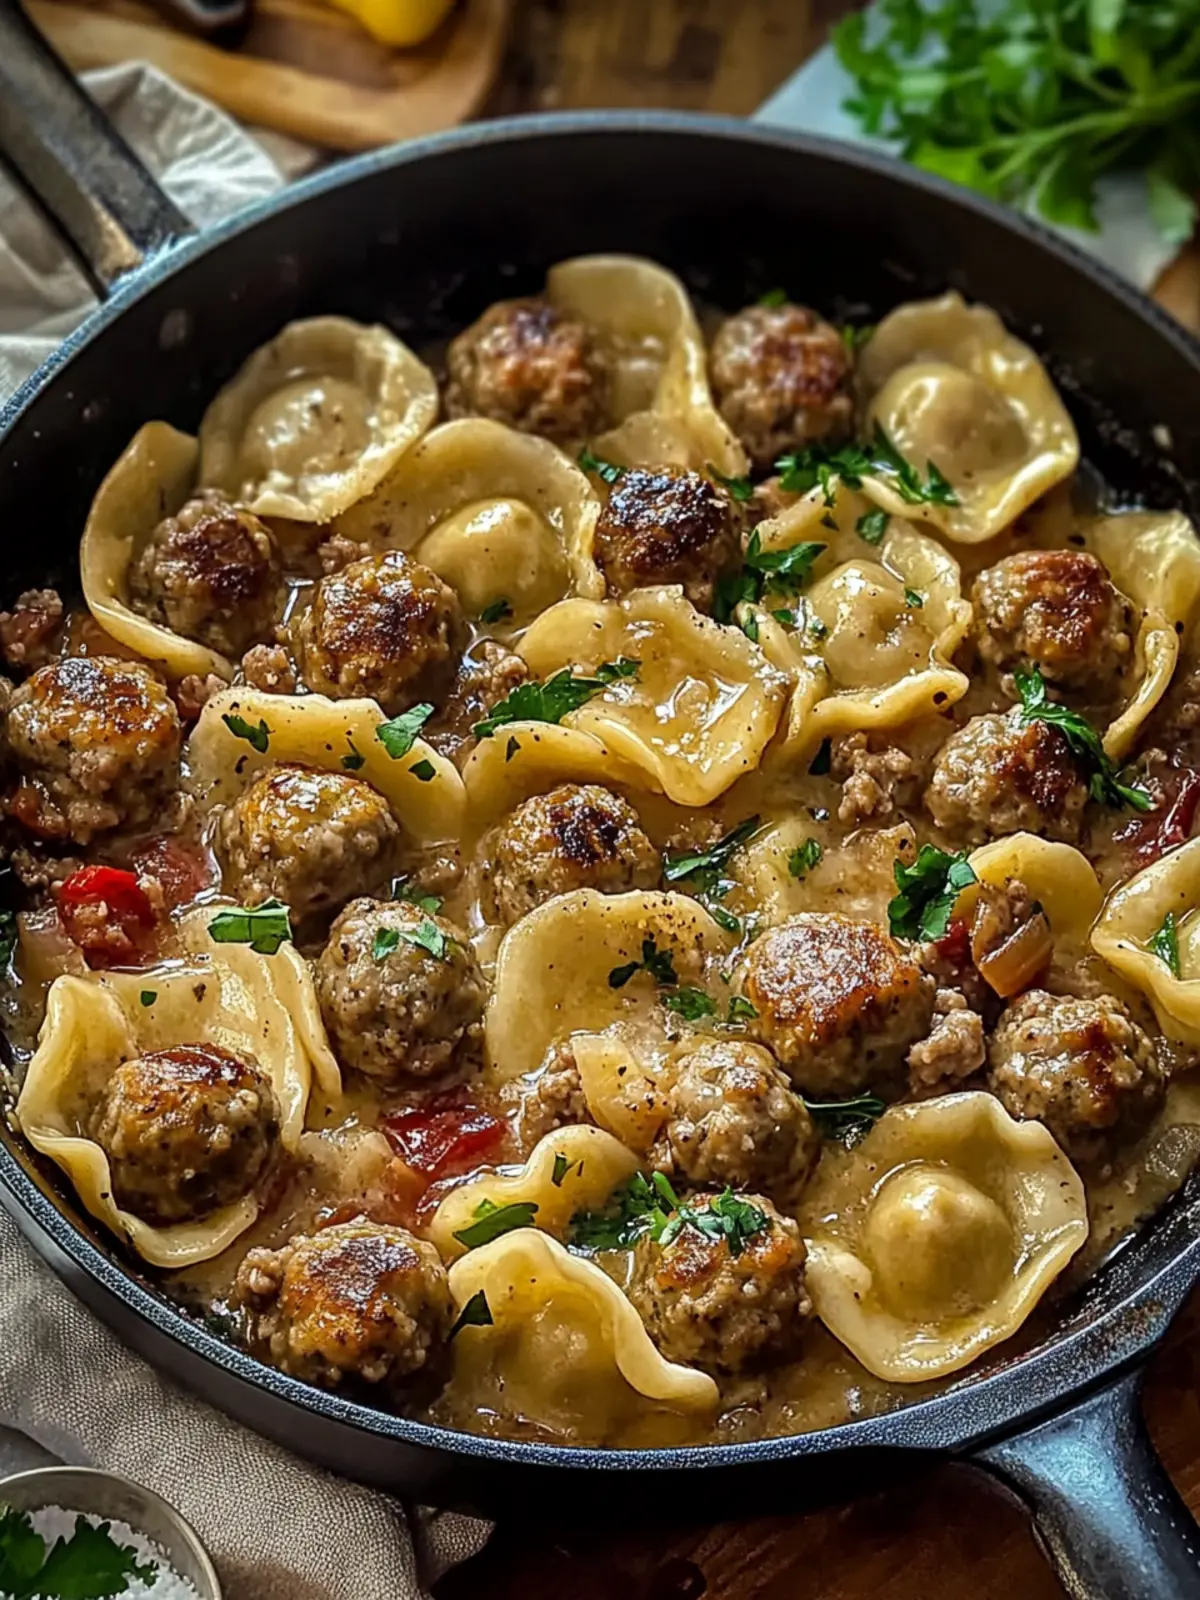
So I did something a little reckless. I browned the beef, tossed in some onions and garlic, and threw the frozen pierogies right into the same skillet. No boiling, no separate pans, no fuss. I poured in some broth, let everything simmer together, and topped it with a generous handful of shredded cheddar. The kids wandered into the kitchen asking what smelled so good, and honestly, I wasn’t sure myself yet. But when I lifted that first forkful—soft pierogi, savory meatball-style beef, melty cheese all tangled together—I knew I’d stumbled onto something dangerously good.
This isn’t fancy food. It’s the kind of meal you make when you’re tired, when you need something that feels like a hug but doesn’t require a culinary degree. The pierogies get tender and slightly crispy on the edges, the meatballs (well, seasoned beef crumbles that think they’re meatballs) soak up all that savory goodness, and the cheese pulls everything together into one glorious, comforting mess. My husband ate three servings. The kids asked for seconds before they finished their firsts. And I stood there at the stove, eating straight from the pan, already planning when I’d make it again.
This Comforting Pierogi Meatball Skillet Heaven has become my secret weapon for busy nights when I need something that feels special but takes almost no effort. It’s the recipe I didn’t plan, the one that came together from fridge scraps and a little bit of hope. And honestly? It might just be the best accident I’ve ever made in my kitchen.
Why You’ll Love This Recipe
Let’s be real for a second. There are a million skillet dinners out there, but this one hits different. I’ve tested this recipe at least six times now, tweaking the seasoning, adjusting the liquid ratio, trying different cheese combinations. Each time, it got better. And here’s why I think you’ll fall for it too:
- One-Pan Wonder: Everything comes together in a single skillet. Less cleanup, more time on the couch. You don’t even have to boil the pierogies separately—they cook right in the pan with everything else.
- Budget-Friendly: Frozen pierogies are cheap. Ground beef is affordable. Cheese is a given. This meal costs less than takeout for two and feeds a family of four with leftovers.
- Crowd-Pleaser: I’ve served this to picky kids, hungry teenagers, and adults who claim they don’t like “casseroles.” Every single person went back for seconds. It’s magic, I swear.
- Ready in 30 Minutes: From start to finish, this skillet comes together in about half an hour. That’s faster than waiting for delivery, and way more satisfying.
- Comfort Food Without the Guilt: Okay, it’s not health food. But it’s real food made from real ingredients, and sometimes that’s exactly what you need.
What makes this recipe different from every other pierogi skillet out there? It’s the way the meat gets seasoned like mini meatballs—garlic, onion, a touch of Worcestershire, and smoked paprika that adds this subtle warmth you can’t quite place. And the cooking method? The pierogies get a chance to brown slightly in the rendered beef fat before the liquid goes in, giving them these crispy edges that contrast beautifully with the soft, pillowy centers. It’s not just another dump-and-stir recipe. It’s a technique I figured out through trial and error, and it makes all the difference.
This is the kind of meal that makes you close your eyes after the first bite. It’s comfort food at its finest—hearty, cheesy, savory, and deeply satisfying. Whether you’re cooking for a family on a busy weeknight or just need something warm and cozy after a long day, this skillet delivers every single time.
What Ingredients You Will Need
This recipe uses simple, everyday ingredients that come together to create something truly special. Most of these are pantry staples or easy to find at any grocery store. Here’s what you’ll need:
For the Meatballs
- 1 pound ground beef (80/20 works best—the fat adds flavor and keeps the meat juicy)
- ½ cup breadcrumbs (plain or Italian, either works; I prefer panko for a lighter texture)
- 1 large egg (helps bind everything together)
- 3 cloves garlic, minced (fresh is best, but jarred minced garlic works in a pinch)
- 1 teaspoon onion powder (adds savory depth without the texture of raw onion)
- 1 teaspoon smoked paprika (this is my secret ingredient—trust me on this)
- ½ teaspoon salt (adjust to taste)
- ¼ teaspoon black pepper
- 1 tablespoon Worcestershire sauce (adds that umami punch)
For the Skillet
- 1 tablespoon olive oil (for browning the meatballs)
- 1 medium onion, diced (yellow or sweet onion works great)
- 2 cloves garlic, minced (because you can never have too much garlic)
- 1 (16-ounce) package frozen pierogies (I use Mrs. T’s classic potato and cheddar, but any variety works)
- 1 cup beef broth (low-sodium is best so you can control the salt)
- ½ cup heavy cream (adds richness and helps create that luscious sauce)
- 1 cup shredded cheddar cheese (sharp cheddar gives the best flavor)
- ¼ cup grated Parmesan cheese (for extra savory goodness)
- Fresh parsley, chopped (for garnish, optional but pretty)
Ingredient Notes and Substitutions
Ground beef: You can substitute ground turkey or chicken, but add a tablespoon of olive oil to the pan since leaner meats need a little help staying moist. For a vegetarian version, use plant-based ground meat or crumbled tofu.
Pierogies: I prefer classic potato and cheddar, but feel free to experiment. Potato and onion, sauerkraut, or even sweet potato pierogies would all work beautifully. Just make sure they’re frozen—fresh pierogies cook faster and might get mushy.
Cheese: Cheddar is classic, but Monterey Jack, mozzarella, or a blend of Italian cheeses would be delicious. If you want a little heat, try pepper jack. I’ve also made this with gouda, and it was incredible.
Heavy cream: For a lighter option, use half-and-half or whole milk. The sauce won’t be quite as thick, but it’ll still be tasty. You can also use unsweetened evaporated milk in a pinch.
Beef broth: Chicken broth or vegetable broth work fine if that’s what you have. I’ve even used beef Better than Bouillon mixed with water, and it turned out great.
Equipment Needed
You don’t need a lot of fancy equipment for this recipe, which is part of its beauty. Here’s what you’ll need:
- Large skillet or cast-iron pan: A 12-inch skillet is ideal. Cast iron holds heat beautifully and gives the pierogies those gorgeous crispy edges. I use my trusty Lodge cast iron, but any heavy-bottomed skillet works.
- Mixing bowl: For combining the meatball ingredients. Nothing fancy—just something big enough to get your hands in there.
- Spatula or wooden spoon: For stirring and breaking up the meat. A wooden spoon is gentler on your pan, but a metal spatula works fine for cast iron.
- Measuring cups and spoons: Because eyeballing ingredients is a gamble, and I’ve lost that bet too many times.
- Cheese grater: Pre-shredded cheese has anti-caking agents that prevent it from melting smoothly. Grating your own is worth the extra minute, I promise.
- Lid for the skillet: You’ll need this to steam the pierogies at the end. If your skillet doesn’t have a lid, a sheet of aluminum foil works perfectly.
If you don’t have a cast-iron skillet, don’t worry. A non-stick skillet or stainless steel pan will work just fine. Just keep an eye on the heat so nothing sticks or burns. And if you’re using a non-stick pan, you might want to skip the step where you brown the pierogies directly in the pan—they won’t get as crispy, but they’ll still be delicious.
Preparation Method
Alright, let’s get cooking. This comes together faster than you think, so have everything prepped and ready before you start. Trust me, it makes the whole process smoother.
Step 1: Make the Meatballs
In a large mixing bowl, combine the ground beef, breadcrumbs, egg, minced garlic, onion powder, smoked paprika, salt, pepper, and Worcestershire sauce. Use your hands to mix everything together until just combined. Don’t overmix, or the meatballs will be tough. Roll the mixture into small meatballs—about 1-inch in diameter. You should get around 20 to 24 meatballs. Set them on a plate while you prep the rest.
Step 2: Brown the Meatballs
Heat the olive oil in your large skillet over medium-high heat. Once the oil is shimmering, carefully add the meatballs in a single layer. Don’t crowd the pan—work in batches if you need to. Cook the meatballs for about 4 to 5 minutes, turning occasionally, until they’re browned on all sides. They don’t need to be cooked through yet; they’ll finish cooking in the sauce. Use a slotted spoon to transfer the browned meatballs to a plate and set them aside.
Step 3: Sauté the Aromatics
In the same skillet, add the diced onion. Cook for 3 to 4 minutes, stirring occasionally, until the onion is soft and translucent. Scrape up any browned bits from the bottom of the pan—that’s flavor gold. Add the minced garlic and cook for another 30 seconds until fragrant. Your kitchen should smell amazing right about now.
Step 4: Add the Pierogies
Add the frozen pierogies to the skillet in a single layer. Let them cook undisturbed for 2 to 3 minutes so they get a chance to brown on the bottom. This step is optional but highly recommended—those crispy edges are everything. Flip the pierogies carefully and let them brown on the other side for another 2 minutes.
Step 5: Build the Sauce
Pour in the beef broth and use your spatula to scrape up any remaining browned bits from the bottom of the pan. Bring the broth to a simmer. Return the meatballs to the skillet, nestling them between the pierogies. Reduce the heat to medium-low and let everything simmer for 5 to 7 minutes, until the pierogies are tender and the meatballs are cooked through.
Step 6: Add the Cream and Cheese
Pour the heavy cream over the skillet and gently stir to combine. Sprinkle the shredded cheddar and Parmesan cheese evenly over the top. Cover the skillet with a lid or foil and let it cook for 2 to 3 minutes, until the cheese is melted and bubbly. The sauce should be thick and luscious at this point. If it’s too thin, let it simmer uncovered for another minute or two.
Step 7: Garnish and Serve
Remove the skillet from the heat. Sprinkle with fresh chopped parsley if you’re feeling fancy. Let it rest for 2 to 3 minutes before serving—this allows the sauce to set slightly and makes serving easier. Scoop generous portions into bowls and get ready for some serious comfort.
Cooking Tips & Techniques
After making this recipe more times than I care to admit, I’ve picked up a few tricks that make a real difference. Here are my best tips for skillet success:
Don’t skip browning the meatballs. I know it’s tempting to just dump everything in the pan and call it a day, but that initial sear creates a crust that locks in moisture and adds deep, savory flavor. Plus, those browned bits on the bottom of the pan become the foundation of your sauce. It’s worth the extra few minutes, I promise.
Use low-sodium broth. Cheese and Worcestershire sauce both add salt, so starting with low-sodium broth gives you more control over the final seasoning. You can always add more salt at the end, but you can’t take it out.
Grate your own cheese. I know, I know, it’s an extra step. But pre-shredded cheese is coated with cellulose and starches to prevent clumping, which means it doesn’t melt as smoothly. Freshly grated cheese melts into a silky, cohesive sauce that coats every pierogi and meatball beautifully.
Let the pierogies brown undisturbed. When you add them to the skillet, resist the urge to stir or flip them right away. Let them sit for a good 2 to 3 minutes so they develop that golden-brown crust. If you move them too soon, they’ll stick and won’t get crispy.
Cover the skillet at the end. The lid traps steam, which helps the pierogies finish cooking through and softens them to that perfect pillowy texture. It also helps the cheese melt evenly without burning. If you don’t have a lid, a sheet of foil works just fine.
My biggest mistake? The first time I made this, I added the cream too early and it curdled. Lesson learned: always add the cream after the broth has simmered and reduced slightly, and keep the heat at medium-low. High heat and cream don’t get along.
Variations & Adaptations
One of the best things about this recipe is how flexible it is. Here are some variations I’ve tried and loved:
Spicy Pierogi Skillet
Add ½ teaspoon of red pepper flakes with the garlic, and use pepper jack cheese instead of cheddar. The heat cuts through the richness beautifully. I made this version for a game day gathering, and it disappeared in minutes.
Chicken Sausage Version
Swap the ground beef for 1 pound of sliced chicken sausage (I like sun-dried tomato or spinach and feta). Skip the meatball step and just brown the sausage slices directly in the skillet. This version is a little lighter but just as satisfying.
Vegetarian Option
Use plant-based ground meat or crumbled extra-firm tofu instead of beef. Sauté the tofu with the same seasonings and Worcestershire sauce (use vegan Worcestershire if needed). The rest of the recipe stays the same. I’ve made this for my vegetarian sister-in-law, and she asked for the recipe on the spot.
Bacon Lover’s Twist
Cook 4 slices of bacon in the skillet before browning the meatballs. Remove the bacon, crumble it, and use the rendered fat instead of olive oil for cooking the meatballs and onions. Sprinkle the crumbled bacon over the finished dish. This version is pure indulgence.
Lighter Version
Use ground turkey instead of beef, swap the heavy cream for half-and-half, and use reduced-fat cheese. The sauce won’t be as rich, but it’ll still be delicious. I’ve also made this with whole milk and a tablespoon of flour to thicken it, and it worked great.
Serving & Storage Suggestions
This skillet is a complete meal on its own, but if you want to round it out, here are some ideas:
Serving suggestions: Serve this piping hot straight from the skillet. A simple green salad with a tangy vinaigrette cuts through the richness perfectly. Steamed broccoli or roasted asparagus make great vegetable sides. And honestly? A slice of crusty bread to soak up any leftover sauce is never a bad idea. If you’re feeling extra cozy, serve it alongside a bowl of creamy mac and cheese soup for the ultimate comfort food feast.
Storage: Leftovers keep well in an airtight container in the refrigerator for up to 4 days. The flavors actually meld together overnight, making it even better the next day. I’ve been known to pack this for lunch and look forward to it all morning.
Reheating: The best way to reheat this is in a skillet over medium-low heat with a splash of broth or water to loosen the sauce. Stir gently until heated through. You can also microwave individual portions, but the pierogies might get a little soft. If you’re in a hurry, the microwave works—just cover the bowl with a damp paper towel to add moisture.
Freezing: This skillet freezes surprisingly well. Let it cool completely, then transfer to a freezer-safe container. It’ll keep for up to 3 months. Thaw overnight in the refrigerator and reheat in a skillet. The sauce might separate slightly, but a good stir brings it back together.
Flavor development: If you can resist eating it all in one sitting, you’ll notice the flavors deepen and meld together beautifully overnight. The pierogies absorb some of the sauce, becoming even more tender and flavorful. It’s one of those rare dishes that tastes even better the next day.
Nutritional Information & Benefits
Let’s be honest—this isn’t a diet meal. But it’s real food made from real ingredients, and there’s something to be said for that. Here’s the estimated nutritional breakdown per serving (based on 6 servings):
| Nutrient | Amount Per Serving |
|---|---|
| Calories | 485 |
| Protein | 28g |
| Fat | 28g |
| Carbohydrates | 32g |
| Fiber | 2g |
| Sugar | 4g |
| Sodium | 720mg |
Health benefits: Ground beef is a great source of protein, iron, and B vitamins. Pierogies provide carbohydrates for energy (and comfort, let’s be real). Garlic and onions are packed with antioxidants and anti-inflammatory properties. And cheese? Well, cheese has calcium and protein, and I’m choosing to focus on that.
Dietary considerations: This recipe contains gluten (from the pierogies and breadcrumbs) and dairy (from the cheese and cream). For a gluten-free version, use gluten-free pierogies and gluten-free breadcrumbs. For a dairy-free version, use dairy-free cheese and a plant-based cream alternative. The texture might change slightly, but the flavor will still be there.
Potential allergens: This recipe contains wheat, dairy, and eggs. If you’re serving someone with allergies, make sure to check your ingredient labels carefully.
My personal take? This is a meal I make when I need comfort, not when I’m counting calories. It’s about nourishing your soul as much as your body. And sometimes, that’s exactly what you need.
Frequently Asked Questions
Can I use fresh pierogies instead of frozen?
Absolutely. Fresh pierogies cook faster, so reduce the simmering time by about 3 to 4 minutes. Keep an eye on them—they’re done when they float and the edges are tender. Fresh pierogies also brown more quickly, so watch them closely during the browning step.
Can I make this ahead of time?
Yes! You can assemble the entire skillet (without the final cheese topping) and refrigerate it for up to 24 hours. When you’re ready to serve, reheat it in the skillet, add the cheese, and let it melt under the lid. It’s a great make-ahead meal for busy weeknights or when you’re hosting.
What other cheeses work well in this recipe?
So many options! Gouda adds a smoky richness, mozzarella gives that perfect stretch, and provolone melts beautifully. For a sharper flavor, try aged white cheddar or Gruyère. I’ve even used crumbled feta on top for a salty tang, and it was surprisingly good.
Can I add vegetables to this skillet?
Definitely. Mushrooms, bell peppers, zucchini, or spinach all work well. Add mushrooms and bell peppers with the onions so they have time to soften. Stir in spinach at the very end, just before adding the cheese, and let it wilt from the residual heat. It’s an easy way to sneak in extra veggies.
How do I prevent the sauce from curdling?
Keep the heat at medium-low when you add the cream, and don’t let the sauce boil after adding it. If the cream does curdle slightly, don’t panic—it’s still safe to eat, and the cheese will help mask any texture issues. To be extra safe, you can temper the cream by stirring a few spoonfuls of hot broth into it before adding it to the skillet.
Conclusion
This Comforting Pierogi Meatball Skillet Heaven is everything I want in a weeknight dinner—it’s quick, satisfying, and deeply comforting without requiring a lot of effort or fancy ingredients. It’s the kind of recipe that proves you don’t need to spend hours in the kitchen to create something memorable. Sometimes the best meals come from a little bit of improvisation and a whole lot of trust in the process.
I love that this recipe is flexible enough to adapt to whatever you have on hand. Swap the beef for chicken sausage, add extra veggies, or experiment with different cheese blends. Make it your own. That’s the beauty of cooking—it’s never about following rules; it’s about making something that feels good to you.
If you’re looking for another cozy one-pan meal, you should definitely try my easy creamy mushroom chicken comfort bowl—it has that same soul-warming energy. And if you’re in the mood for something with a little more kick, the one-pot creamy buffalo chicken pasta is always a hit in my house.
I’d love to hear how this skillet turns out for you. Did you add your own twist? Did your family devour it as fast as mine did? Drop a comment below and let me know. And if you loved it, share it with a friend who needs a little comfort food in their life. Happy cooking, friends!
Pin This Recipe!

Easy Comforting Pierogi Meatball Skillet Heaven

A quick and comforting one-pan meal featuring tender pierogies, savory meatballs, and melted cheese in a rich, creamy sauce. Perfect for busy weeknights when you need something hearty and satisfying without a lot of fuss.
- Prep Time: 15 minutes
- Cook Time: 20 minutes
- Total Time: 35 minutes
- Yield: 6 servings 1x
- Category: Main Course
- Cuisine: American
Ingredients
- 1 pound ground beef (80/20 works best)
- ½ cup breadcrumbs (plain or Italian, preferably panko)
- 1 large egg
- 3 cloves garlic, minced
- 1 teaspoon onion powder
- 1 teaspoon smoked paprika
- ½ teaspoon salt
- ¼ teaspoon black pepper
- 1 tablespoon Worcestershire sauce
- 1 tablespoon olive oil
- 1 medium onion, diced
- 2 cloves garlic, minced
- 1 (16-ounce) package frozen pierogies (classic potato and cheddar recommended)
- 1 cup beef broth (low-sodium)
- ½ cup heavy cream
- 1 cup shredded cheddar cheese (sharp cheddar recommended)
- ¼ cup grated Parmesan cheese
- Fresh parsley, chopped (for garnish, optional)
Instructions
- In a large mixing bowl, combine the ground beef, breadcrumbs, egg, minced garlic, onion powder, smoked paprika, salt, pepper, and Worcestershire sauce. Mix with your hands until just combined. Roll into small meatballs, about 1 inch in diameter (around 20 to 24 meatballs). Set aside.
- Heat olive oil in a large skillet (12-inch recommended) over medium-high heat. Add the meatballs in a single layer (work in batches if needed) and cook for 4 to 5 minutes, turning occasionally, until browned on all sides. Transfer to a plate and set aside.
- In the same skillet, add the diced onion. Cook for 3 to 4 minutes, stirring occasionally, until soft and translucent. Add the minced garlic and cook for 30 seconds until fragrant.
- Add the frozen pierogies to the skillet in a single layer. Cook undisturbed for 2 to 3 minutes to brown the bottom, then flip and brown the other side for another 2 minutes.
- Pour in the beef broth and scrape up any browned bits from the bottom of the pan. Bring to a simmer. Return the meatballs to the skillet, nestling them between the pierogies. Reduce heat to medium-low and simmer for 5 to 7 minutes, until pierogies are tender and meatballs are cooked through.
- Pour the heavy cream over the skillet and gently stir to combine. Sprinkle the shredded cheddar and Parmesan cheese evenly over the top. Cover the skillet with a lid or foil and cook for 2 to 3 minutes, until the cheese is melted and bubbly. If the sauce is too thin, simmer uncovered for another minute or two.
- Remove from heat. Garnish with fresh chopped parsley if desired. Let rest for 2 to 3 minutes before serving. Scoop into bowls and serve.
Notes
For best results, use low-sodium broth to control salt levels. Grate your own cheese for smoother melting. Let pierogies brown undisturbed for crispy edges. Add cream after broth has simmered and keep heat at medium-low to prevent curdling. Leftovers keep in the refrigerator for up to 4 days and can be frozen for up to 3 months.
Nutrition
- Serving Size: 1 serving (based on
- Calories: 485
- Sugar: 4
- Sodium: 720
- Fat: 28
- Saturated Fat: 12
- Carbohydrates: 32
- Fiber: 2
- Protein: 28
Keywords: pierogi meatball skillet, one-pan dinner, comfort food, easy weeknight meal, cheesy pierogi skillet, ground beef recipe, frozen pierogies



