Love this? Save it for later!
Share the inspiration with your friends
I was standing over a cold pan of leftover jasmine rice, wondering if I had the energy to turn it into anything worth eating. It was late, the fridge was mostly empty, and the idea of plain reheated rice made me want to just order takeout. But I had that soy glaze sitting in the fridge—the one I make when I want something savory and sticky—and a memory popped into my head. A memory of a little street stall in Tokyo where a man was pressing rice into perfect little cakes and grilling them until they crackled. I had no idea if I could pull that off at midnight in my own kitchen, but I figured, why not try?
I scooped out the cold rice, added a splash of rice vinegar and a pinch of salt, and started pressing it into patties with my hands. They felt fragile, like they might fall apart the second they hit the pan. But I got my cast iron skillet screaming hot, brushed it with a little sesame oil, and placed those rice discs down. The sizzle was immediate—satisfying in a way that only a hot pan can deliver. I let them cook until the bottoms turned that deep golden brown, almost crusty, then flipped them carefully. The second side did the same thing. Honestly, I was shocked at how good they looked.
Then came the glaze. I brushed each crispy cake with a mixture of soy sauce, a tiny bit of honey, and a splash of mirin. The glaze hit the hot surface and immediately started bubbling, turning sticky and caramelized. I pulled them off the pan, let them cool for maybe thirty seconds (who was I kidding, I couldn’t wait), and took a bite. The outside was crunchy, almost like a rice cracker, and the inside was soft and chewy. The glaze was salty and sweet, clinging to every crevice. That night, I ate four of them standing at the counter, and I knew this little accident was going to become a regular thing.
Why You’ll Love This Recipe
These Crispy Grilled Rice Balls with Savory Soy Glaze are the kind of snack that feels both humble and completely satisfying. They start with leftover rice—something you probably have sitting in your fridge right now—and turn into something you’d happily serve to guests. I’ve tested this method about six times now, tweaking the heat, the pressing technique, and the glaze ratio, and this version is the one that works every single time.
- Simple Ingredients : You need cooked rice, soy sauce, a sweetener, and a little oil. That’s it. No fancy grocery trips required.
- Quick & Easy : From fridge to plate in under 20 minutes. Perfect for when you need something fast but don’t want to sacrifice flavor.
- Perfect for Leftovers : This is the ultimate way to use up day-old rice. It transforms boring leftovers into a crave-worthy dish.
- Crowd-Pleaser : I’ve served these at small gatherings and they disappear fast. Kids love them, adults love them, and they’re naturally gluten-free if you use tamari.
- Unbelievably Crispy : The contrast between the crunchy exterior and the soft, tender interior is what makes these so addictive. It’s textural perfection.
What sets this recipe apart from other rice ball recipes is the grilling method. Instead of deep frying or baking, you get a direct sear that creates that shatteringly crisp crust without the heaviness of oil. The soy glaze isn’t just brushed on top—it hits the hot pan and caramelizes, creating a sticky, savory coating that clings to every bite. This isn’t just another way to eat leftover rice. It’s the best way.
What Ingredients You Will Need
This recipe relies on a short list of pantry staples, but each one plays a specific role in building flavor and texture. I’ve tested substitutions for most of these, so don’t worry if you’re missing something.
- Cooked White Rice (3 cups, day-old preferred) : Day-old rice works best because it’s slightly dried out, which helps the balls hold their shape. Freshly cooked rice can work, but let it cool completely first. I usually use jasmine or short-grain sushi rice for the best stickiness.
- Rice Vinegar (1 tablespoon) : Adds a subtle tang that balances the savory glaze. You can substitute with apple cider vinegar in a pinch.
- Salt (½ teaspoon) : Seasons the rice from the inside out. Don’t skip this—it makes a big difference.
- Sesame Oil (2 tablespoons, for cooking) : Gives the rice balls a nutty flavor and helps them crisp up beautifully. Avocado oil or vegetable oil work too, but you’ll lose that toasty aroma.
- Soy Sauce (3 tablespoons) : The base of the glaze. Use tamari for a gluten-free version, or coconut aminos for a lower-sodium option.
- Honey or Maple Syrup (1 tablespoon) : Adds sweetness to balance the saltiness of the soy sauce. I’ve used both, and honey gives a slightly thicker, glossier glaze.
- Mirin (1 tablespoon) : A sweet Japanese rice wine that adds depth and shine to the glaze. If you don’t have it, mix 1 teaspoon of sugar with 1 tablespoon of water and a splash of sake or dry sherry.
- Garlic (1 clove, minced, optional) : I add this about half the time. It gives the glaze a little punch. If you’re not a garlic fan, just leave it out.
- Sesame Seeds (1 tablespoon, for garnish) : Adds a nice visual touch and a little extra crunch. Toasted sesame seeds are ideal.
- Green Onions (2, sliced, for garnish) : Fresh and bright, they cut through the richness of the glaze perfectly.
I personally recommend using Kikkoman soy sauce for the glaze—it has a consistent flavor that I’ve come to trust. For the rice, if you have leftover rice from making cozy hibachi steak bowls, that works exceptionally well here. The grains are already seasoned and slightly firm.
Equipment Needed
You don’t need much for this recipe, which is part of its charm. Here’s what you’ll want on hand:
- Cast Iron Skillet or Non-Stick Pan : A cast iron skillet gives you the best sear and heat retention. If you’re using non-stick, make sure it’s in good condition so the rice doesn’t stick.
- Mixing Bowl : For combining the rice with vinegar and salt.
- Measuring Cups and Spoons : Accuracy matters with the glaze ingredients.
- Spatula : A thin, flexible spatula makes flipping the rice balls much easier without breaking them.
- Pastry Brush : For brushing the glaze onto the rice balls while they cook. A spoon works too, but a brush gives you more even coverage.
- Small Bowl : For mixing the glaze.
If you don’t have a cast iron skillet, don’t worry. I’ve made these in a stainless steel pan and they turned out great—just make sure the pan is hot enough before adding the oil. I’ve also used a non-stick pan on a camping trip, and while the sear wasn’t as dramatic, they were still delicious. Budget-friendly options work fine here; you don’t need fancy equipment.
Preparation Method
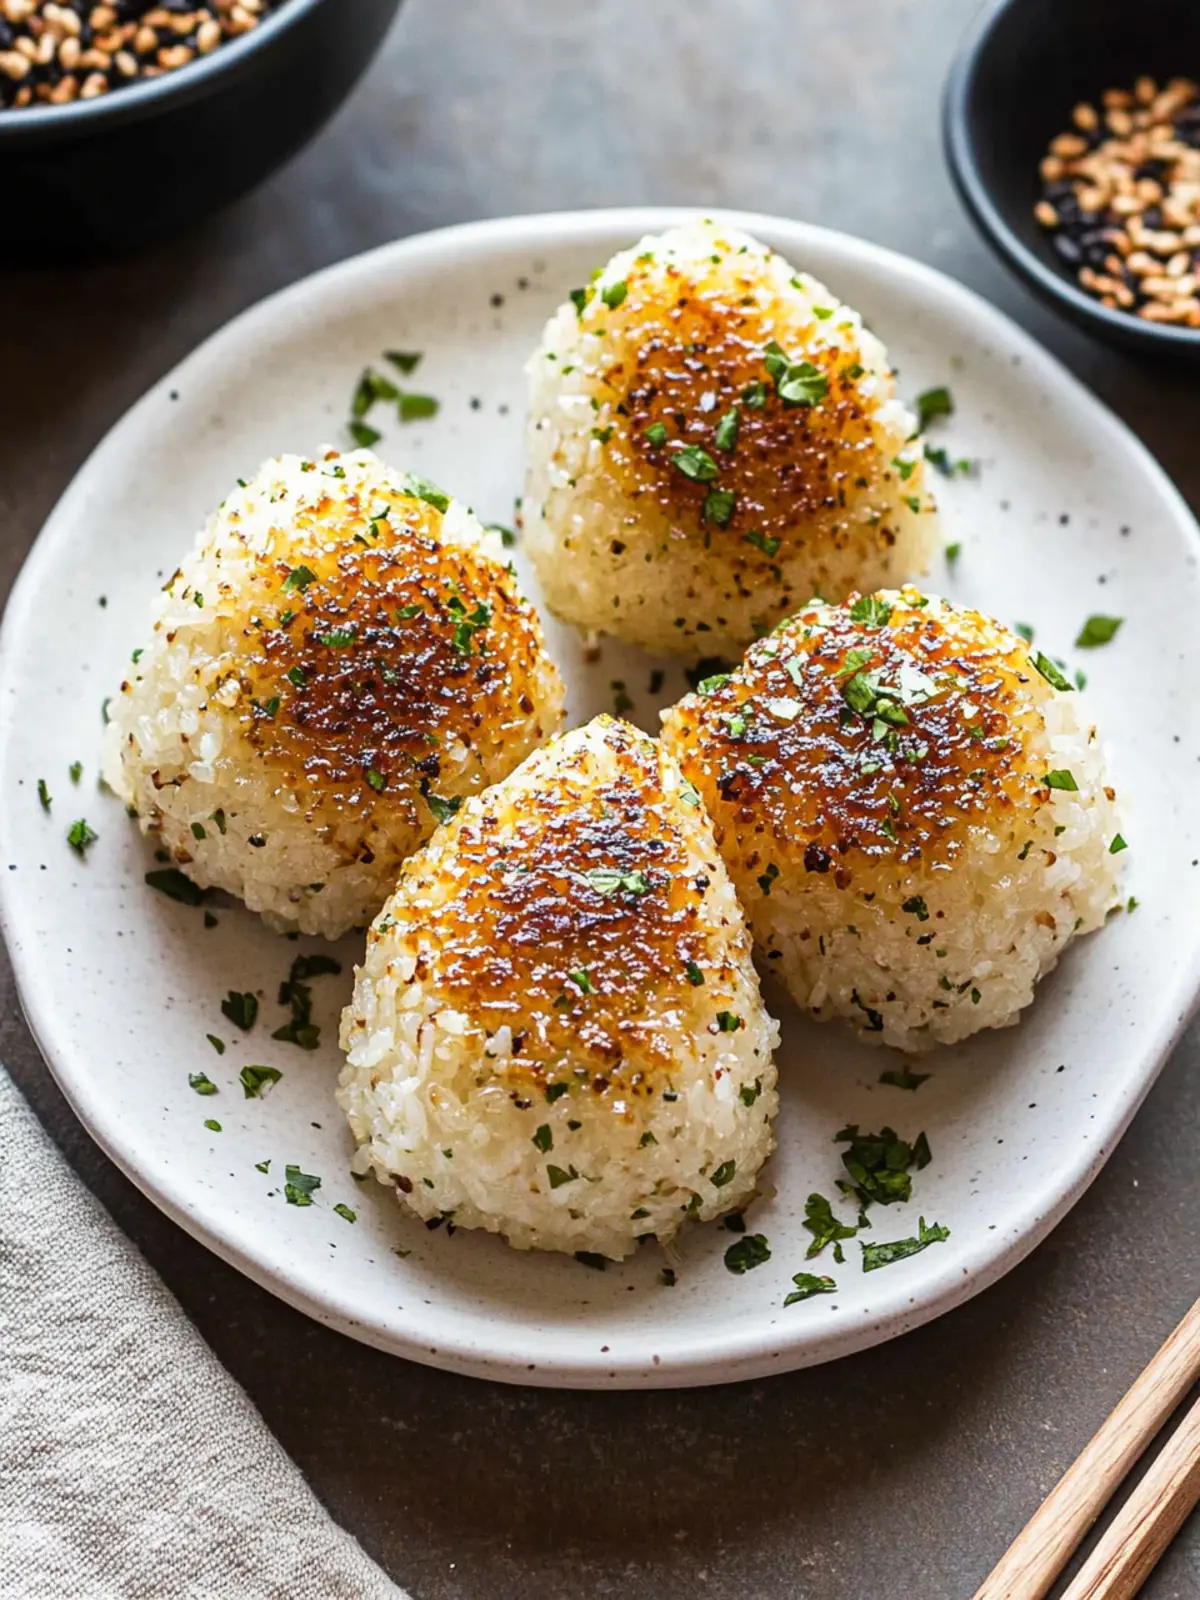
Let’s get these rice balls crispy. Follow these steps closely, especially the pressing technique—it’s the key to keeping everything together.
- Prepare the rice (2 minutes) : In a mixing bowl, combine the 3 cups of cooked rice, 1 tablespoon of rice vinegar, and ½ teaspoon of salt. Gently fold everything together with a spatula until the vinegar and salt are evenly distributed. The rice should feel slightly sticky but not wet.
- Shape the rice balls (5 minutes) : Lightly wet your hands with water to prevent sticking. Scoop about ½ cup of the rice mixture and press it firmly into a ball, then flatten it slightly into a disc about ½ inch thick. Repeat with the remaining rice. You should get about 8 discs. The key here is to press firmly—if the rice isn’t compacted, it will fall apart in the pan. If the rice feels too dry to hold together, sprinkle a few drops of water over it and mix again.
- Mix the glaze (1 minute) : In a small bowl, whisk together 3 tablespoons of soy sauce, 1 tablespoon of honey, 1 tablespoon of mirin, and the minced garlic (if using). Set it aside near the stove.
- Heat the pan (2 minutes) : Place your cast iron skillet over medium-high heat. Add 1 tablespoon of sesame oil and let it heat until it shimmers. You want the pan hot enough that a drop of water sizzles on contact, but not so hot that the oil smokes.
- Cook the rice balls (8-10 minutes) : Carefully place 4 of the rice discs into the hot pan. Don’t overcrowd the pan—work in batches if needed. Let them cook undisturbed for about 4 minutes. You’ll know they’re ready to flip when the bottom is deep golden brown and crispy. Use a thin spatula to gently flip each disc. Cook for another 3-4 minutes on the second side.
- Glaze and finish (2 minutes) : Once both sides are crispy, reduce the heat to medium-low. Using a pastry brush, generously brush the tops of each rice ball with the soy glaze. Let them cook for another 30 seconds, then flip and brush the other side. Cook for another 30 seconds. The glaze will bubble and caramelize quickly, so keep an eye on it.
- Serve immediately : Transfer the glazed rice balls to a plate. Sprinkle with sesame seeds and sliced green onions. Serve hot—they’re best within 5 minutes of coming off the pan.
One thing I learned the hard way: don’t try to flip them too early. If you force them, they’ll crack. Let the crust develop naturally, and they’ll release from the pan on their own. The first time I made these, I flipped one too soon and ended up with a pile of fried rice in the pan. Still tasted good, but not as pretty.
Cooking Tips & Techniques
After making these Crispy Grilled Rice Balls more times than I can count, I’ve picked up a few tricks that make the process foolproof.
Use day-old rice : This is non-negotiable for the best texture. Fresh rice is too moist and sticky, which makes it harder to shape and less likely to crisp up. If you only have fresh rice, spread it on a baking sheet and refrigerate it uncovered for an hour to dry it out a bit.
Wet your hands : Rice is sticky stuff. Keep a small bowl of water nearby and dip your hands between shaping each ball. It makes the process so much cleaner and prevents the rice from sticking to your palms.
Don’t skimp on the oil : The sesame oil isn’t just for flavor—it creates the barrier between the rice and the pan that allows for even browning. If the pan looks dry, add a little more oil between batches.
Watch the glaze : The sugar in the glaze can burn quickly if left too long. Once you brush it on, you only need about 30 seconds per side. If you see the glaze starting to smoke, pull the rice balls off immediately.
Keep them warm : If you’re making a double batch, keep the finished rice balls on a baking sheet in a 200°F oven while you cook the rest. They’ll stay crispy for about 20 minutes this way.
I once tried to rush the process by using high heat the whole time. The glaze burned before the rice had a chance to crisp properly, and I ended up with bitter, blackened spots. Now I stick to medium-high for the initial sear and medium-low for the glazing stage. It takes a little longer, but the results are worth it.
Variations & Adaptations
This recipe is incredibly flexible. Here are a few ways I’ve adapted it depending on what I have on hand or what I’m craving.
- Spicy Kick : Add 1 teaspoon of sriracha or gochujang to the glaze mixture. The heat pairs beautifully with the sweet soy. I’ve also sprinkled red pepper flakes over the finished rice balls for an extra punch.
- Herb and Cheese : Mix ¼ cup of finely chopped fresh herbs (parsley, chives, or cilantro) and ¼ cup of grated Parmesan cheese into the rice before shaping. The cheese adds a salty, savory element that makes these feel more like a meal. This version is great alongside a fresh summer bliss tomato garlic salad.
- Vegan Option : Swap the honey for maple syrup or agave nectar. The glaze will be slightly thinner, but it still caramelizes beautifully. Use a vegan-friendly oil like avocado oil for cooking.
- Brown Rice Version : I’ve made these with leftover brown rice, and they work well. Brown rice is less sticky, so you’ll need to press the discs a bit firmer. The texture is chewier and nuttier, which I actually prefer sometimes.
- Stuffed Rice Balls : Before shaping, place a small cube of mozzarella, a dollop of pesto, or a teaspoon of kimchi in the center of each rice disc. Seal the rice around the filling and flatten slightly. The melted center is a nice surprise when you bite into it.
My personal favorite variation is the spicy one. I made it on a whim after making gochujang rice bowls and having leftover gochujang in the fridge. The heat level was just right—enough to wake up your taste buds without overwhelming the soy glaze.
Serving & Storage Suggestions
These rice balls are best served hot and fresh, right after glazing. The contrast between the crispy exterior and the soft interior is at its peak within the first few minutes. I like to serve them on a wooden board with a small bowl of extra soy glaze for dipping, along with some pickled vegetables on the side. They pair wonderfully with a quick pickled onion recipe—the acidity cuts through the richness beautifully.
For a full meal, I’ll serve these alongside a simple miso soup or a cucumber salad. They also work great as an appetizer for a small gathering. Just make a big batch and let people grab them as they come off the pan.
Storage : If you have leftovers (unlikely, but possible), let them cool completely, then store them in an airtight container in the refrigerator for up to 3 days. The texture will soften, but they’re still tasty.
Reheating : The best way to reheat these is in a hot skillet with a little oil. Reheat each side for about 2 minutes until the crust crisps up again. You can also use an air fryer at 375°F for 3-4 minutes. The microwave will make them soft and chewy, which isn’t bad, but you lose the crunch.
Freezing : You can freeze the unglazed, cooked rice balls. Place them on a baking sheet in a single layer and freeze until solid, then transfer to a freezer bag. To serve, reheat directly from frozen in a hot skillet, then glaze as directed. The glaze won’t freeze well, so always make it fresh.
I’ve noticed that the flavors actually deepen a bit after a day in the fridge. The soy glaze soaks into the rice slightly, making each bite more savory. It’s a different experience from the fresh version, but still delicious in its own way.
Nutritional Information & Benefits
These Crispy Grilled Rice Balls are a relatively light snack or side dish. Here’s an approximate breakdown per serving (2 rice balls):
- Calories : 180-200
- Protein : 4g
- Carbohydrates : 35g
- Fat : 4g
- Fiber : 1g
- Sugar : 4g
Rice provides easily digestible carbohydrates for quick energy, while the sesame oil adds healthy fats that support heart health. The soy sauce contributes a small amount of protein and adds flavor without adding significant calories. If you use brown rice, you’ll get more fiber and micronutrients like magnesium and B vitamins.
These are naturally dairy-free and can be made gluten-free with tamari. They’re also relatively low in fat compared to fried snacks, making them a lighter option for when you’re craving something savory and crunchy. I like that I can enjoy them without feeling heavy afterward.
One thing to note: the sodium content can be moderate due to the soy sauce. If you’re watching your salt intake, use low-sodium soy sauce or reduce the amount slightly. The flavor will still be plenty savory.
Conclusion
These Crispy Grilled Rice Balls with Savory Soy Glaze have become my go-to solution for leftover rice, and I honestly don’t see that changing anytime soon. They’re fast, they’re forgiving, and they deliver that perfect combination of crunch and chew that makes you want to keep eating. Whether you’re making them for a quick snack, a side dish, or a fun appetizer, they always deliver.
I’d love for you to try this recipe and make it your own. Add a little heat, stuff them with cheese, or just keep it simple with the classic soy glaze. Whatever you do, let me know how it goes. Drop a comment below, share your photos, or tell me what variation you tried. This is one of those recipes that gets better the more you play with it.
So go ahead—raid your fridge for that leftover rice, heat up your skillet, and make something crispy and delicious. You’ve got this.
Frequently Asked Questions
Can I use freshly cooked rice instead of day-old rice?
You can, but it’s trickier. Fresh rice is more moist and sticky, which makes it harder to shape and less likely to crisp up. If you’re in a pinch, spread the fresh rice on a baking sheet and refrigerate it uncovered for about an hour before shaping.
How do I keep the rice balls from falling apart in the pan?
The key is to press the rice firmly when shaping. Make sure your hands are wet so the rice doesn’t stick to your palms, and compact each disc well. Also, let them cook undisturbed for a full 4 minutes before attempting to flip—the crust needs time to form.
Can I make these in an air fryer?
Yes! Preheat your air fryer to 375°F. Lightly spray the rice balls with oil and cook for 8-10 minutes, flipping halfway through. Brush with the glaze during the last 2 minutes of cooking. They won’t be as deeply caramelized as pan-fried, but they’ll still be crispy.
What can I use instead of mirin?
If you don’t have mirin, mix 1 teaspoon of sugar with 1 tablespoon of water and a splash of sake or dry sherry. You can also just use an extra tablespoon of honey or maple syrup for a slightly sweeter glaze.
How long do these stay crispy after cooking?
They’re best within the first 5-10 minutes after coming off the pan. After that, the steam from the soft interior starts to soften the crust. If you need to keep them warm, place them on a wire rack in a 200°F oven for up to 20 minutes—this helps maintain some crispiness.
Pin This Recipe!
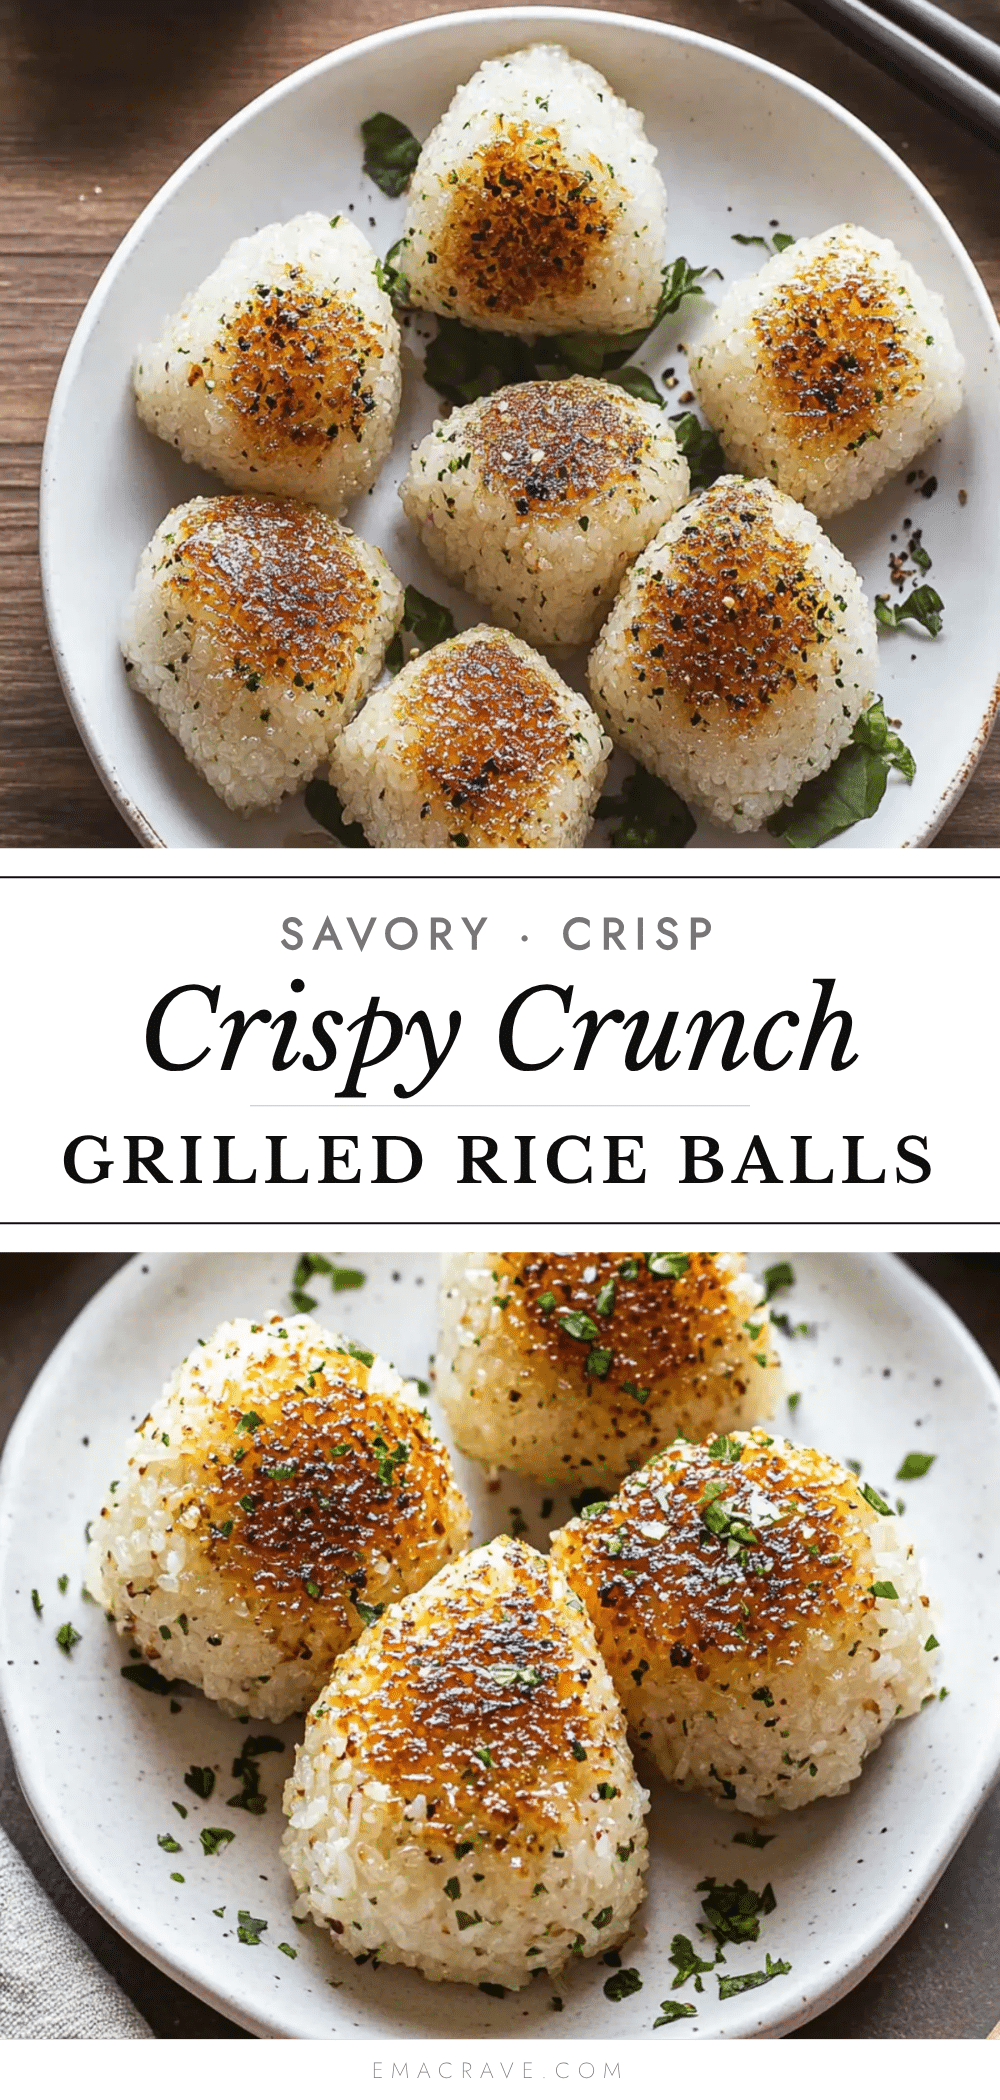
Crispy Grilled Rice Balls with Savory Soy Glaze
Transform leftover rice into crispy, golden rice balls with a savory soy glaze that caramelizes to perfection. This quick and easy recipe delivers a satisfying crunch and chewy interior, perfect as a snack, side dish, or appetizer.
- Prep Time: 10 minutes
- Cook Time: 10 minutes
- Total Time: 20 minutes
- Yield: 4 servings (2 rice balls per serving) 1x
- Category: Appetizer
- Cuisine: Japanese
Ingredients
- 3 cups cooked white rice, day-old preferred
- 1 tablespoon rice vinegar
- ½ teaspoon salt
- 2 tablespoons sesame oil, for cooking
- 3 tablespoons soy sauce
- 1 tablespoon honey or maple syrup
- 1 tablespoon mirin
- 1 clove garlic, minced (optional)
- 1 tablespoon sesame seeds, for garnish
- 2 green onions, sliced, for garnish
Instructions
- In a mixing bowl, combine the cooked rice, rice vinegar, and salt. Gently fold until evenly distributed.
- Lightly wet your hands with water. Scoop about ½ cup of the rice mixture, press firmly into a ball, then flatten into a disc about ½ inch thick. Repeat to make about 8 discs.
- In a small bowl, whisk together soy sauce, honey, mirin, and minced garlic (if using). Set aside.
- Heat a cast iron skillet over medium-high heat. Add 1 tablespoon of sesame oil and heat until shimmering.
- Place 4 rice discs in the hot pan. Cook undisturbed for about 4 minutes until deep golden brown and crispy. Flip carefully and cook another 3-4 minutes.
- Reduce heat to medium-low. Brush the tops of the rice balls with the soy glaze. Cook for 30 seconds, then flip and brush the other side. Cook for another 30 seconds.
- Transfer to a plate. Sprinkle with sesame seeds and sliced green onions. Serve immediately.
Notes
Use day-old rice for best texture. Press rice firmly when shaping to prevent falling apart. Don’t flip too early; let the crust develop. Watch the glaze closely as it can burn quickly. Keep finished rice balls warm in a 200°F oven for up to 20 minutes.
Nutrition
- Serving Size: 2 rice balls
- Calories: 190
- Sugar: 4
- Sodium: 600
- Fat: 4
- Saturated Fat: 0.5
- Carbohydrates: 35
- Fiber: 1
- Protein: 4
Keywords: crispy rice balls, grilled rice balls, soy glaze, leftover rice, Japanese appetizer, gluten-free option, vegan option



