Love this? Save it for later!
Share the inspiration with your friends
The first time I made this ground beef bibimbap bowl, it was a Tuesday night and I was staring into my fridge, completely uninspired. I had a pound of ground beef thawed, a half-used bag of spinach, and a jar of gochujang that had been sitting there since I made those gochujang oven roasted carrots last month. Honestly, I was this close to just ordering takeout. But the idea of another sad bowl of cereal felt like a personal failure.
So I grabbed a skillet, threw the beef in, and started pulling random things from the fridge. I had some leftover rice from the night before, a couple of eggs, and a carrot that was still crunchy. I figured, why not try to make a bibimbap bowl? The whole thing came together in less than thirty minutes, and when I took that first bite—the mix of savory beef, the slightly sweet and spicy gochujang, a runny egg yolk coating everything—I actually laughed. It was absurdly good for something I just threw together out of desperation.
That Tuesday night bowl turned into a weekly thing. I tweaked the seasoning, figured out the perfect way to cook the beef so it wasn’t dry, and started adding different veggies depending on what I had. It became my go-to for those nights when I need something that feels fancy but takes almost no effort. This isn’t some complicated, authentic Korean restaurant recipe. It’s the weeknight version—the one that uses one pan and a few pantry staples and still manages to taste like you spent an hour in the kitchen.
If you’ve never made bibimbap at home because it looked too involved, trust me—this ground beef version is your way in. It’s forgiving, it’s fast, and it’s exactly the kind of dinner that makes you look forward to leftovers the next day.
Why You’ll Love This Recipe
Let me tell you why this ground beef bibimbap bowl has earned a permanent spot in my weekly rotation. It’s not just about the taste—though that’s obviously a big part of it. It’s about how easy it is to pull off without any stress.
- Quick & Easy: This whole bowl comes together in about 25 minutes. The beef cooks in one skillet while the rice steams, and you can prep the veggies while everything is going. Perfect for a busy weeknight when you want something homemade but don’t have an hour to spend.
- Simple Ingredients: Ground beef, rice, eggs, and a handful of veggies. You probably have most of this stuff in your kitchen right now. No hunting for obscure ingredients at a specialty store.
- Perfect for Meal Prep: Make a big batch of the beef and rice on Sunday, and you’ve got lunch or dinner ready to go in minutes. Just reheat and add a fresh egg on top.
- Crowd-Pleaser: I’ve served this to picky kids, skeptical parents, and friends who usually only want pizza. Every single person went back for seconds. There’s something about that sweet-savory beef and runny yolk that wins everyone over.
- Unbelievably Delicious: The beef gets coated in a sauce made from soy sauce, brown sugar, garlic, and a touch of sesame oil. It caramelizes in the pan, creating these little crispy bits that are absolutely addictive. Paired with the fresh veggies and that creamy yolk? It’s comfort food that feels surprisingly light.
What really makes this recipe different from other bibimbap versions is the ground beef itself. Instead of using thinly sliced beef that can get chewy or dry, ground beef stays juicy and absorbs all that savory-sweet sauce perfectly. Plus, it’s way more forgiving if you accidentally overcook it by a minute or two. This is the kind of bowl that makes you close your eyes after the first bite—not because it’s fancy, but because it’s just that satisfying.
What Ingredients You Will Need
This recipe relies on simple, everyday ingredients that come together to create something surprisingly complex. The beauty of this ground beef bibimbap bowl is that you can swap things in and out based on what you have, but here’s what I use for the best results.
For the Ground Beef
- 1 pound ground beef (80/20 is ideal—the fat keeps it juicy and adds flavor)
- 3 tablespoons soy sauce (I use low-sodium so I can control the saltiness)
- 2 tablespoons brown sugar (packed—this creates that glossy, caramelized coating)
- 3 cloves garlic, minced (fresh is best, but jarred minced garlic works in a pinch)
- 1 tablespoon sesame oil (this adds that signature nutty aroma; don’t skip it)
- 1 tablespoon gochujang (Korean chili paste) (adds mild heat and deep flavor; you can find it in the international aisle or online)
- 1 tablespoon vegetable oil (for cooking the beef)
- 2 green onions, sliced (for garnish and a fresh pop of flavor)
- 1 teaspoon sesame seeds (toasted, for that final touch)
For the Bowl Assembly
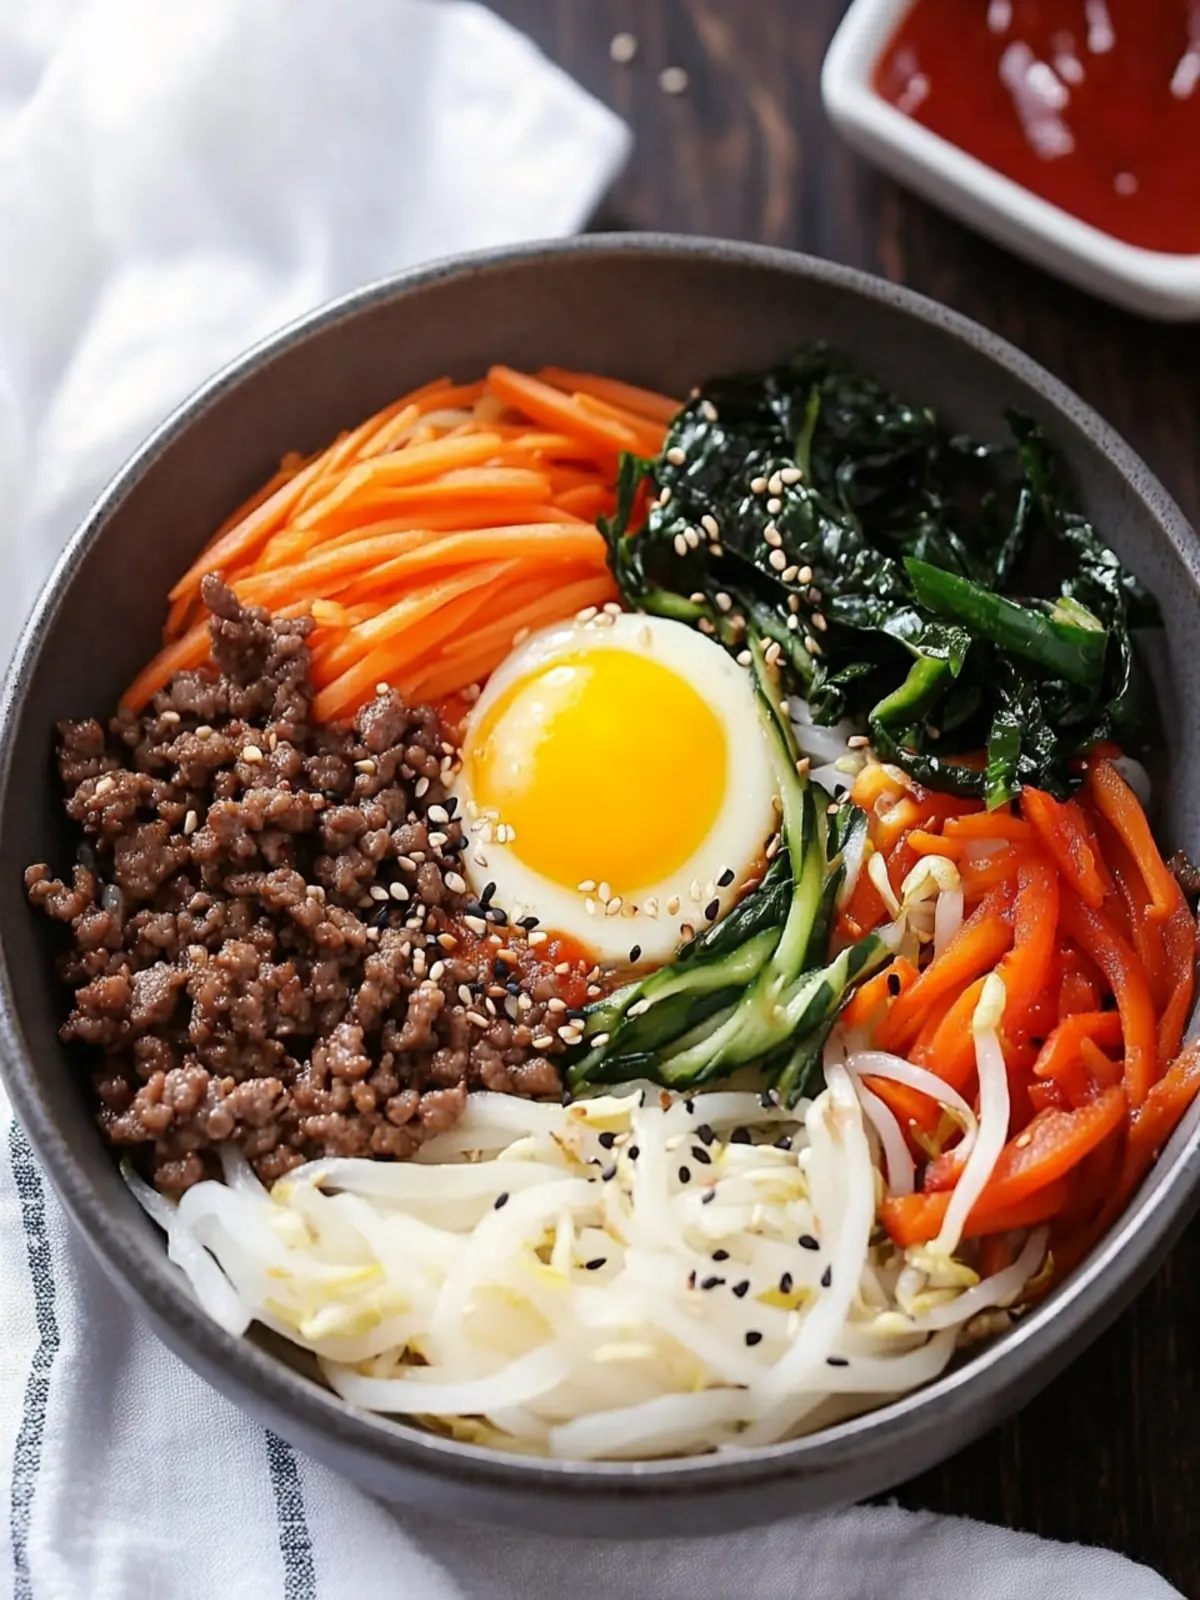
- 2 cups cooked white rice (short-grain or medium-grain is traditional, but jasmine or basmati work too)
- 4 large eggs (you’ll fry these sunny-side up so the yolk stays runny)
- 1 cup fresh spinach (you can sauté it quickly or leave it raw—both work)
- 1 medium carrot, julienned (thin matchsticks add nice crunch and color)
- 1 cup bean sprouts (blanched quickly or left raw for a fresh, crisp texture)
- 1 medium zucchini, sliced into half-moons (optional, but adds another layer of veggie goodness)
- Extra gochujang or sriracha (for serving, so everyone can adjust the heat)
I really recommend using a good quality gochujang—brands like Chung Jung One or Bibigo are widely available and have the right balance of sweet, savory, and spicy. If you can’t find gochujang, you can substitute with a mix of sriracha and a tiny bit of miso paste, but honestly, it’s worth tracking down the real thing. For the rice, day-old rice that’s been refrigerated works even better than fresh because it’s slightly drier and holds up better under all the toppings.
Equipment Needed
You don’t need any fancy gadgets for this one. Here’s what I use every time I make this ground beef bibimbap bowl:
- A large skillet or frying pan (non-stick works great for the beef, but cast iron gives you better caramelization)
- A small non-stick pan (for frying the eggs—makes cleanup easier)
- A medium pot (for cooking the rice, or you can use a rice cooker if you have one)
- A sharp knife and cutting board (for prepping the veggies and garlic)
- A wooden spoon or spatula (for breaking up the ground beef as it cooks)
- A small bowl (for mixing the sauce ingredients together before adding them to the pan)
If you don’t have a rice cooker, just cook your rice according to package directions—it’s really not complicated. And if you’re short on time, you can use frozen pre-cooked rice that you microwave. I’ve done it plenty of times, and while fresh rice is better, the frozen stuff works in a pinch. For the eggs, I’ve found that a well-seasoned cast iron skillet gives you the best crispy edges on the white while keeping the yolk perfectly runny. But a regular non-stick pan does the job just fine.
Preparation Method
Alright, let’s get cooking. This whole process moves pretty fast, so I like to have everything prepped and ready before I turn on the stove. Trust me on this one—it makes the whole thing way less stressful.
Step 1: Cook the Rice
Start by cooking your rice. If you’re using a rice cooker, just follow the instructions for 1 cup of dry rice (which makes about 2 cups cooked). If you’re cooking it on the stove, rinse 1 cup of rice in a fine-mesh strainer until the water runs clear, then add it to a pot with 1 ½ cups of water. Bring it to a boil, then reduce the heat to low, cover, and let it simmer for 15 minutes. Turn off the heat and let it sit, covered, for another 5 minutes. Fluff with a fork and set aside. This usually takes about 20 minutes total, so you can prep everything else while it cooks.
Step 2: Make the Sauce for the Beef
In a small bowl, whisk together the soy sauce, brown sugar, minced garlic, sesame oil, and gochujang. Stir until the brown sugar is mostly dissolved. It’ll look a little thick and sticky—that’s perfect. Set this aside for now. (If you’re using low-sodium soy sauce, you might want to add a tiny pinch of salt later, but taste first.)
Step 3: Cook the Ground Beef
Heat a large skillet over medium-high heat and add the vegetable oil. Once the oil is shimmering, add the ground beef. Break it up with a wooden spoon into small crumbles—I like mine fairly fine so every bite has some beef. Let it cook undisturbed for about 3-4 minutes so it gets a nice brown crust on one side. Then start stirring and breaking it up further. Cook for another 3-4 minutes until the beef is fully browned and no longer pink.
Now, pour the sauce mixture over the cooked beef. Stir everything together and let it simmer for about 2-3 minutes. The sauce will reduce and get thick and glossy, coating each little piece of beef. You’ll see it start to caramelize around the edges of the pan. That’s where all the flavor lives. Once the sauce is mostly absorbed and the beef looks sticky and shiny, remove the pan from the heat. Sprinkle the sliced green onions and sesame seeds over the top and give it a quick stir.
Step 4: Prep the Veggies
While the beef is cooking, you can prep the vegetables. For the spinach, you can either leave it raw (it wilts slightly from the heat of the bowl) or quickly sauté it in a tiny bit of sesame oil for about 30 seconds. For the carrots, just julienne them into thin matchsticks. If you’re using zucchini, slice it into thin half-moons. For the bean sprouts, I like to blanch them in boiling water for about 30 seconds, then drain and rinse with cold water to stop the cooking. But honestly, you can just leave them raw—they’re perfectly crunchy and fresh as is.
Step 5: Fry the Eggs
In a small non-stick pan, heat a tiny bit of vegetable oil over medium heat. Crack an egg into the pan and let it cook until the white is set but the yolk is still completely runny—about 2-3 minutes. You want the edges to be slightly crispy if possible. Don’t flip it. Repeat for the remaining eggs. I usually cook them one at a time so they don’t stick together, but if you have a big enough pan, you can do two at once.
Step 6: Assemble the Bowls
Divide the cooked rice evenly between four bowls. Top each bowl with a generous portion of the ground beef. Arrange the spinach, carrots, zucchini, and bean sprouts around the beef in little piles—it looks prettier that way, but honestly, you can just throw everything on top. Place a fried egg right in the center of each bowl. Serve with extra gochujang or sriracha on the side so everyone can add their own heat level.
When you’re ready to eat, break that yolk with your fork and mix everything together. The yolk creates this creamy, rich sauce that coats the rice and beef and veggies. It’s pure magic.
Cooking Tips & Techniques
I’ve made this ground beef bibimbap bowl probably twenty times by now, and I’ve learned a few things the hard way. Here are my best tips to make sure yours turns out perfect every time.
Don’t crowd the pan when cooking the beef. If you add too much meat at once, it’ll steam instead of sear. You want that deep brown crust on the beef, so give it space. If you’re doubling the recipe, cook the beef in two batches. I learned this the hard way when I ended up with gray, sad beef that had zero flavor. A good sear makes all the difference.
Let the sauce reduce properly. When you add the sauce to the cooked beef, don’t rush it. Let it simmer and bubble until it’s thick and sticky. You want it to coat the beef like a glaze, not be watery. If you take it off the heat too soon, the beef will be wet instead of caramelized. Trust your eyes—when you see those glossy, sticky bits forming, you’re there.
Use day-old rice if you can. Freshly cooked rice is great, but it can be a little too moist and sticky for bibimbap. Day-old rice that’s been refrigerated has a firmer texture that holds up better when you mix everything together. If you’re using fresh rice, spread it out on a plate and let it cool for 10 minutes before adding it to the bowls. This helps it firm up a bit.
Fry the eggs in the same pan as the beef. After you take the beef out, there’s usually a little bit of that delicious sauce left in the pan. If you fry your eggs right in that same pan (add a tiny bit more oil if needed), the edges of the egg get infused with that sweet-savory flavor. It’s a small step that adds a ton of extra taste.
Toast your sesame seeds. Raw sesame seeds are fine, but toasting them in a dry pan for about 30 seconds until they’re golden and fragrant makes them so much better. They add a nutty crunch that really elevates the whole bowl. Just watch them closely—they burn fast.
Variations & Adaptations
One of the best things about this ground beef bibimbap bowl is how easy it is to change up. Here are some of my favorite variations that I’ve tried over the months.
Vegetarian Version: Swap the ground beef for crumbled firm tofu or tempeh. Crumble it up and cook it the same way—the sauce works beautifully with both. You can also use a plant-based ground meat substitute if that’s your thing. Just cook it according to the package directions before adding the sauce.
Spicy Upgrade: If you like things hot, add an extra tablespoon of gochujang to the sauce, or stir in a teaspoon of gochugaru (Korean red pepper flakes) along with the garlic. You can also drizzle sriracha or chili oil over the finished bowl. I’ve done this on nights when I need a serious flavor kick.
Low-Carb Option: Skip the rice and serve the beef and veggies over a bed of cauliflower rice, shredded cabbage, or even mixed greens. The beef and egg are so flavorful that you honestly won’t miss the rice. I’ve made this version for lunch a bunch of times, and it’s just as satisfying.
Add More Veggies: This recipe is super flexible. Throw in some sautéed mushrooms, bell peppers, kimchi, or even leftover roasted vegetables. I’ve added zesty spicy Asian cucumber salad on the side before, and the crunch and tang paired perfectly with the rich beef and egg.
Swap the Protein: Ground chicken, turkey, or pork all work great in place of beef. The cooking time stays the same, and the sauce adapts to any protein. Ground pork, in particular, gets incredibly juicy and flavorful. I tried it once when I was out of beef, and it was honestly just as good.
Serving & Storage Suggestions
This ground beef bibimbap bowl is best served immediately while the rice is warm and the egg yolk is still runny. But if you have leftovers (which is rare in my house), here’s how to handle them.
Serving: Serve the bowls hot, with the egg placed right on top so everyone can break the yolk themselves. I like to set out extra gochujang, sriracha, and a little bowl of sesame seeds so people can customize their bowls. A side of Asian cucumber salad or some quick-pickled radishes makes a fantastic accompaniment—the acidity cuts through the richness of the beef and egg.
Storage: Store the cooked beef, rice, and veggies separately in airtight containers in the refrigerator. The beef will keep for up to 4 days, and the rice for about 3 days. The veggies are best eaten within 2 days. Don’t store the fried egg with everything else—it’ll get rubbery. Fry a fresh egg when you’re ready to eat the leftovers.
Reheating: Reheat the beef and rice separately. For the beef, a quick zap in the microwave (about 1-2 minutes) or a quick stir in a hot skillet works great. The rice can be microwaved with a damp paper towel over the top to add moisture back in. Once everything is hot, assemble your bowl and fry a fresh egg. The flavors actually get even better after a day or two in the fridge—the beef absorbs more of the sauce and becomes incredibly tender.
Freezing: You can freeze the cooked ground beef for up to 3 months. Just let it cool completely, then transfer it to a freezer-safe bag or container. Thaw it overnight in the fridge and reheat it in a skillet. I wouldn’t recommend freezing the rice or veggies—they’ll get mushy. But having that beef ready to go makes for an incredibly fast dinner.
Nutritional Information & Benefits
Here’s an approximate breakdown for one serving of this ground beef bibimbap bowl (based on 4 servings, using 80/20 ground beef and white rice):
- Calories: ~520-560
- Protein: ~32g
- Fat: ~22g
- Carbohydrates: ~48g
- Fiber: ~4g
- Sugar: ~12g
This bowl is a pretty balanced meal on its own. You’ve got protein from the beef and egg, carbs from the rice for energy, and a good amount of fiber and vitamins from the vegetables. The spinach adds iron and vitamin K, the carrots are packed with vitamin A, and the bean sprouts provide a nice dose of vitamin C. The egg yolk is a great source of choline, which is important for brain health. If you’re watching your sodium, use low-sodium soy sauce and go easy on the extra gochujang at the table. For a lighter version, swap the white rice for brown rice or cauliflower rice and use lean ground beef (93/7).
Conclusion
This ground beef bibimbap bowl has honestly become one of my most-made recipes. It started as a desperate fridge-clearing experiment, and now it’s the meal I turn to when I want something that feels special but doesn’t require a trip to the grocery store or an hour of prep. The beef gets perfectly caramelized and sticky, the runny egg ties everything together, and the fresh veggies keep it from feeling heavy. It’s the kind of bowl that makes you feel like you’re eating something from a restaurant, even when you’re in sweatpants on your couch.
I really hope you give this one a try. Don’t be afraid to play around with the veggies or the spice level—make it your own. And if you come up with a version you love, I’d honestly love to hear about it. Drop a comment below or tag me in your photos. This recipe is meant to be shared and adapted, and I’m always looking for new ideas. Until next time, happy cooking—and don’t forget to break that yolk.
Frequently Asked Questions
Can I use a different protein instead of ground beef?
Absolutely. Ground chicken, turkey, pork, or even crumbled tofu work great. Just adjust the cooking time slightly depending on the protein. Ground pork is my personal favorite alternative—it gets incredibly juicy.
Is gochujang very spicy?
Gochujang has a mild to medium heat level. It’s more savory and slightly sweet than it is fiery. If you’re sensitive to spice, start with half a tablespoon and taste as you go. You can always add more.
Can I make this recipe gluten-free?
Yes, easily. Use tamari or coconut aminos instead of soy sauce, and make sure your gochujang is labeled gluten-free (some brands contain wheat). Everything else in the recipe is naturally gluten-free.
How do I keep the egg yolk runny when reheating leftovers?
You can’t really reheat a fried egg and keep the yolk runny. The best approach is to store the beef, rice, and veggies separately, then fry a fresh egg when you’re ready to eat the leftovers. It takes just two minutes and makes a huge difference.
What can I serve with this bibimbap bowl?
This bowl is pretty complete on its own, but it pairs beautifully with a light, tangy side. I love serving it with zesty spicy Asian cucumber salad or some quick kimchi. A simple miso soup on the side is also a great choice for a cozy meal.
Pin This Recipe!
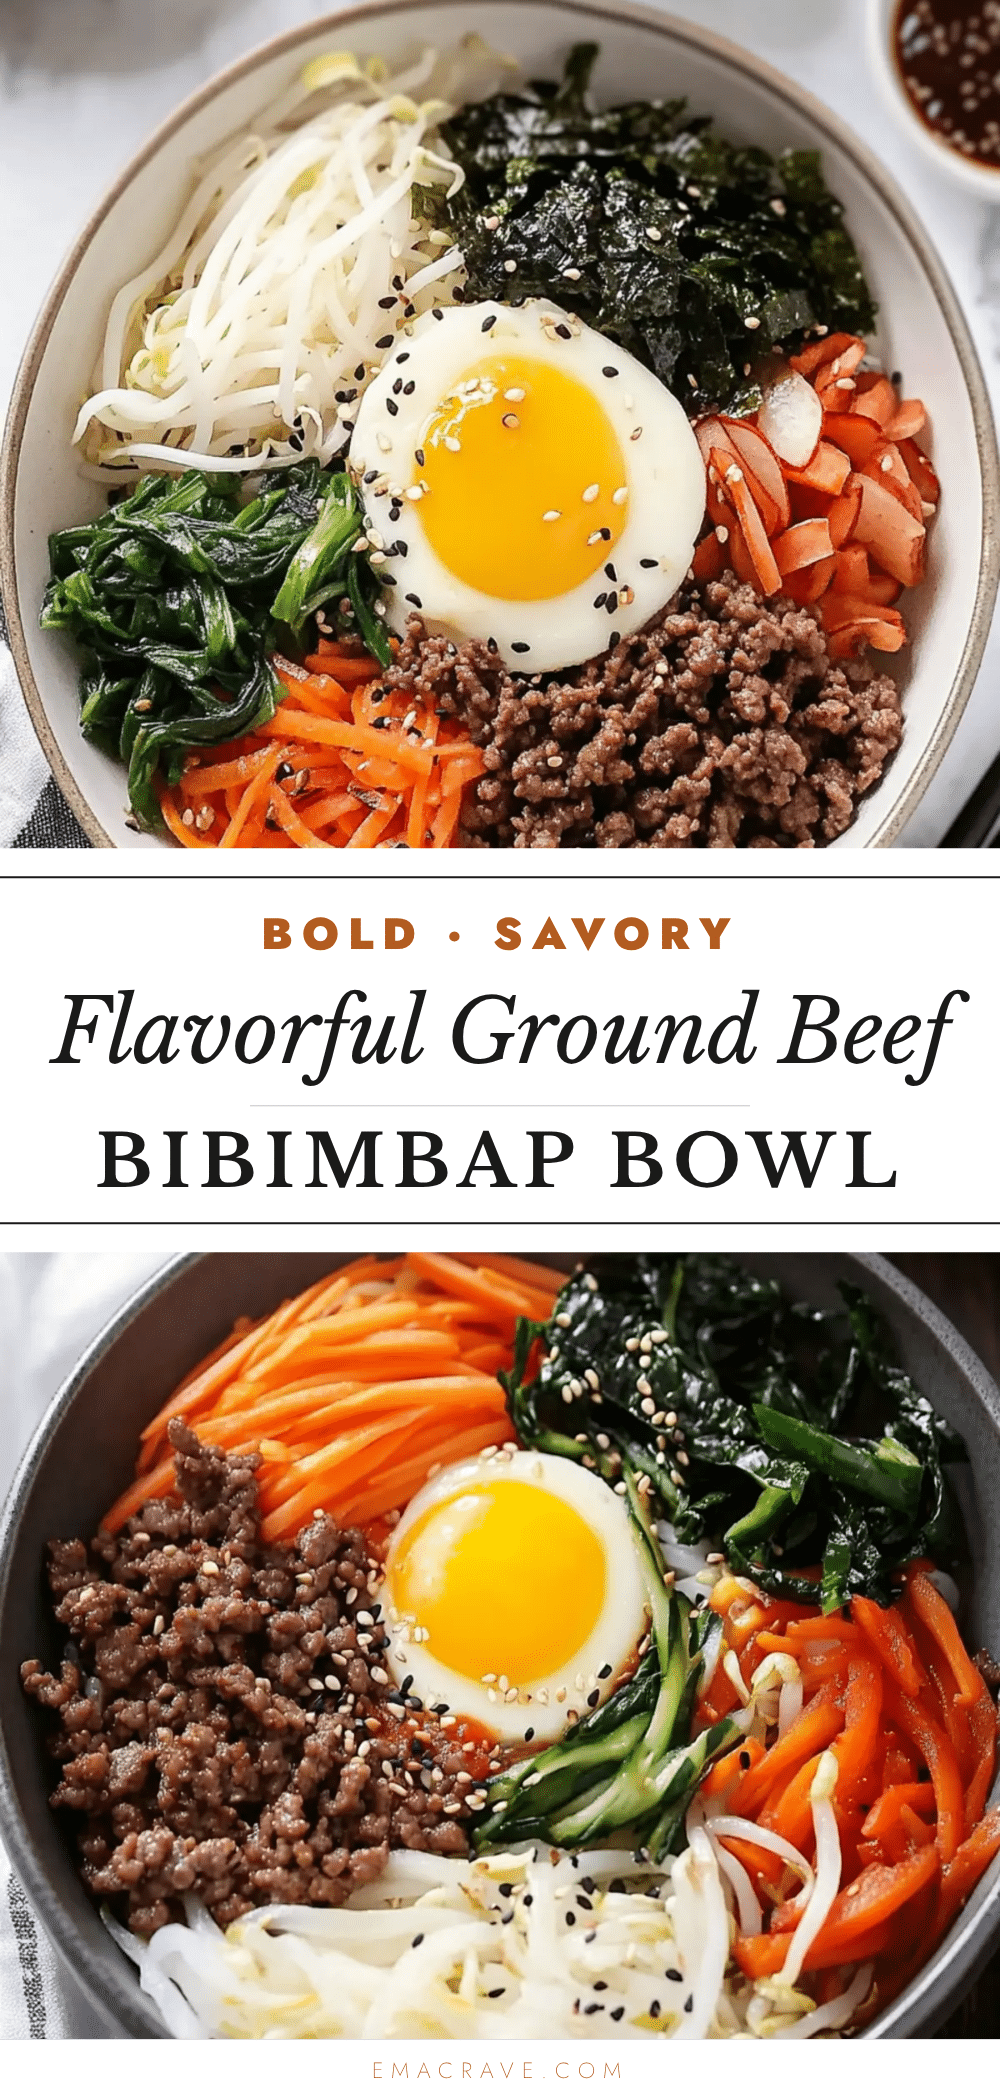
Best Easy Ground Beef Bibimbap Bowl Recipe
This quick and easy ground beef bibimbap bowl comes together in about 25 minutes with simple ingredients. The savory-sweet beef, fresh veggies, and runny egg yolk create a satisfying, restaurant-quality meal perfect for busy weeknights.
- Prep Time: 10 minutes
- Cook Time: 15 minutes
- Total Time: 25 minutes
- Yield: 4 servings 1x
- Category: Main Course
- Cuisine: Korean
Ingredients
- 1 pound ground beef (80/20)
- 3 tablespoons low-sodium soy sauce
- 2 tablespoons packed brown sugar
- 3 cloves garlic, minced
- 1 tablespoon sesame oil
- 1 tablespoon gochujang (Korean chili paste)
- 1 tablespoon vegetable oil
- 2 green onions, sliced
- 1 teaspoon toasted sesame seeds
- 2 cups cooked white rice (short-grain or medium-grain)
- 4 large eggs
- 1 cup fresh spinach
- 1 medium carrot, julienned
- 1 cup bean sprouts
- 1 medium zucchini, sliced into half-moons (optional)
- Extra gochujang or sriracha for serving
Instructions
- Cook the rice: Rinse 1 cup dry rice, add to a pot with 1 1/2 cups water, bring to a boil, reduce heat to low, cover, and simmer for 15 minutes. Remove from heat and let sit covered for 5 minutes. Fluff with a fork.
- Make the sauce: In a small bowl, whisk together soy sauce, brown sugar, minced garlic, sesame oil, and gochujang until sugar is mostly dissolved.
- Cook the beef: Heat a large skillet over medium-high heat with vegetable oil. Add ground beef, breaking it into small crumbles. Cook undisturbed for 3-4 minutes to brown, then stir and cook another 3-4 minutes until fully browned. Pour sauce over beef, stir, and simmer 2-3 minutes until thick and glossy. Remove from heat and stir in green onions and sesame seeds.
- Prep the veggies: Leave spinach raw or quickly sauté in sesame oil. Julienne carrot into thin matchsticks. Slice zucchini into half-moons. Blanch bean sprouts in boiling water for 30 seconds, then drain and rinse with cold water (or leave raw).
- Fry the eggs: In a small non-stick pan with a bit of vegetable oil over medium heat, fry eggs sunny-side up until whites are set but yolks are runny, about 2-3 minutes. Do not flip.
- Assemble the bowls: Divide cooked rice among 4 bowls. Top each with ground beef, then arrange spinach, carrots, zucchini, and bean sprouts around the beef. Place a fried egg in the center. Serve with extra gochujang or sriracha.
Notes
Use day-old rice for best texture. For extra flavor, fry eggs in the same pan used for beef. Toast sesame seeds in a dry pan for 30 seconds until fragrant. Store beef, rice, and veggies separately; fry fresh egg when reheating.
Nutrition
- Serving Size: 1 bowl
- Calories: 540
- Sugar: 12
- Sodium: 800
- Fat: 22
- Saturated Fat: 8
- Carbohydrates: 48
- Fiber: 4
- Protein: 32
Keywords: bibimbap, ground beef bibimbap, easy bibimbap, Korean bowl, weeknight dinner, ground beef recipe, Korean recipe



