Love this? Save it for later!
Share the inspiration with your friends
“You really need to try these Danish carnival buns,” my coworker said, sliding a box across the breakroom table at precisely 3 p.m. I eyed the golden, pillowy pastries with skepticism — I’m not usually one to fall for flashy bakery treats, especially those with elaborate fillings. But the moment I took a bite, the creamy cheesecake surprise inside had me hooked. Honestly, it was one of those rare moments when a recipe just clicks without much fuss.
The carnival buns, or “fastelavnsboller” as they’re called in Denmark, aren’t just any sweet roll. They have this delicate balance of fluffy dough and a luscious cheesecake filling that somehow feels both indulgent and comforting. I ended up making them three times that week — surprising my family, my friends, even the neighbor who stopped by unannounced. It’s funny how something so simple can turn into a favorite overnight.
What’s really neat about this recipe is how it carries that cozy, celebratory vibe without needing hours in the kitchen. The scent of butter and vanilla wafting through the house feels like a quiet invitation to slow down, savor a moment, and enjoy a little treat with good company. I think that’s why these buns stuck with me — they’re a reminder that comfort and joy don’t have to be complicated.
Why You’ll Love This Recipe
After trying plenty of carnival buns recipes, this one stands out for several reasons. I’ve tested it multiple times, tweaking the dough to get that perfect softness and playing around with the cheesecake filling for creaminess that melts in your mouth. Here’s why this recipe will likely become your go-to:
- Quick & Easy: You can have these buns ready in about 90 minutes, making them perfect for spontaneous bake sessions or last-minute brunch plans.
- Simple Ingredients: No need for specialty shopping trips — just pantry staples and basic dairy products are all you need.
- Perfect for Celebrations: Whether it’s a carnival, a casual coffee date, or a cozy weekend breakfast, these buns bring a touch of festive sweetness.
- Crowd-Pleaser: Kids and adults alike go crazy for the creamy cheesecake surprise tucked inside each soft bun.
- Unbelievably Delicious: The combination of tender, buttery dough and rich, tangy cheesecake filling is a total flavor win.
This recipe isn’t just another cinnamon roll or sweet bun. The secret lies in blending cream cheese with just enough sugar and vanilla to create that creamy cheesecake center, baked inside a tender dough that’s lightly sweetened and pillowy soft. Plus, a dusting of powdered sugar on top adds a subtle elegance without stealing the spotlight.
For a twist, I’ve sometimes swapped the classic cream cheese for a mix of ricotta and mascarpone — a little something I picked up while making cozy apple cider cheesecake last fall. It makes the filling just a touch silkier. Honestly, this recipe brings that kind of joyful comfort food feeling that makes you close your eyes after the first bite, savoring the moment.
What Ingredients You Will Need
This recipe uses simple, wholesome ingredients to deliver a soft, flavorful bun with a creamy cheesecake center. Most of these are common staples, so you likely have many on hand already.
- For the Dough:
- All-purpose flour — 3 ½ cups (440g), sifted for lightness
- Granulated sugar — ½ cup (100g), for just the right sweetness
- Unsalted butter — 6 tablespoons (85g), softened (I prefer Plugrá for its rich flavor)
- Milk — 1 cup (240ml), warmed to about 110°F (43°C) to activate yeast
- Active dry yeast — 2 ¼ teaspoons (one packet)
- Large eggs — 2, room temperature (adds richness and structure)
- Salt — ½ teaspoon, to balance sweetness
- For the Cheesecake Filling:
- Cream cheese — 8 ounces (225g), softened (I recommend Philadelphia for smooth texture)
- Powdered sugar — ⅓ cup (40g), sifted
- Vanilla extract — 1 teaspoon (pure, if possible)
- Large egg yolk — 1 (helps with the creamy texture)
- For the Topping:
- Powdered sugar, for dusting
- Optional: Sliced almonds or pearl sugar for extra crunch
If you want a dairy-free version, swap the butter for a plant-based spread and use coconut or almond milk. For a gluten-free option, you could try a blend of gluten-free all-purpose flour, but note that the texture will be slightly different.
Equipment Needed
- Large mixing bowl (for dough preparation)
- Measuring cups and spoons (precision matters here!)
- Stand mixer with dough hook attachment or a sturdy wooden spoon for hand mixing
- Small bowl for mixing cheesecake filling
- Baking sheet lined with parchment paper or a silicone mat
- Kitchen towel or plastic wrap to cover dough while rising
- Rolling pin (optional — you can shape the buns by hand)
- Cooling rack (to let the buns breathe after baking)
If you don’t have a stand mixer, don’t sweat it — I often make this dough by hand with a big wooden spoon and some elbow grease. Just be patient when kneading to develop that perfect softness. For those on a budget, silicone baking mats are a great investment since they’re reusable and keep buns from sticking.
Preparation Method
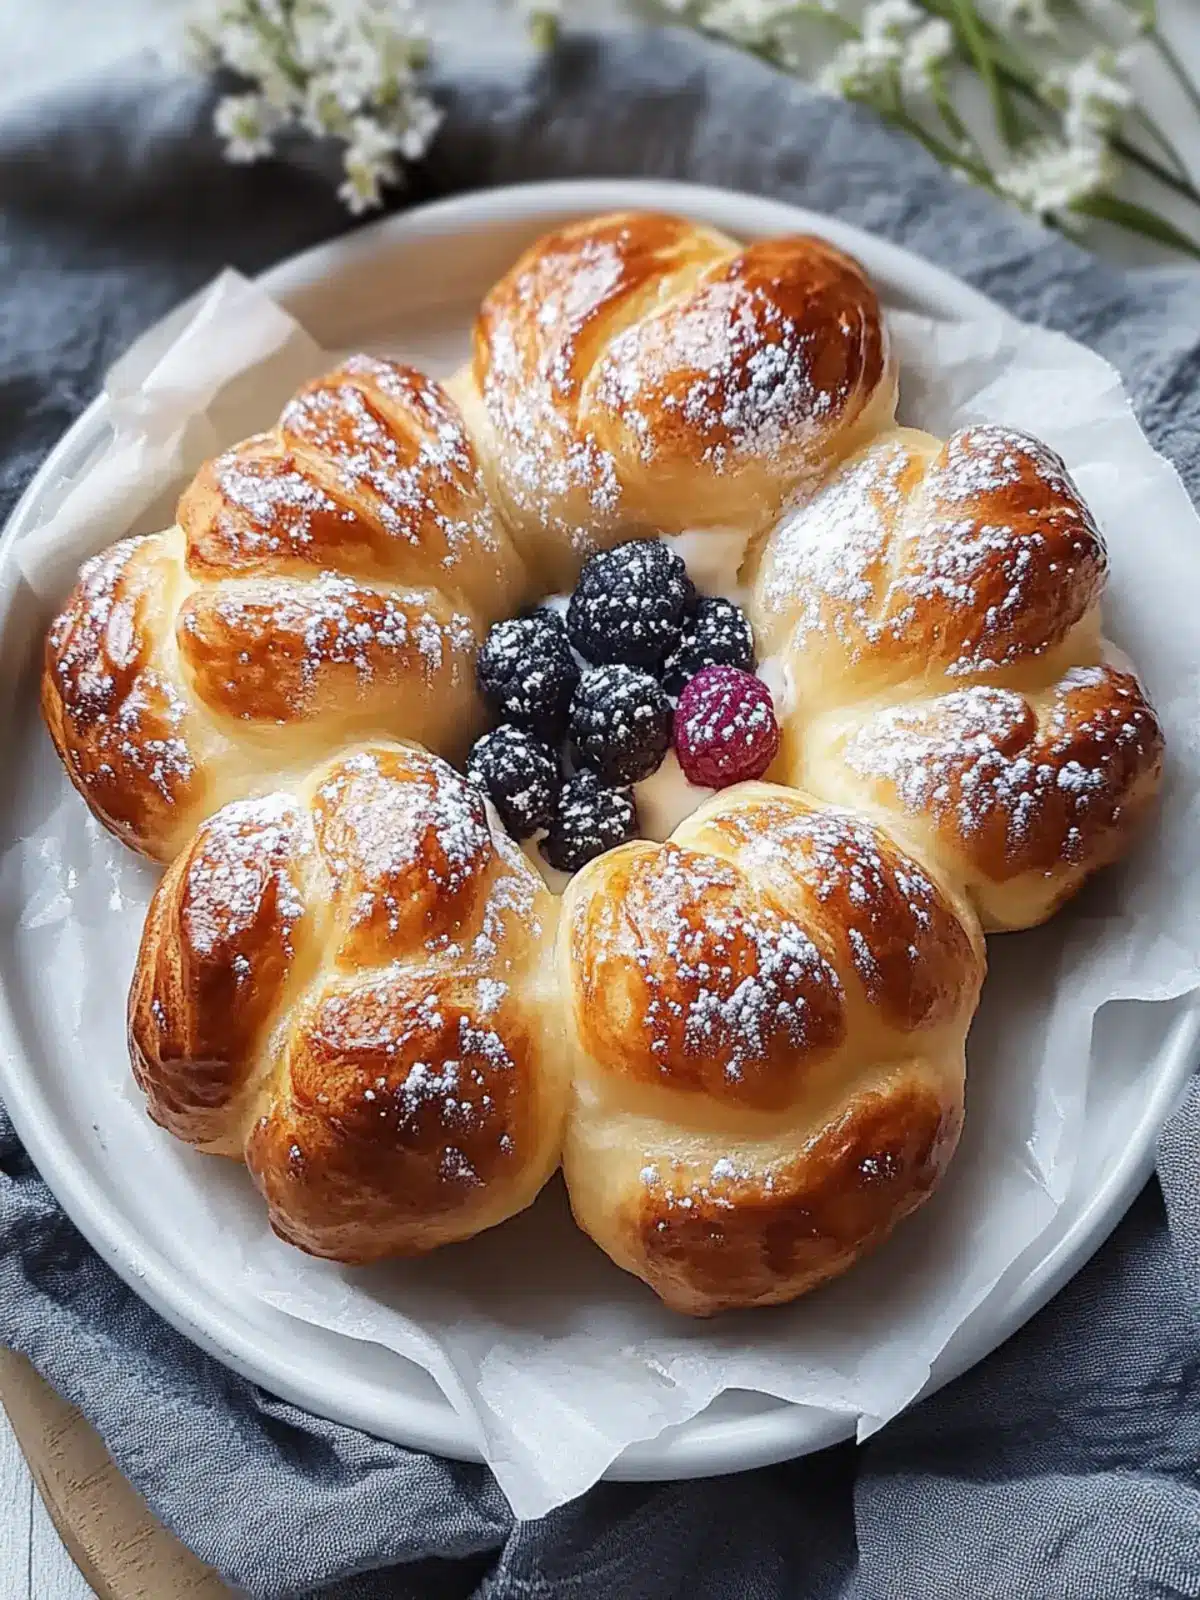
- Activate the yeast: Warm the milk to about 110°F (43°C). Pour into a small bowl, sprinkle the yeast and a pinch of sugar on top. Let it sit for 5-7 minutes until foamy and bubbly — if it doesn’t foam, your yeast might be old, so swap it out.
- Make the dough: In a large bowl or stand mixer, combine the flour, sugar, and salt. Add softened butter, eggs, and the activated yeast mixture. Mix on low speed with a dough hook for about 8-10 minutes, or knead by hand on a floured surface for around 12 minutes. The dough should be soft, slightly tacky but not sticky.
- First rise: Shape the dough into a ball and place it in a lightly greased bowl. Cover with a kitchen towel or plastic wrap and let it rise in a warm spot for about 1 hour, or until doubled in size.
- Prepare cheesecake filling: While dough rises, beat cream cheese, powdered sugar, vanilla extract, and egg yolk together in a small bowl until smooth and creamy. Set aside.
- Shape the buns: Once risen, punch down the dough gently. Divide into 12 equal pieces (about 70g or 2.5 oz each). Flatten each piece into a round disk, place about a tablespoon of cheesecake filling in the center, and fold dough edges over to seal. Shape gently into balls.
- Second rise: Place buns on parchment-lined baking sheet, spaced at least 2 inches apart. Cover loosely and let rise another 30-40 minutes until puffy.
- Bake: Preheat oven to 350°F (175°C). Bake buns for 18-22 minutes or until golden brown on top. Keep an eye to avoid overbaking — you want them soft, not dry.
- Cool and finish: Transfer buns to a cooling rack. Once cool, dust generously with powdered sugar. Optionally, sprinkle sliced almonds or pearl sugar on top before baking for texture.
If the filling oozes out a bit during baking, no worries — it just adds a rustic charm and extra cheesecake goodness around the buns. For a prettier finish, I sometimes brush the buns with melted butter right out of the oven.
Cooking Tips & Techniques
Making these carnival buns can feel a bit tricky if it’s your first time working with enriched dough, but here are a few tips from my kitchen trials:
- Don’t rush the yeast: Let it bloom fully in warm milk. Too hot, and it dies; too cold, and it won’t activate well.
- Kneading is key: The dough should be soft but elastic. Under-kneading leads to dense buns, while over-kneading can make dough tough. If kneading by hand, test elasticity by gently stretching — it should hold without tearing.
- Keep the filling chilled: If your cream cheese mixture gets too warm, it can melt and leak during baking. Keep it cool in the fridge until ready to use.
- Don’t overfill: A tablespoon of filling per bun is perfect. Overfilling risks bursting and a messier bake.
- Watch your oven temp: Ovens vary, so start checking buns around 18 minutes to avoid dryness. They should be golden but still soft.
- Second rise matters: This makes the buns airy and light. If you skip it, they’ll be dense.
I remember the first time I tried skipping the second rise, and those buns were heavy and kind of sad — lesson learned! Also, multitasking while the dough rises (maybe whipping up a quick side like this savory garlic mushroom rice pilaf) helps the time fly by.
Variations & Adaptations
One of the joys of Danish carnival buns is their versatility. Here are some ways I’ve played around with the recipe:
- Fruit-filled: Swap the cheesecake filling for a mix of raspberry jam and cream cheese for a tart-sweet surprise.
- Spiced dough: Add a teaspoon of ground cardamom or cinnamon to the dough for that classic Nordic flavor twist.
- Vegan version: Use a vegan cream cheese alternative and plant-based milk and butter substitutes for a dairy-free treat.
- Gluten-free: Substitute with a 1:1 gluten-free flour blend, though texture will be less fluffy and more crumbly.
- Nutty topping: Before baking, brush buns with egg wash and sprinkle chopped toasted hazelnuts or sliced almonds for crunch.
My personal favorite is adding a handful of fresh blueberries to the cheesecake filling, bringing a juicy burst that pairs beautifully with the creamy center — a trick I borrowed from experimenting with creamy Nutella macarons. It’s like a mini fruit-cheesecake party in each bun.
Serving & Storage Suggestions
These Danish carnival buns are best enjoyed fresh and slightly warm. I like to let them sit for 10 minutes after baking, just enough to cool but still cozy. They go wonderfully with a cup of strong coffee or a lightly brewed tea.
If you want to serve them at a brunch or party, arrange the buns on a pretty platter dusted with extra powdered sugar, maybe alongside some fresh berries or a simple fruit salad for color contrast.
For storage, keep buns in an airtight container at room temperature for up to 2 days. They lose their softness quickly if left uncovered. For longer storage, freeze fully cooled buns in a zip-top freezer bag for up to 3 months. Thaw overnight in the fridge, then warm gently in a 300°F (150°C) oven for 5-7 minutes to bring back that fresh-baked feel.
Flavors actually mellow and deepen after a day, so if you can wait, they taste surprisingly better the next morning. Just a heads-up — the cheesecake filling may firm up when chilled, so warming before eating helps with that creamy texture.
Nutritional Information & Benefits
Each bun provides roughly 300-350 calories, depending on size and filling amount. The core ingredients — flour, butter, and cream cheese — deliver a satisfying mix of carbohydrates and fats, with moderate protein from eggs and dairy.
Cream cheese brings a good source of calcium and vitamin A, while using real butter adds fat-soluble vitamins. Opting for whole milk increases richness but can be swapped for lower-fat milk if preferred.
This recipe isn’t low-calorie by any means, but it’s a wonderful occasional treat that feels indulgent without going overboard. For those watching gluten, swapping to gluten-free flour blends makes it accessible, and dairy-free alternatives open it up for lactose-sensitive eaters.
From a wellness perspective, I love that these buns combine comfort with quality ingredients — no strange preservatives or artificial flavors, just real food you can pronounce, much like the wholesome approach in recipes like the healthy vibrant beetroot pasta sauce.
Conclusion
These Danish carnival buns with creamy cheesecake surprise aren’t just a sweet treat — they’re a little celebration wrapped in dough. Whether you’re baking for a special occasion or just because the mood strikes, this recipe is approachable, satisfying, and full of delightful textures and flavors.
Feel free to tweak the filling or spices to suit your tastes — that’s part of the fun in baking. I still remember the first time I made these for a friend’s brunch, and how everyone kept asking for the recipe afterward. That kind of reaction makes the hands-on effort totally worth it.
Give these buns a try, and you might find yourself making them more often than you expect. I’d love to hear about your variations or any tweaks you come up with, so drop a comment below and share your experience. Happy baking — may your kitchen smell of vanilla and warm butter for many mornings to come!
FAQs
Can I make the dough ahead of time and refrigerate it?
Yes! After the first rise, punch down the dough, cover tightly, and refrigerate for up to 24 hours. Let it come to room temperature and rise again before shaping.
What if my cheesecake filling leaks during baking?
That can happen if the filling is too warm or overfilled. Keep filling chilled until use and use about a tablespoon per bun to prevent leaks.
Can I freeze these Danish carnival buns?
Absolutely. Freeze fully cooled buns in an airtight bag for up to 3 months. Thaw overnight in the fridge and warm in a low oven before serving.
Is there a vegan version of this recipe?
Yes, using vegan cream cheese, plant-based milk, and butter alternatives works well. You may need to adjust rising times slightly.
Can I substitute the cream cheese filling with other flavors?
Definitely! Fruit jams, almond paste, or even Nutella make delicious fillings. Just keep the quantity similar to avoid soggy buns.
Pin This Recipe!
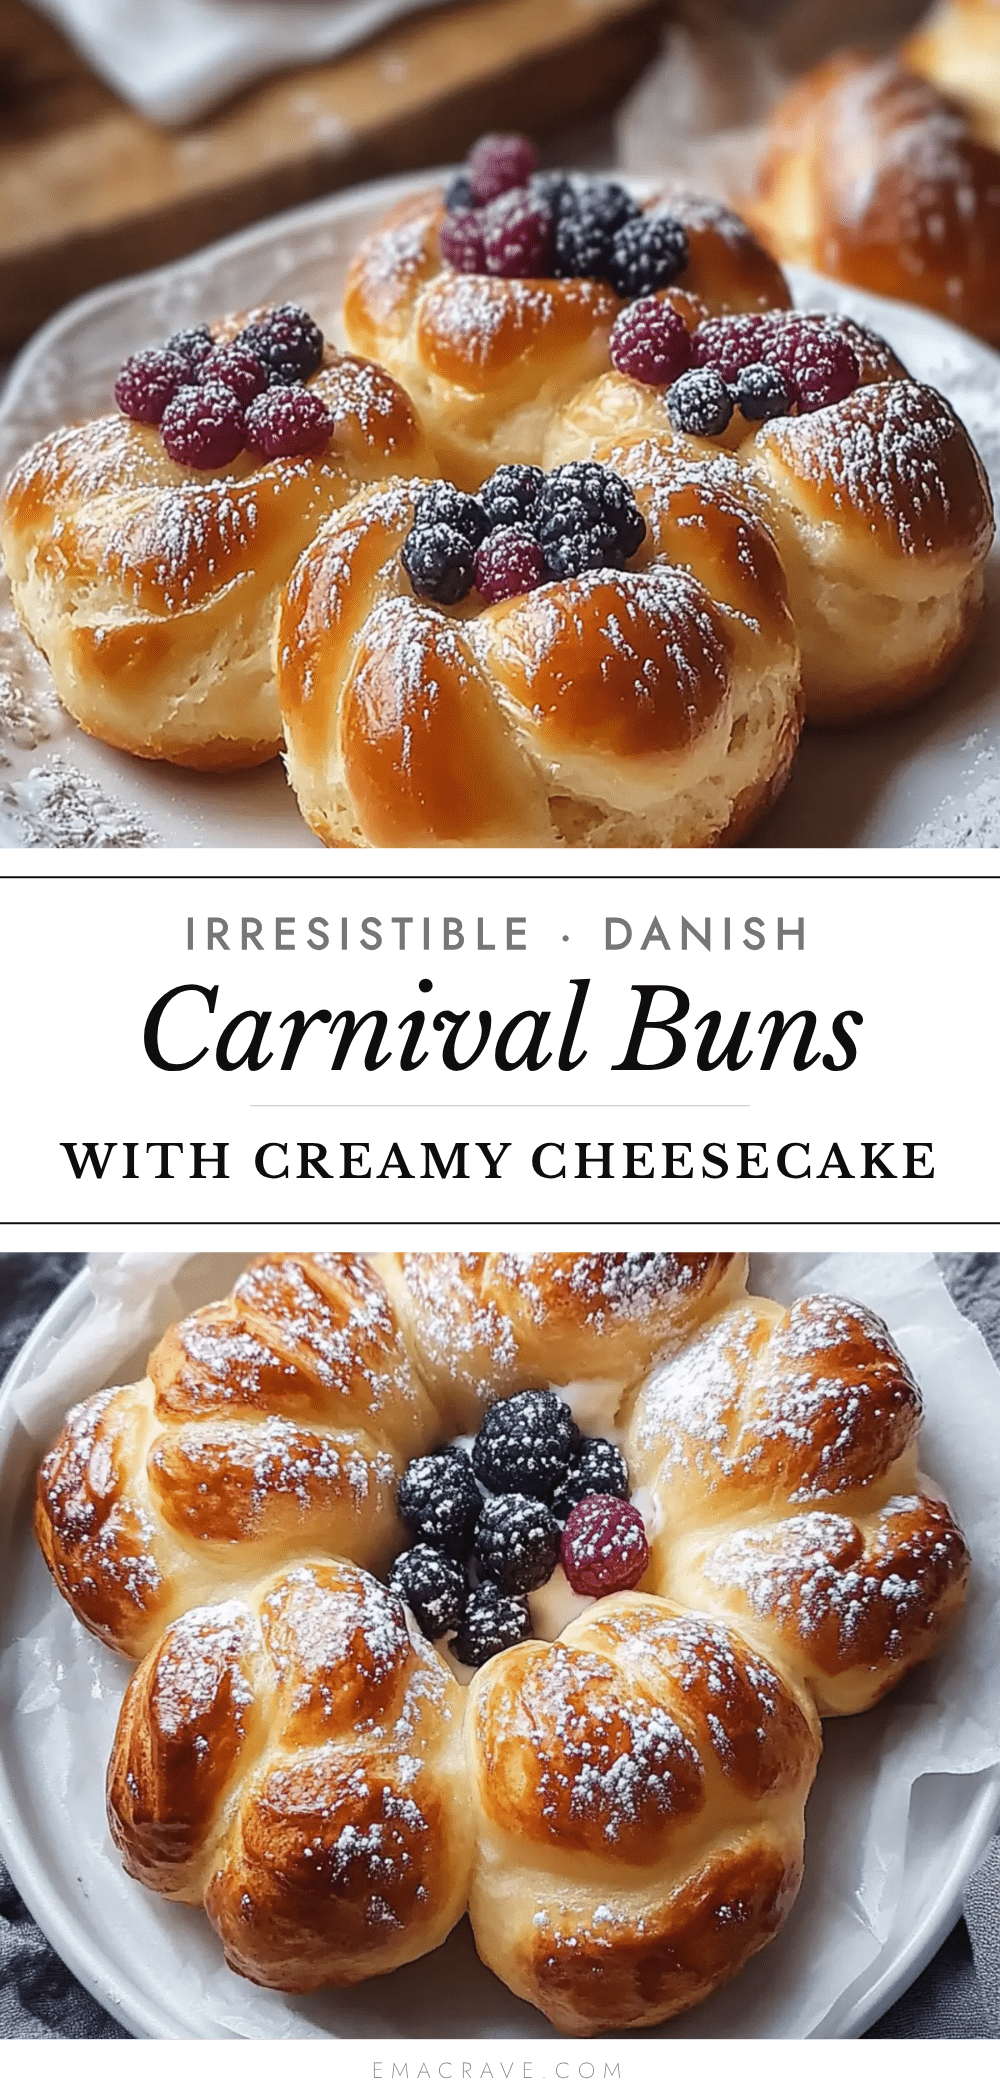
Delicious Danish Carnival Buns Recipe with Creamy Cheesecake Surprise
These Danish carnival buns, or fastelavnsboller, feature a fluffy dough with a luscious creamy cheesecake filling, perfect for celebrations or cozy breakfasts. They are quick and easy to make with simple pantry ingredients.
- Prep Time: 20 minutes
- Cook Time: 20 minutes
- Total Time: 1 hour 50 minutes
- Yield: 12 buns 1x
- Category: Dessert
- Cuisine: Danish
Ingredients
- 3 ½ cups all-purpose flour (440g), sifted
- ½ cup granulated sugar (100g)
- 6 tablespoons unsalted butter (85g), softened
- 1 cup milk (240ml), warmed to about 110°F (43°C)
- 2 ¼ teaspoons active dry yeast (one packet)
- 2 large eggs, room temperature
- ½ teaspoon salt
- 8 ounces cream cheese (225g), softened
- ⅓ cup powdered sugar (40g), sifted
- 1 teaspoon vanilla extract
- 1 large egg yolk
- Powdered sugar, for dusting
- Optional: sliced almonds or pearl sugar for topping
Instructions
- Activate the yeast: Warm the milk to about 110°F (43°C). Pour into a small bowl, sprinkle the yeast and a pinch of sugar on top. Let it sit for 5-7 minutes until foamy and bubbly.
- Make the dough: In a large bowl or stand mixer, combine the flour, sugar, and salt. Add softened butter, eggs, and the activated yeast mixture. Mix on low speed with a dough hook for about 8-10 minutes, or knead by hand on a floured surface for around 12 minutes until dough is soft and slightly tacky but not sticky.
- First rise: Shape the dough into a ball and place it in a lightly greased bowl. Cover with a kitchen towel or plastic wrap and let it rise in a warm spot for about 1 hour, or until doubled in size.
- Prepare cheesecake filling: Beat cream cheese, powdered sugar, vanilla extract, and egg yolk together in a small bowl until smooth and creamy. Set aside.
- Shape the buns: Punch down the risen dough. Divide into 12 equal pieces (about 2.5 oz or 70g each). Flatten each piece into a round disk, place about a tablespoon of cheesecake filling in the center, and fold dough edges over to seal. Shape gently into balls.
- Second rise: Place buns on a parchment-lined baking sheet, spaced at least 2 inches apart. Cover loosely and let rise another 30-40 minutes until puffy.
- Bake: Preheat oven to 350°F (175°C). Bake buns for 18-22 minutes or until golden brown on top.
- Cool and finish: Transfer buns to a cooling rack. Once cool, dust generously with powdered sugar. Optionally, sprinkle sliced almonds or pearl sugar on top before baking for extra texture.
Notes
Keep the cream cheese filling chilled until use to prevent leaking during baking. Use about a tablespoon of filling per bun to avoid overfilling. Watch oven temperature closely to avoid drying out the buns. The second rise is important for light, airy buns. For a prettier finish, brush buns with melted butter right after baking.
Nutrition
- Serving Size: 1 bun
- Calories: 325
- Sugar: 12
- Sodium: 180
- Fat: 15
- Saturated Fat: 9
- Carbohydrates: 38
- Fiber: 1
- Protein: 6
Keywords: Danish carnival buns, fastelavnsboller, cheesecake buns, sweet rolls, creamy filling, bakery treats, festive pastries



