Love this? Save it for later!
Share the inspiration with your friends
“Are you sure this is just a quick throw-together?” my friend asked, eyes wide as she took a bite of these Decadent Brownie Cheesecake Bars. Honestly, I was skeptical at first too. It started on a chaotic Saturday afternoon when I was juggling too many things and realized I forgot to bring dessert for a last-minute get-together. I grabbed a few pantry staples with zero high hopes and decided to combine them in a way that felt a little indulgent yet manageable.
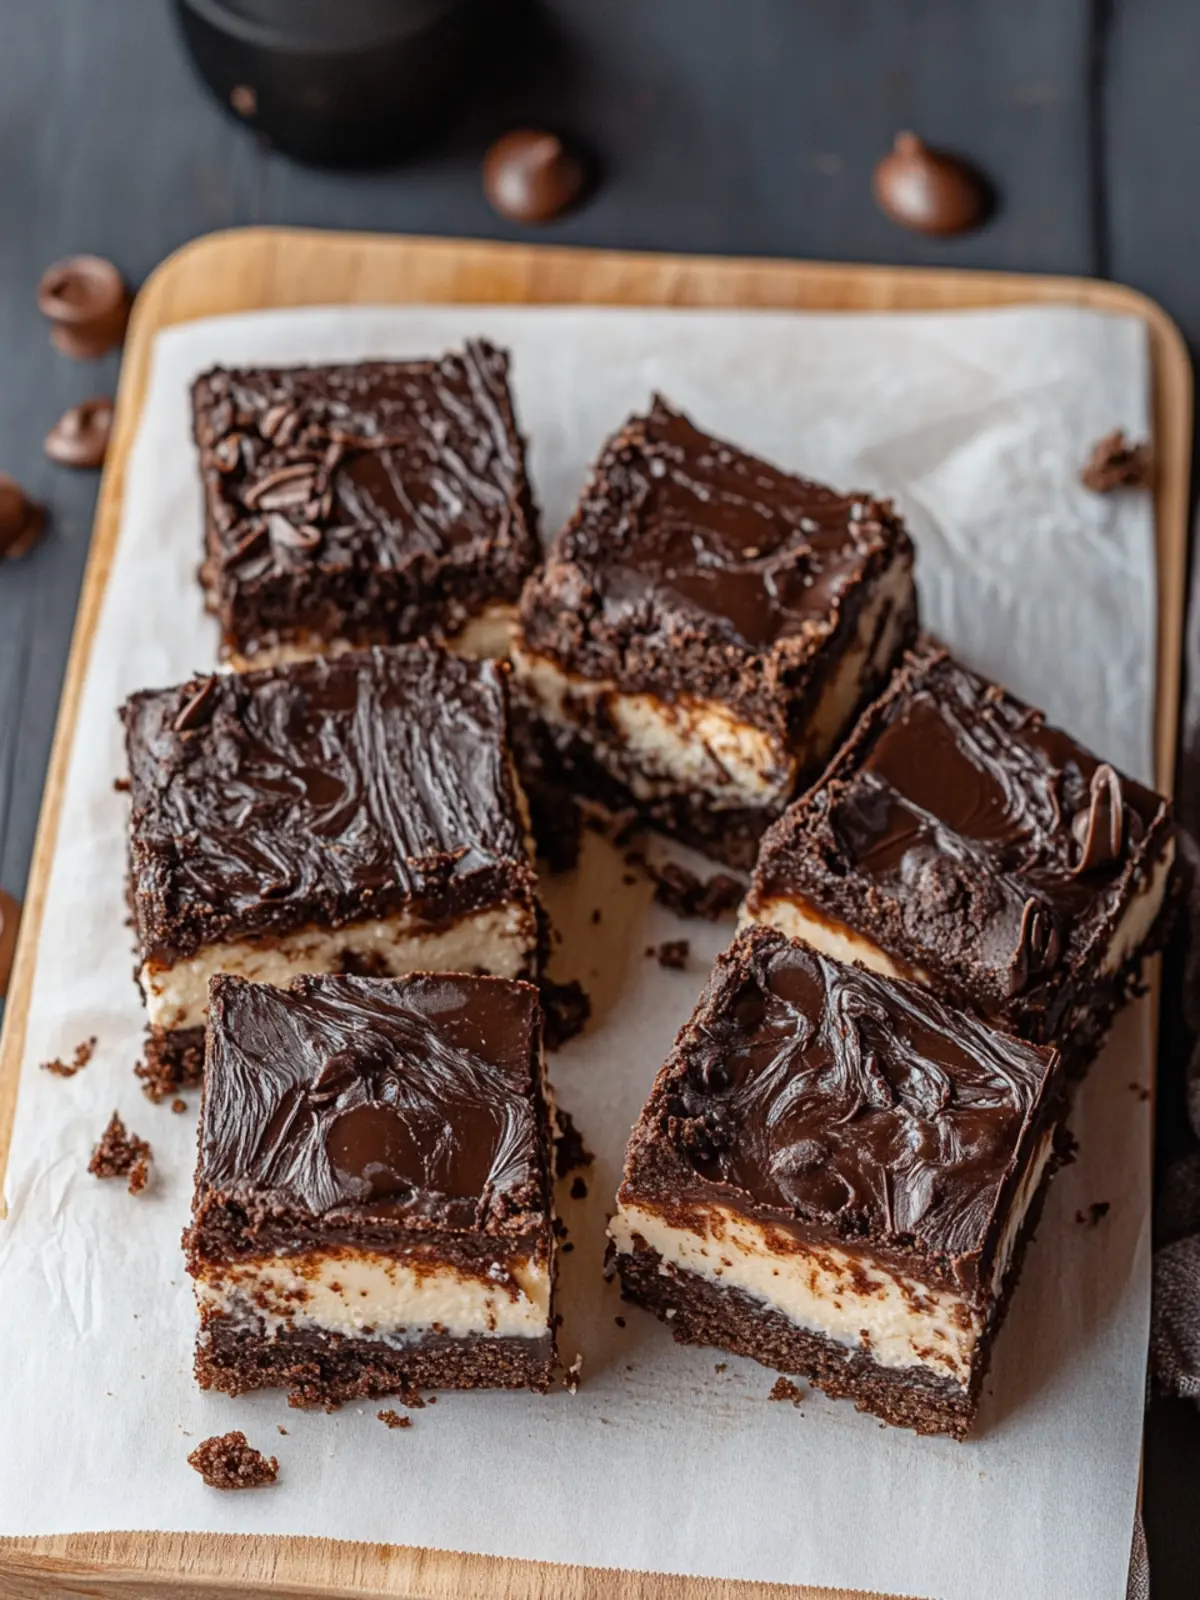
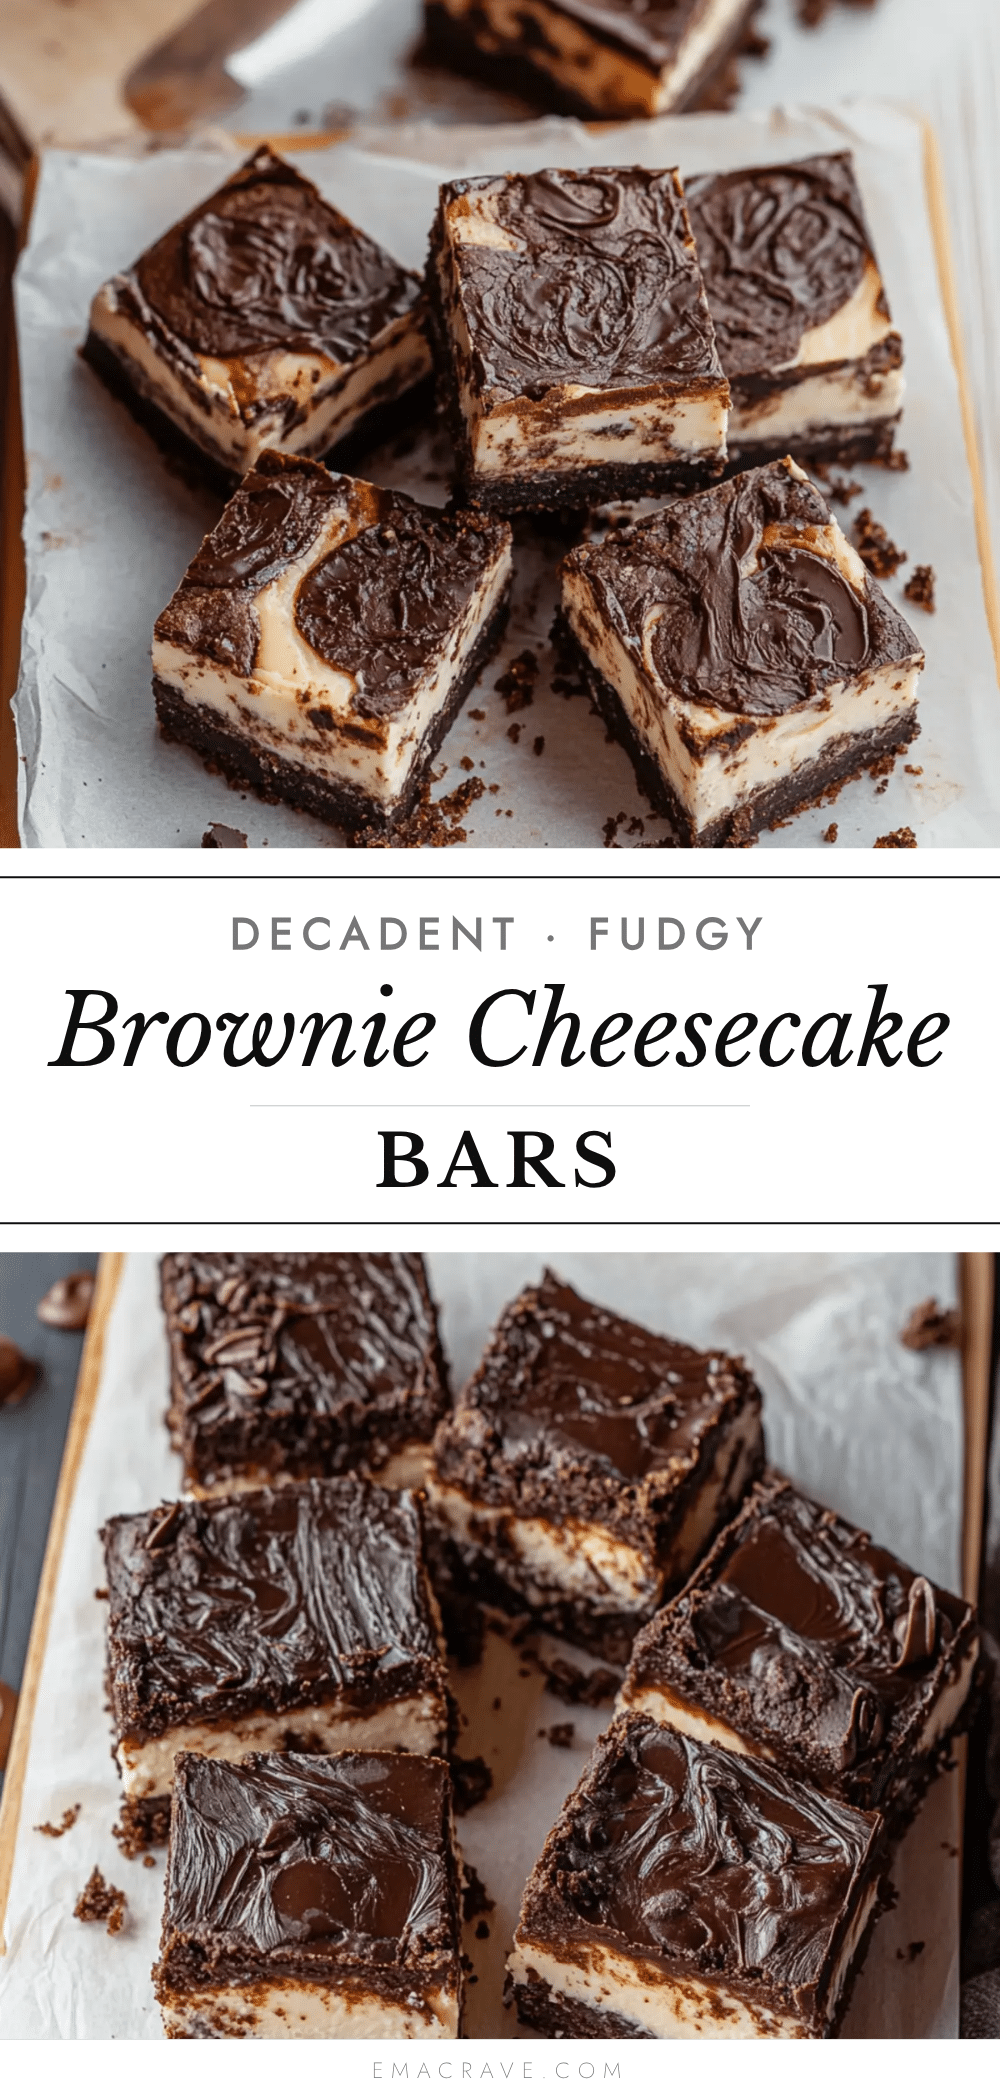
The rich, fudgy brownie base paired with the creamy cheesecake layer turned out to be a total game-changer. The swirls formed by folding the two layers created this mesmerizing marbled look that somehow made the bars feel special enough to wow guests without requiring a fancy technique. The smell alone—the warm chocolate mingling with tangy cream cheese—had everyone hovering near the kitchen counter before the plates even arrived.
Since that day, these bars have become my go-to crowd-pleaser, appearing at potlucks, casual dinners, and even when I want a little treat for myself. They’re deceptively simple but deliver that kind of comforting richness you might expect from a bakery but with none of the fuss. The best part? You don’t have to wait for a special occasion to make them because they’re worth it anytime.
It’s funny how sometimes the most unplanned recipes become the favorites. This one stuck with me because it’s just the right balance between brownie and cheesecake—no one layer overpowering the other—and because it’s impossible to stop at one. Let’s just say, these brownie cheesecake bars quietly took over my dessert rotation, and I’m not mad about it.
Why You’ll Love This Recipe
Coming from someone who’s made countless desserts over the years, these Decadent Brownie Cheesecake Bars stand out for a bunch of reasons. I’ve tested and tweaked this recipe multiple times to get the texture and flavor spot on, and I can tell you, it’s solid every single time.
- Quick & Easy: This recipe comes together in under 45 minutes, making it perfect for last-minute plans or when you just want a sweet fix without fussing.
- Simple Ingredients: You probably already have everything on hand—cream cheese, cocoa powder, sugar, eggs, and a few basics. No specialty shopping required.
- Perfect for Any Occasion: Whether it’s a casual brunch, a potluck, or a cozy night in, these bars fit right in. I’ve even brought them to holiday parties, and they vanish fast.
- Crowd-Pleaser: Kids, adults, picky eaters—everyone seems to love the combination of fudgy brownie and creamy cheesecake.
- Unbelievably Delicious: The texture is just right—the brownie is dense but not dry, and the cheesecake layer is silky and tangy, creating a delightful contrast in every bite.
What sets this recipe apart is the way the two layers swirl together, creating not just a treat for the taste buds but also for the eyes. The cheesecake is whipped just enough to stay creamy without cracking, and the brownie batter is rich without being overly sweet. Plus, there’s a subtle hint of vanilla that ties everything together, making it feel like comfort food reimagined.
If you’ve ever enjoyed the idea of a brownie-cheesecake hybrid but found other recipes too complicated or too dense, this one might just change your mind. It’s indulgent yet approachable, fancy enough to impress guests but straightforward enough to whip up on a busy day. Honestly, I find myself making these bars more than once a week sometimes—there’s just something about them that feels like a little celebration in every bite.
What Ingredients You Will Need
This recipe uses simple, wholesome ingredients that come together to deliver rich flavor and satisfying texture without any fuss. Most of these are pantry staples, and substitutions are easy if you want to tweak things a bit.
- For the Brownie Layer:
- Unsalted butter, 1/2 cup (113g), melted (adds richness and moisture)
- Sugar, 1 cup (200g) (granulated or superfine for better mixing)
- Large eggs, 2, room temperature (for structure and moisture)
- Pure vanilla extract, 1 tsp (for depth of flavor)
- All-purpose flour, 3/4 cup (95g) (for structure; can swap with almond flour for gluten-free)
- Unsweetened cocoa powder, 1/3 cup (35g) (I recommend Ghirardelli for rich chocolate flavor)
- Salt, 1/4 tsp (to balance sweetness)
- For the Cheesecake Layer:
- Cream cheese, 8 oz (226g), softened (use full-fat for best texture)
- Sugar, 1/3 cup (67g) (smooth and sweet without overpowering)
- Large egg, 1, room temperature
- Pure vanilla extract, 1/2 tsp
- Optional: Fresh lemon juice, 1 tsp (adds a subtle tang that brightens flavor)
Looking for seasonal twists? Try stirring in fresh raspberries or chopped nuts into the brownie layer for texture and bursts of flavor. If you want a dairy-free option, swap cream cheese for a vegan cream cheese alternative, and use coconut oil in place of butter.
These ingredients combine to create a lush, fudgy brownie crust layered with a creamy, smooth cheesecake topping that sets beautifully without cracking. Trust me, picking quality cocoa powder and real vanilla makes a big difference here.
Equipment Needed
- 8×8 inch (20×20 cm) square baking pan – a metal pan works best for even heat distribution, but glass is fine too
- Mixing bowls – at least two, one for the brownie batter and one for the cheesecake mixture
- Electric mixer or hand mixer – helpful for whipping the cream cheese smooth and beating eggs into the batter
- Rubber spatula – for folding ingredients gently and scraping bowls clean
- Measuring cups and spoons – accurate measurements really help with baking success
- Whisk – handy for mixing dry ingredients and beating eggs
If you don’t have an electric mixer, no worries—just take a little extra time to beat the cream cheese until smooth by hand. Also, a silicone spatula is my favorite since it’s flexible and scrapes cleanly without wasting batter. For budget-friendly options, you can often find quality bakeware and utensils at local discount stores that hold up well enough for home baking.
Preparation Method
- Preheat your oven: Set the oven to 325°F (163°C) and line your 8×8 inch pan with parchment paper, leaving some overhang for easy removal later. This prevents sticking and makes cleanup a breeze. (10 minutes prep)
- Make the brownie batter: In a medium bowl, whisk together the melted butter and sugar until combined but not grainy. Add the eggs one at a time, beating well after each addition, then stir in vanilla extract. In a separate bowl, sift the flour, cocoa powder, and salt together. Gradually fold the dry ingredients into the wet mixture until just combined—don’t overmix to keep the texture tender. The batter should be thick and glossy. (10 minutes)
- Prepare the cheesecake layer: In another bowl, beat the softened cream cheese with sugar until smooth and creamy—this might take about 2-3 minutes with an electric mixer. Add the egg, vanilla extract, and lemon juice if using, mixing until just combined. Avoid overbeating to prevent cracks after baking. (5 minutes)
- Assemble the bars: Pour half of the brownie batter into the lined pan and spread evenly. Dollop half of the cheesecake mixture over the brownie layer in spoonfuls. Repeat with the remaining brownie batter and cheesecake mixture, alternating dollops on top. Use a knife or skewer to gently swirl the layers together, creating a marbled effect. Don’t over-swirl—just a few figure-eight motions will do. (10 minutes)
- Bake and cool: Place the pan in the oven and bake for 40-45 minutes, or until the edges are set and a toothpick inserted into the center comes out with a few moist crumbs (not wet batter). The cheesecake layer will be slightly jiggly but should firm up as it cools. Cool completely in the pan on a wire rack, then chill in the refrigerator for at least 2 hours before slicing. (45 minutes baking + chilling time)
Pro tip: If you notice the edges baking too fast, loosely cover the pan with foil halfway through baking. The bars should have a fudgy texture, not cakey, so resist the urge to overbake. When slicing, use a sharp knife wiped clean between cuts for neat bars.
Cooking Tips & Techniques
One thing I learned the hard way is that cream cheese needs to be fully softened for the cheesecake layer to be silky and crack-free. Cold cream cheese can cause lumps and uneven baking.
When mixing the brownie batter, gently folding in the flour mixture keeps the texture tender. Overmixing develops gluten and leads to tough brownies, which nobody wants.
Swirling the cheesecake and brownie layers just enough to create a marbled effect is key. Too much swirling blends the layers completely, losing the visual appeal and the distinct flavor contrast. I usually do a few slow figure-eights with a butter knife and call it good.
Timing is everything: chilling the bars after baking is not optional. This resting period lets the cheesecake firm up nicely and makes slicing cleaner. I often prepare these bars the day before serving to let the flavors meld together.
If you want to speed things up, you can chill them in the freezer for about 30 minutes, but watch carefully so they don’t freeze solid.
Multitasking tip: While these bars bake, you can prep a quick snack like savory pizza fries or plan your next dessert such as sweet potato cheesecake cookies for later.
Variations & Adaptations
- Nutty Delight: Add 1/2 cup chopped walnuts or pecans to the brownie batter for crunch and a toasty flavor. Toast the nuts lightly for extra aroma.
- Berry Swirl: Drop spoonfuls of raspberry or strawberry jam into the cheesecake layer before swirling to add fruity brightness and a pop of color.
- Mocha Magic: Stir 1 tbsp instant espresso powder into the brownie batter for a subtle coffee kick that pairs beautifully with chocolate.
- Gluten-Free: Swap all-purpose flour with a gluten-free blend 1:1. Use almond flour for a nuttier taste but reduce quantity slightly to avoid dryness.
- Vegan Option: Replace butter with coconut oil, use dairy-free cream cheese, and swap eggs with flax eggs (1 tbsp flaxseed meal + 3 tbsp water per egg, chilled).
One personal favorite tweak is adding a sprinkle of sea salt flakes on top before baking—this tiny touch contrasts the sweetness and amps up the flavor complexity.
Serving & Storage Suggestions
These bars are best served chilled or at room temperature. If you want a slightly gooey texture, let them sit out for 15 minutes before serving. They look great dusted with powdered sugar or garnished with fresh berries.
They pair wonderfully with a cup of coffee or a glass of cold milk. For a party, try serving alongside a platter of s’more cracker cookies or a rich dessert wine to impress your guests.
Store leftover bars tightly covered in the fridge for up to 5 days. For longer storage, wrap tightly and freeze for up to 2 months. To thaw, move bars to the fridge overnight and bring to room temperature before serving.
Flavors tend to deepen and meld after a day or two, making these bars even more delicious when enjoyed the next day.
Nutritional Information & Benefits
Each bar (assuming 16 servings) contains approximately:
| Calories | 220 |
|---|---|
| Fat | 14g |
| Carbohydrates | 20g |
| Protein | 3g |
The cream cheese adds a good amount of calcium and protein, while cocoa powder provides antioxidants. Using quality ingredients means you’re enjoying more than just empty calories—there’s some nutritional value tucked inside this indulgent treat.
This recipe is naturally gluten-free if you swap the flour, and you can easily make it lower sugar by adjusting the amount of sugar or using a sugar substitute. Just keep in mind that sugar plays a role in texture and moisture.
If you have dairy allergies, try the vegan adaptations mentioned earlier. Be mindful of egg allergies, as eggs are essential in binding the layers here.
Conclusion
These Decadent Brownie Cheesecake Bars have become one of those recipes I return to whenever I want something that feels both indulgent and approachable. The way the fudgy brownie and creamy cheesecake layers come together is honestly a little magical, and guests never fail to ask for the recipe.
Feel free to make these bars your own—add nuts, swirl in your favorite jam, or give them a coffee twist. I love how adaptable they are while still delivering that rich, comforting flavor combo that’s hard to resist.
Give them a try next time you want to impress without the stress. And if you do, I’d love to hear how you customized your batch or what occasion you served them for. Baking is always more fun when shared!
Frequently Asked Questions
Can I make these bars ahead of time?
Absolutely! They actually taste better after chilling overnight. Just keep them covered in the fridge until serving.
What’s the best way to store leftover bars?
Store in an airtight container in the fridge for up to 5 days or freeze wrapped tightly for up to 2 months.
Can I use low-fat cream cheese instead of full-fat?
You can, but the texture might be less creamy and the bars less rich. Full-fat cream cheese gives the best results.
How do I prevent the cheesecake layer from cracking?
Make sure your cream cheese is fully softened and avoid overbeating the mixture. Also, don’t overbake—slight jiggle in the center is okay.
Can I add chocolate chips or nuts to the brownie layer?
Definitely! Mix in 1/2 cup chocolate chips or chopped nuts for extra texture and flavor.
Pin This Recipe!
Decadent Brownie Cheesecake Bars
These bars combine a rich, fudgy brownie base with a creamy cheesecake layer, creating a luscious marbled dessert that’s quick and easy to make. Perfect for any occasion, they deliver bakery-quality indulgence with simple pantry staples.
- Prep Time: 25 minutes
- Cook Time: 45 minutes
- Total Time: 3 hours 10 minutes
- Yield: 16 servings 1x
- Category: Dessert
- Cuisine: American
Ingredients
- 1/2 cup (113g) unsalted butter, melted
- 1 cup (200g) sugar (granulated or superfine)
- 2 large eggs, room temperature
- 1 tsp pure vanilla extract
- 3/4 cup (95g) all-purpose flour (can substitute almond flour for gluten-free)
- 1/3 cup (35g) unsweetened cocoa powder
- 1/4 tsp salt
- 8 oz (226g) cream cheese, softened (full-fat recommended)
- 1/3 cup (67g) sugar
- 1 large egg, room temperature
- 1/2 tsp pure vanilla extract
- Optional: 1 tsp fresh lemon juice
- Optional variations: 1/2 cup chopped walnuts or pecans, 1 tbsp instant espresso powder, raspberry or strawberry jam, chocolate chips
Instructions
- Preheat oven to 325°F (163°C) and line an 8×8 inch pan with parchment paper, leaving overhang for easy removal.
- Make the brownie batter: whisk melted butter and sugar until combined. Add eggs one at a time, beating well after each. Stir in vanilla extract.
- In a separate bowl, sift flour, cocoa powder, and salt. Gradually fold dry ingredients into wet mixture until just combined; batter should be thick and glossy.
- Prepare cheesecake layer: beat softened cream cheese with sugar until smooth. Add egg, vanilla extract, and lemon juice if using; mix until just combined.
- Assemble bars: pour half the brownie batter into pan and spread evenly. Dollop half the cheesecake mixture over brownie layer. Repeat with remaining brownie and cheesecake mixtures. Swirl layers gently with a knife or skewer to create marbled effect.
- Bake for 40-45 minutes until edges are set and a toothpick inserted comes out with a few moist crumbs. Cool completely in pan on wire rack, then chill in refrigerator at least 2 hours before slicing.
Notes
Use full-fat cream cheese for best texture. Do not overmix brownie batter to keep it tender. Swirl cheesecake and brownie layers gently to maintain marbled look. Chill bars at least 2 hours before slicing for clean cuts. Cover pan with foil if edges bake too fast. For faster chilling, use freezer for 30 minutes but avoid freezing solid.
Nutrition
- Serving Size: 1 bar (assuming 16 b
- Calories: 220
- Fat: 14
- Carbohydrates: 20
- Protein: 3
Keywords: brownie cheesecake bars, easy dessert, quick brownies, cheesecake dessert, marbled brownies, crowd-pleaser dessert



