Love this? Save it for later!
Share the inspiration with your friends
The kitchen was quiet except for the soft hum of the oven and the faint crackle of a fire burning low in the living room. I had just wrapped up a long day — you know the kind that leaves you a little drained, craving comfort but lacking the energy to make anything complicated. So, I rummaged through the pantry, hoping for a quick fix, and landed on a jar of hazelnut spread that had been sitting untouched for weeks. Honestly, I wasn’t too sure about what I could whip up with it. But then, I remembered an old recipe I once tweaked on a whim, blending that creamy hazelnut goodness with a simple pastry crust and a smooth cream filling.
As the bars baked, the warm, nutty aroma filled the kitchen, instantly calming me down. There’s something about that scent — it’s like a soft blanket on a chilly night, inviting you to slow down and savor the moment. When I finally took the bars out, the creamy center was just set enough to hold its shape but still melt in your mouth. I ended up having not just one but three pieces before I even realized it. That night, these creamy hazelnut cream bars became my little secret for unwinding after hectic days, a treat that feels both indulgent and reassuring, without any fuss.
It’s funny how some recipes sneak up on you, turning simple pantry staples into something quietly special. These bars aren’t flashy or complicated, but they have that comforting, homemade vibe that sticks with you, perfect for those cozy nights in when all you want is a little sweetness and a lot of calm. If you’re the type who appreciates a dessert that’s easy to make yet feels like a warm hug, this recipe might just become your next favorite go-to.
Why You’ll Love This Creamy Hazelnut Cream Bars Recipe
Having made these bars countless times, I can confidently say this recipe hits a sweet spot of taste, texture, and ease. Whether you’re new to baking or a seasoned home cook, these creamy hazelnut cream bars deliver that satisfying dessert experience without the usual stress.
- Quick & Easy: Ready in under 45 minutes, including baking—perfect for those spontaneous dessert cravings or when you want something cozy but don’t want to spend hours in the kitchen.
- Simple Ingredients: Using pantry staples like hazelnut spread, cream cheese, and basic baking essentials, no special trips to specialty stores required.
- Perfect for Cozy Nights In: Ideal for curling up with a book or pairing with a warm drink for relaxed evenings.
- Crowd-Pleaser: Whether it’s a small family gathering or an intimate friend visit, these bars always get asked for seconds and sometimes thirds.
- Unbelievably Delicious: The creamy, nutty filling contrasts beautifully with the buttery crust, creating a rich yet balanced flavor profile that’s indulgent without being overwhelming.
What sets this recipe apart is the way the hazelnut cream blends seamlessly into a luscious filling, made smoother by a touch of whipped cream, which I discovered after a few tries. This little tweak makes the texture silky and light, avoiding that heavy or overly sweet trap. Plus, the buttery crust adds just the right amount of crunch and structure.
This isn’t just another hazelnut dessert floating around; it’s one I keep coming back to because it feels like a quiet celebration of flavors that bring a bit of calm and comfort to the everyday. For a little inspiration on cozy homemade breakfasts, you might also enjoy the fluffy eggnog pancakes I shared recently — they pair beautifully with a cup of tea or coffee, just like these bars pair with your favorite evening drink.
What Ingredients You Will Need
This recipe uses simple, wholesome ingredients to deliver bold flavor and satisfying texture without the fuss. Most are pantry staples, but there are a few tips to help you get the best out of each component.
- For the crust:
- 1 ½ cups (180g) all-purpose flour (for a gluten-free option, use almond flour)
- ¼ cup (50g) granulated sugar
- ½ cup (113g) unsalted butter, cold and cubed (I recommend Kerrygold for richness)
- ¼ tsp salt
- For the creamy hazelnut filling:
- 8 oz (225g) cream cheese, softened (room temperature to avoid lumps)
- ½ cup (130g) hazelnut spread (Nutella works well, but homemade or store brands with real hazelnuts are great too)
- ½ cup (60g) powdered sugar
- 1 tsp vanilla extract
- ⅓ cup (80ml) heavy cream, whipped to soft peaks (adds silkiness and lightness)
- Optional toppings:
- Chopped toasted hazelnuts (for crunch)
- A dusting of powdered sugar
Look for cream cheese with a smooth texture and no additives for the best results. The hazelnut spread is the star here — sweeter or less sweet versions will change the final flavor, so pick one that suits your taste. When whipping the cream, make sure it’s cold and fresh for that perfect fluffiness. If you want a dairy-free version, swap heavy cream with coconut cream and use a dairy-free cream cheese alternative.
Equipment Needed
- 8×8 inch (20×20 cm) square baking pan — glass or metal works fine
- Mixing bowls — one large for crust and one medium for filling
- Electric mixer or hand whisk — for whipping cream and mixing filling smoothly
- Measuring cups and spoons — accuracy helps ensure the right texture
- Spatula — for folding whipped cream into the filling
- Food processor (optional) — handy if you prefer to pulse butter into flour quickly, but a fork or pastry cutter works too
- Cooling rack — to let the bars cool evenly
I’ve used both metal and glass pans for this recipe; the glass pan gives a slightly more even bake, but the metal pan crisps the crust a bit more, which I love. For whipping cream, an electric mixer saves time, but if you’re patient, a good whisk will get you there. If you don’t have a food processor, just chill the butter well and cut it in with a fork or pastry cutter — takes a bit longer but works fine. Simple tools, nothing fancy, and all easy to clean up.
Preparation Method
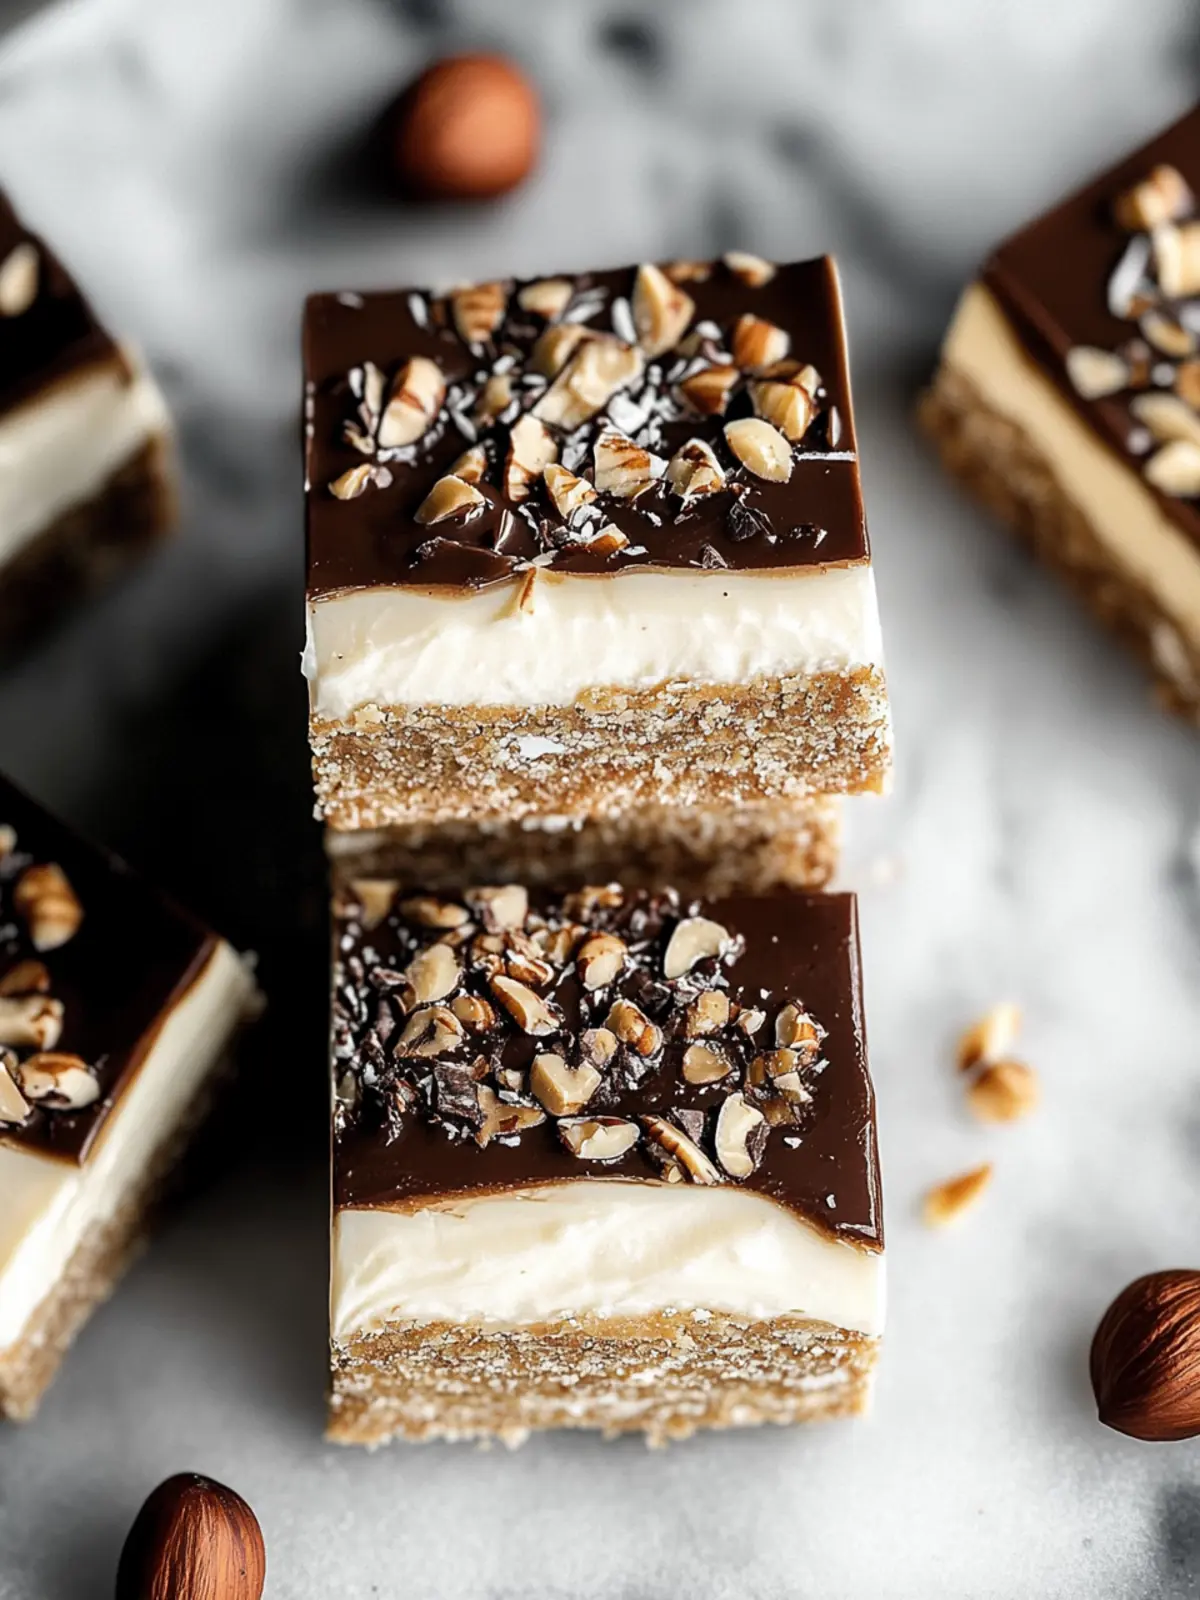
- Prepare the crust: Preheat your oven to 350°F (175°C). In a large bowl, combine 1 ½ cups (180g) all-purpose flour, ¼ cup (50g) granulated sugar, and ¼ tsp salt. Add ½ cup (113g) cold, cubed unsalted butter. Using a food processor or pastry cutter, blend until the mixture resembles coarse crumbs with some pea-sized butter bits. Press this evenly into the bottom of your greased 8×8 inch (20×20 cm) baking pan. Bake for about 15 minutes, or until the edges are lightly golden. Remove from oven and let cool slightly.
- Make the hazelnut cream filling: While the crust bakes, beat 8 oz (225g) softened cream cheese in a medium bowl until smooth. Add ½ cup (130g) hazelnut spread, ½ cup (60g) powdered sugar, and 1 tsp vanilla extract. Mix until well combined and creamy. In a separate bowl, whip ⅓ cup (80ml) heavy cream to soft peaks. Gently fold the whipped cream into the hazelnut mixture, being careful not to deflate the cream — this keeps the filling light and airy.
- Assemble and bake: Pour the creamy hazelnut filling over the cooled crust, smoothing the top with a spatula. Bake for another 20–25 minutes at 350°F (175°C), until the edges are set but the center still jiggles slightly when you gently shake the pan. This texture ensures a creamy, luscious bite after chilling.
- Cool and chill: Remove bars from oven and allow to cool completely on a wire rack. Once cooled, refrigerate for at least 2 hours — overnight is even better. Chilling helps the filling firm up while maintaining that creamy softness.
- Serve and garnish: Before slicing, sprinkle with chopped toasted hazelnuts for crunch and a light dusting of powdered sugar if desired. Cut into 12 squares using a sharp knife, wiping the blade clean between cuts for neat edges.
Pro tip: If your crust feels too soft after baking, give it a quick chill before adding the filling. Also, don’t rush folding in the whipped cream — gentle is key to keep that cloud-like texture. I once overheated the cream and ended up with a dense filling; lesson learned! The jiggly center when baking is a good sign that you’re right on track.
Cooking Tips & Techniques
Making creamy hazelnut cream bars might sound straightforward, but a few tricks make all the difference between “meh” and “wow.”
- Butter temperature for crust: Keeping the butter cold until just before mixing ensures a flakier, crumbly texture. If the butter melts too soon, the crust can turn dense or greasy.
- Whipping cream just right: Stop whipping once soft peaks form. Overwhipping can cause the cream to turn grainy or even separate. I usually give it a quick test with the whisk — if the peak droops slightly when you lift it, it’s perfect.
- Folding technique: Use a spatula to fold the whipped cream gently into the hazelnut mixture. A few big folds are better than overmixing, which kills the airiness.
- Don’t overbake the filling: The center should still wobble slightly when you remove it from the oven. It firms up in the fridge, so resist the urge to bake it solid.
- Chill time: This is non-negotiable. The bars need time to set properly. I once tried slicing them too soon, and it was a messy disappointment.
Multitasking tip: While the crust bakes, whip your cream and prepare the filling so everything flows smoothly. This way, you won’t be stuck waiting around—and you’ll keep the kitchen relatively tidy. If you feel like experimenting with other cozy treats after this, you might enjoy my take on savory French dip biscuits, which are equally comforting on cool evenings.
Variations & Adaptations
These creamy hazelnut cream bars are a lovely base for all kinds of tweaks. Here are some ways to make the recipe your own:
- Vegan Version: Swap cream cheese with vegan cream cheese, use coconut cream instead of heavy cream, and replace butter with a plant-based spread. Make sure your hazelnut spread is dairy-free.
- Chocolate Twist: Add a layer of melted dark chocolate on top of the cooled bars before chilling. This adds a bittersweet counterpoint to the sweet filling.
- Seasonal Flair: Incorporate a tablespoon of pumpkin spice or cinnamon into the crust for a warm, autumnal vibe. Alternatively, sprinkle crushed freeze-dried raspberries on top for a tart contrast in summer.
- Nut-Free Option: Replace hazelnut spread with sunflower seed butter or cookie butter for those with nut allergies.
- Extra Crunch: Mix chopped toasted hazelnuts into the crust or swirl a handful into the filling for texture variation.
Personally, I once added a hint of orange zest to the filling, and it gave the bars a fresh brightness that balanced the richness beautifully. If you’re into cozy breakfasts, you might also appreciate the comforting notes in my fluffy orange pancakes recipe, which shares that same balance of sweet and tangy.
Serving & Storage Suggestions
These creamy hazelnut cream bars are best served chilled or at room temperature. Pull them out of the fridge 10–15 minutes before serving to soften slightly for the optimal creamy texture. They pair wonderfully with a warm cup of coffee, black tea, or even a frothy latte.
For a more indulgent treat, serve alongside a scoop of vanilla ice cream or a dollop of whipped cream. They also make a dreamy dessert for intimate dinners or a sweet finish to a cozy weekend brunch.
Store leftover bars in an airtight container in the refrigerator for up to 4 days. They keep their flavor and texture well but tend to soften a bit over time, so enjoy them sooner rather than later. For longer storage, you can freeze the bars wrapped tightly in plastic wrap and foil for up to 2 months. Thaw overnight in the fridge and bring to room temperature before serving.
Flavors actually deepen after chilling overnight, making them an excellent make-ahead dessert. I often prepare these bars the day before a low-key dinner party—it saves time and gives me one less thing to worry about. For other make-ahead ideas that bring warmth and ease to your table, check out my recipe for creamy Chinese coconut pudding, which also benefits from resting time.
Nutritional Information & Benefits
Each creamy hazelnut cream bar (based on 12 servings) contains approximately:
| Calories | 280 kcal |
|---|---|
| Fat | 18g (mostly from nuts and cream) |
| Carbohydrates | 25g |
| Protein | 4g |
| Fiber | 2g |
Hazelnuts are a good source of healthy monounsaturated fats, vitamin E, and antioxidants, which may support heart health. Using moderate amounts of sugar keeps the bars from being overly sweet while letting the natural nuttiness shine through. The cream cheese adds protein and calcium, while the whipped cream contributes richness and satiety.
This dessert is gluten-containing unless you swap to a gluten-free flour, but it can be adapted for many dietary needs. The recipe is low in added sugars compared to most store-bought hazelnut bars and free from preservatives or artificial ingredients. For those mindful of allergens, consider nut-free substitutions as mentioned earlier.
Conclusion
These creamy hazelnut cream bars have quietly become one of my favorite comfort desserts for cozy nights at home. They’re simple to make, use ingredients that don’t require a special shopping trip, and deliver a rich, satisfying flavor that feels like a treat without being overwhelming. What I love most is how forgiving this recipe is — you can tweak it to suit your preferences or dietary needs without losing that signature creamy, nutty goodness.
Whether you’re unwinding after a long day or planning a low-key weekend with friends, these bars bring a little warmth and sweetness to the table. I hope you find the same comfort in them as I do. Feel free to share how you make them your own, or ask any questions below — I always enjoy hearing about your kitchen adventures and recipe twists!
Here’s to many cozy nights filled with simple pleasures and creamy hazelnut dreams.
FAQs about Creamy Hazelnut Cream Bars
Can I make these bars ahead of time?
Absolutely! They taste even better after chilling overnight. Just store them covered in the fridge and slice when ready to serve.
Is there a gluten-free option for the crust?
Yes, you can replace all-purpose flour with almond flour or a gluten-free baking mix. The texture will be slightly different but still delicious.
Can I use other nut butters instead of hazelnut spread?
Yes, sunflower seed butter or almond butter can work, though the flavor will change. Adjust the sweetness as needed since some nut butters are less sweet.
How do I prevent the filling from cracking?
Don’t overbake the filling; remove it when the center still jiggles slightly. Cooling slowly at room temperature before refrigerating also helps prevent cracks.
What’s the best way to store leftover bars?
Keep them in an airtight container in the refrigerator for up to 4 days. For longer storage, freeze them well-wrapped and thaw in the fridge before serving.
Pin This Recipe!
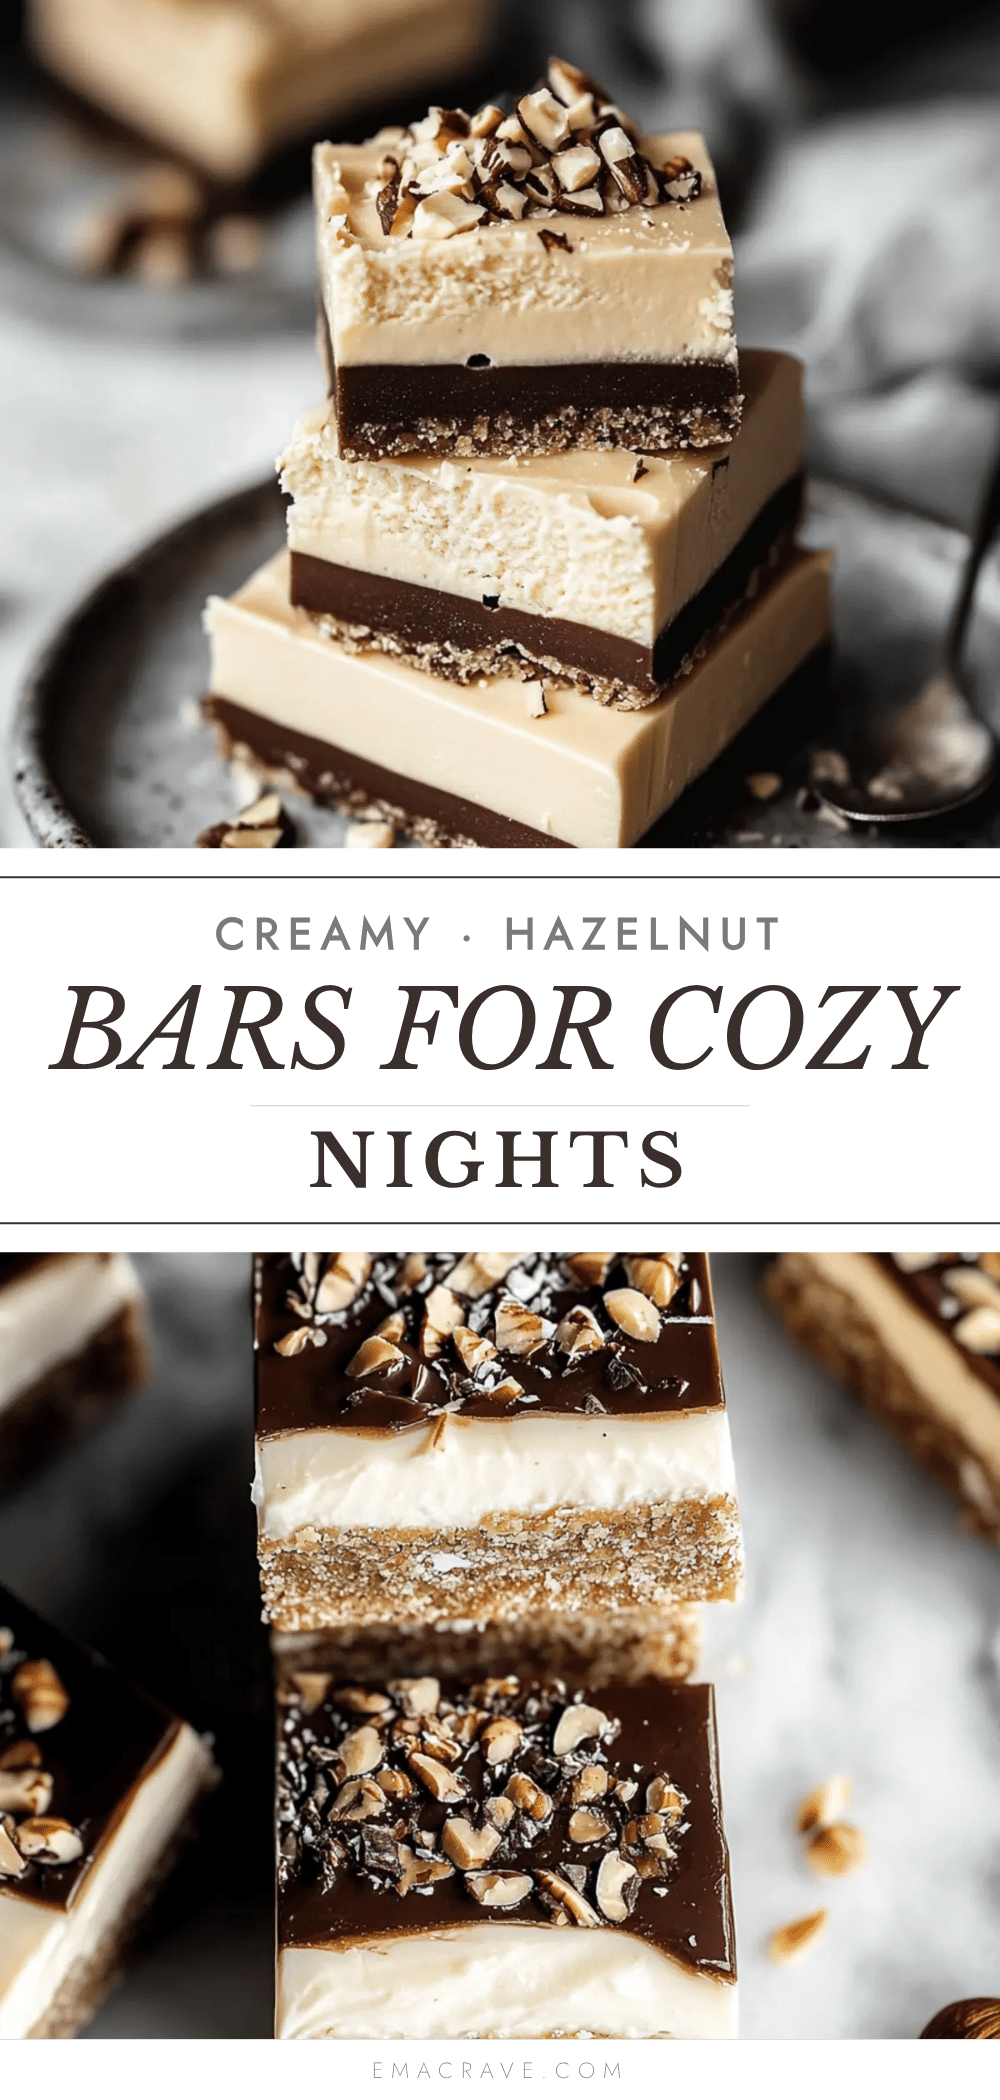
Creamy Hazelnut Cream Bars
These creamy hazelnut cream bars feature a buttery crust and a smooth, nutty filling, perfect for cozy nights in. Easy to make with simple pantry staples, they deliver a rich yet balanced dessert experience.
- Prep Time: 15 minutes
- Cook Time: 40 minutes
- Total Time: 2 hours 55 minutes
- Yield: 12 servings 1x
- Category: Dessert
- Cuisine: American
Ingredients
- 1 ½ cups (180g) all-purpose flour (for gluten-free option, use almond flour)
- ¼ cup (50g) granulated sugar
- ½ cup (113g) unsalted butter, cold and cubed
- ¼ tsp salt
- 8 oz (225g) cream cheese, softened
- ½ cup (130g) hazelnut spread (e.g., Nutella)
- ½ cup (60g) powdered sugar
- 1 tsp vanilla extract
- ⅓ cup (80ml) heavy cream, whipped to soft peaks
- Optional toppings: chopped toasted hazelnuts, powdered sugar
Instructions
- Preheat oven to 350°F (175°C). In a large bowl, combine flour, sugar, and salt. Add cold, cubed butter and blend with a food processor or pastry cutter until mixture resembles coarse crumbs with some pea-sized butter bits.
- Press crust mixture evenly into the bottom of a greased 8×8 inch (20×20 cm) baking pan. Bake for about 15 minutes or until edges are lightly golden. Remove and let cool slightly.
- In a medium bowl, beat softened cream cheese until smooth. Add hazelnut spread, powdered sugar, and vanilla extract; mix until creamy and well combined.
- In a separate bowl, whip heavy cream to soft peaks. Gently fold whipped cream into the hazelnut mixture to keep filling light and airy.
- Pour filling over cooled crust and smooth the top with a spatula. Bake for 20–25 minutes at 350°F (175°C) until edges are set but center jiggles slightly.
- Remove from oven and cool completely on a wire rack. Refrigerate for at least 2 hours or overnight to firm up the filling.
- Before serving, sprinkle with chopped toasted hazelnuts and a dusting of powdered sugar if desired. Cut into 12 squares.
Notes
Keep butter cold until mixing for a flaky crust. Whip cream to soft peaks and fold gently to maintain light texture. Do not overbake the filling; it should jiggle slightly when done. Chill bars for at least 2 hours or overnight for best texture. For dairy-free version, substitute cream cheese and heavy cream with vegan alternatives.
Nutrition
- Serving Size: 1 bar (1/12th of rec
- Calories: 280
- Fat: 18
- Carbohydrates: 25
- Fiber: 2
- Protein: 4
Keywords: hazelnut cream bars, creamy dessert, easy dessert, homemade bars, hazelnut spread dessert, cozy dessert, quick dessert



