Love this? Save it for later!
Share the inspiration with your friends
I was standing in my kitchen last December, staring at a half-gallon of eggnog that someone had brought to our ugly sweater party. Nobody touched it. I mean, nobody. By the time the party wound down, that carton was still sitting there, cold and ignored, while every other drink had been polished off. I felt bad for it, honestly. So I shoved it in the fridge, determined to do something with it before it went to waste.
The next morning, I pulled it out again. I had this vague memory of my grandma making something she called “refrigerator pudding” during the holidays — it wasn’t baked, it wasn’t fussy, and it set up in the fridge while you went about your day. And I thought, why not try that with eggnog? So I grabbed a saucepan, some cornstarch, and a whisk, and I just went for it. No recipe, no plan, just a hunch.
That first batch was a little lumpy, if I’m being honest. But the flavor? Oh, the flavor was everything. It tasted like Christmas in a cup — warm spices, creamy texture, that unmistakable eggnog richness. I made it again the next week, tweaking the ratios until it came out silky smooth every single time. By the third try, I had friends texting me asking for the recipe. And now, here I am, sharing it with you.
This Creamy Holiday Eggnog Pudding is the kind of dessert that feels fancy but takes almost no effort. It’s rich without being heavy, sweet without being cloying, and it comes together in about 10 minutes on the stove. Then you just let the fridge do the rest of the work. It saved me from tossing out a perfectly good carton of eggnog that year, and now it’s become a staple in my holiday rotation.
I think you’re going to love this one.
Why You’ll Love This Recipe
Look, I’ve tested a lot of pudding recipes over the years. Some are too thin, some are too thick, and some just don’t deliver on flavor. This one hits the sweet spot. Here’s why it works:
- Quick & Easy: You only need about 10 minutes of active cooking time. Seriously. The stove does the heavy lifting, and then the fridge finishes the job. Perfect for those chaotic holiday weeks when you need a dessert but don’t have hours to spend in the kitchen.
- Simple Ingredients: You probably already have most of these in your pantry. Eggnog, milk, sugar, cornstarch, eggs, vanilla. That’s it. No weird specialty items, no expensive extracts you’ll never use again.
- Perfect for Holiday Gatherings: This pudding is a showstopper at Christmas dinners, cookie swaps, and New Year’s Eve parties. It’s elegant enough to serve in fancy glasses but homey enough for a casual family dessert.
- Crowd-Pleaser: I’ve served this to kids, adults, even my picky aunt who “doesn’t like eggnog.” Every single person went back for seconds. It has that universal appeal — creamy, spiced, and just familiar enough to feel comforting.
- Unbelievably Delicious: The texture is what gets people. It’s silky, smooth, and velvety, with just the right amount of wobble. And the flavor? That warm hug of nutmeg and cinnamon wrapped in creamy dairy goodness. It’s next-level comfort food.
What makes this recipe different from all the other eggnog puddings out there? It’s the technique. Instead of relying on eggs alone to thicken the pudding, I use a combination of cornstarch and egg yolks. This gives you a pudding that’s stable, smooth, and never curdles. Plus, I add a pinch of salt to balance the sweetness — a trick I learned from years of making homemade chocolate chip cookie rolls. Salt makes everything taste more like itself.
This isn’t just a dessert. It’s the kind of thing that makes you close your eyes after the first bite. It’s comfort food reimagined — faster, simpler, but with the same soul-soothing satisfaction. Perfect for impressing guests without stress, or turning a quiet evening into something memorable.
What Ingredients You Will Need
This recipe uses simple, wholesome ingredients to deliver that rich, creamy, holiday-spiced flavor. Most of these are pantry staples, especially if you’ve done any holiday baking recently. Let me walk you through each one.
For the Pudding Base
- 2 cups (480 ml) eggnog — Use full-fat eggnog for the richest flavor. I prefer the store-bought kind from the refrigerated section, but any brand works. If you’re feeling ambitious, homemade eggnog works beautifully too. Just make sure it’s well-chilled before you start.
- 1 cup (240 ml) whole milk — Whole milk gives the best creamy texture. You can substitute with 2% if that’s what you have, but avoid skim milk — the pudding won’t be as luxurious. For a dairy-free version, use full-fat oat milk or canned coconut milk.
- 1/2 cup (100 g) granulated sugar — Regular white sugar works perfectly. You can reduce it to 1/3 cup if you prefer a less sweet pudding, especially since eggnog is already sweetened.
- 1/4 cup (30 g) cornstarch — This is the thickening agent. Make sure it’s cornstarch, not corn flour. And please, please sift it if it’s lumpy. Nobody wants lumpy pudding.
- 4 large egg yolks — Save the whites for an omelet or meringue. The yolks add richness, color, and help thicken the pudding. Let them come to room temperature before using so they incorporate smoothly.
- 1 teaspoon vanilla extract — Pure vanilla extract is best. Avoid imitation vanilla if you can — the flavor difference is noticeable in a simple pudding like this.
- 1/4 teaspoon ground nutmeg — Freshly grated nutmeg is a game-changer here. It has a warmth and complexity that pre-ground nutmeg just can’t match. If you only have pre-ground, it’s fine, but consider upgrading for this recipe.
- 1/4 teaspoon ground cinnamon — Adds that cozy holiday warmth. You can also use a cinnamon stick to infuse the milk while it heats, then remove it before adding the egg mixture.
- 1/8 teaspoon salt — Don’t skip this. Salt balances the sweetness and makes all the flavors pop. I use fine sea salt.
For Serving (Optional but Recommended)
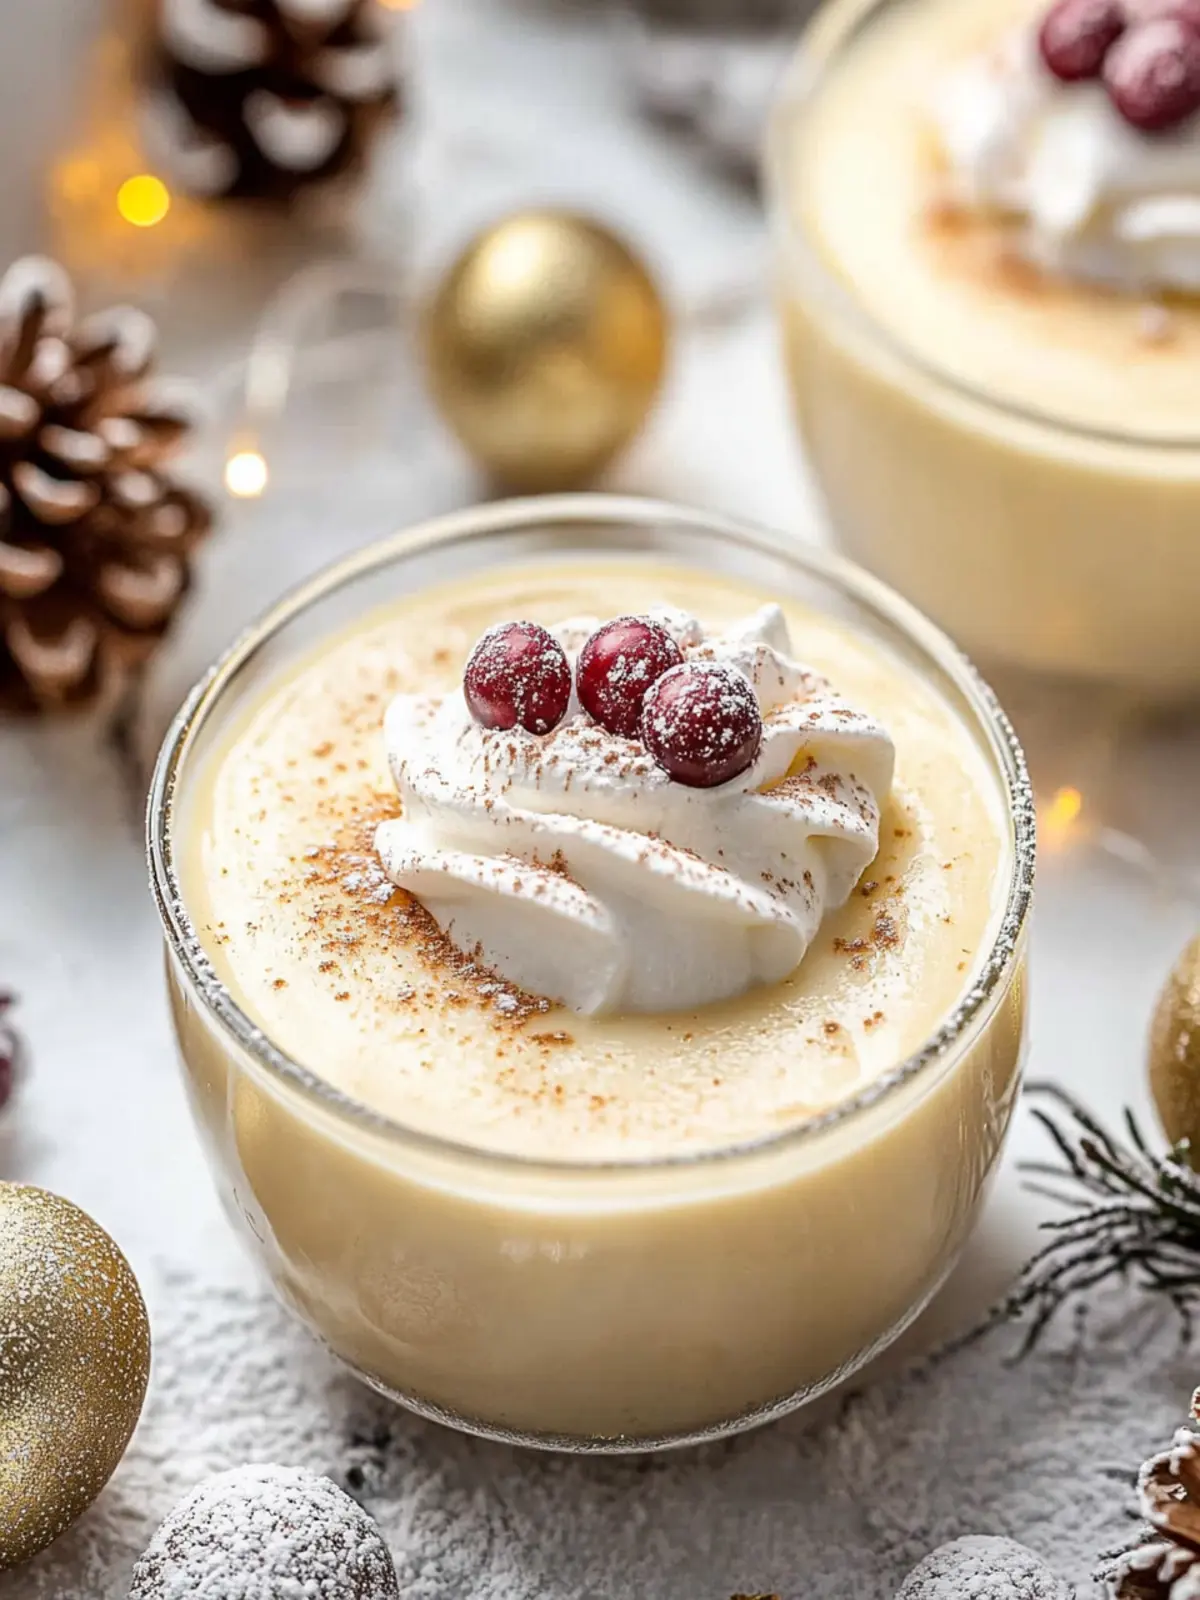
- Whipped cream — Homemade is best, but store-bought works in a pinch. A dollop on top makes it feel extra special.
- Extra nutmeg or cinnamon — For dusting on top right before serving. It looks pretty and adds a fresh burst of spice.
- Bourbon or rum (optional) — A tablespoon added to the pudding after cooking gives it an adult kick. I’ve done this for New Year’s Eve parties and it’s always a hit.
One quick note about eggnog brands: I’ve tested this with several, and my personal favorite is the organic eggnog from the refrigerated section at most grocery stores. It tends to be thicker and less sweet, which gives you more control over the final flavor. But honestly, any brand works. Just avoid the shelf-stable cartons if you can — they have a different texture that doesn’t set up as nicely.
If you’re looking for a dairy-free option, I’ve had good results using oat milk and a high-quality vegan eggnog. The texture is slightly less rich, but the flavor is still fantastic. This recipe is pretty forgiving, so don’t be afraid to experiment.
Equipment Needed
You don’t need anything fancy for this recipe. Here’s what you’ll need:
- Medium saucepan — A 2-quart saucepan is perfect. Heavy-bottomed is best to prevent scorching. I’ve ruined a batch or two by using a thin pan that heated unevenly.
- Whisk — A good whisk is non-negotiable. You’ll be whisking constantly, so make sure it’s comfortable in your hand. I prefer a balloon whisk for this job.
- Mixing bowl — A medium bowl for whisking the egg yolks and sugar together. Any bowl works, but a wide one makes it easier to whisk without splashing.
- Fine-mesh strainer — This is optional but highly recommended. Straining the pudding before chilling removes any lumps or cooked egg bits. It makes the texture silky smooth.
- Measuring cups and spoons — Accurate measurements matter in pudding. Use liquid measuring cups for the eggnog and milk, dry measuring cups for the sugar and cornstarch.
- Spatula — A rubber spatula for scraping every last bit of pudding into the serving dishes. Waste not, want not.
- Serving dishes — Ramekins, small glasses, or even teacups work beautifully. I love using clear glass so you can see the gorgeous pale color of the pudding.
- Plastic wrap — To press directly onto the surface of the pudding to prevent a skin from forming. If you like the skin, skip this step.
If you don’t have a fine-mesh strainer, don’t worry. Just whisk the pudding really well while it’s cooking, and you’ll be fine. I’ve made this without straining plenty of times, and it still comes out great. The strainer just gives you that extra level of polish.
Preparation Method
Ready to make the best eggnog pudding of your life? Let’s get into it. Take your time with each step, and don’t rush the whisking — that’s where the magic happens.
Step 1: Whisk the Egg Yolks and Sugar
In your mixing bowl, combine the 4 egg yolks and 1/2 cup sugar. Whisk them together until the mixture turns pale yellow and slightly thick, about 2 minutes. You’ll notice it gets lighter in color and forms a ribbon when you lift the whisk. This is called “ribbon stage,” and it means the sugar has dissolved into the yolks. Don’t rush this step — it helps create that smooth, creamy texture later.
Step 2: Add the Cornstarch and Spices
Sprinkle the 1/4 cup cornstarch, 1/4 teaspoon nutmeg, 1/4 teaspoon cinnamon, and 1/8 teaspoon salt over the egg yolk mixture. Whisk it all together until smooth and no lumps remain. This is your “slurry” — it’ll help thicken the pudding evenly. If you see any cornstarch lumps, press them against the side of the bowl with the whisk until they break up. Trust me, you don’t want to find a lump of raw cornstarch in your finished pudding.
Step 3: Heat the Eggnog and Milk
Pour the 2 cups of eggnog and 1 cup of milk into your saucepan. Heat over medium heat, stirring occasionally, until it’s steaming but not boiling. You’ll see small bubbles forming around the edges — that’s your cue. This usually takes about 3-4 minutes. Don’t let it boil, or the milk proteins can scorch and give the pudding a weird flavor. I learned this the hard way during my first attempt.
Step 4: Temper the Egg Yolks
Here’s the most important step, and the one that scares people off. Don’t be nervous — it’s easier than it sounds. Slowly drizzle about 1 cup of the hot eggnog mixture into the egg yolk mixture while whisking constantly. This warms up the yolks gradually so they don’t scramble when you add them to the pot. Keep whisking the whole time. Once that cup is incorporated, pour the egg yolk mixture back into the saucepan with the remaining hot eggnog, still whisking.
Step 5: Cook Until Thickened
Return the saucepan to medium heat and cook, whisking constantly, until the mixture thickens and just starts to bubble. This takes about 4-6 minutes. You’ll feel it getting thicker — the whisk will meet more resistance. When you see a few lazy bubbles pop on the surface, cook for exactly 1 more minute, then remove from heat. The pudding will still look a bit thin at this point, but it will continue to thicken as it cools.
Step 6: Add Vanilla and Strain
Remove the saucepan from the heat and stir in the 1 teaspoon of vanilla extract. If you’re using bourbon or rum, add it now. Now, if you have a fine-mesh strainer, place it over a clean bowl and pour the pudding through it. Use your spatula to push it through. This catches any tiny lumps or cooked egg bits. If you don’t have a strainer, just whisk it vigorously for another minute — it’ll smooth out.
Step 7: Portion and Chill
Divide the pudding evenly among your serving dishes. Press a piece of plastic wrap directly onto the surface of each pudding — this prevents a skin from forming. If you like the skin, skip the plastic wrap. Refrigerate for at least 4 hours, but overnight is best. The pudding needs time to fully set and develop its flavor. I’ve made this the morning of a party and served it that evening, and it was perfect.
Step 8: Serve and Enjoy
When you’re ready to serve, remove the plastic wrap. Top with a generous dollop of whipped cream and a light dusting of fresh nutmeg or cinnamon. Serve cold. That first spoonful is going to be pure magic — creamy, spiced, and perfectly sweet.
Cooking Tips & Techniques
After making this pudding about a dozen times (not exaggerating), I’ve picked up a few tricks that make the process smoother and the results more consistent. Here are my best tips:
- Whisk constantly. I know it’s annoying, but it’s non-negotiable. If you stop whisking, the pudding will scorch on the bottom of the pan. Set a timer if you have to, or put on a podcast. Just keep that whisk moving.
- Don’t rush the tempering. I’ve scrambled eggs before, and it’s not pretty. Add the hot liquid slowly while whisking like your life depends on it. The goal is to raise the temperature of the yolks gradually so they stay smooth.
- Use room temperature eggs. Cold egg yolks are more likely to seize up when you add hot liquid. Let your eggs sit on the counter for 30 minutes before you start. If you’re in a hurry, place them in a bowl of warm water for 5 minutes.
- Trust the process. The pudding will look thin when you take it off the heat. Don’t be tempted to cook it longer. It will thicken as it cools, and even more as it chills in the fridge. Overcooking can make it grainy.
- Season to taste. Before you pour the pudding into dishes, taste it. Add more nutmeg or a pinch more salt if you think it needs it. Just be careful — it’s hot, so let it cool for a minute on a spoon before tasting.
- Make it ahead. This pudding actually gets better after a day in the fridge. The flavors meld together and the texture becomes even silkier. I often make it two days before a party.
One mistake I made early on was using low-fat eggnog. Don’t do it. The pudding was thin and watery, and it never set up properly. Full-fat eggnog is the way to go — it has the fat content needed for that luxurious texture. Also, if you’re making this for a crowd, double the recipe. It disappears fast.
Variations & Adaptations
This recipe is wonderfully versatile. Here are some ways to change it up based on your mood, dietary needs, or what you have on hand.
Dietary Variations
- Dairy-Free: Use full-fat oat milk or canned coconut milk instead of whole milk. For the eggnog, look for a vegan eggnog alternative — several brands make good ones. The texture will be slightly less rich, but the flavor is still fantastic.
- Gluten-Free: This recipe is naturally gluten-free. Just double-check your cornstarch and vanilla extract labels to make sure they’re certified gluten-free if that’s a concern.
- Lower Sugar: Reduce the sugar to 1/3 cup. You can also use a sugar substitute like monk fruit sweetener, but keep in mind that the texture might be slightly different.
Flavor Variations
- Spiced Eggnog Pudding: Add 1/4 teaspoon ground ginger, 1/8 teaspoon ground cloves, and a pinch of allspice along with the nutmeg and cinnamon. This gives it a chai-like warmth that’s perfect for cold winter nights.
- Chocolate Eggnog Pudding: Whisk 2 tablespoons of unsweetened cocoa powder into the cornstarch mixture. The chocolate pairs beautifully with the eggnog spices. I’ve made this for Christmas Eve, and it was a hit.
- Boozy Eggnog Pudding: Stir in 1-2 tablespoons of dark rum, bourbon, or brandy after removing the pudding from heat. The alcohol adds warmth and depth without making it taste boozy. Just don’t add too much, or the pudding won’t set properly.
- Pumpkin Eggnog Pudding: Replace 1/2 cup of the eggnog with pumpkin puree and add an extra 1/2 teaspoon of pumpkin pie spice. This is my go-to for Friendsgiving.
Serving Variations
- Parfait Style: Layer the pudding with crushed gingerbread cookies or graham crackers and whipped cream for a beautiful parfait. This is how I serve it at parties — it looks fancy with minimal effort.
- Pudding Cups: Pour the pudding into small cups and top with a thin layer of caramel sauce. The combination of eggnog and caramel is incredible.
- Pie Filling: Use this pudding as a filling for a pre-baked pie crust. Let it set in the fridge for 6 hours, then top with whipped cream. It’s like an eggnog cream pie, and it’s divine.
Personally, my favorite variation is the spiced version with a splash of dark rum. I make it every New Year’s Eve, and it’s become a tradition. The spices make it feel extra festive, and the rum gives it just enough kick to feel grown-up.
Serving & Storage Suggestions
This pudding is best served cold, straight from the fridge. The texture is at its peak when it’s fully chilled — firm enough to hold its shape but soft enough to melt on your tongue. Here are my serving and storage tips:
Serving
- Temperature: Serve cold. If you’ve made it ahead, take it out of the fridge about 10 minutes before serving to take the chill off slightly. This lets the flavors open up.
- Presentation: I love serving this in clear glass cups or small mason jars. You can see the beautiful pale color, and it looks so elegant. Top with a generous swirl of whipped cream, a dusting of nutmeg, and maybe a cinnamon stick for garnish.
- Pairings: This pudding pairs beautifully with pistachio bundt cake for a dessert spread, or with a cup of strong coffee or spiced chai. For a boozy pairing, try it with a glass of bourbon or a dark rum cocktail.
- Occasions: Perfect for Christmas dinner, New Year’s Eve parties, cookie swaps, or any holiday gathering. It’s also wonderful as a make-ahead dessert for Thanksgiving if you want something lighter than pie.
Storage
- Refrigerator: Store the pudding covered in the fridge for up to 5 days. Keep the plastic wrap pressed onto the surface to prevent a skin from forming. If you don’t mind the skin, just cover with a lid or foil.
- Freezer: I don’t recommend freezing this pudding. The texture becomes watery and grainy when thawed. If you have leftovers, just keep them in the fridge.
- Flavor Development: The flavors actually improve after a day or two in the fridge. The spices meld together, and the texture becomes even silkier. I often make this two days before I plan to serve it.
Reheating
This pudding is meant to be served cold, but if you prefer it warm, you can gently reheat it in the microwave in 15-second bursts, stirring between each. Just be aware that the texture will be softer and more saucy. It’s still delicious, just different.
Nutritional Information & Benefits
Here’s the nutritional breakdown for one serving (about 1/2 cup, without whipped cream or optional add-ins):
- Calories: Approximately 280
- Fat: 12g (7g saturated)
- Carbohydrates: 36g (28g sugar)
- Protein: 7g
- Fiber: 0g
- Sodium: 130mg
This pudding is a treat, no doubt about it. But it does have some redeeming qualities. The egg yolks provide a good dose of choline, which supports brain health. The milk and eggnog offer calcium and vitamin D for strong bones. And the spices — nutmeg and cinnamon — have anti-inflammatory properties and add flavor without extra sugar.
If you’re watching your sugar intake, you can reduce the sugar to 1/3 cup or use a sugar substitute. For a lower-fat version, use 2% milk and low-fat eggnog, though the texture won’t be as luxurious. This is one of those desserts that’s worth the indulgence, especially during the holidays. I say, enjoy it in moderation and savor every bite.
One thing to note: this recipe contains dairy and eggs, so it’s not suitable for those with allergies to those ingredients. The dairy-free and vegan variations I mentioned earlier work well if you need to accommodate dietary restrictions.
Conclusion
This Creamy Holiday Eggnog Pudding has become my go-to dessert for the holiday season, and I think it’s about to become yours too. It’s quick, easy, and uses simple ingredients you probably already have. But more than that, it’s the kind of dessert that makes people stop and ask, “Wait, you made this?” It’s that good.
I love that this recipe is forgiving enough for beginners but impressive enough for experienced cooks. You can dress it up with whipped cream and spices, or keep it simple and let the eggnog flavor shine. You can make it your own with different spices, add-ins, or serving styles. That’s the beauty of a good base recipe — it’s a starting point for your creativity.
I’d love to hear how this turns out for you. Did you try a variation? Add a secret ingredient? Serve it at a party? Drop a comment below and let me know. And if you share a photo on social media, tag me — I love seeing your creations. This pudding is meant to be shared, so go ahead and spread the holiday cheer.
Here’s to easy, delicious desserts that bring people together. Happy holidays, and happy cooking!
Frequently Asked Questions
Can I make this pudding without eggs?
Yes, you can make an egg-free version by using an extra 2 tablespoons of cornstarch and omitting the egg yolks. The texture will be slightly less rich, but it will still set up nicely. You can also use a commercial egg replacer if you prefer.
Why is my pudding lumpy?
Lumpy pudding usually happens when the cornstarch isn’t fully dissolved before cooking, or when the eggs are added too quickly without tempering. Make sure to whisk the cornstarch thoroughly into the egg yolk mixture, and always temper the eggs slowly. If you end up with lumps, just strain the pudding through a fine-mesh strainer — it will smooth right out.
Can I use almond milk or oat milk instead of whole milk?
Absolutely. Oat milk is my preferred substitute because it has a similar consistency to whole milk. Almond milk works too, but the pudding will be slightly thinner. Avoid skim milk or rice milk — they don’t have enough fat to create that creamy texture.
How do I know when the pudding is done cooking?
The pudding is done when it thickens enough to coat the back of a spoon and you see a few lazy bubbles break the surface. Cook for exactly 1 more minute after those bubbles appear, then remove from heat. The pudding will look thinner than you expect, but it will thicken significantly as it cools.
Can I double this recipe?
Yes, this recipe doubles beautifully. Just use a larger saucepan and expect the cooking time to increase by a few minutes. Make sure to whisk constantly, and be patient — it will take a little longer to come to a simmer. I’ve made a triple batch for holiday parties, and it worked perfectly.
Pin This Recipe!
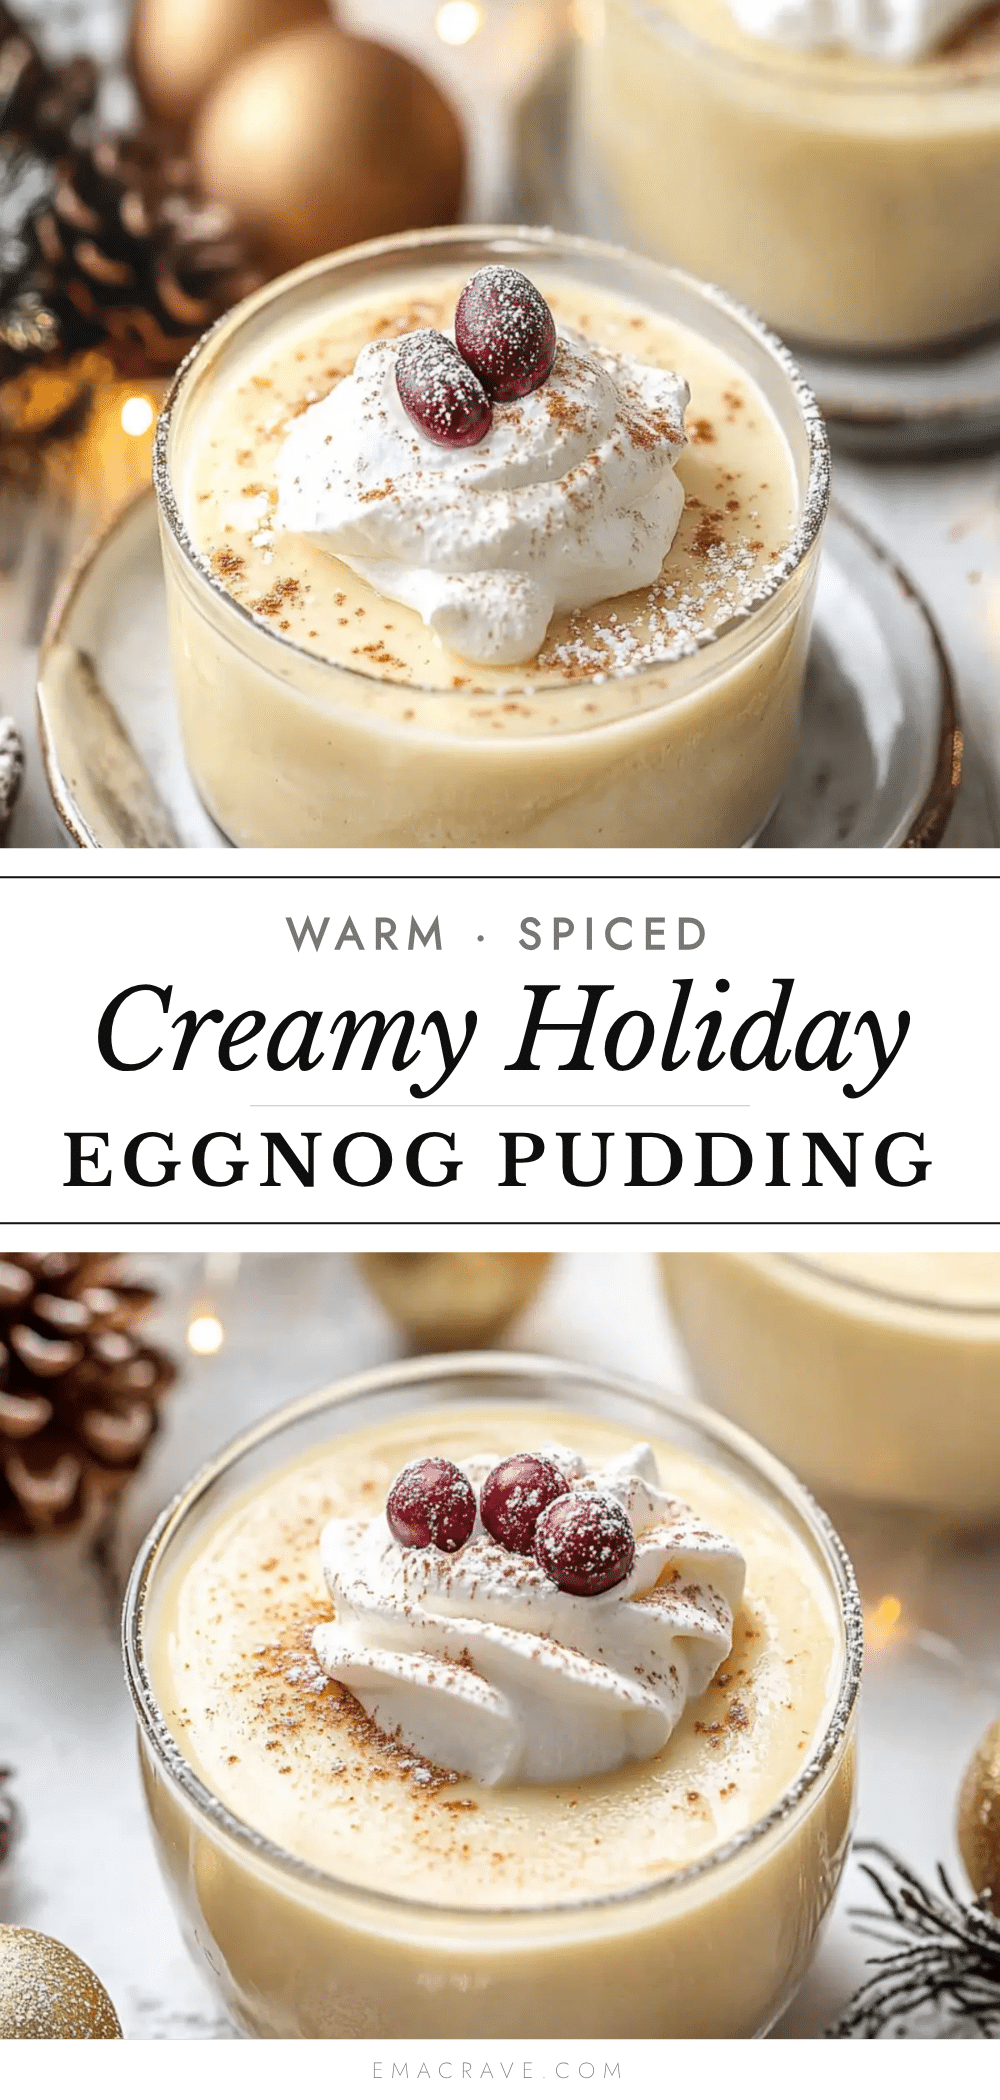
Creamy Holiday Eggnog Pudding (Easy 10-Min Recipe)
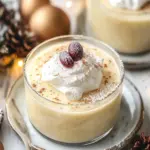
This creamy eggnog pudding comes together in just 10 minutes on the stove and sets in the fridge. It’s a rich, spiced holiday dessert that’s perfect for Christmas dinners, cookie swaps, or New Year’s Eve parties.
- Prep Time: 10 minutes
- Cook Time: 10 minutes
- Total Time: 4 hours 20 minutes (includes chilling)
- Yield: 4 servings 1x
- Category: Dessert
- Cuisine: American
Ingredients
- 2 cups (480 ml) eggnog
- 1 cup (240 ml) whole milk
- 1/2 cup (100 g) granulated sugar
- 1/4 cup (30 g) cornstarch
- 4 large egg yolks
- 1 teaspoon vanilla extract
- 1/4 teaspoon ground nutmeg
- 1/4 teaspoon ground cinnamon
- 1/8 teaspoon salt
- Whipped cream (for serving, optional)
- Extra nutmeg or cinnamon (for dusting, optional)
- Bourbon or rum (optional, 1-2 tablespoons)
Instructions
- In a mixing bowl, whisk together 4 egg yolks and 1/2 cup sugar until pale yellow and thick, about 2 minutes.
- Sprinkle 1/4 cup cornstarch, 1/4 teaspoon nutmeg, 1/4 teaspoon cinnamon, and 1/8 teaspoon salt over the egg yolk mixture. Whisk until smooth and no lumps remain.
- In a medium saucepan, heat 2 cups eggnog and 1 cup milk over medium heat until steaming but not boiling (small bubbles around the edges), about 3-4 minutes.
- Slowly drizzle about 1 cup of the hot eggnog mixture into the egg yolk mixture while whisking constantly to temper the yolks. Then pour the egg yolk mixture back into the saucepan, whisking continuously.
- Return the saucepan to medium heat and cook, whisking constantly, until the mixture thickens and just starts to bubble, about 4-6 minutes. Cook for 1 more minute after bubbles appear, then remove from heat.
- Remove from heat and stir in 1 teaspoon vanilla extract (and optional bourbon or rum). If desired, strain through a fine-mesh strainer into a clean bowl to remove any lumps.
- Divide the pudding among serving dishes. Press plastic wrap directly onto the surface of each pudding to prevent a skin from forming (or skip if you like the skin). Refrigerate for at least 4 hours, preferably overnight.
- Serve cold, topped with whipped cream and a dusting of fresh nutmeg or cinnamon.
Notes
For best results, use full-fat eggnog and whole milk. Let egg yolks come to room temperature before starting. Whisk constantly while cooking to prevent scorching. The pudding will thicken significantly as it cools and chills. For a dairy-free version, use full-fat oat milk or canned coconut milk and vegan eggnog. For a lower-sugar version, reduce sugar to 1/3 cup. The pudding can be stored in the refrigerator for up to 5 days. Do not freeze.
Nutrition
- Serving Size: 1/2 cup
- Calories: 280
- Sugar: 28
- Sodium: 130
- Fat: 12
- Saturated Fat: 7
- Carbohydrates: 36
- Protein: 7
Keywords: eggnog pudding, holiday dessert, easy pudding, creamy pudding, Christmas dessert, eggnog recipe, stovetop pudding