Love this? Save it for later!
Share the inspiration with your friends
The blender was still wet from my morning smoothie when I spotted the bunch of bananas on the counter. They were past their prime—speckled brown, soft, and practically begging for something other than the freezer. I almost tossed them into a bag for banana bread, but honestly? I wasn’t in the mood to preheat the oven. It was one of those sticky afternoons where even the thought of turning on the stove felt like a punishment.
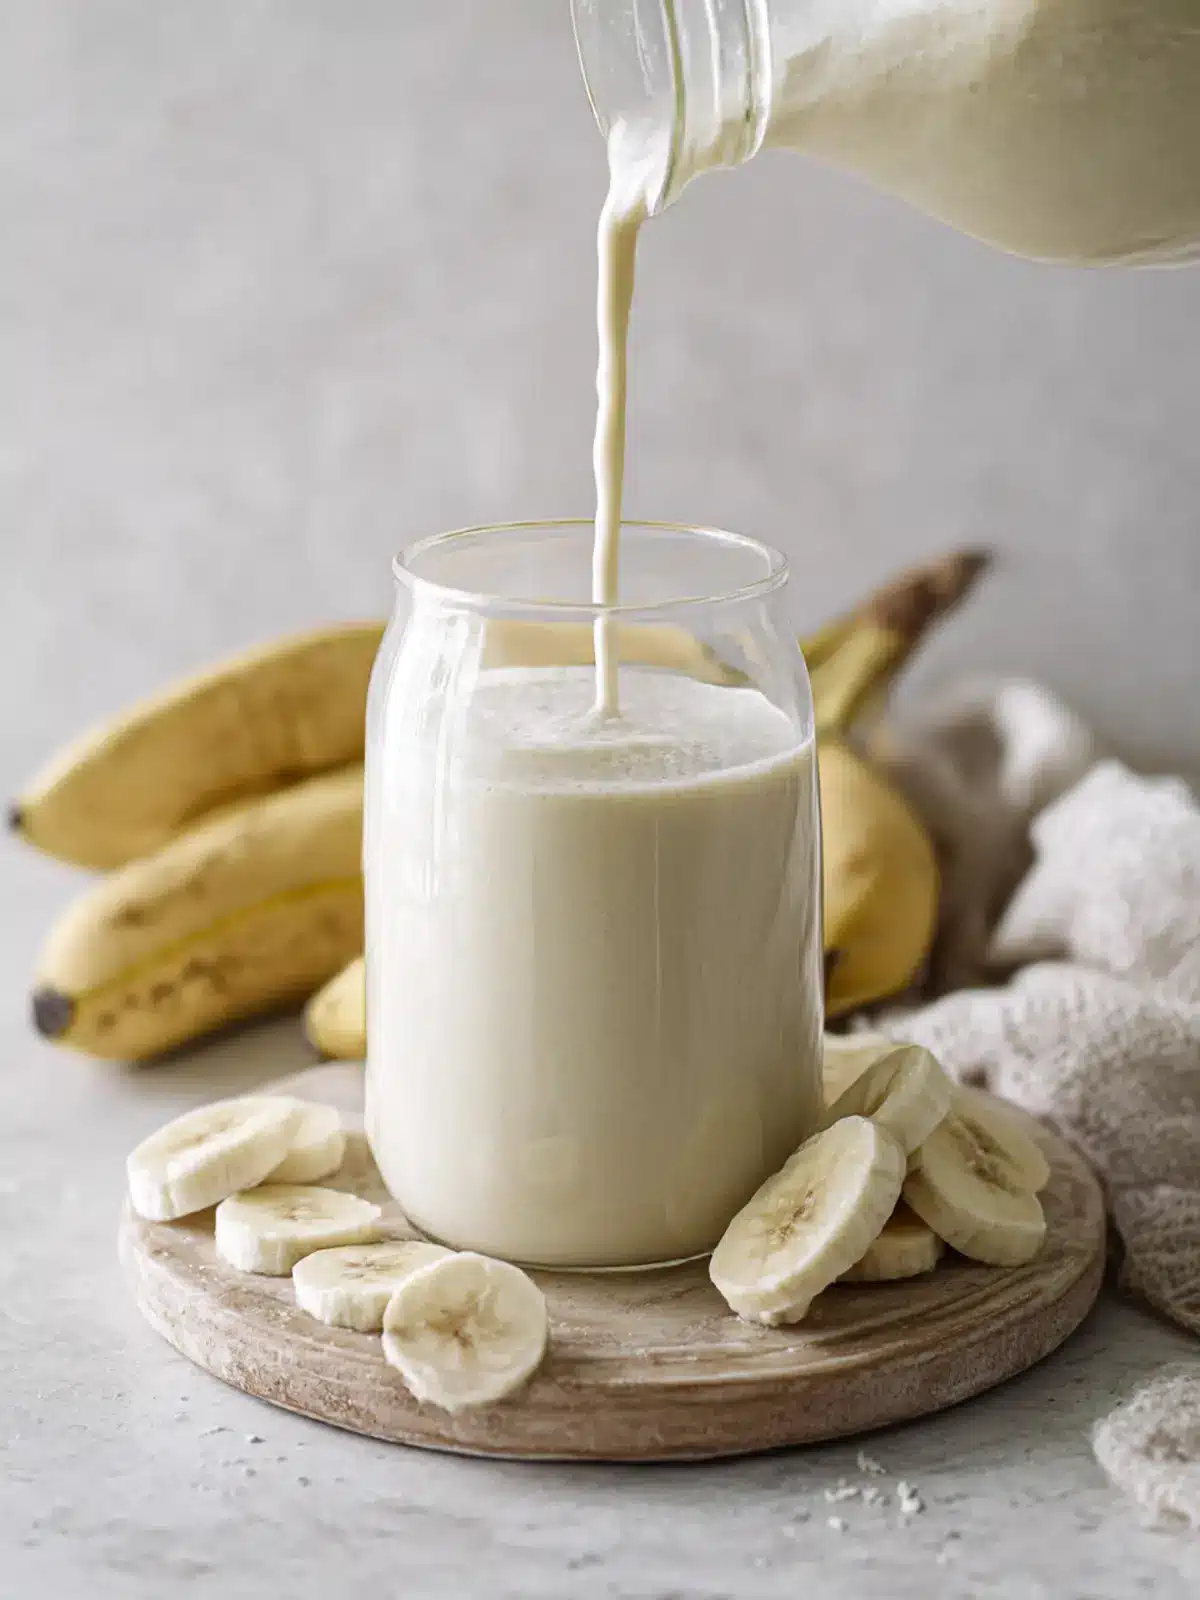
So I did something a little weird. I tossed a banana into the blender with some water, a pinch of salt, and a splash of vanilla. I figured I’d make a quick smoothie, drink it, and move on with my day. But when I poured that liquid into a glass, it was pale, creamy, and surprisingly smooth. It looked like milk. It poured like milk. And when I took a sip, it tasted like a gentle whisper of banana—sweet, but not overpowering.
I stood there in my quiet kitchen, glass in hand, and thought, Wait. Did I just make banana milk?
That accidental creation became my go-to drink for the rest of the week. I drank it over granola, used it in my coffee, and even let my kid try it (she asked for more, which is basically a five-star review in our house). It was so ridiculously simple that I almost felt silly sharing it. But then I realized—that’s exactly why it needed to be shared. Sometimes the best recipes aren’t complicated. They’re just the ones you stumble into when you’re not trying so hard.
This creamy vegan banana milk is exactly that. It takes five minutes. It uses ingredients you probably already have. And it’s the kind of drink that makes you wonder why you ever bought carton milk in the first place. Honestly, it’s become a staple in my fridge, right next to my quick caramelized banana yogurt bowl for busy mornings.
Why You’ll Love This Recipe
Let me tell you why this creamy vegan banana milk has earned a permanent spot in my weekly rotation. It’s not just because it’s easy—though, let’s be real, that’s a huge part of it.
- Quick & Easy: From counter to glass in under five minutes. No soaking, no straining, no fancy equipment. Just a blender and a banana.
- Simple Ingredients: You need exactly four things—banana, water, salt, and vanilla. That’s it. No grocers’ list, no hunting for obscure items.
- Perfect for Busy Mornings: Pour it over cereal, blend it into coffee, or just drink it straight. It’s a lifesaver when you’re running late and need something cold and satisfying.
- Crowd-Pleaser: My kids love it. My neighbor who swears she hates bananas? She asked for the recipe. Even my dairy-loving husband admitted it’s “actually pretty good.”
- Unbelievably Creamy: The natural pectin in bananas creates a silky texture that mimics whole milk. No gums, no thickeners, no weird additives.
What makes this different from every other plant-based milk recipe out there? It’s the ratio. After a week of tweaking, I found the perfect balance of banana to water that gives you a drinkable milk—not a thin smoothie, not a thick shake. It’s that Goldilocks zone where the banana flavor is present but subtle, and the texture is smooth enough to pour over your morning granola or stir into your afternoon iced coffee.
This isn’t just another dairy-free milk alternative. It’s the kind of recipe that makes you feel like you’ve hacked the system. You’re saving money, reducing waste (hello, spotty bananas), and drinking something that actually tastes good. Plus, it’s naturally sweet—no added sugar, no dates, no maple syrup. Just the gentle sweetness of a ripe banana doing its thing.
What Ingredients You Will Need
This recipe uses simple, everyday ingredients to deliver a creamy, refreshing milk alternative without any fuss. You probably already have everything in your kitchen right now.
The Core Ingredients
- 1 large ripe banana (very ripe with brown spots, peeled and broken into chunks) — The riper the banana, the sweeter and more flavorful your milk will be. I prefer using bananas that are too soft for eating but not yet mushy. (Pro tip: If your bananas are greenish, your milk will taste starchy and bland—wait a few days!)
- 2 cups cold water (filtered if possible) — The water-to-banana ratio is crucial here. Too much water and you’ll get banana-flavored water. Too little and you’ll end up with a smoothie. Two cups is the sweet spot for a drinkable consistency.
- Pinch of fine sea salt (about 1/16 teaspoon) — This isn’t about making it salty. Salt enhances the natural sweetness of the banana and balances the flavor. Trust me on this one—don’t skip it.
- ½ teaspoon vanilla extract (optional but recommended) — Vanilla adds warmth and rounds out the banana flavor. Use pure vanilla extract if you have it; imitation works fine in a pinch.
Optional Add-Ins
- 1 pitted Medjool date — If your bananas aren’t super ripe, a date adds extra sweetness without overpowering the banana flavor.
- ½ teaspoon cinnamon — For a cozy, spiced version that pairs beautifully with fall flavors or your morning oatmeal.
- 1 tablespoon almond butter — Adds protein and makes the milk richer. Great for post-workout recovery or a more filling drink.
- 1 teaspoon cacao powder — Turns this into chocolate banana milk. My kids fight over this version.
When it comes to ingredient selection, I recommend using organic bananas when possible—especially since you’re blending the whole fruit, skin included (well, not the skin—just the flesh). But honestly, conventional bananas work perfectly fine. I’ve made this with both, and the difference is negligible.
For the water, cold water is key. Warm water will make the banana oxidize faster, turning your milk brown and giving it an off flavor. If you want to meal prep, use ice-cold water and store immediately in the fridge.
One more thing—if you’re making this for someone with a nut allergy, rest easy. This recipe is naturally nut-free. And if you’re avoiding soy, gluten, or oats, you’re in luck—this milk contains none of those. It’s about as allergen-friendly as a recipe can get.
Equipment Needed
You don’t need a fancy setup for this one. Here’s what you’ll need:
- High-speed blender — A Vitamix or Blendtec works beautifully, but honestly, any blender will do. I’ve made this in a $30 budget blender and it turned out just fine. The key is blending long enough to break down the banana completely.
- Fine-mesh strainer or nut milk bag — Optional, but recommended if you want ultra-smooth milk. I usually skip this step because I don’t mind a tiny bit of texture, but if you’re serving it to guests or using it in coffee, strain it.
- Glass jar or bottle — For storage. A 16-ounce mason jar works perfectly. Make sure it has a tight-fitting lid.
- Measuring cups and spoons — For accuracy. I’ve eyeballed this recipe many times, but measuring ensures consistent results.
If you don’t have a nut milk bag, you can use a clean dish towel or cheesecloth. Or honestly, just don’t strain it—the banana pulp settles at the bottom anyway, and you can shake it before drinking. I’ve done both, and I usually go the unstrained route because it’s less cleanup and the texture is still pleasant.
One tip: if you’re using a budget blender, blend for a full 60 seconds instead of 30. The extra time helps break down the banana fibers more thoroughly. My first batch came out a little stringy because I rushed it. Lesson learned.
Preparation Method
This is where the magic happens. Follow these steps, and you’ll have creamy vegan banana milk in under five minutes.
- Prep your banana. Peel one large, very ripe banana and break it into 3-4 chunks. The riper, the better—those brown spots mean maximum sweetness and creaminess. If your banana is still a little firm, that’s okay, but the milk won’t be as sweet.
- Add to blender. Drop the banana chunks into your blender pitcher. Add 2 cups of cold water, a pinch of fine sea salt, and ½ teaspoon of vanilla extract (if using). If you’re adding any optional ingredients like a date or cinnamon, toss those in now.
- Blend on high. Start on low speed for 5 seconds to break up the banana, then ramp up to high speed. Blend for 30-45 seconds, or until the mixture is completely smooth and creamy. You should see a uniform, pale liquid with no visible chunks. (If you’re using a budget blender, blend for a full 60 seconds.)
- Taste and adjust. Stop the blender and take a small sip. Is it sweet enough? If not, add a date or a tiny splash of maple syrup and blend again. Too thick? Add another ¼ cup of water and pulse. Too thin? Add half a banana and re-blend. This is your milk—adjust it to your liking.
- Strain (optional). If you want ultra-smooth milk, pour the mixture through a fine-mesh strainer or nut milk bag into a bowl or large measuring cup. Use a spatula to gently press the liquid through. The leftover banana pulp can be added to oatmeal, smoothies, or even pancake batter. (I’ve done all three—zero waste!)
- Transfer to a jar. Pour the milk into a glass jar or bottle with a tight-fitting lid. Give it a good shake before each use, because natural separation happens—the banana solids will settle at the bottom over time.
- Chill and serve. Refrigerate for at least 30 minutes before drinking if you like it cold. Or serve immediately over ice. The milk will thicken slightly as it chills, which is totally normal.
A few sensory cues to watch for: the milk should look pale and creamy, like thinned-out yogurt. It should smell faintly of banana and vanilla—not sour or fermented. If it smells off, trust your nose and start over. Fresh banana milk lasts 2-3 days in the fridge, so make small batches.
One thing I learned the hard way: don’t over-blend. I once let my blender run for 90 seconds because I got distracted, and the milk turned frothy and slightly warm. It still tasted fine, but the texture was weird—almost like a banana milkshake that had been whipped too long. Stick to 30-45 seconds, and you’re golden.
Cooking Tips & Techniques
After making this recipe at least twenty times (not exaggerating), I’ve picked up a few tricks that make a real difference.
Use very ripe bananas. This is the single most important tip. Green or barely ripe bananas will give you starchy, bland milk that tastes more like raw plantain than sweet banana. Wait until those peels are spotted brown—or even mostly brown. The sugar content is highest at this stage, which means your milk will be naturally sweet without any added sweetener.
Cold water is your friend. Warm water accelerates oxidation, which turns your milk brown and gives it a slightly fermented taste. Always use cold water from the tap, or even add a few ice cubes to keep everything chilled during blending. If you’re meal prepping, use ice-cold water and transfer immediately to the fridge.
Don’t skip the salt. I know it seems weird, but that tiny pinch of salt does two things: it enhances the natural sweetness of the banana, and it balances the flavor so the milk doesn’t taste flat. I’ve made batches with and without salt side by side, and the salted version is noticeably more flavorful. It’s a small step that makes a big difference.
Strain if you’re using it in coffee. Banana milk is naturally a little thicker than cow’s milk, and if you pour it directly into hot coffee, the heat can cause the banana solids to curdle slightly. Straining removes most of the fiber, giving you a smoother coffee experience. I learned this after my first cup of banana latte looked… chunky. Not cute.
Shake before each use. Natural separation is inevitable. The banana solids settle at the bottom, and the watery part floats to the top. A quick shake (or a stir with a spoon) brings everything back together. Don’t worry—it’s not spoiled. It’s just being natural.
One mistake I made early on was using frozen bananas. I thought it would save time, but frozen bananas release too much water as they thaw, making the milk watery and thin. Stick to fresh, room-temperature bananas for the best texture.
Variations & Adaptations
This recipe is incredibly flexible. Here are some of my favorite variations:
- Chocolate Banana Milk: Add 1 tablespoon of unsweetened cacao powder and 1 pitted date to the blender. Blend as usual. This version is rich enough to double as a dessert—my kids request it almost daily.
- Spiced Banana Milk: Add ½ teaspoon of cinnamon, ¼ teaspoon of nutmeg, and a tiny pinch of cardamom. This variation is perfect for fall mornings or cozy evenings. I’ve also added a pinch of ginger for a little warmth.
- Protein-Packed Banana Milk: Add 1 scoop of vanilla or unflavored plant-based protein powder and 1 tablespoon of almond butter. This turns your milk into a post-workout recovery drink that actually tastes good. Just blend a little longer to incorporate the powder fully.
- Berry Banana Milk: Add ¼ cup of frozen strawberries or blueberries. Blend until smooth. The color is gorgeous—a soft pink or purple—and the flavor is fruity and refreshing. Perfect for kids who are picky about plain milk.
- Oat Banana Milk: Replace ½ cup of the water with oat milk for an extra-creamy texture. This version is thicker and almost dessert-like. I use it in my coffee when I want something indulgent.
For dietary adaptations, this recipe is naturally vegan, gluten-free, nut-free, soy-free, and refined sugar-free. If you’re avoiding bananas (maybe due to a sensitivity or just personal preference), you can try this with ripe mango or cooked sweet potato—though the texture will be different. I’ve tested a mango version, and it’s delicious but thinner.
If you’re following a low-carb or keto diet, this recipe isn’t ideal because bananas are high in natural sugars. But you can make a smaller batch with half a banana and extra water to reduce the carb content. It won’t be as creamy, but it’ll still be tasty.
One personal variation I’ve been obsessed with lately: adding a splash of coconut cream and a pinch of turmeric. It turns the milk a beautiful golden color, and the coconut flavor pairs beautifully with banana. I call it my “golden banana latte,” and it’s become my weekend morning ritual.
Serving & Storage Suggestions
This creamy vegan banana milk is best served cold, straight from the fridge, over a glass of ice. But here are some other ways I love to use it:
- Over cereal or granola: Pour it over your favorite breakfast bowl. It adds a subtle banana sweetness that pairs beautifully with oats, nuts, and seeds.
- In coffee or tea: Use it as a creamer. The banana flavor is mild enough that it won’t overpower your coffee, but it adds a natural sweetness that reduces the need for sugar. Just remember to strain it first for the smoothest results.
- In smoothies: Use it as a base for your morning smoothie. It adds creaminess without extra calories or additives.
- In baking: Substitute it for milk in pancake batter, muffin recipes, or even creamy sauces. The banana flavor is subtle enough to work in most baked goods.
- As a standalone drink: Honestly, this is my favorite way to enjoy it. A cold glass of banana milk with a sprinkle of cinnamon on top is pure comfort.
Storage instructions: Store your banana milk in a sealed glass jar in the refrigerator for up to 3 days. The flavor is best within the first 24 hours, but it’s still good on day two or three. Give it a good shake before each use because natural separation happens.
Freezing: You can freeze banana milk in ice cube trays for up to a month. Pop a cube into your morning smoothie or coffee for a quick flavor boost. The texture will change slightly after freezing—it becomes a bit grainier—but it’s still fine for blending.
Reheating: If you want warm banana milk, pour it into a small saucepan and heat gently over low heat, stirring constantly. Do not boil, or the milk will separate and become grainy. I’ve made warm banana milk with cinnamon for cozy winter mornings, and it’s lovely.
One thing to note: the flavor develops over time. On day one, it’s fresh and bright. On day two, the banana flavor deepens and becomes more pronounced. Some people prefer it on day two—I’m one of them. But by day three, it starts to lose its freshness, so I recommend finishing it within 48 hours for the best experience.
Nutritional Information & Benefits
Here’s the approximate nutritional breakdown for one cup (8 ounces) of unsweetened banana milk made with one banana and two cups of water:
- Calories: 55-65
- Carbohydrates: 14g
- Sugar: 7g (naturally occurring)
- Fiber: 1.5g
- Protein: 0.7g
- Fat: 0.2g
- Potassium: 210mg
- Vitamin B6: 0.2mg
- Vitamin C: 5mg
Health benefits: Bananas are packed with potassium, which supports heart health and muscle function. They’re also a good source of vitamin B6, which helps your body produce red blood cells and maintain proper nerve function. The fiber in bananas aids digestion and helps you feel full longer.
Dietary considerations: This recipe is naturally vegan, gluten-free, nut-free, soy-free, and refined sugar-free. It’s also low in fat and contains no added oils. If you’re watching your sugar intake, keep in mind that the sugar comes entirely from the banana—no added sweeteners.
Potential allergens: Bananas are generally well-tolerated, but some people with latex allergies may also react to bananas due to cross-reactivity. If you have a known banana sensitivity, this recipe isn’t for you.
From a personal wellness perspective, I love that this milk gives me a gentle energy boost without the crash that comes from sugary drinks. It’s hydrating, satisfying, and feels like a treat even though it’s basically just blended fruit. I’ve swapped it into my morning routine instead of my usual almond milk, and I genuinely feel more satisfied until lunch.
Conclusion
This creamy vegan banana milk is proof that the best recipes don’t need to be complicated. It’s quick, it’s affordable, and it uses ingredients you probably already have in your kitchen. Whether you’re looking for a dairy-free milk alternative, a refreshing afternoon drink, or a way to use up those spotty bananas on your counter, this recipe has you covered.
What I love most about this recipe is how customizable it is. You can make it plain, chocolatey, spiced, or berry-flavored. You can drink it straight, pour it over cereal, or blend it into your morning coffee. It’s a blank canvas that happens to taste amazing on its own.
I’d love to hear how you make it your own. Did you add cinnamon? Try it with chocolate? Use it in a creamy mango coconut chia parfait? Drop a comment below and let me know—I read every single one. And if you loved this recipe, share it with a friend who’s looking for easy, plant-based ideas. Happy blending!
Frequently Asked Questions
Can I make banana milk without a blender?
Technically, yes, but it’s a lot of work. You’d need to mash the banana very thoroughly with a fork, then whisk it vigorously into cold water. The texture won’t be as smooth, and you’ll likely have small banana chunks floating around. A blender is really the best tool here.
Why did my banana milk turn brown?
Oxidation. Bananas naturally brown when exposed to air, especially when blended. To slow this down, use cold water, blend for a shorter time (30-45 seconds max), and store the milk immediately in the fridge. Adding a splash of lemon juice can also help preserve the color, but it will slightly change the flavor.
Can I use frozen bananas?
I don’t recommend it. Frozen bananas release too much water as they thaw, making the milk watery and thin. Plus, they don’t blend as smoothly. Stick to fresh, room-temperature bananas for the best texture and flavor.
How long does homemade banana milk last?
Up to 3 days in the refrigerator, stored in a sealed glass jar. The flavor is best within the first 24-48 hours. After that, the banana flavor becomes more pronounced and the texture may separate more noticeably. Always shake well before drinking.
Can I use this milk in hot coffee?
Yes, but strain it first. The banana solids can curdle slightly when exposed to high heat, giving your coffee a grainy texture. Straining removes most of the fiber, resulting in a smoother latte experience. I also recommend letting your coffee cool slightly before adding the milk.
Pin This Recipe!
Creamy Vegan Banana Milk: Best 5-Minute Refreshing Drink
This creamy vegan banana milk is a quick, 5-minute dairy-free milk alternative made with just four simple ingredients. It’s naturally sweet, refreshing, and perfect for busy mornings or as a healthy drink.
- Prep Time: 5 minutes
- Cook Time: 0 minutes
- Total Time: 5 minutes
- Yield: 2 servings 1x
- Category: Drinks
- Cuisine: American
Ingredients
- 1 large ripe banana (very ripe with brown spots, peeled and broken into chunks)
- 2 cups cold water (filtered if possible)
- Pinch of fine sea salt (about 1/16 teaspoon)
- ½ teaspoon vanilla extract (optional but recommended)
- 1 pitted Medjool date (optional, for extra sweetness)
- ½ teaspoon cinnamon (optional, for a spiced version)
- 1 tablespoon almond butter (optional, for richness)
- 1 teaspoon cacao powder (optional, for chocolate version)
Instructions
- Prep your banana: Peel one large, very ripe banana and break it into 3-4 chunks.
- Add to blender: Drop the banana chunks into your blender pitcher. Add 2 cups of cold water, a pinch of fine sea salt, and ½ teaspoon of vanilla extract (if using). If adding any optional ingredients like a date or cinnamon, toss those in now.
- Blend on high: Start on low speed for 5 seconds to break up the banana, then ramp up to high speed. Blend for 30-45 seconds, or until the mixture is completely smooth and creamy. (If using a budget blender, blend for a full 60 seconds.)
- Taste and adjust: Stop the blender and take a small sip. If not sweet enough, add a date or a tiny splash of maple syrup and blend again. Too thick? Add another ¼ cup of water and pulse. Too thin? Add half a banana and re-blend.
- Strain (optional): If you want ultra-smooth milk, pour the mixture through a fine-mesh strainer or nut milk bag into a bowl or large measuring cup. Use a spatula to gently press the liquid through. The leftover banana pulp can be added to oatmeal, smoothies, or pancake batter.
- Transfer to a jar: Pour the milk into a glass jar or bottle with a tight-fitting lid. Give it a good shake before each use, because natural separation happens.
- Chill and serve: Refrigerate for at least 30 minutes before drinking if you like it cold. Or serve immediately over ice. The milk will thicken slightly as it chills.
Notes
Use very ripe bananas for maximum sweetness. Cold water is key to prevent oxidation. Don’t skip the salt—it enhances flavor. Strain if using in hot coffee to avoid curdling. Shake before each use. Best consumed within 48 hours.
Nutrition
- Serving Size: 1 cup (8 ounces)
- Calories: 5565
- Sugar: 7
- Sodium: 50
- Fat: 0.2
- Carbohydrates: 14
- Fiber: 1.5
- Protein: 0.7
Keywords: banana milk, vegan milk, dairy-free milk, plant-based milk, 5-minute recipe, easy milk alternative, healthy drink, banana recipe



