Love this? Save it for later!
Share the inspiration with your friends
The rice cooker let out its final click, and I stared at the leftover white rice sitting in the pot. Again. It was a Tuesday night, and I was too tired to think about another stir-fry or fried rice situation. I’d been scrolling through my phone, half-watching some travel show, when they flashed a shot of a street vendor in Bangkok pressing rice into a sizzling pan. The edges turned golden and crackly. I sat up straighter. I had rice. I had a jar of peanut butter in the pantry. And honestly? I had a craving for something that crunched.
So I did what any reasonable person would do at 9 PM on a weekday. I grabbed that cold leftover rice, mashed it into patties with my hands, and threw them into a hot skillet with some oil. The sound alone—that aggressive, satisfying sizzle—told me I was onto something. I whisked together a quick spicy peanut sauce with stuff I had lying around (soy sauce, sriracha, lime, a little honey), and by the time the patties were bronzed and crispy on both sides, dinner felt less like a chore and more like a discovery.
The first bite was a mess of textures. The outside shattered, the inside stayed soft and chewy, and the sauce coated everything in that salty-sweet-spicy magic. I ate three patties standing at the counter. These crispy rice cakes with spicy peanut sauce weren’t just a way to use up leftovers—they became the reason I started keeping extra rice on purpose. They’re quick, they’re forgiving, and they turn pantry staples into something that feels genuinely special. No fuss, just crunch.
Why You’ll Love This Recipe
Let me tell you why this one sticks. I’ve made these crispy rice cakes more times than I can count, and every single time, they deliver. No fancy equipment, no obscure ingredients—just honest food that works.
- Quick & Easy: From fridge to plate in under 20 minutes. Seriously. Perfect for those nights when you need dinner now.
- Simple Ingredients: You probably have everything already. Leftover rice, peanut butter, soy sauce, a lime, and some pantry spices. No special trip required.
- Perfect for Snacking or Dinner: They work as an appetizer, a side dish, or a light main. I’ve even packed them for lunch (they reheat beautifully).
- Crowd-Pleaser: I brought these to a small gathering once, and people kept circling back to the plate. Kids love the crunch, adults love the sauce.
- Unbelievably Delicious: The contrast between the crispy exterior and the tender interior, plus that bold peanut sauce—it’s comfort food with a kick.
What makes these different from other rice cake recipes? It’s the technique. I press the rice firmly so the patties hold together without falling apart in the pan. And the sauce? It’s not too thick, not too thin—it clings to each cake like it belongs there. I’ve tested this with short-grain, long-grain, even leftover jasmine rice from takeout, and it works every time.
This is the kind of recipe that makes you close your eyes after the first bite. It’s humble ingredients doing something unexpectedly brilliant. And honestly? That’s my favorite kind of cooking.
What Ingredients You Will Need
This recipe keeps things simple. Most of these are pantry staples, and the few fresh items are easy to find. Here’s what you’ll need for the rice cakes and that addictive spicy peanut sauce.
For the Crispy Rice Cakes
- 3 cups cooked white rice, cooled (day-old is best, but freshly cooked and cooled works too—short-grain or jasmine gives the best texture)
- 2 tablespoons all-purpose flour (helps bind the cakes; use rice flour for gluten-free)
- 1 large egg, lightly beaten (acts as a binder; for a vegan version, use 1 tablespoon flaxseed meal mixed with 3 tablespoons water)
- 2 green onions, finely chopped (adds a mild, fresh bite)
- 1 teaspoon salt
- ½ teaspoon garlic powder
- ¼ teaspoon white pepper (or black pepper if that’s what you have)
- 2 to 3 tablespoons vegetable oil (for frying; use avocado or canola oil for a neutral flavor)
For the Spicy Peanut Sauce
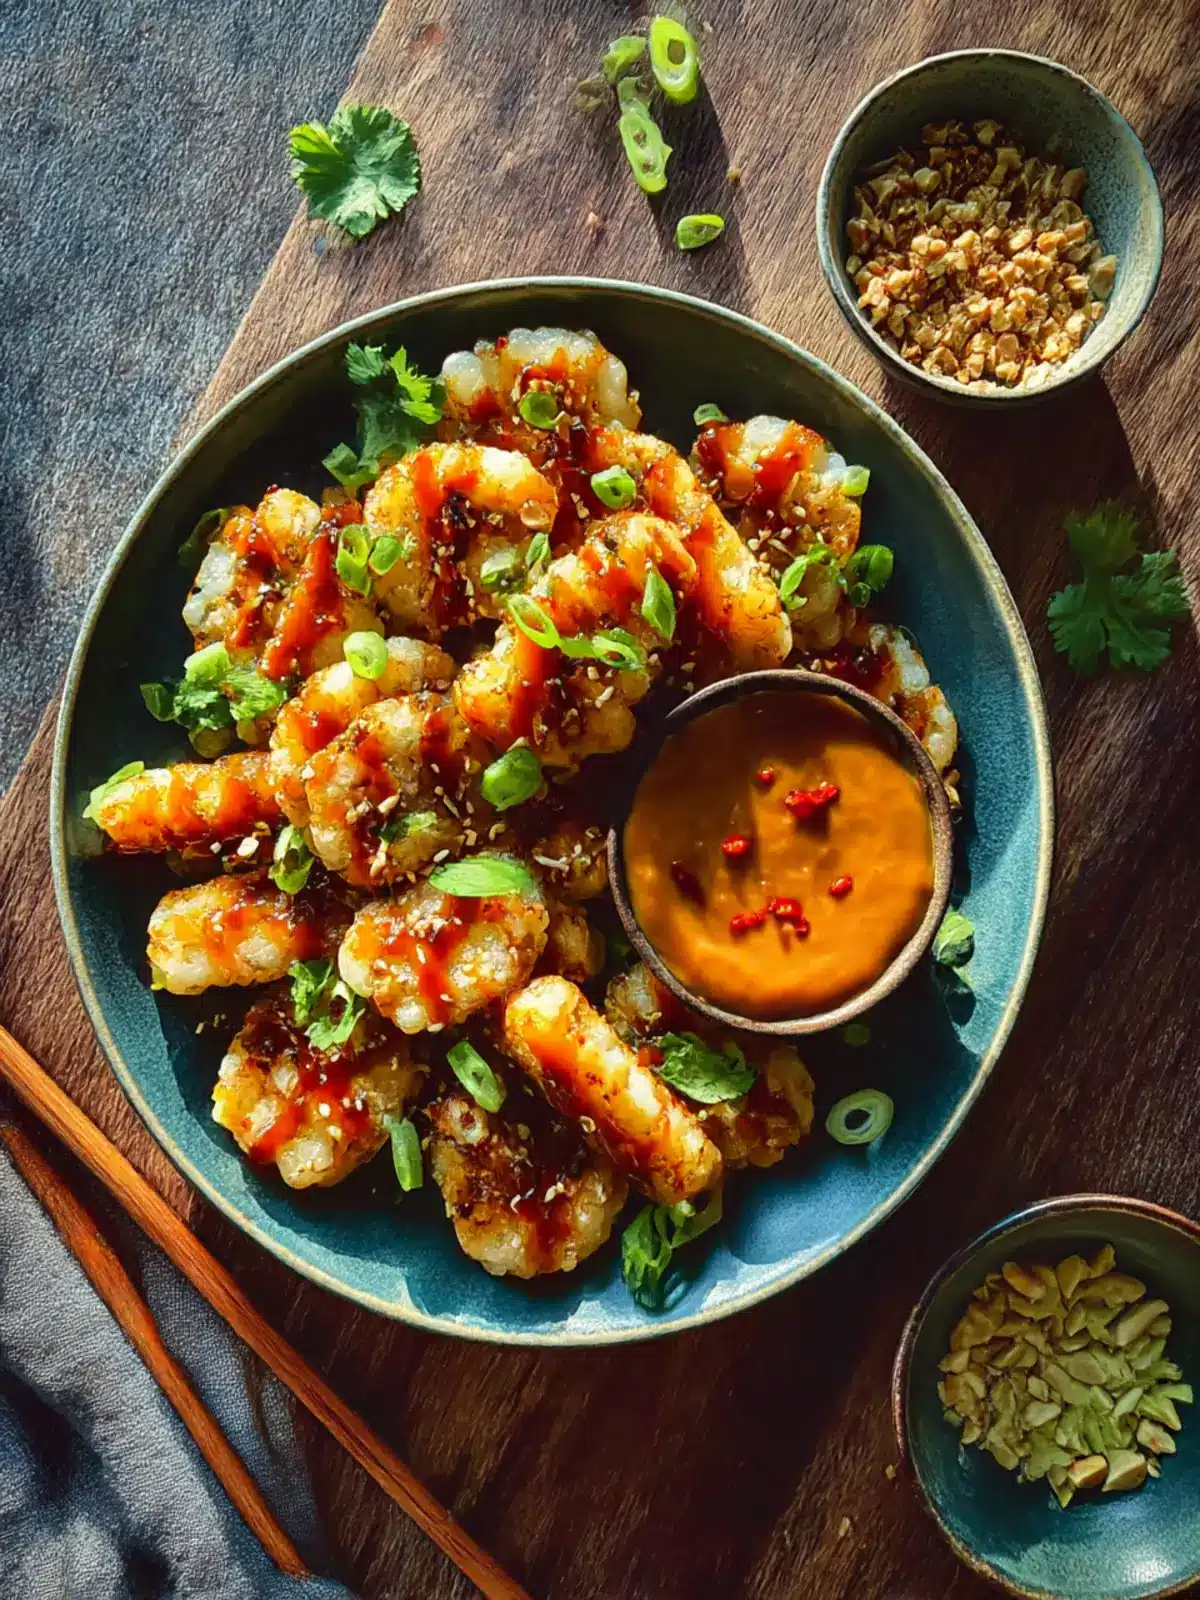
- ¼ cup creamy peanut butter (I prefer natural peanut butter with no added sugar, but any kind works—just adjust sweetness)
- 2 tablespoons soy sauce (or tamari for gluten-free)
- 1 tablespoon sriracha (adjust to your heat preference; start with 1 teaspoon if you’re sensitive)
- 1 tablespoon honey or maple syrup (balances the heat and salt)
- 1 tablespoon lime juice (fresh is best, but bottled works in a pinch)
- 2 to 3 tablespoons warm water (to thin the sauce to your desired consistency)
- 1 teaspoon sesame oil (optional, but adds a lovely nutty depth)
For Garnish (Optional but Recommended)
- Additional chopped green onions
- Toasted sesame seeds
- Fresh cilantro leaves
- Thinly sliced red chili
Ingredient Tip: I’ve tried this with brown rice and even quinoa, and while it works, the texture is less sticky. Short-grain white rice really is the MVP here—it holds together like a dream. For the peanut butter, I recommend Skippy Natural or Jif Natural for a consistent result. If your peanut butter is thick and oily, just stir it well before measuring.
Equipment Needed
You don’t need much for this recipe, which is part of the beauty. Here’s what I use every time:
- A large non-stick skillet or frying pan (10 to 12 inches works best—gives you room to fry multiple cakes without crowding)
- A mixing bowl (medium size for combining the rice mixture)
- A small whisk or fork (for the peanut sauce)
- A spatula (preferably a thin, flexible one for flipping the cakes without breaking them)
- A measuring cup and spoons
- A small bowl (for the sauce)
If you don’t have a non-stick skillet, a well-seasoned cast iron pan works too—just use a little extra oil and let the cakes form a crust before flipping. I’ve used both, and the non-stick is definitely easier for beginners. For a budget option, a basic non-stick pan from any kitchen store will do the job perfectly.
Pro Tip: Keep a paper towel-lined plate nearby for draining the fried cakes. It helps them stay crispy instead of getting soggy.
Preparation Method
This comes together fast, so I like to have everything prepped before I start. Here’s the step-by-step.
- Make the peanut sauce first. In a small bowl, whisk together the peanut butter, soy sauce, sriracha, honey, and lime juice. Add warm water one tablespoon at a time, whisking until smooth and pourable. Stir in the sesame oil if using. Taste and adjust—more lime for tang, more sriracha for heat. Set aside. (This sauce keeps for up to a week in the fridge.)
- Prepare the rice mixture. In a medium mixing bowl, combine the cooled rice, flour, beaten egg, chopped green onions, salt, garlic powder, and white pepper. Use your hands or a spatula to mix until everything is evenly distributed. The mixture should feel sticky and slightly clumpy.
- Shape the cakes. Scoop about ⅓ cup of the rice mixture into your hands. Press it firmly into a patty about ½-inch thick. Really squeeze it—this helps the cakes hold together during frying. Place each formed patty on a clean plate or cutting board. You should get 6 to 8 cakes depending on size.
- Heat the oil. Pour the vegetable oil into your skillet and set it over medium-high heat. Let it heat for about 2 minutes. To test, drop a tiny piece of rice into the oil—if it sizzles immediately, you’re ready.
- Fry the cakes. Carefully place 3 to 4 patties into the hot oil, leaving space between them. Don’t overcrowd the pan. Cook for 3 to 4 minutes on the first side, until the bottom is deep golden brown and crispy. The edges should look lacy and caramelized. Flip gently with a spatula and cook for another 3 to 4 minutes on the second side.
- Drain and repeat. Transfer the cooked cakes to a paper towel-lined plate. Repeat with the remaining patties, adding a little more oil if needed. Keep the cooked cakes warm in a 200°F oven while you finish the batch.
- Serve immediately. Arrange the crispy rice cakes on a plate, drizzle generously with the spicy peanut sauce, and sprinkle with green onions, sesame seeds, and cilantro if using. Serve warm.
Sensory Cue: When the cakes are ready to flip, the edges will look dark golden and slightly crispy, and you’ll see small bubbles around the sides. If they resist when you try to lift them, let them cook another minute—they’ll release easily when the crust is set.
Cooking Tips & Techniques
I’ve made these crispy rice cakes at least a dozen times, and I’ve learned a few things the hard way. Here’s what I wish I knew from the start.
Use cold rice. Freshly cooked rice is too sticky and soft—it won’t hold its shape. Day-old rice that’s been in the fridge is perfect. The grains are firmer, and they crisp up better. If you’re using fresh rice, spread it on a baking sheet and let it cool completely, then refrigerate for 30 minutes.
Press firmly when shaping. This is the number one mistake I see. If you don’t compress the rice mixture, the cakes will fall apart in the pan. Squeeze each patty like you mean it. I even press them a second time right before they hit the oil.
Don’t skip the flour and egg. These binders are non-negotiable for a sturdy cake. I once tried to make them without egg, and they crumbled into a mess of fried rice bits. Not the worst thing ever, but not what we’re going for.
Let the pan get hot. Medium-high heat is key. If the oil isn’t hot enough, the cakes will absorb oil and turn greasy instead of crispy. If it’s too hot, the outside burns before the inside warms through. A good test: the rice sizzles immediately when it hits the pan.
Don’t flip too early. I ruined my first batch by flipping too soon. Wait until the bottom is deeply golden and the edges look crisp. A good 3 to 4 minutes per side. Patience pays off.
Multitask the sauce. While the rice cakes are frying, you can whisk the sauce in under a minute. Or make it ahead—it actually gets better after sitting for a few hours as the flavors meld.
Variations & Adaptations
This recipe is a fantastic base for experimenting. Here are some ways I’ve tweaked it.
- Vegan Version: Replace the egg with a flax egg (1 tablespoon flaxseed meal + 3 tablespoons water, let sit for 5 minutes). Use maple syrup instead of honey in the sauce. Works beautifully.
- Gluten-Free: Use tamari instead of soy sauce and rice flour instead of all-purpose flour. The texture stays the same.
- Extra Crunchy: Add 2 tablespoons of toasted sesame seeds or crushed peanuts to the rice mixture before shaping. It adds a lovely nutty crunch.
- Spicy Upgrade: Add 1 teaspoon of gochujang (Korean chili paste) to the rice mixture for a deeper, fermented heat. Or stir some into the peanut sauce.
- Herb Infusion: Mix in ¼ cup of finely chopped fresh cilantro, mint, or Thai basil into the rice. It brightens the whole dish.
- Baked Version: For a lighter option, place the shaped cakes on a parchment-lined baking sheet, brush with oil, and bake at 400°F for 15 to 18 minutes, flipping halfway. They won’t be as shatteringly crispy, but they’re still delicious.
I once added a handful of shredded carrots to the rice mixture, and it was fantastic—added color and a little sweetness. Don’t be afraid to play around.
Serving & Storage Suggestions
These crispy rice cakes are best served warm, straight from the pan, when the exterior is at its crunchiest. I like to arrange them on a platter, drizzle the peanut sauce over the top, and garnish generously. They’re perfect as an appetizer for a party, a fun side dish alongside a creamy curried butter beans or a simple green salad, or even as a light main dish with some steamed veggies.
Storage: Leftover rice cakes can be stored in an airtight container in the refrigerator for up to 3 days. The peanut sauce keeps in a jar in the fridge for up to a week.
Reheating: The best way to bring back the crunch is in a skillet over medium heat with a tiny splash of oil. Reheat for 2 to 3 minutes per side. An air fryer works brilliantly too—350°F for 4 to 5 minutes. The microwave will make them soft, so I’d avoid it unless you’re in a real pinch.
Flavor Development: The peanut sauce actually tastes even better the next day—the flavors meld and deepen. I often make a double batch just to have it on hand for dipping veggies or drizzling over crispy cauliflower grilled cheese.
Nutritional Information & Benefits
Here’s an estimated breakdown per serving (2 rice cakes with sauce, based on 4 servings):
- Calories: 320
- Fat: 16g
- Carbohydrates: 38g
- Protein: 9g
- Fiber: 3g
- Sugar: 6g
Health Benefits: This recipe offers a good balance of carbs for energy, protein from the peanut butter and egg, and healthy fats from the oil and peanuts. The lime juice adds a dose of vitamin C, and if you add fresh herbs or chili, you get a boost of antioxidants. It’s also naturally dairy-free and can be made gluten-free and vegan with simple swaps.
Dietary Considerations: Contains peanuts, gluten (if using all-purpose flour and soy sauce), and eggs. For nut-free, try sunflower seed butter in the sauce. Always check labels if cooking for allergies.
I love that this recipe feels indulgent but uses whole, recognizable ingredients. It’s comfort food I can feel good about eating.
Frequently Asked Questions
Can I use brown rice instead of white rice?
Yes, but the texture will be less sticky and the cakes may be a bit more fragile. I recommend adding an extra tablespoon of flour to help bind them. Short-grain brown rice works best.
Why are my rice cakes falling apart in the pan?
This usually happens for two reasons: the rice mixture isn’t pressed firmly enough, or the pan isn’t hot enough. Make sure you squeeze each patty tightly before frying, and let the oil heat fully before adding the cakes. Also, don’t flip too early—let a good crust form first.
Can I make these ahead of time?
Absolutely. You can shape the rice cakes up to a day in advance and keep them covered in the fridge. Fry them just before serving for the best texture. The peanut sauce can be made up to a week ahead.
Is there a substitute for peanut butter?
Yes! Sunflower seed butter, almond butter, or tahini all work well. Keep in mind that the flavor will change slightly. For a nut-free version, sunflower seed butter is my go-to.
Can I freeze the cooked rice cakes?
Yes, you can freeze them after frying. Let them cool completely, then place them in a single layer on a baking sheet and freeze until solid. Transfer to a freezer bag. To reheat, bake at 375°F for 10 to 12 minutes or air fry at 350°F for 5 to 6 minutes.
Conclusion
These crispy rice cakes with spicy peanut sauce are proof that the best recipes often come from the most humble beginnings. A container of leftover rice, a few pantry staples, and twenty minutes are all you need to create something that feels genuinely special. The crunch, the sauce, the little kick of heat—it all comes together in a way that’s greater than the sum of its parts.
I hope you make these and make them your own. Add extra chili if you like heat, throw in some herbs if you have them, or double the sauce because you know you’ll want it. That’s the beauty of a recipe like this—it’s forgiving, flexible, and always delicious.
If you give these a try, I’d love to hear how they turn out. Drop a comment below, tag me in your photos, or let me know your favorite variation. And if you’re looking for another quick, flavor-packed meal, you might enjoy these crispy buffalo ranch tofu wraps or this creamy salmon pasta with sun-dried tomatoes. Happy cooking!
Pin This Recipe!
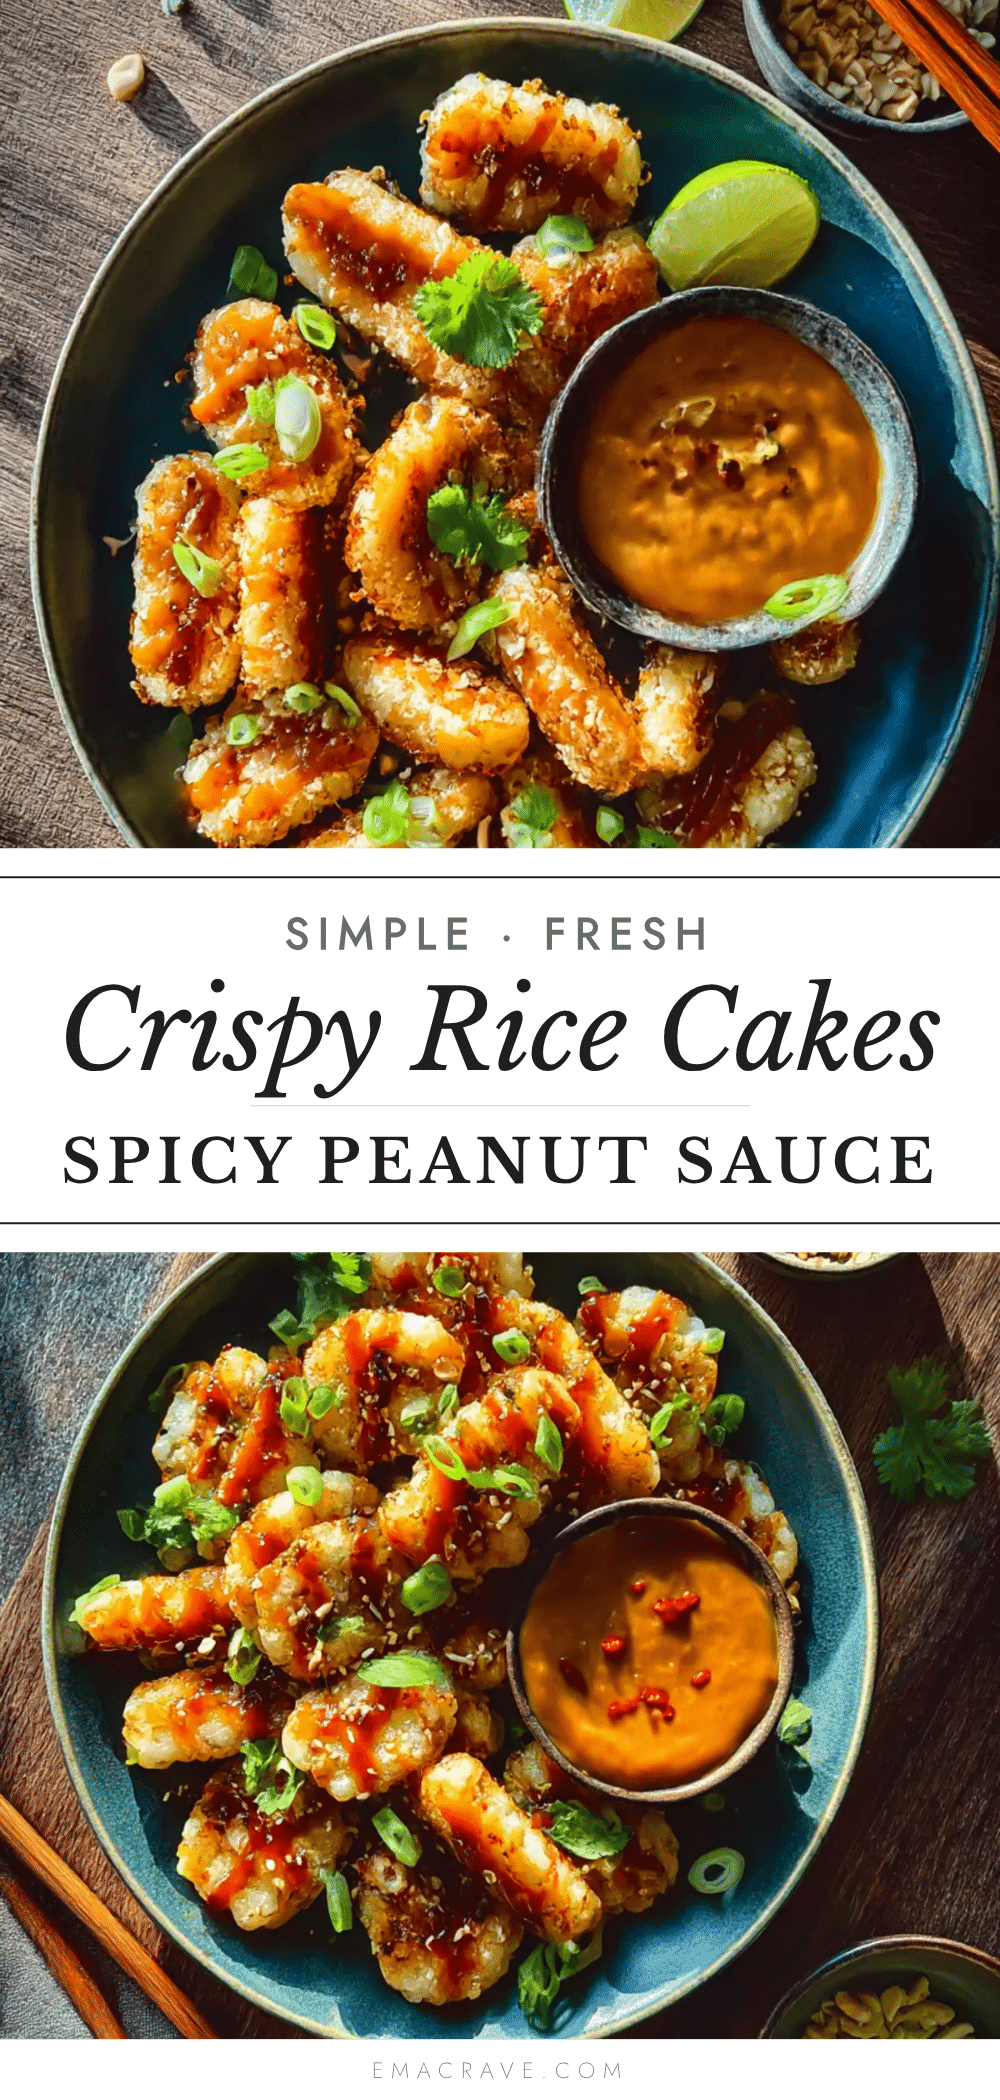
Crispy Rice Cakes with Easy Spicy Peanut Sauce
Transform leftover rice into crispy, golden patties with a bold, spicy peanut sauce. This quick and easy recipe turns humble pantry staples into a crunchy, satisfying meal or snack in under 20 minutes.
- Prep Time: 10 minutes
- Cook Time: 10 minutes
- Total Time: 20 minutes
- Yield: 4 servings 1x
- Category: Appetizer
- Cuisine: Thai-inspired
Ingredients
- 3 cups cooked white rice, cooled (day-old is best)
- 2 tablespoons all-purpose flour (or rice flour for gluten-free)
- 1 large egg, lightly beaten (or 1 tablespoon flaxseed meal mixed with 3 tablespoons water for vegan)
- 2 green onions, finely chopped
- 1 teaspoon salt
- ½ teaspoon garlic powder
- ¼ teaspoon white pepper (or black pepper)
- 2 to 3 tablespoons vegetable oil (for frying; avocado or canola oil recommended)
- ¼ cup creamy peanut butter (natural preferred)
- 2 tablespoons soy sauce (or tamari for gluten-free)
- 1 tablespoon sriracha (adjust to taste)
- 1 tablespoon honey or maple syrup
- 1 tablespoon lime juice (fresh preferred)
- 2 to 3 tablespoons warm water (to thin sauce)
- 1 teaspoon sesame oil (optional)
- Additional chopped green onions (for garnish, optional)
- Toasted sesame seeds (for garnish, optional)
- Fresh cilantro leaves (for garnish, optional)
- Thinly sliced red chili (for garnish, optional)
Instructions
- Make the peanut sauce first: In a small bowl, whisk together peanut butter, soy sauce, sriracha, honey, and lime juice. Add warm water one tablespoon at a time, whisking until smooth and pourable. Stir in sesame oil if using. Taste and adjust seasoning. Set aside.
- Prepare the rice mixture: In a medium mixing bowl, combine cooled rice, flour, beaten egg, chopped green onions, salt, garlic powder, and white pepper. Mix with your hands or a spatula until evenly distributed. The mixture should be sticky and slightly clumpy.
- Shape the cakes: Scoop about ⅓ cup of the rice mixture into your hands. Press firmly into a patty about ½-inch thick. Really squeeze it to help the cakes hold together. Place each formed patty on a clean plate or cutting board. You should get 6 to 8 cakes.
- Heat the oil: Pour vegetable oil into a large non-stick skillet and set over medium-high heat. Let it heat for about 2 minutes. Test by dropping a tiny piece of rice into the oil—if it sizzles immediately, it’s ready.
- Fry the cakes: Carefully place 3 to 4 patties into the hot oil, leaving space between them. Cook for 3 to 4 minutes on the first side, until deep golden brown and crispy. Flip gently and cook for another 3 to 4 minutes on the second side.
- Drain and repeat: Transfer cooked cakes to a paper towel-lined plate. Repeat with remaining patties, adding more oil if needed. Keep cooked cakes warm in a 200°F oven while finishing the batch.
- Serve immediately: Arrange crispy rice cakes on a plate, drizzle generously with spicy peanut sauce, and sprinkle with green onions, sesame seeds, and cilantro if using. Serve warm.
Notes
Use cold, day-old rice for best texture. Press rice patties firmly to prevent crumbling. Let pan get hot before frying to ensure crispiness. Peanut sauce can be made ahead and keeps for up to a week in the fridge. For baked version, place shaped cakes on parchment-lined baking sheet, brush with oil, and bake at 400°F for 15-18 minutes, flipping halfway.
Nutrition
- Serving Size: 2 rice cakes with sa
- Calories: 320
- Sugar: 6
- Sodium: 680
- Fat: 16
- Saturated Fat: 3
- Carbohydrates: 38
- Fiber: 3
- Protein: 9
Keywords: crispy rice cakes, spicy peanut sauce, leftover rice, easy appetizer, vegetarian, gluten-free option, vegan option, quick snack



