Love this? Save it for later!
Share the inspiration with your friends
The first time I made these homemade honey buns, it was honestly an accident. I had a half-empty jar of honey staring at me from the pantry, a fridge full of butter, and a serious craving for something warm and sticky. I wasn’t trying to recreate a bakery classic or anything fancy. I just wanted bread that tasted like a hug. So I threw some dough together, drizzled honey over the top, and hoped for the best. What came out of the oven was so much better than I expected. The buns puffed up golden and soft, and the glaze bubbled into this thick, caramel-like coating that stuck to every crevice. I stood there in my pajamas, pulling apart the first bun with my fingers, and honestly? I didn’t even share. That was three batches ago, and I’ve been tweaking the recipe ever since. These homemade honey buns have become my go-to for lazy Sunday mornings, unexpected guests, or any day that just calls for something sweet. They’re not complicated, but they taste like you spent hours in the kitchen. And that sticky glaze? It’s the kind of thing you’ll want to lick off the pan.
There’s something about the way honey and butter melt together that feels like pure comfort. It’s not overly sugary or artificial. It’s deep, warm, and a little bit floral. And when you pair that with a soft, pillowy yeast dough, you get a bun that’s satisfying without being heavy. I’ve tested this recipe multiple times to get the texture just right. Not too dense, not too airy. Just tender enough to pull apart with your hands. I’ve also played around with the glaze ratio because honestly, some recipes skimp on it. Not this one. You get a generous coating that seeps into the buns as they bake. Every bite has that sticky-sweet finish. If you’ve ever been disappointed by dry honey buns from the store, this from-scratch version will change your mind. It’s the real deal.
I remember pulling the first tray out of the oven and thinking, why didn’t I make these sooner? The smell alone is intoxicating. It fills your whole kitchen and lingers for hours. My neighbor actually knocked on my door once asking what I was baking. That’s the kind of recipe this is. It gets people curious. And once they taste one, they’re hooked. These homemade honey buns are perfect for sharing, but I won’t judge if you keep them all to yourself. They’re that good.
Why You’ll Love This Recipe
Let me tell you why this recipe has earned a permanent spot in my rotation. I’ve tested dozens of honey bun recipes over the years, and this one hits every single mark. It’s not just another sweet bread. It’s the version I keep coming back to, and here’s why you will too.
- Quick & Easy : The dough comes together in about 15 minutes of active work. After one rise, you’re shaping and baking. From start to finish, you’re looking at under 2 hours. That’s fast for homemade yeast buns.
- Simple Ingredients : You probably already have everything in your pantry. Flour, butter, honey, yeast, milk, eggs, sugar, and salt. No fancy extracts or hard-to-find items. Just real, everyday staples.
- Perfect for Any Occasion : These buns work for breakfast, brunch, dessert, or a late-night snack. I’ve brought them to potlucks and watched them disappear in minutes. They’re also amazing for holiday mornings when you want something special without the stress.
- Crowd-Pleaser : Kids love the sticky sweetness, and adults appreciate the balanced flavor. I’ve never met anyone who didn’t reach for a second one. They’re universally loved.
- Unbelievably Delicious : The texture is soft and tender, and the glaze is thick enough to cling to every bite. It’s the kind of bun that makes you close your eyes after the first taste. Pure comfort food.
What makes this recipe different from the rest? It’s the technique. I brush the buns with melted butter right before the second rise, which gives them that extra soft crust. And the glaze? I cook it briefly on the stove to thicken it before pouring it over the buns. That little step makes all the difference. It turns a simple syrup into a rich, sticky coating that doesn’t run off. This isn’t just another honey bun recipe. It’s the best version I’ve ever made, and I’m confident you’ll agree.
Honestly, this recipe feels like a warm hug on a plate. It’s the kind of food that makes you slow down and enjoy the moment. Whether you’re making them for a special occasion or just because it’s Tuesday, these homemade honey buns deliver every single time.
What Ingredients You Will Need
This recipe uses simple, wholesome ingredients to deliver that signature sticky-sweet flavor and soft texture. Most of these are pantry staples, which makes these buns perfect for spontaneous baking. Let’s break down what you’ll need and why each ingredient matters.
For the Dough
- 3 ½ cups (440g) all-purpose flour – I recommend Gold Medal or King Arthur for consistent results. Spoon and level your flour for the best texture. Too much flour makes dense buns.
- 1 packet (2 ¼ tsp) active dry yeast – Red Star or Fleischmann’s work great. Make sure your yeast is fresh. Test it by proofing in warm milk with a pinch of sugar. If it doesn’t foam after 5 minutes, start over.
- ½ cup (120ml) whole milk, warm (110°F) – Warm milk activates the yeast and adds richness. Don’t use cold milk; it slows down the rise. If you don’t have whole milk, 2% works fine.
- ¼ cup (50g) granulated sugar – Feeds the yeast and adds subtle sweetness to the dough.
- 1 large egg, room temperature – Adds structure and tenderness. Cold eggs can shock the dough, so let yours sit out for 30 minutes first.
- ¼ cup (60g) unsalted butter, melted and cooled – Butter adds flavor and softness. I prefer Kerrygold for its rich taste, but any unsalted butter works.
- 1 teaspoon salt – Balances the sweetness and strengthens the gluten.
For the Honey Glaze
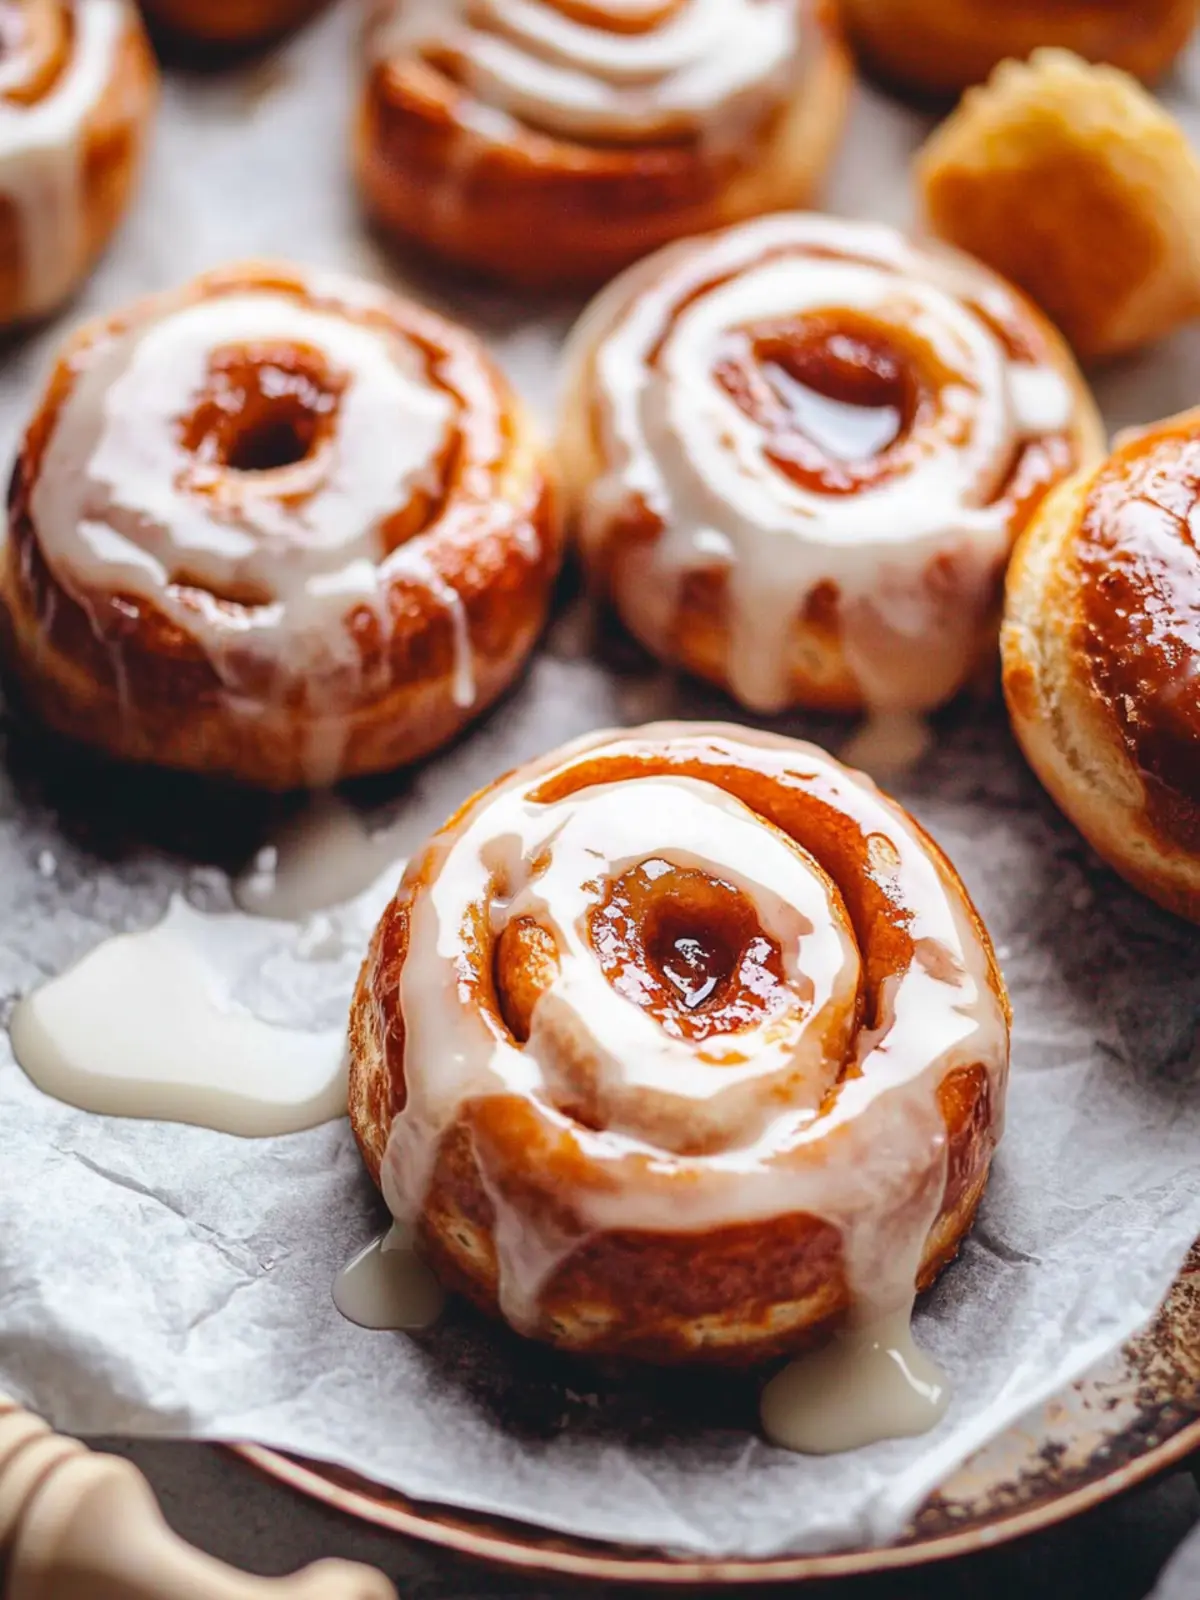
- ½ cup (170g) honey – Use a good-quality honey like Nature Nate’s or local raw honey. The flavor really comes through. Avoid clover honey if you want a deeper taste.
- ¼ cup (60g) unsalted butter – Adds richness and helps the glaze thicken.
- 2 tablespoons brown sugar, packed – Gives the glaze a caramel-like depth. Light or dark brown sugar both work.
- 2 tablespoons heavy cream – Makes the glaze creamy and smooth. You can substitute with whole milk, but the glaze will be thinner.
- Pinch of salt – Essential for balancing the sweetness.
For Brushing and Topping
- 2 tablespoons melted butter – Brushed on the buns before the second rise for a soft, golden crust.
- Optional: Flaky sea salt – A light sprinkle before serving cuts the sweetness and adds a professional touch. Maldon salt is my go-to.
Substitution guidance: If you’re dairy-free, use plant-based butter and oat milk for the dough. The glaze works with coconut cream instead of heavy cream, though it will have a slight coconut flavor. For a gluten-free version, use a 1:1 gluten-free flour blend, but expect a denser texture. I’ve tested it with Bob’s Red Mill, and it works in a pinch.
Equipment Needed
You don’t need fancy equipment to make these homemade honey buns. Here’s what I use and a few alternatives if you’re working with a basic kitchen setup.
- Stand mixer with dough hook – This makes kneading effortless, but you can absolutely knead by hand. It’ll take about 8-10 minutes of arm work. I’ve done both, and the stand mixer is faster, but hand-kneading gives you a good arm workout.
- 9×13-inch baking dish – Glass or metal both work. Glass heats more evenly, but metal gives a slightly crisper bottom. I prefer a metal pan for these buns.
- Large mixing bowl – For proofing the dough. Make sure it’s big enough to allow the dough to double in size.
- Small saucepan – For making the glaze. A non-stick pan works best to prevent sticking.
- Pastry brush – For brushing melted butter on the buns. A silicone brush is easy to clean and doesn’t shed bristles.
- Measuring cups and spoons – Accurate measurements matter in baking. Use dry measuring cups for flour and sugar, and liquid measuring cups for milk and honey.
- Kitchen scale (optional but helpful) – Weighing your flour ensures consistency. I use it every time.
- Plastic wrap or a clean kitchen towel – For covering the dough while it rises.
If you don’t have a stand mixer, don’t worry. I’ve made these buns by hand plenty of times. Just mix the dough in a bowl, then turn it out onto a floured surface and knead until smooth. It’s a little more work, but the result is the same. A tip: if your dough is sticky, add flour one tablespoon at a time. Too much flour makes tough buns.
Preparation Method
Let’s walk through this step by step. I’ll include all the little details I’ve learned from making these buns over and over. Follow these steps, and you’ll get perfect homemade honey buns every time.
Step 1: Proof the Yeast
In a small bowl, combine ½ cup warm milk (110°F) with 1 tablespoon of the granulated sugar. Sprinkle the yeast on top and let it sit for 5-7 minutes. It should become frothy and bubbly. If it doesn’t, your yeast is dead. Start over with fresh yeast. This step is crucial for a good rise.
Step 2: Make the Dough
In the bowl of your stand mixer, whisk together the remaining sugar, the egg, melted butter, and salt. Add the proofed yeast mixture and stir. Gradually add the flour, one cup at a time, mixing on low speed with the dough hook. Once all the flour is in, increase speed to medium and knead for 5-6 minutes. The dough should be smooth and slightly tacky but not sticky. If it’s too sticky, add flour a tablespoon at a time. If it’s too dry, add a teaspoon of warm milk. I’ve learned that humid days require less flour, so trust the texture more than the exact amount.
Step 3: First Rise
Shape the dough into a ball and place it in a lightly greased bowl. Cover with plastic wrap or a clean kitchen towel. Let it rise in a warm spot for 1 to 1 ½ hours, until doubled in size. I usually put mine in the microwave with a cup of hot water. It creates a warm, humid environment that speeds up the rise. Don’t rush this. A slow rise develops better flavor.
Step 4: Shape the Buns
Punch down the dough to release the air. Turn it out onto a lightly floured surface. Roll it into a rectangle about 12×18 inches. Use a pizza cutter or sharp knife to cut the dough into 12 equal pieces, each about 3×4 inches. Take each piece and roll it up tightly from the short end, pinching the seam to seal. Place each bun seam-side down in your greased 9×13-inch baking dish. They should be snug but not squished. This gives them room to expand.
Step 5: Second Rise
Brush the tops of the buns with the 2 tablespoons of melted butter. Cover the dish with plastic wrap and let the buns rise for another 30-45 minutes, until they’re puffy and touching each other. This second rise is key for soft, fluffy buns. Don’t skip it. While they rise, preheat your oven to 350°F (175°C).
Step 6: Make the Glaze
In a small saucepan, combine the honey, butter, brown sugar, heavy cream, and a pinch of salt. Cook over medium heat, stirring constantly, until the butter melts and the mixture is smooth. Let it simmer for 2-3 minutes, stirring often. It should thicken slightly. Remove from heat and set aside. The glaze will continue to thicken as it cools. Don’t let it boil too long, or it will become too thick to pour.
Step 7: Bake the Buns
Pour the warm glaze evenly over the risen buns. Use a spatula to spread it if needed. Bake for 20-25 minutes, until the buns are golden brown on top and the glaze is bubbling. The internal temperature should reach 190°F. If the tops are browning too fast, tent the dish with foil halfway through. Let the buns cool in the pan for 5-10 minutes before serving. The glaze will set into a sticky, gooey coating.
Step 8: Serve and Enjoy
Sprinkle with flaky sea salt if you like. Serve warm, straight from the pan. Pull them apart with your hands or use a spatula. These buns are best fresh, but they’re still amazing the next day.
Cooking Tips & Techniques
I’ve made my fair share of mistakes with honey buns, and I’m sharing them so you don’t have to. Here are the tips that make the biggest difference.
Temperature matters. Yeast is a living thing. If your milk is too hot, it kills the yeast. Too cold, and it won’t activate. Use a kitchen thermometer to hit 110°F. I’ve ruined batches by guessing, so trust the tool.
Don’t over-flour your surface. When rolling out the dough, use just enough flour to prevent sticking. Too much flour makes the buns dense. I use a light dusting and a bench scraper to lift the dough if it sticks.
Let the glaze cool slightly. Pouring boiling-hot glaze over the buns can make them soggy. Let it cool for 2-3 minutes after simmering. It should be warm but not scorching. This gives you a thick, sticky coating instead of a watery one.
Watch the oven. Every oven runs differently. Start checking your buns at 18 minutes. If the tops are golden and the glaze is bubbling, they’re done. Overbaking dries them out. I’ve learned to trust my nose more than the timer. When the kitchen smells like honey and butter, it’s almost time.
Multitask wisely. While the dough is rising for the first time, clean up your workspace and measure out the glaze ingredients. This saves time and keeps you organized. I also prep my baking dish during the second rise so everything is ready to go.
Consistency is key. If your dough feels too sticky after kneading, resist the urge to add more flour. Instead, wet your hands with a little water and shape the dough. The water prevents sticking without drying out the dough. This trick saved many of my early batches.
Variations & Adaptations
One of the best things about this recipe is how easy it is to customize. I’ve tried several variations, and they’ve all been delicious. Here are some of my favorites.
Blueberry Honey Buns – During summer, I fold 1 cup of fresh blueberries into the dough after the first rise. The berries burst as they bake, creating little pockets of jammy sweetness. It’s a wonderful twist. I also add a teaspoon of lemon zest to the glaze for brightness.
Cinnamon Honey Buns – Mix 2 teaspoons of cinnamon with ¼ cup of brown sugar. After rolling out the dough, sprinkle this mixture evenly over the surface before cutting and shaping. The cinnamon adds warmth and pairs beautifully with the honey glaze. I make these for fall mornings, and they’re always a hit.
Vegan Honey Buns – Use plant-based butter and oat milk for the dough. Replace the egg with a flax egg (1 tablespoon ground flaxseed mixed with 3 tablespoons water). For the glaze, use coconut cream instead of heavy cream. The texture is slightly denser, but the flavor is still amazing. I’ve made this version for friends with dietary restrictions, and no one could tell the difference.
Gluten-Free Honey Buns – Substitute the all-purpose flour with a 1:1 gluten-free flour blend that contains xanthan gum. The dough will be stickier, so wet your hands when shaping. The buns won’t be as fluffy, but they’re still soft and delicious. I’ve tested this with Bob’s Red Mill, and it works well.
Spiced Honey Buns – Add ½ teaspoon of cardamom and ¼ teaspoon of nutmeg to the flour mixture. These spices complement the honey beautifully and give the buns a more complex flavor. I love this version during the holidays.
Feel free to mix and match. You could do a cinnamon-blueberry combination or add a pinch of cayenne to the glaze for a spicy kick. The base recipe is forgiving, so get creative.
Serving & Storage Suggestions
These homemade honey buns are best served warm, straight from the oven. The glaze is at its stickiest and most decadent when fresh. I like to pull them apart with my hands and eat them while they’re still slightly warm. If you’re serving them for brunch, place the baking dish in the center of the table with a stack of small plates and napkins. Everyone can grab their own.
For a complete spread, pair these buns with fresh fruit, scrambled eggs, or a side of crispy bacon. The sweetness of the buns balances beautifully with savory dishes. I also love serving them alongside a hot cup of coffee or a cold glass of milk. If you’re feeling indulgent, drizzle a little extra honey over the top before serving.
Storage: Store leftover buns in an airtight container at room temperature for up to 3 days. The glaze will soften over time, but the buns stay moist. If you live in a humid climate, keep them in the fridge to prevent mold. Just let them come to room temperature before serving.
Freezing: These buns freeze beautifully. Let them cool completely, then wrap each bun individually in plastic wrap. Place them in a freezer-safe bag or container. They’ll keep for up to 3 months. To reheat, unwrap a bun and microwave for 20-30 seconds, or warm in a 300°F oven for 5-7 minutes. The glaze gets sticky again, and the buns taste almost as good as fresh.
Reheating: For best results, reheat in the oven. Place the buns in a baking dish, cover with foil, and warm at 300°F for 10 minutes. This prevents the glaze from burning. If you’re in a hurry, the microwave works fine, but the buns will be softer.
I’ve found that the flavors actually deepen overnight. The honey glaze soaks into the buns, making them even more tender the next day. So don’t worry if you have leftovers. They’re still fantastic.
Nutritional Information & Benefits
Here’s an approximate nutritional breakdown per bun (based on 12 servings):
| Nutrient | Amount |
|---|---|
| Calories | 310 |
| Total Fat | 12g |
| Saturated Fat | 7g |
| Cholesterol | 45mg |
| Sodium | 210mg |
| Total Carbohydrates | 47g |
| Dietary Fiber | 1g |
| Sugars | 24g |
| Protein | 5g |
These values are estimates and will vary based on specific ingredients and portion sizes.
Honey is a natural sweetener with antioxidant properties. It contains small amounts of vitamins and minerals like vitamin C, calcium, and iron. While these buns are a treat, using honey instead of refined sugar gives them a slightly better nutritional profile. The butter and milk provide calcium and vitamin A, which support bone health and immune function.
If you’re watching your sugar intake, you can reduce the glaze by half or use a sugar substitute like monk fruit sweetener. For a lower-fat version, replace the butter in the dough with applesauce. The texture will be denser, but it’s a good option for healthier eating. I’ve made these for friends with diabetes by using a sugar-free honey alternative, and they still turned out great.
This recipe contains gluten, dairy, and eggs. For allergen-friendly options, check the variations section above. Always consult with a healthcare professional for specific dietary needs.
Conclusion
These homemade honey buns with sticky glaze are everything I want in a sweet bread. They’re soft, tender, and coated in a rich honey glaze that’s impossible to resist. I’ve made them for lazy weekends, holiday brunches, and even just because I needed something warm and comforting. Every time, they deliver. The recipe is simple enough for beginners but rewarding enough for experienced bakers. And the best part? You can customize them to your heart’s content. Add fruit, spice, or go vegan. The base is forgiving and always delicious.
I hope you give these buns a try. They’ve become a staple in my kitchen, and I think they’ll become one in yours too. Don’t be afraid to make them your own. That’s the beauty of baking. If you make them, I’d love to hear how they turned out. Leave a comment below or tag me in your photos. Your feedback and adaptations inspire me to keep experimenting. And if you loved this recipe, share it with a friend who needs a little sweetness in their life. Happy baking, and remember — the best meals are the ones shared with people you love.
Frequently Asked Questions
Can I make the dough ahead of time?
Yes, you can prepare the dough the night before. After the first rise, punch it down, cover tightly, and refrigerate for up to 12 hours. The next morning, let it come to room temperature for 30 minutes, then shape and proceed with the second rise. The flavor actually develops more during the cold rest.
Why didn’t my buns rise properly?
Several things could cause this. Your yeast might be expired, your milk was too hot or too cold, or your kitchen was too drafty. Always proof your yeast first to make sure it’s active. Also, make sure your dough is covered during the rise to prevent a dry skin from forming.
Can I use a different sweetener instead of honey?
Honey is the star here, but you can substitute with maple syrup or agave nectar. Keep in mind that maple syrup has a thinner consistency, so the glaze won’t be as thick. Agave is sweeter than honey, so you might want to reduce the amount slightly.
How do I prevent the glaze from burning?
If your oven runs hot, check the buns at 18 minutes. If the tops are browning too fast, tent the dish with aluminum foil halfway through baking. Also, make sure your glaze isn’t too thick before pouring. A thick glaze burns more easily.
Can I double this recipe?
Absolutely. Double all the ingredients and use two 9×13-inch pans. The baking time might increase by 3-5 minutes, so keep an eye on them. These buns are perfect for feeding a crowd, and they freeze well, so doubling is a great idea for parties or meal prep.
Pin This Recipe!
Homemade Honey Buns with Perfect Sticky Glaze
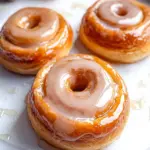
Soft, pillowy yeast buns coated in a rich, sticky honey glaze that’s perfect for breakfast, brunch, or dessert. This easy recipe uses simple pantry ingredients and delivers bakery-quality results every time.
- Prep Time: 15 minutes
- Cook Time: 25 minutes
- Total Time: 1 hour 45 minutes
- Yield: 12 servings 1x
- Category: Dessert
- Cuisine: American
Ingredients
- 3 ½ cups (440g) all-purpose flour
- 1 packet (2 ¼ tsp) active dry yeast
- ½ cup (120ml) whole milk, warm (110°F)
- ¼ cup (50g) granulated sugar
- 1 large egg, room temperature
- ¼ cup (60g) unsalted butter, melted and cooled
- 1 teaspoon salt
- ½ cup (170g) honey
- ¼ cup (60g) unsalted butter
- 2 tablespoons brown sugar, packed
- 2 tablespoons heavy cream
- Pinch of salt
- 2 tablespoons melted butter (for brushing)
- Optional: flaky sea salt (for topping)
Instructions
- Proof the yeast: In a small bowl, combine ½ cup warm milk (110°F) with 1 tablespoon of the granulated sugar. Sprinkle the yeast on top and let it sit for 5-7 minutes until frothy and bubbly.
- Make the dough: In the bowl of a stand mixer, whisk together the remaining sugar, egg, melted butter, and salt. Add the proofed yeast mixture and stir. Gradually add the flour, one cup at a time, mixing on low speed with the dough hook. Once all flour is in, increase speed to medium and knead for 5-6 minutes until smooth and slightly tacky.
- First rise: Shape the dough into a ball and place it in a lightly greased bowl. Cover with plastic wrap or a clean kitchen towel. Let it rise in a warm spot for 1 to 1 ½ hours, until doubled in size.
- Shape the buns: Punch down the dough and turn it out onto a lightly floured surface. Roll it into a 12×18-inch rectangle. Cut into 12 equal pieces (about 3×4 inches each). Roll each piece tightly from the short end, pinching the seam to seal. Place seam-side down in a greased 9×13-inch baking dish.
- Second rise: Brush the tops of the buns with 2 tablespoons melted butter. Cover the dish with plastic wrap and let rise for 30-45 minutes until puffy and touching each other. Meanwhile, preheat oven to 350°F (175°C).
- Make the glaze: In a small saucepan, combine honey, ¼ cup butter, brown sugar, heavy cream, and a pinch of salt. Cook over medium heat, stirring constantly, until butter melts and mixture is smooth. Let simmer for 2-3 minutes until slightly thickened. Remove from heat.
- Bake: Pour the warm glaze evenly over the risen buns. Bake for 20-25 minutes until golden brown and glaze is bubbling. Internal temperature should reach 190°F. If browning too fast, tent with foil halfway through. Let cool in the pan for 5-10 minutes.
- Serve: Sprinkle with flaky sea salt if desired. Serve warm, straight from the pan.
Notes
For best results, use a kitchen thermometer to ensure milk is at 110°F. If dough is too sticky, wet your hands with water instead of adding more flour. Let the glaze cool for 2-3 minutes after simmering before pouring over buns to prevent sogginess. Store leftovers in an airtight container at room temperature for up to 3 days, or freeze for up to 3 months.
Nutrition
- Serving Size: 1 bun
- Calories: 310
- Sugar: 24
- Sodium: 210
- Fat: 12
- Saturated Fat: 7
- Carbohydrates: 47
- Fiber: 1
- Protein: 5
Keywords: honey buns, sticky buns, homemade buns, sweet bread, breakfast buns, honey glaze, yeast buns



