Love this? Save it for later!
Share the inspiration with your friends
I was standing in my kitchen, a bag of marshmallows in one hand and a bunch of limes staring at me from the fruit bowl. It was one of those afternoons where I needed a dessert, but I didn’t want to turn on the oven. The humidity was brutal, and the last thing I wanted was to heat up the whole house. I had a serious craving for something bright and tangy, not heavy or chocolatey. That’s when the idea hit me—what if I combined the buttery, crunchy goodness of a classic Rice Krispie treat with the tart, creamy soul of a Key lime pie?
Honestly, I thought it might be a disaster. Rice Krispie treats are supposed to be about gooey marshmallow and butter, not citrus. But I had a feeling the zesty lime could cut through all that sweetness in a way that just worked. I grabbed a Microplane and started zesting, squeezing lime juice into the melted marshmallow mixture, and holding my breath. The kitchen smelled incredible—like a bakery and a tropical vacation had a baby.
The first bite was a total surprise. You get that classic chewy, crispy texture, but then this bright, sunny lime flavor hits you. It’s not subtle. It’s zesty. It’s exactly what you want on a hot day when you need something sweet but refreshing. I’ve made these Zesty Key Lime Pie Rice Krispie Treats at least five times since that first experiment, and they disappear every single time. They’re the kind of no-bake dessert that makes you look like a genius with almost zero effort.
Why You’ll Love This Recipe
Let’s be real—there are a million dessert recipes out there, but these treats earn a permanent spot in your rotation. Here’s why you’ll keep coming back to them:
- Quick & Easy: They come together in under 20 minutes. No oven, no mixer, no complicated steps. Just a pot, a spatula, and a pan.
- Simple Ingredients: You probably have most of these in your pantry right now. Marshmallows, butter, Rice Krispies cereal, and a couple of fresh limes. That’s it.
- No-Bake Magic: Perfect for summer when you refuse to turn on the oven. Or honestly, any time you want dessert without the wait.
- Crowd-Pleaser: Kids love the familiar texture, and adults go wild for that tangy lime kick. It’s a guaranteed hit at potlucks and barbecues.
- Unbelievably Delicious: The combination of sweet marshmallow, buttery cereal, and tart lime is next-level. It’s comfort food with a bright, sunny twist.
What makes these different from every other Rice Krispie treat recipe out there? It’s the technique. I don’t just stir in lime zest at the end. I bloom the zest in the melted butter first, which releases all those essential oils and makes the lime flavor sing. Then I add fresh lime juice right into the marshmallow mixture. The result is a treat that tastes like a Key lime pie in bar form—without the fuss of a graham cracker crust or baking.
These treats are the kind of dessert that makes you close your eyes after the first bite. They’re comfort food reimagined—brighter, faster, and with the same soul-soothing satisfaction. Perfect for impressing guests without stress, or turning a simple Tuesday into something memorable.
What Ingredients You Will Need
This recipe uses simple, wholesome ingredients to deliver bold flavor and satisfying texture without the fuss. Most of these are pantry staples, but the fresh limes are non-negotiable for that authentic zing.
- 3 tablespoons unsalted butter (I use salted butter in a pinch and just skip the extra salt, but unsalted gives you more control)
- 1 (10-ounce) bag mini marshmallows (Jet-Puffed is my go-to for consistent melting, but any brand works)
- 1 tablespoon fresh lime zest (from about 2-3 limes—zest them before juicing, it’s way easier)
- 2 tablespoons fresh lime juice (about 1-2 limes, depending on how juicy they are)
- 5 cups Rice Krispies cereal (or any crisp rice cereal—store brands work fine here)
- 1/4 teaspoon salt (optional, but it balances the sweetness and makes the lime pop)
- 1/4 cup powdered sugar (for dusting, optional but pretty)
- Extra lime zest (for garnish, because we eat with our eyes first)
Ingredient Selection Tips: Look for firm, bright green limes that feel heavy for their size—they’ll be juicier. I recommend zesting with a Microplane for the finest texture, which blends seamlessly into the mixture. If you only have bottled lime juice, it won’t taste the same. Trust me on this one. Fresh makes all the difference.
Substitution Guidance: For a dairy-free version, use vegan butter and vegan marshmallows (Dandies brand works great). You can also swap the Rice Krispies for a gluten-free crisp rice cereal if needed. If you want a graham cracker vibe, crush up a few graham crackers and press them into the bottom of the pan before pouring the mixture on top—instant Key lime pie crust situation.
Equipment Needed
You don’t need fancy gadgets for this recipe, which is part of the beauty. Here’s what you’ll need:
- Large saucepan: A 4-quart pot works perfectly. Make sure it’s big enough to stir everything without spilling.
- Rubber spatula or wooden spoon: Silicone spatulas are my favorite because they scrape the sides clean and don’t scratch your pot.
- 9×13-inch baking dish: This gives you the perfect thickness—not too thin, not too thick. You can use an 8×8 for thicker bars, just increase the cook time slightly.
- Parchment paper: Line your pan with it, leaving overhang on two sides. This makes lifting the treats out a total breeze.
- Microplane or fine grater: For zesting the limes. A box grater works too, but the texture won’t be as fine.
- Citrus juicer: Not essential, but it saves your hands from cramping. I use a simple handheld one.
- Measuring cups and spoons: For accuracy. Eyeballing marshmallows is a rookie mistake.
Budget-Friendly Options: If you don’t have parchment paper, you can grease the pan generously with butter or non-stick spray. It won’t lift out as cleanly, but it’ll still work. A wooden spoon is just as good as a silicone spatula—just be gentle on your pot.
Preparation Method
This comes together faster than you think, so have everything measured and ready before you start. Trust me, melted marshmallows wait for no one.
- Prep your pan: Line a 9×13-inch baking dish with parchment paper, leaving about 2 inches of overhang on the long sides. Lightly grease the parchment with butter or non-stick spray. Set aside.
- Zest and juice your limes: Wash your limes thoroughly. Zest them first using a Microplane, being careful to only get the green part—the white pith is bitter. You need about 1 tablespoon of zest. Then cut the limes in half and juice them until you have 2 tablespoons of fresh juice. Set both aside.
- Melt the butter: In a large saucepan over medium-low heat, melt the 3 tablespoons of unsalted butter. Once it’s fully melted, add the lime zest. Let it cook for about 30 seconds, stirring constantly. This blooms the zest and makes the flavor way more intense.
- Add the marshmallows: Dump the entire bag of mini marshmallows into the pot. Stir constantly with your spatula until the marshmallows are almost completely melted. This takes about 3-4 minutes. Don’t walk away—marshmallows can burn fast if the heat is too high.
- Add the lime juice: Pour in the 2 tablespoons of fresh lime juice and the 1/4 teaspoon of salt (if using). Stir until everything is smooth and glossy. The mixture will look a little thin at first, but it thickens as it cools.
- Remove from heat: Take the pot off the burner immediately. You don’t want to cook the mixture any further.
- Add the cereal: Pour in the 5 cups of Rice Krispies cereal. Fold gently with your spatula until every piece of cereal is coated in the lime-marshmallow mixture. Work quickly but carefully—you don’t want to crush the cereal too much.
- Press into the pan: Scrape the mixture into your prepared pan. Use another piece of parchment paper or a greased spatula to press it down evenly. Don’t press too hard, or the treats will be dense and hard. Just gentle, even pressure.
- Cool and set: Let the treats cool at room temperature for about 30 minutes. If you’re in a hurry, pop them in the fridge for 15 minutes. They need to be fully set before you cut them.
- Cut and serve: Lift the whole block out using the parchment overhang. Place it on a cutting board. Use a sharp knife to cut into squares. Wipe the knife clean between cuts for the neatest edges.
- Garnish: Dust with powdered sugar and a sprinkle of extra lime zest right before serving. This step is optional but makes them look bakery-level pretty.
Sensory Cues: When you add the lime juice, you should smell a bright, citrusy burst. The mixture should be glossy and stretchy, not watery. When you fold in the cereal, you’ll hear a satisfying soft crunch. The finished treats should feel firm but give slightly when you press them.
Cooking Tips & Techniques
I’ve made Rice Krispie treats more times than I can count, and I’ve definitely learned some lessons the hard way. Here’s what I wish someone had told me:
Low and slow is the way to go. Melt your butter and marshmallows over medium-low heat. High heat makes the marshmallows seize up and turn into a sticky, rubbery mess. If you see any browning, you’ve gone too far. Patience pays off here.
Don’t skip the blooming step. Cooking the lime zest in the butter for 30 seconds releases the essential oils. This is what makes the lime flavor taste natural and bright instead of artificial and flat. It’s a tiny step with a huge payoff.
Work fast but gently. Once you add the cereal, you have about 2 minutes before the mixture starts to set. Fold it gently—if you stir too aggressively, you’ll crush the cereal and end up with dense, hard bars instead of light, crispy ones.
Wet your hands or spatula. Pressing the mixture into the pan is sticky business. Lightly wet your hands or grease your spatula with butter or non-stick spray. This prevents sticking and gives you a smooth, even surface.
The biggest mistake I ever made? I once used stale marshmallows. They didn’t melt properly and left weird, chewy lumps in the treats. Always use fresh marshmallows for the best texture. If your bag has been open for more than a week, buy a new one.
Variations & Adaptations
One of the best things about this recipe is how easy it is to tweak. Here are some of my favorite variations:
- Key Lime Pie Style: Crush 1/2 cup of graham crackers and press them into the bottom of the pan before adding the cereal mixture. Top with a drizzle of melted white chocolate for the full pie experience.
- Coconut Lime: Add 1/2 cup of toasted shredded coconut when you fold in the cereal. The coconut adds a chewy texture and tropical flavor that pairs beautifully with the lime.
- Spicy Lime: Add 1/4 teaspoon of cayenne pepper or chili powder along with the lime juice. The heat sneaks up on you and makes the sweetness even more addictive.
- Vegan Version: Use vegan butter and vegan marshmallows (Dandies brand melts perfectly). Everything else is already plant-based.
- Gluten-Free: Most crisp rice cereals are naturally gluten-free, but double-check the label. Some brands use malt flavoring that contains gluten.
- Berry Lime: Fold in 1/2 cup of freeze-dried strawberries or raspberries along with the cereal. The tart berries add color and a fruity twist.
I personally love the coconut lime variation—it reminds me of a tropical dessert I had on vacation a few years ago. It’s like a mini getaway in every bite.
Serving & Storage Suggestions
These treats are best served at room temperature, right after they’ve set. The texture is perfectly chewy and crispy, and the lime flavor is at its brightest. If you want to get fancy, arrange them on a platter with extra lime wedges and a dusting of powdered sugar.
What to serve with them: These pair beautifully with a tall glass of iced tea, a cold glass of milk, or even a tropical blueberry coconut cooler mocktail. For a fun dessert spread, serve them alongside dark chocolate mocha breakfast bread for a sweet and tangy contrast.
Storage Instructions: Store in an airtight container at room temperature for up to 3 days. Do not refrigerate—the fridge makes them hard and stale. If your kitchen is humid, add a piece of bread to the container to absorb excess moisture. Replace the bread daily.
Freezing: These freeze surprisingly well. Wrap individual treats in plastic wrap, then place them in a freezer-safe bag. Freeze for up to 2 months. Thaw at room temperature for about 15 minutes before serving. The texture won’t be quite as crispy as fresh, but they’re still delicious.
Flavor Development: The lime flavor actually mellows out a bit after the first day. If you want a punchier lime taste, add an extra teaspoon of zest to the mixture. The treats are best enjoyed within 24 hours of making them.
Nutritional Information & Benefits
Let’s be honest—these are a treat, not a health food. But here’s the estimated breakdown per serving (based on 12 servings):
- Calories: 180
- Fat: 6g
- Carbohydrates: 32g
- Protein: 1g
- Sugar: 18g
- Fiber: 0g
- Sodium: 150mg
Health Highlights: The fresh lime juice and zest provide a small amount of vitamin C, which supports immune health. The butter adds a touch of vitamin A. While these aren’t low-calorie, they are lower in fat and sugar than many traditional desserts like brownies or cheesecake.
Dietary Considerations: This recipe can easily be made vegan and gluten-free with simple substitutions. It contains dairy in the butter, but you can swap it for a plant-based alternative. Always check your marshmallow brand for gelatin content if you’re vegetarian or vegan.
My Personal Perspective: I believe in balance. These treats are a fun, nostalgic dessert that brings joy without requiring a full day in the kitchen. They’re perfect for celebrations, lazy weekends, or when you just need a little brightness in your day.
Conclusion
These Zesty Key Lime Pie Rice Krispie Treats are proof that the best recipes often come from happy accidents. They’re quick, easy, and bursting with fresh lime flavor that feels like sunshine in every bite. Whether you’re making them for a summer barbecue, a kid’s birthday party, or just because you deserve a treat, they never disappoint.
I love how versatile they are—you can dress them up with graham crackers and white chocolate for a fancy dessert, or keep them simple for a quick weekday snack. However you make them, they’re guaranteed to disappear fast. If you try them, I’d love to hear how they turn out! Leave a comment below and let me know your favorite variation. Don’t forget to share this recipe with a friend who needs a little lime in their life.
Happy cooking, and remember—sometimes the best desserts are the ones you never planned to make.
Frequently Asked Questions
Can I use bottled lime juice instead of fresh?
I really don’t recommend it. Bottled lime juice has a flat, slightly bitter taste that just doesn’t compare to fresh. The fresh zest is also crucial for that bright, aromatic flavor. Spend the extra dollar on real limes—your taste buds will thank you.
Why did my Rice Krispie treats turn out hard?
This usually happens when you press the mixture too firmly into the pan or overcook the marshmallows. Use gentle, even pressure when pressing, and melt the marshmallows over low heat just until they’re smooth. If they bubble or brown, you’ve gone too far.
Can I make these ahead of time?
Absolutely! You can make them up to 2 days in advance. Store them in an airtight container at room temperature. If you’re making them for a party, add the powdered sugar and extra zest garnish right before serving so they look fresh.
How do I get clean, neat cuts?
Use a sharp knife and wipe it clean with a damp paper towel between each cut. For the cleanest edges, let the treats cool completely before cutting. If they’re still warm, the knife will drag and leave messy edges.
Can I double this recipe?
Yes! Simply double all the ingredients and use a larger pan (like a 12×17-inch jelly roll pan). Keep an eye on the melting time—it will take a bit longer for the marshmallows to melt. Work quickly when folding in the cereal, as a larger batch sets faster.
Pin This Recipe!
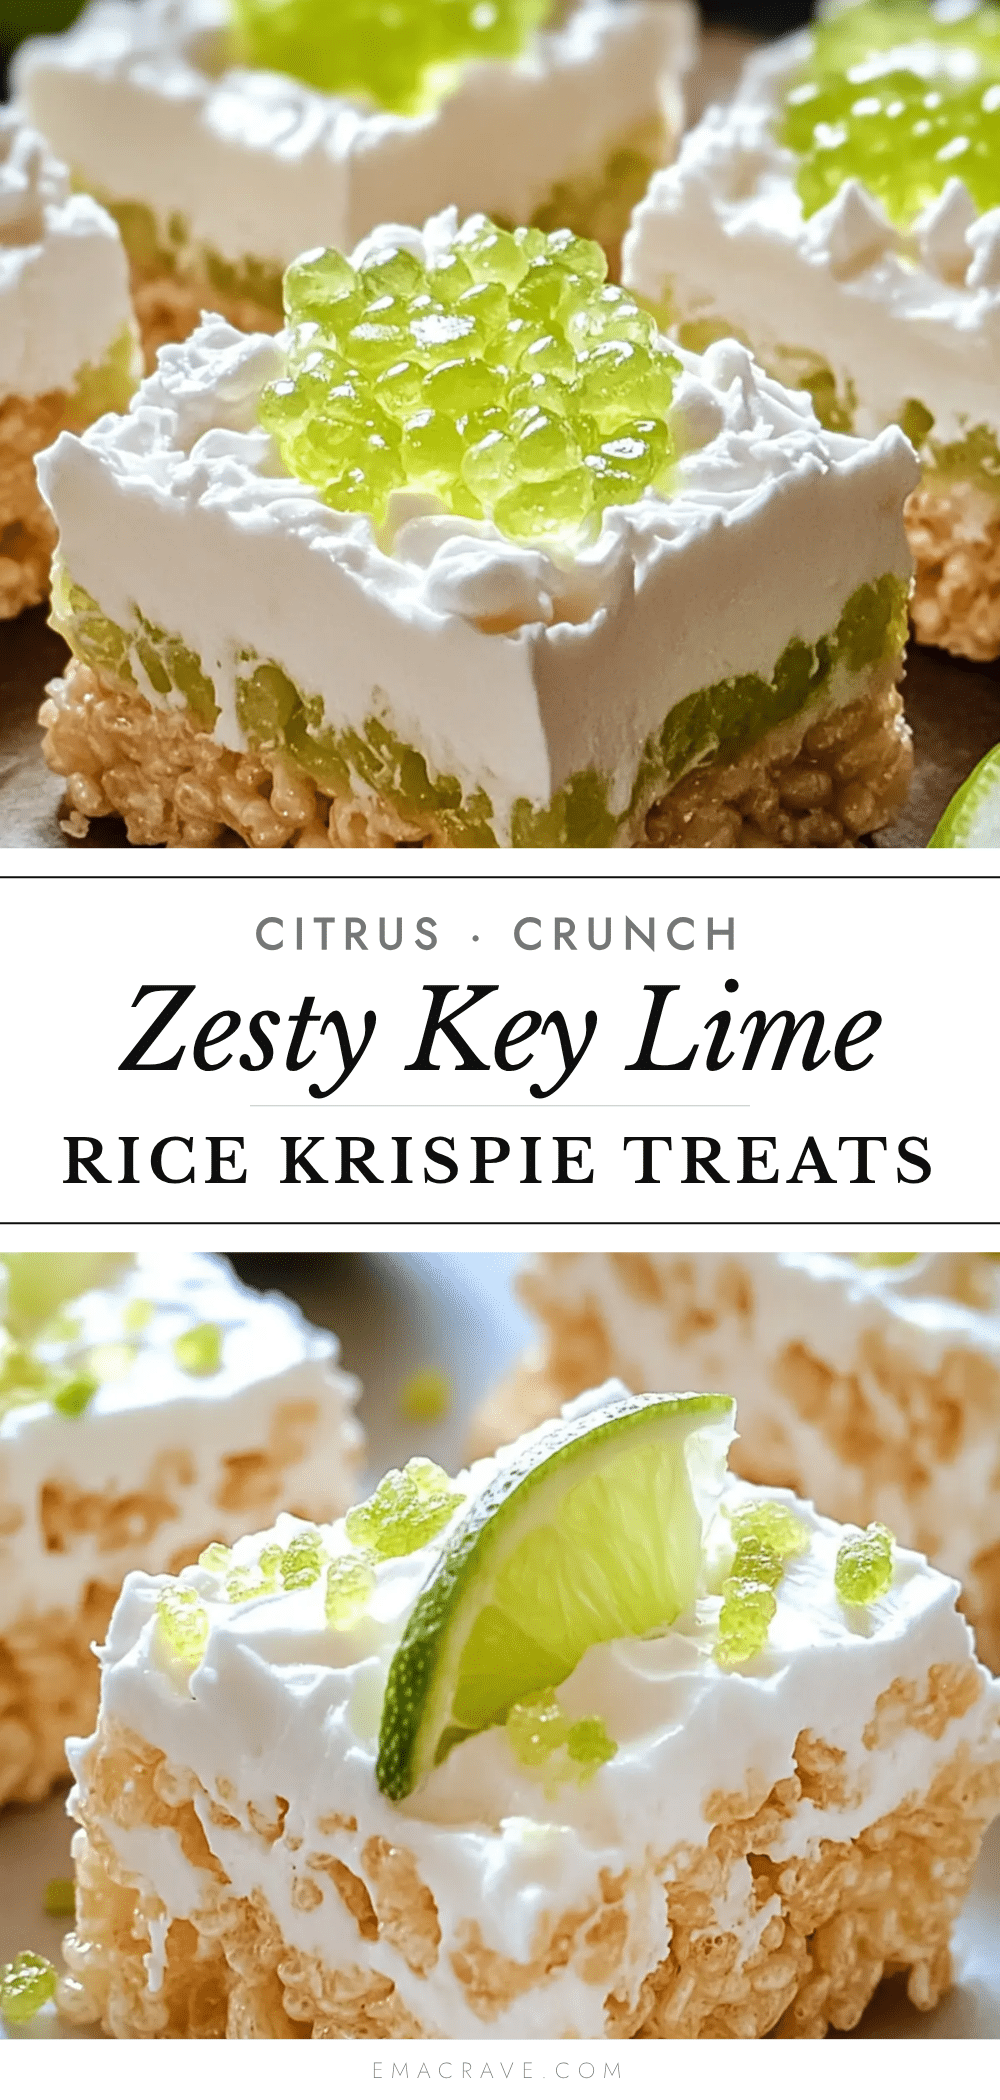
Zesty Key Lime Pie Rice Krispie Treats
These no-bake treats combine the buttery, crunchy goodness of classic Rice Krispie treats with the tart, creamy soul of a Key lime pie. Ready in just 20 minutes, they’re the perfect refreshing dessert for hot days.
- Prep Time: 10 minutes
- Cook Time: 10 minutes
- Total Time: 20 minutes
- Yield: 12 servings 1x
- Category: Dessert
- Cuisine: American
Ingredients
- 3 tablespoons unsalted butter
- 1 (10-ounce) bag mini marshmallows
- 1 tablespoon fresh lime zest (from about 2–3 limes)
- 2 tablespoons fresh lime juice (about 1–2 limes)
- 5 cups Rice Krispies cereal
- 1/4 teaspoon salt (optional)
- 1/4 cup powdered sugar (for dusting, optional)
- Extra lime zest (for garnish)
Instructions
- Line a 9×13-inch baking dish with parchment paper, leaving about 2 inches of overhang on the long sides. Lightly grease the parchment with butter or non-stick spray. Set aside.
- Wash your limes thoroughly. Zest them first using a Microplane, being careful to only get the green part—the white pith is bitter. You need about 1 tablespoon of zest. Then cut the limes in half and juice them until you have 2 tablespoons of fresh juice. Set both aside.
- In a large saucepan over medium-low heat, melt the 3 tablespoons of unsalted butter. Once it’s fully melted, add the lime zest. Let it cook for about 30 seconds, stirring constantly. This blooms the zest and makes the flavor way more intense.
- Dump the entire bag of mini marshmallows into the pot. Stir constantly with your spatula until the marshmallows are almost completely melted. This takes about 3-4 minutes. Don’t walk away—marshmallows can burn fast if the heat is too high.
- Pour in the 2 tablespoons of fresh lime juice and the 1/4 teaspoon of salt (if using). Stir until everything is smooth and glossy. The mixture will look a little thin at first, but it thickens as it cools.
- Take the pot off the burner immediately. You don’t want to cook the mixture any further.
- Pour in the 5 cups of Rice Krispies cereal. Fold gently with your spatula until every piece of cereal is coated in the lime-marshmallow mixture. Work quickly but carefully—you don’t want to crush the cereal too much.
- Scrape the mixture into your prepared pan. Use another piece of parchment paper or a greased spatula to press it down evenly. Don’t press too hard, or the treats will be dense and hard. Just gentle, even pressure.
- Let the treats cool at room temperature for about 30 minutes. If you’re in a hurry, pop them in the fridge for 15 minutes. They need to be fully set before you cut them.
- Lift the whole block out using the parchment overhang. Place it on a cutting board. Use a sharp knife to cut into squares. Wipe the knife clean between cuts for the neatest edges.
- Dust with powdered sugar and a sprinkle of extra lime zest right before serving. This step is optional but makes them look bakery-level pretty.
Notes
For the best flavor, use fresh limes and bloom the zest in melted butter. Work quickly when folding in the cereal to avoid crushing it. Store in an airtight container at room temperature for up to 3 days. Do not refrigerate. For vegan version, use vegan butter and vegan marshmallows. For gluten-free, check cereal label.
Nutrition
- Serving Size: 1 square
- Calories: 180
- Sugar: 18
- Sodium: 150
- Fat: 6
- Saturated Fat: 3.5
- Carbohydrates: 32
- Protein: 1
Keywords: key lime pie, rice krispie treats, no-bake dessert, lime dessert, easy dessert, summer dessert



