Love this? Save it for later!
Share the inspiration with your friends
The first time I made this garlic and herb sourdough bread, it was eleven o’clock at night and I was slightly annoyed at myself. I had forgotten to feed my starter that morning, and now I was standing in the kitchen with a half-empty jar of bubbly discard, wondering if I should just toss it. But the garlic on my counter—a whole head, papery and fragrant—was staring at me. So I chopped it up, grabbed some rosemary from the sad little plant on my windowsill, and threw everything together in a bowl. I wasn’t expecting much. Honestly, I was just trying to use up ingredients before they went bad.
What came out of the oven an hour and a half later was something else entirely. The crust was golden and crackly, the crumb was soft with those beautiful irregular holes you only get from a good fermentation, and the garlic had mellowed into something sweet and almost buttery. My kitchen smelled like a fancy bakery, and I was standing there in my pajamas eating a slice straight from the loaf pan. No butter, no nothing. Just bread.
That loaf changed how I think about sourdough. I used to treat it like a science experiment—weighing everything to the gram, obsessing over hydration percentages, getting stressed about bulk fermentation times. But this garlic and herb version taught me to relax. It doesn’t need a perfect crumb or a dramatic oven spring to be incredible. It just needs good ingredients and a little patience. And honestly? It tastes even better the next day, sliced thin and toasted until the edges are crispy. If you’ve been intimidated by sourdough before, this is the recipe that will make you believe you can do it.
Why You’ll Love This Recipe
I have made this garlic and herb sourdough bread at least once a week for the past six months. Sometimes twice. It’s become my default loaf for everything from morning toast to dinner party sides, and I keep finding new reasons to love it.
- Incredible Flavor Without Fuss: The garlic roasts right into the dough as it bakes, so you get these pockets of sweet, mellow garlic throughout the crumb. No need to pre-roast or caramelize anything—it just works.
- Simple, Real Ingredients: You need flour, water, salt, your sourdough starter, garlic, and herbs. That’s it. No commercial yeast, no fancy additives, no hard-to-find specialty flours.
- Perfect for Beginners and Experts Alike: This dough is forgiving. It’s not overly sticky, it handles well during shaping, and it bakes beautifully even if your starter isn’t at peak activity. I’ve made it with discard and with active starter, and both versions work.
- Endlessly Customizable: Use whatever herbs you have on hand. Rosemary and thyme are my go-to, but oregano, sage, or even dried Italian seasoning work great. You can add cheese, sun-dried tomatoes, or olives without changing the basic method.
- Makes Your Kitchen Smell Amazing: I’m not exaggerating when I say this bread makes your whole house smell like a rustic Italian bakery. The combination of garlic and herbs baking into a crusty loaf is pure comfort.
What really sets this recipe apart from other sourdough loaves is the way the garlic integrates into the dough. Instead of just sprinkling minced garlic on top before baking (which burns), I fold it in during the stretch and fold process. This distributes the garlic evenly throughout the crumb, so every single slice has that savory, aromatic flavor. The herbs get a similar treatment—they’re layered in during the folds, which keeps them from burning on the crust while still infusing the whole loaf.
This is the kind of bread that makes you close your eyes after the first bite. It’s savory without being heavy, aromatic without being overpowering, and crusty without being tough. It’s comfort food in its purest form, and it’s easier to make than you think.
What Ingredients You Will Need
This recipe uses simple, wholesome ingredients to deliver bold flavor and satisfying texture without the fuss. Most of these are pantry staples, and the garlic and herbs are easy to find year-round.
- Bread Flour (500g / about 4 cups): I prefer King Arthur Bread Flour for its high protein content (12.7%), which gives the best structure and chew. You can use all-purpose flour in a pinch, but the crumb will be slightly less open and the crust might not be as crackly.
- Water (350g / about 1.5 cups, room temperature): Filtered or bottled water works best. Chlorinated tap water can inhibit fermentation, so if your tap water has a strong smell, let it sit out for an hour before using.
- Sourdough Starter (100g / about ½ cup, active and bubbly): I use a 100% hydration starter that I feed with equal parts flour and water. It should be at its peak—doubled in size and full of bubbles—when you mix the dough. If you only have discard, the bread will still work but will be denser and less tangy.
- Fine Sea Salt (10g / about 1.5 teaspoons): I use Redmond Real Salt because it’s unrefined and has a clean, mineral taste. Table salt works too, but reduce to 8g since it’s more concentrated.
- Fresh Garlic (15g / about 4-5 large cloves, finely minced): Use the flat side of your knife to smash each clove first—this releases the oils and makes mincing easier. Don’t use pre-minced jarred garlic; it’s too wet and lacks the punchy flavor you need here.
- Fresh Rosemary (1 tablespoon, finely chopped): Strip the leaves off the woody stem before chopping. The finer you chop it, the more evenly it distributes through the dough.
- Fresh Thyme (1 tablespoon, leaves only): Run your fingers down the stem to strip the tiny leaves off. No need to chop them further—they’re small enough as they are.
- Olive Oil (1 tablespoon, optional but recommended): I add this during the stretch and fold process for a slightly softer crumb and richer flavor. Extra virgin olive oil from California Olive Ranch is my go-to for baking.
Ingredient Selection Tips: For the best garlic flavor, look for firm, heavy cloves with tight, unbroken skin. Avoid garlic that’s sprouting green shoots—it’s past its prime and will taste bitter. For herbs, fresh is non-negotiable here. Dried herbs can burn during the long bake time and won’t give you that bright, aromatic flavor. If you only have dried herbs, use half the amount and add them during the final fold to minimize burning.
Substitution Guidance: To make this dairy-free and vegan, simply skip the optional butter wash after baking. For a gluten-free version, this recipe won’t work as written—sourdough relies on gluten development for structure. Try a gluten-free bread flour blend with added psyllium husk instead.
Equipment Needed
You don’t need a lot of fancy equipment to make great sourdough, but a few key tools make the process smoother and more consistent.
- Digital Kitchen Scale: This is non-negotiable for sourdough. Measuring by volume (cups) is inconsistent because how you scoop flour changes the weight. A simple OXO scale costs about $20 and will last for years.
- Large Mixing Bowl: I use a 4-quart stainless steel bowl. Glass or ceramic works too, but avoid plastic—it can retain odors and is harder to clean sticky dough from.
- Bench Scraper: This little tool is a lifesaver for dividing dough, cleaning your work surface, and transferring shaped loaves. A metal one with a curved edge works best.
- Dutch Oven (5.5 to 7 quarts): A heavy pot with a lid creates steam during baking, which gives you that glossy, crackly crust. I use a Lodge enameled cast iron Dutch oven. If you don’t have one, you can bake on a preheated baking sheet with a pan of water on the bottom rack.
- Parchment Paper: For easy transfer of the shaped dough into the hot pot. I use unbleached parchment to avoid any chemical taste at high temperatures.
- Banneton or Proofing Basket (optional): A banneton gives the dough structure during its final rise and creates those beautiful flour rings on the crust. If you don’t have one, a colander lined with a floured kitchen towel works perfectly.
- Razor Blade or Lame: For scoring the dough right before baking. A sharp knife works in a pinch, but a lame gives you cleaner cuts and better oven spring.
- Plastic Wrap or a Shower Cap: To cover the dough during bulk fermentation. A reusable shower cap from the dollar store is my favorite hack—it’s stretchy, reusable, and fits any bowl.
Budget-Friendly Tip: You don’t need a fancy Dutch oven to start. A heavy stainless steel pot with a tight-fitting lid works almost as well. Just make sure it’s oven-safe to 500°F.
Preparation Method
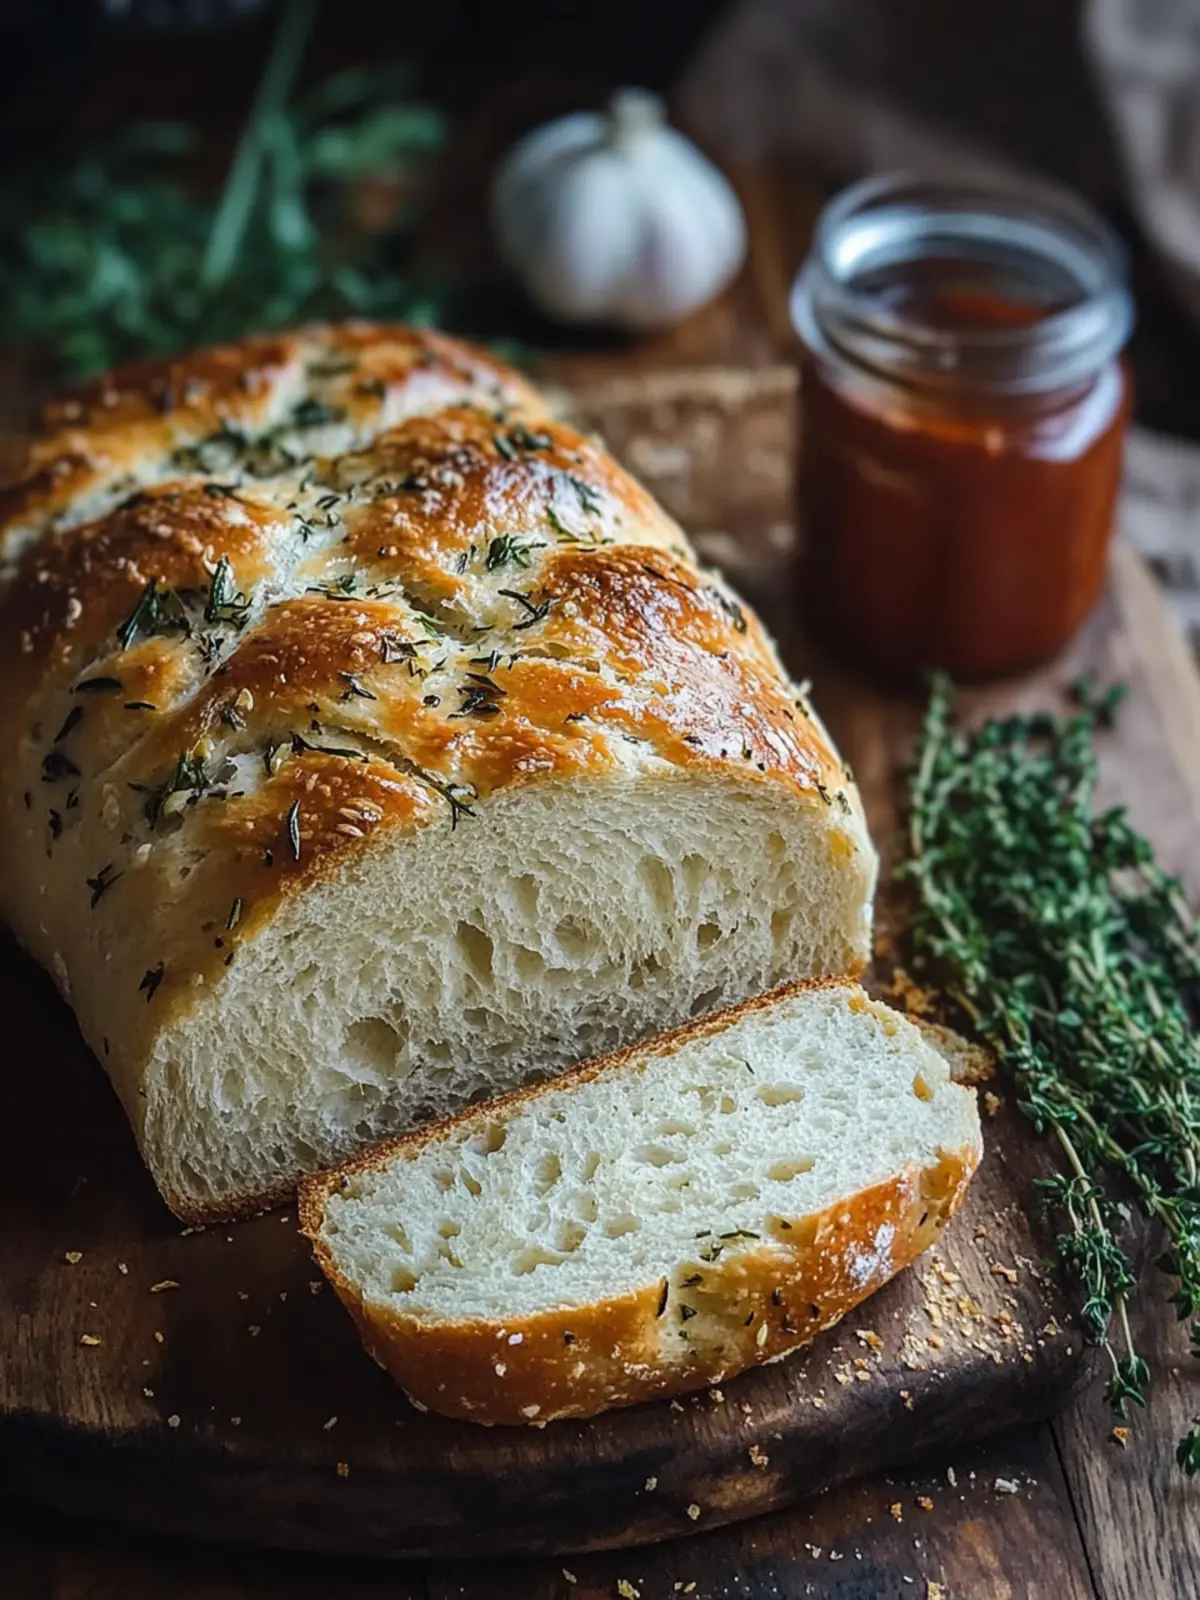
Making sourdough is a process, but it’s not complicated. The key is to follow the timing and trust the dough. Here’s how it breaks down.
Step 1: Mix the Dough (9:00 AM)
In your large mixing bowl, combine 500g bread flour and 350g room temperature water. Use your hand or a wooden spoon to mix until no dry bits remain. This is called the autolyse—it lets the flour absorb the water and starts developing gluten before you add the starter. Cover the bowl with plastic wrap and let it rest for 30 to 60 minutes.
Step 2: Add the Starter and Salt (9:45 AM)
After the autolyse, add 100g of active sourdough starter on top of the dough. Sprinkle 10g fine sea salt over the starter. Use wet fingers to pinch everything together, folding the dough over itself repeatedly until the starter and salt are fully incorporated. The dough will feel shaggy and loose at first—that’s normal. Cover and rest for 30 minutes.
Step 3: Stretch and Folds (10:15 AM to 12:15 PM)
Over the next 2 hours, you’ll perform 4 sets of stretch and folds, spaced 30 minutes apart. Here’s how: wet your hand slightly, grab one side of the dough, stretch it up as high as it will go without tearing, and fold it over the center. Rotate the bowl 90 degrees and repeat. Do this 4 times total per set, covering the bowl between each set.
During the second set of folds, add the minced garlic and chopped herbs. Sprinkle them over the dough before you start stretching, and they’ll get folded into the layers naturally. During the third set, add the tablespoon of olive oil if using. The dough will start to feel smoother and more elastic with each set.
Step 4: Bulk Fermentation (12:15 PM to 4:15 PM)
After the final set of folds, cover the bowl and let the dough rise at room temperature (70-75°F is ideal). This takes about 4 hours, but go by the dough’s appearance, not the clock. You’re looking for the dough to increase in volume by about 50-70%, with bubbles visible on the surface and edges. It should feel puffy and jiggly when you gently shake the bowl.
Step 5: Shape the Dough (4:15 PM)
Lightly flour your work surface. Turn the dough out gently—don’t punch it down. Use your bench scraper to fold the dough into a round shape: fold the top edge to the center, then the bottom, then the sides. Flip it over so the seam is on the bottom, and use your hands to drag the dough toward you on the counter, creating surface tension. It should form a tight, smooth ball.
Step 6: Cold Proof (4:30 PM to Next Morning)
Place the shaped dough seam-side up in a floured banneton or lined bowl. Cover tightly with plastic wrap or a shower cap, and refrigerate for 12 to 18 hours. This slow cold proof develops flavor and makes the dough easier to score. The longer it sits, the more tangy and complex the flavor becomes.
Step 7: Preheat and Bake (Next Morning, 8:00 AM)
Place your Dutch oven in the oven and preheat to 500°F for at least 45 minutes. The pot needs to be screaming hot to create that initial burst of steam. While it heats, remove the dough from the fridge and let it sit at room temperature for 20 minutes. Flip it out onto a piece of parchment paper, seam-side down. Dust the top lightly with flour, then score it with a razor blade—a single deep slash down the center, or a cross pattern, or whatever design you like.
Carefully transfer the dough (on the parchment) into the hot Dutch oven. Cover with the lid and bake for 25 minutes. Remove the lid, reduce the oven temperature to 450°F, and bake for another 20-25 minutes until the crust is deep golden brown and the internal temperature reaches 205-210°F. Let cool completely on a wire rack before slicing—at least 2 hours. I know it’s hard to wait, but cutting into hot bread ruins the texture.
Cooking Tips & Techniques
After making this garlic and herb sourdough bread dozens of times, I’ve learned a few things the hard way. Here are the tips that made the biggest difference in my results.
Don’t Skip the Autolyse
That 30-minute rest after mixing flour and water isn’t just a suggestion—it’s the most important step for developing gluten without kneading. During autolyse, enzymes in the flour break down starches into sugars, which feeds your starter and gives you better oven spring. I once skipped it because I was in a hurry, and the dough never developed the same elasticity. The crumb was dense and flat.
Keep Your Hands Wet
Sourdough is a wet dough, and it will stick to dry hands like glue. Keep a small bowl of water next to your work area and dip your fingers before every stretch and fold. It makes handling the dough much less frustrating and prevents you from tearing the gluten structure you’re trying to build.
Watch the Dough, Not the Clock
Bulk fermentation time varies wildly depending on your kitchen temperature, your starter’s strength, and the flour you use. In my warm kitchen (78°F), bulk fermentation takes about 3.5 hours. In winter when my house is 68°F, it can take 6 hours. The dough should look puffy, have visible bubbles, and feel airy when you poke it. If it’s still dense and tight, let it go longer.
Score with Confidence
A hesitant score creates a ragged cut that doesn’t open properly. Hold your blade at a 30-45 degree angle and cut about ½ inch deep in one smooth motion. I ruined my first few loaves by scoring too shallowly—the bread burst open at random spots instead of along my intended line.
Let It Cool Completely
This is the hardest tip to follow, but it matters. When bread comes out of the oven, the interior is still setting. Cutting it early releases steam and makes the crumb gummy and sticky. I once cut into a loaf after 30 minutes because I couldn’t wait, and the texture was disappointing. Now I set a timer for 2 hours and walk away.
Variations & Adaptations
Once you’ve mastered the basic garlic and herb sourdough, the possibilities are endless. Here are a few variations I’ve tried and loved.
Cheesy Garlic Herb Sourdough
During the final stretch and fold, add 100g (about 1 cup) of shredded Parmesan or Gruyère. The cheese melts into the dough during baking, creating these incredible savory pockets. I made this for a friend’s dinner party, and people actually asked for the recipe before I could even offer it.
Roasted Garlic Version
If you prefer a sweeter, more mellow garlic flavor, roast a whole head of garlic at 400°F for 40 minutes until soft and golden. Squeeze the cloves out of their skins and mash them into a paste. Add this paste during the stretch and folds instead of raw minced garlic. The flavor is less pungent and more caramelized—perfect for sandwiches.
Sun-Dried Tomato and Herb
Replace the fresh garlic with 50g (about ⅓ cup) of oil-packed sun-dried tomatoes, drained and chopped. Add them during the second set of folds along with the herbs. The tomatoes add a tangy, umami richness that pairs beautifully with rosemary and thyme. This version is amazing toasted with a smear of goat cheese.
Gluten-Free Adaptation (Experimental)
While traditional sourdough can’t be made gluten-free with this method, you can try using a gluten-free bread flour blend and adding 10g psyllium husk powder to the water before mixing. The texture won’t be the same—it’s denser and less airy—but the garlic and herb flavor still shines. I’ve had decent results with Cup4Cup gluten-free flour.
Serving & Storage Suggestions
This garlic and herb sourdough bread is incredibly versatile. Here’s how I like to serve and store it.
Serving Ideas:
- Warm from the oven with a generous pat of salted butter
- Toasted and topped with poached eggs and avocado for a savory breakfast
- Sliced thin and served alongside a bowl of creamy tomato soup for dipping
- Used as the base for bruschetta with fresh tomatoes, basil, and a drizzle of balsamic
- Grilled and rubbed with a cut garlic clove for garlic bread that’s next-level
Storage Instructions: Store the completely cooled loaf in a paper bag at room temperature for up to 3 days. The crust stays crisp, and the interior stays moist. For longer storage, wrap tightly in plastic wrap and then foil, and freeze for up to 3 months. To thaw, leave it at room temperature for a few hours, then reheat in a 350°F oven for 10 minutes to restore the crust.
Reheating Tips: Never microwave sourdough—it turns the crust rubbery and the crumb tough. Instead, slice the bread and toast it, or wrap the whole loaf in foil and warm it in a 350°F oven for 10-15 minutes. The flavors actually deepen after a day or two, so day-old garlic herb sourdough is perfect for hearty soups or panzanella salad.
Nutritional Information & Benefits
Per slice (based on 12 slices per loaf, using bread flour and olive oil):
- Calories: 180
- Protein: 6g
- Carbohydrates: 35g
- Fiber: 1.5g
- Fat: 2g
- Sodium: 320mg
Health Benefits: Sourdough fermentation breaks down phytic acid in wheat, which makes the minerals in the flour more bioavailable. This means your body can absorb more iron, zinc, and magnesium from sourdough than from regular bread. The long fermentation also produces lactic acid, which gives sourdough a lower glycemic index than commercial bread—it won’t spike your blood sugar as dramatically. Garlic adds allicin, a compound with antimicrobial and anti-inflammatory properties, while fresh herbs provide antioxidants.
Dietary Considerations: This recipe is vegan and dairy-free as written. It contains gluten, so it’s not suitable for celiac disease. To reduce sodium, you can cut the salt to 8g without affecting the fermentation process. The olive oil is optional, so you can omit it for a completely fat-free bread.
Conclusion
This garlic and herb sourdough bread has become a staple in my kitchen for good reason. It’s forgiving enough for beginners, rewarding enough for experienced bakers, and delicious enough to convert even the most skeptical sourdough skeptics. The combination of aromatic garlic, fresh herbs, and that tangy, chewy crumb is something you just can’t get from store-bought bread.
What I love most about this recipe is how adaptable it is. You can make it your own—swap the herbs, add cheese, throw in some olives, or keep it simple. The method stays the same, and the results are always satisfying. I’ve brought this loaf to potlucks, given it as hostess gifts, and eaten half a loaf in one sitting more times than I care to admit. It never gets old.
I’d love to hear how yours turns out! Did you try a variation? Did you add something unexpected? Drop a comment below and let me know. And if you’re looking for another savory bread to try, my easy homemade garlic pita bread is a faster option when you need bread in under an hour. Happy baking!
Frequently Asked Questions
Can I use dried herbs instead of fresh?
You can, but the flavor won’t be as bright. Use half the amount of dried herbs and add them during the final stretch and fold to minimize burning. Fresh herbs really do make a difference here.
My dough isn’t rising. What went wrong?
Most likely your starter isn’t active enough. Make sure it’s bubbly and doubled in size before you mix the dough. Also check your kitchen temperature—sourdough needs warmth (70-80°F) to rise. If your kitchen is cold, try using warm water (80-85°F) when mixing.
Can I bake this without a Dutch oven?
Yes! Preheat a baking sheet on the middle rack and a cast iron skillet on the bottom rack. When you put the bread in, pour 1 cup of hot water into the skillet and quickly close the oven door. The steam mimics the effect of a Dutch oven.
Why is my crust too thick or too pale?
A thick, tough crust usually means the bread baked too long without enough steam. Make sure your Dutch oven is fully preheated and the lid stays on for the first 25 minutes. A pale crust means you need more oven time or a higher temperature—don’t be afraid to let it get deep golden brown.
How do I know when the bread is fully baked?
The best way is to use an instant-read thermometer. Insert it into the center of the loaf through the bottom—it should read 205-210°F. If you don’t have a thermometer, tap the bottom of the loaf; it should sound hollow when fully baked.
Pin This Recipe!
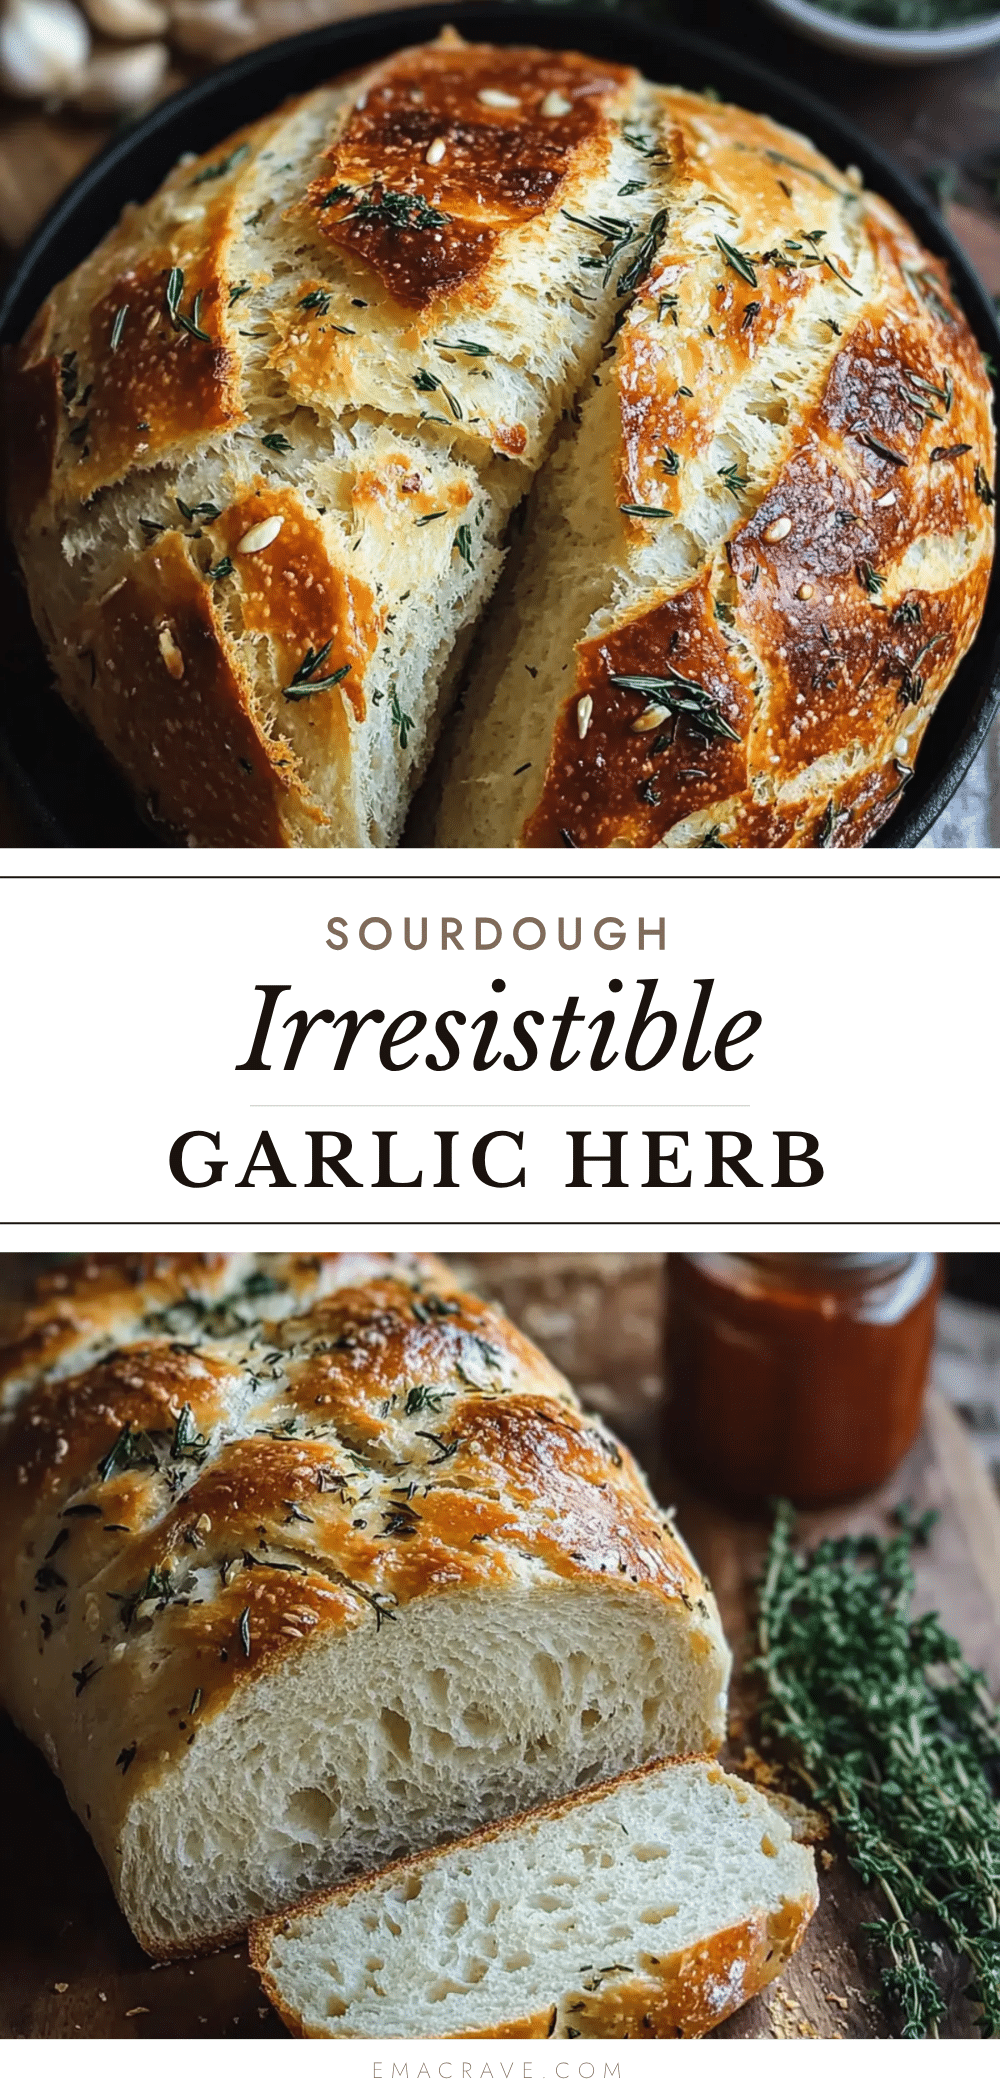
Best Homemade Garlic Herb Sourdough Bread
This garlic and herb sourdough bread is forgiving enough for beginners, rewarding enough for experienced bakers, and delicious enough to convert even the most skeptical sourdough skeptics. The combination of aromatic garlic, fresh herbs, and that tangy, chewy crumb is something you just can’t get from store-bought bread.
- Prep Time: 30 minutes
- Cook Time: 45 minutes
- Total Time: 14 hours 15 minutes (includes bulk fermentation and cold proof)
- Yield: 12 servings 1x
- Category: Bread
- Cuisine: American
Ingredients
- 500g bread flour (about 4 cups)
- 350g water (about 1.5 cups, room temperature)
- 100g sourdough starter (about ½ cup, active and bubbly)
- 10g fine sea salt (about 1.5 teaspoons)
- 15g fresh garlic (about 4–5 large cloves, finely minced)
- 1 tablespoon fresh rosemary, finely chopped
- 1 tablespoon fresh thyme leaves
- 1 tablespoon olive oil (optional)
Instructions
- Mix the Dough (9:00 AM): In a large mixing bowl, combine 500g bread flour and 350g room temperature water. Mix until no dry bits remain. Cover and let rest for 30 to 60 minutes (autolyse).
- Add the Starter and Salt (9:45 AM): After autolyse, add 100g active sourdough starter on top of the dough. Sprinkle 10g fine sea salt over the starter. Use wet fingers to pinch everything together, folding the dough over itself until fully incorporated. Cover and rest for 30 minutes.
- Stretch and Folds (10:15 AM to 12:15 PM): Over 2 hours, perform 4 sets of stretch and folds, spaced 30 minutes apart. Wet your hand, stretch one side of the dough up and fold over the center. Rotate bowl 90 degrees and repeat 4 times per set. During the second set, add minced garlic and chopped herbs. During the third set, add olive oil if using.
- Bulk Fermentation (12:15 PM to 4:15 PM): Cover the bowl and let the dough rise at room temperature (70-75°F) for about 4 hours, until increased by 50-70% in volume, with bubbles visible on the surface. It should feel puffy and jiggly.
- Shape the Dough (4:15 PM): Lightly flour your work surface. Turn out the dough gently. Fold the top edge to the center, then bottom, then sides. Flip seam-side down and drag toward you to create surface tension, forming a tight, smooth ball.
- Cold Proof (4:30 PM to Next Morning): Place shaped dough seam-side up in a floured banneton or lined bowl. Cover tightly and refrigerate for 12 to 18 hours.
- Preheat and Bake (Next Morning, 8:00 AM): Place Dutch oven in oven and preheat to 500°F for at least 45 minutes. Remove dough from fridge, let sit 20 minutes. Flip onto parchment paper, seam-side down. Dust with flour, score with a razor blade. Transfer to hot Dutch oven, cover, and bake 25 minutes. Remove lid, reduce oven to 450°F, bake 20-25 minutes until deep golden brown and internal temperature reaches 205-210°F. Cool completely on wire rack for at least 2 hours.
Notes
Don’t skip the autolyse; keep hands wet when handling dough; watch the dough not the clock for bulk fermentation; score with confidence; let cool completely before slicing. For best results, use fresh herbs and active starter.
Nutrition
- Serving Size: 1 slice
- Calories: 180
- Sodium: 320
- Fat: 2
- Carbohydrates: 35
- Fiber: 1.5
- Protein: 6
Keywords: sourdough bread, garlic herb bread, homemade bread, artisan bread, sourdough recipe, garlic bread, herb bread



